Appearance
WeWeb MCP
Use the WeWeb MCP server to let an external AI agent work on your WeWeb projects. Instead of building inside the editor with WeWeb AI, you can stay in the AI client you already use, such as ChatGPT, Claude, Cursor, Codex, or Antigravity, and ask it to create pages, manage your backend, edit workflows, and inspect your project through natural language.
The server is available at:
https://ai-api.weweb.io/v1/mcpCURRENTLY IN BETA
WeWeb MCP is currently in beta. Tool calls run against your real project and can create, edit, or delete resources. We recommend testing on a non-critical project first and reviewing changes as the agent works.
WeWeb recommends Claude Opus
For the best results today, we recommend using Claude Opus as the underlying model. In our testing, it follows WeWeb tooling more reliably and produces higher-quality output than other models. As the MCP server matures, we'll broaden the list of recommended models.
What is MCP?
The Model Context Protocol (MCP) is an open standard that lets AI agents discover and call external tools in a consistent way. By exposing WeWeb as an MCP server, any compatible client can list the available WeWeb tools and invoke them to act on your project.
This is the inverse of a chat connector: rather than WeWeb calling out to an external service, an external agent calls into WeWeb to do the work for you.
How it works
- Connect your AI client to the WeWeb MCP server using the steps below.
- Authenticate. On first use, the client opens a browser window so you can sign in to WeWeb and authorize access.
- Select a workspace and project. Ask the agent to list your workspaces and projects, then switch to the ones you want to work on.
- Build and iterate. Describe what you want and let the agent call the relevant WeWeb tools.
Supported clients
The following clients are supported today:
| Client | Connection method |
|---|---|
ChatGPT | Add a custom connector with the server URL |
Claude Desktop | Add a custom connector with the server URL, or edit the config file manually |
Claude Code | Single terminal command |
Cursor | MCP config entry |
VS Code | MCP config entry, or add through MCP settings |
Codex | Add a Streamable HTTP server in settings, then click Authenticate |
Antigravity | Add an entry to mcp_config.json |
Connect your client
ChatGPT
Follow along in the guide above, or use these steps:
- Click your user profile.
- Click
Settings. - Click
Connectors. - Click
Advanced settings. - Toggle on developer mode.
- Click
Create. - Name it
WeWeb. - Copy the MCP URL from this page:
https://ai-api.weweb.io/v1/mcp- Paste it into the Connection field in ChatGPT.
- Confirm you wish to create the app.
- When your browser opens, go to WeWeb to sign in.
- Click
Authorizeand approve access.
Claude Desktop
Follow along in the guide above, or use these steps:
- Click the
+in the chat. - Hover
Connectors. - Hover
Add connector. - Click
Add custom connector. - Name the connector
WeWeb. - Copy the MCP URL from this page:
https://ai-api.weweb.io/v1/mcp- Paste the URL into the URL field in Claude.
- Click
Add. - When your browser opens, go to WeWeb to sign in.
- Click
Authorizeand approve access.
Manual setup
If you prefer to wire up the server by hand, open Claude Desktop's configuration file and register WeWeb there:
Follow along in the guide above, or use these steps:
- Copy the JSON block below.
- Click your user profile in the bottom left.
- Click
Settings. - Click
Developer. - Click
Edit Config. - Open the
.jsonfile in your code editor of choice. - Inside the
mcpServersobject, paste theweweb-aiJSON you copied from above. - Confirm your file matches the layout shown in the guide.
- Save the file (
⌘ + Son Mac,Ctrl + Son Windows).
- MacOS:
~/Library/Application Support/Claude/claude_desktop_config.json - Windows:
%APPDATA%\Claude\claude_desktop_config.json
json
{
  "mcpServers": {
    "weweb-ai": {
      "command": "npx",
      "args": ["-y", "mcp-remote", "https://ai-api.weweb.io/v1/mcp"]
    }
  }
}
INFO
Already running other MCP servers? Place the "weweb-ai" block alongside them, inside the single mcpServers object. Keeping one mcpServers key is what keeps the file valid JSON.
Restart Claude Desktop, and on restart you will be prompted to authenticate with WeWeb.
Claude Code
Follow along in the guide above, or use these steps:
- Copy the command below.
- Paste the command into your terminal.
bash
claude mcp add --transport http WeWeb https://ai-api.weweb.io/v1/mcpThe first time you use a WeWeb tool, Claude Code prompts you to authenticate.
Cursor
Follow along in the guide above, or use these steps:
- Copy the JSON block below.
- Click the settings cog icon.
- Go to
MCP. - Click
Add new global MCP server. - Inside the
mcpServersobject, paste theweweb-aiJSON you copied from above. - Confirm your file matches the layout shown in the guide.
- Save the file (
⌘ + Son Mac,Ctrl + Son Windows). - Restart Cursor, and on restart you will be prompted to authenticate with WeWeb.
json
{
  "mcpServers": {
    "weweb-ai": {
      "command": "npx",
      "args": ["-y", "mcp-remote", "https://ai-api.weweb.io/v1/mcp"]
    }
  }
}
INFO
Already running other MCP servers? Place the "weweb-ai" block alongside them, inside the single mcpServers object. Keeping one mcpServers key is what keeps the file valid JSON.
VS Code
Follow along with these steps to add WeWeb to your user-level MCP configuration:
- Open the Command Palette (
⌘ + Shift + Pon Mac,Ctrl + Shift + Pon Windows). - Run
MCP: Open User Configuration. - Copy the JSON block below.
- Inside the
serversobject, add theweweb-aiblock alongside any other servers you already have. - Save the file (
⌘ + Son Mac,Ctrl + Son Windows). - Restart VS Code, and on restart you will be prompted to authenticate with WeWeb.
json
{
  "servers": {
    "weweb-ai": {
      "type": "http",
      "url": "https://ai-api.weweb.io/v1/mcp"
    }
  }
}
INFO
Already running other MCP servers? Place the "weweb-ai" block alongside them, inside the single servers object. Keeping one servers key is what keeps the file valid JSON.
To add WeWeb to one project only, run MCP: Open Workspace Folder MCP Configuration in step 2 instead. This saves the server to .vscode/mcp.json in your workspace.
Codex
Follow along in the guide above, or use these steps:
- Open your profile menu in Codex and click
Settings. - Click
Settingsagain to open Codex settings. - Click
MCP servers. - Click
Add server. - Name the MCP
WeWeb. - Select
Streamable HTTP. - Copy the MCP URL from this page:
https://ai-api.weweb.io/v1/mcp- Paste the URL into the URL field in Codex.
- Click
Save. - Click
Authenticate, then sign in to WeWeb and approve access when prompted.
Antigravity
Follow along in the guide above, or use these steps:
- Click the
...menu in the Agent panel. - Click
MCP Servers. - Click
Manage MCP Servers. - Click
View raw config. - Copy the JSON block below.
- In your
mcp_config.jsonfile, paste thewewebblock inside themcpServersobject. - Confirm your file matches the layout shown in the guide.
- Save the file (
⌘ + Son Mac,Ctrl + Son Windows). - Restart Antigravity, and on restart you will be prompted to authenticate with WeWeb.
- MacOS and Linux:
~/.gemini/antigravity/mcp_config.json - Windows:
%USERPROFILE%\.gemini\antigravity\mcp_config.json
json
{
  "mcpServers": {
    "weweb": {
      "command": "npx",
      "args": [
        "-y",
        "mcp-remote",
        "https://ai-api.weweb.io/v1/mcp"
      ]
    }
  }
}
INFO
Already running other MCP servers? Place the "weweb" block alongside them, inside the single mcpServers object. Keeping one mcpServers key is what keeps the file valid JSON.
Authenticate and manage tools
No matter which client you use, connecting to the WeWeb MCP server prompts you to sign in to WeWeb and authorize access. The first time you connect, or when your session expires, your client opens a browser window with a screen like this:
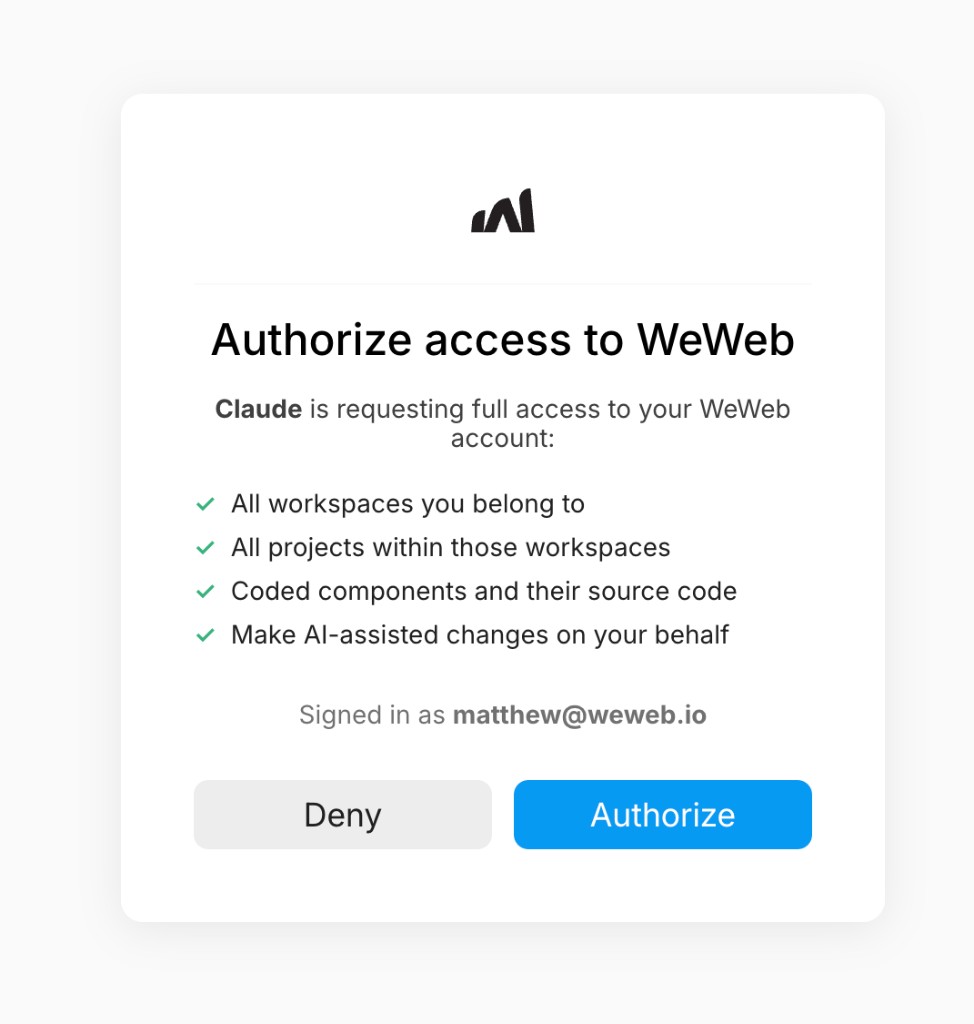
Review what access is being requested, confirm you are signed in to the correct WeWeb account, then click Authorize. Until you approve, the agent cannot call WeWeb tools on your behalf.
What are MCP tools?
An MCP server exposes tools: discrete actions the agent can run, such as creating a page, fetching table view data, or editing a workflow. You do not need to call these tools yourself. Describe what you want in plain language and the agent picks the right ones.
Once connected, your client lists the WeWeb tools available in the session. Many clients let you control how those tools are used, for example whether the agent can run a tool automatically or must ask for your approval first.
Tool permissions in Claude Desktop
This screenshot is from Claude Desktop, but other clients often offer similar controls in their own settings.
In Claude Desktop, open Settings → Connectors, then open your WeWeb connector. Under Tool permissions, choose for each tool or group of tools whether Claude can run it automatically, needs your approval, or is blocked.

See all available WeWeb tools →
Available tools
Once connected, your agent can call the tools below. They are grouped by area. You don't need to memorize them. Describe your goal in plain language and the agent picks the right tools.
Project & general
| Tool | Description |
|---|---|
listWorkspaces | List the WeWeb workspaces accessible to your account |
switchWorkspace | Switch the active workspace for the session |
listProjects | List the WeWeb projects available to your account |
switchProject | Switch the active project for the session |
getWeWebDocumentation | Look up WeWeb documentation to ground its work |
getPageWorkflowTriggersContext | Get available triggers for page workflows |
getAppWorkflowTriggersContext | Get available triggers for app workflows |
getFrontendWorkflowActions | List available frontend workflow actions |
getBackendWorkflowActions | List available backend workflow actions |
wewebFeedback | Send feedback about the MCP experience |
ping | Health check the connection |
Pages & UI elements
| Tool | Description |
|---|---|
searchPages | Find pages in the project |
createPage | Create a new page |
updatePage | Update a page's settings |
getElementsDocumentation | Get documentation for WeWeb elements |
searchPageElements | Find elements on a page |
getPageElementsVariables | List variables used by a page's elements |
getElementLocalContext | Get the local context of an element |
getElementParentStates | Inspect parent states of an element |
getOtherPageSemantic | Read the semantic structure of another page |
editElement | Edit an element's properties or style |
editRepeat | Configure a repeat (list) on an element |
addSection | Add a section to a page |
reuseSection | Reuse an existing section (from another page) on the page |
addElements | Add elements to the page |
replaceSection | Replace an existing section |
replaceElement | Replace an existing element |
Design system
| Tool | Description |
|---|---|
searchTokens | Find design tokens |
createTokens | Create design tokens (colors, typographies, spacings) |
editToken | Edit a design token |
deleteToken | Delete a design token |
getGuidelines | Read the design system guidelines |
editGuidelines | Edit the design system guidelines |
searchClasses | Find CSS classes |
createClass | Create a CSS class |
editClass | Edit a CSS class |
deleteClass | Delete a CSS class |
activateIconSet | Activate an icon set |
Variables
| Tool | Description |
|---|---|
searchVariables | Find variables in the project |
createVariable | Create a variable |
editVariable | Edit a variable |
deleteVariable | Delete a variable |
Frontend workflows
| Tool | Description |
|---|---|
searchGlobalWorkflows | Find global (app, page, function) workflows |
createOrEditElementWorkflow | Create or edit an element-level workflow |
deleteElementWorkflow | Delete an element workflow |
createAppWorkflow | Create an app workflow |
editAppWorkflow | Edit an app workflow |
createPageWorkflow | Create a page workflow |
editPageWorkflow | Edit a page workflow |
createFunctionWorkflow | Create a function workflow |
editFunctionWorkflow | Edit a function workflow |
deleteGlobalWorkflow | Delete an app, page, or function workflow |
Tables & data (WeWeb backend)
| Tool | Description |
|---|---|
listAllTables | List all tables |
createTable | Create a table |
dropTable | Delete a table |
renameTable | Rename a table |
addColumn / dropColumn / renameColumn / modifyColumnType | Manage table columns |
addConstraint / dropConstraint | Manage table constraints |
getTableRows | Read rows from a table |
addRow / updateRow / deleteRow | Manage table rows |
createTableIntegration / deleteTableIntegration / renameTableIntegration | Manage table integrations |
listStorageFiles | List files in storage |
Table views (interface data)
| Tool | Description |
|---|---|
searchTableViews | Find table views |
fetchTableViewData | Fetch data from a table view |
fetchRawTableData | Fetch raw table data |
createTableView / updateTableView / deleteTableView | Manage table views |
createTableViewIntegration / updateTableViewIntegration | Manage table view integrations |
Authentication & users
| Tool | Description |
|---|---|
installAuthProvider | Install an authentication provider |
listInstalledAuth | List installed auth providers |
editAuthProviderConfig | Edit an auth provider's configuration |
deleteAuthProviderConfig | Remove an auth provider |
listUsers / createUser | Manage users |
listRoles / createRole / deleteRole | Manage roles |
Backend workflows & environment
| Tool | Description |
|---|---|
listAllBackendWorkflows | List backend workflows |
getBackendWorkflow | Read a backend workflow |
createBackendWorkflow / editBackendWorkflow / deleteBackendWorkflow | Manage backend workflows |
listAllEnvVariables | List environment variables |
createEnvVariable / editEnvVariable / deleteEnvVariable | Manage environment variables |
getWeWebBackendStatus | Check the WeWeb backend status |
installWeWebBackendUrl | Connect a WeWeb backend to the project |
Tips
- Select a workspace and project first. Ask the agent to run
listWorkspacesandswitchWorkspace, thenlistProjectsandswitchProject, before making changes so it acts on the right project. - Set up backend work before interface work. When a request spans both, have the agent create tables and backend workflows before building the UI that depends on them.
- Review as you go. Because tools run against your live project, keep an eye on changes and use the WeWeb editor and
Previewto verify results.
Related
- Learn more about WeWeb AI →: build with AI directly inside the WeWeb editor
- Learn more about AI modes →
- Learn more about passing context to AI →
- AI CRM with MCP build guide →