

Appearance
Setup
Follow these steps to connect Stripe to your WeWeb project so you can use Stripe actions and webhooks.
1. Get your Stripe keys
- Go to Stripe Dashboard → API keys.
- Use Test mode (toggle in the dashboard) while building and testing.
- Copy:
- Publishable key (starts with
pk_test_orpk_live_) - Secret key (starts with
sk_test_orsk_live_)
- Publishable key (starts with
Test vs live
Use test keys (pk_test_, sk_test_) in the WeWeb Editor and when testing. Switch to live keys (pk_live_, sk_live_) only for Production when you’re ready to accept real payments.
2. Add Stripe in WeWeb
In WeWeb, open the
Data & APItab, then open theIntegrationssubtab. You can also open theIntegrationspanel from theInterfacetab.Add the Stripe integration if it’s not already there. It sits under
Payments & Billing.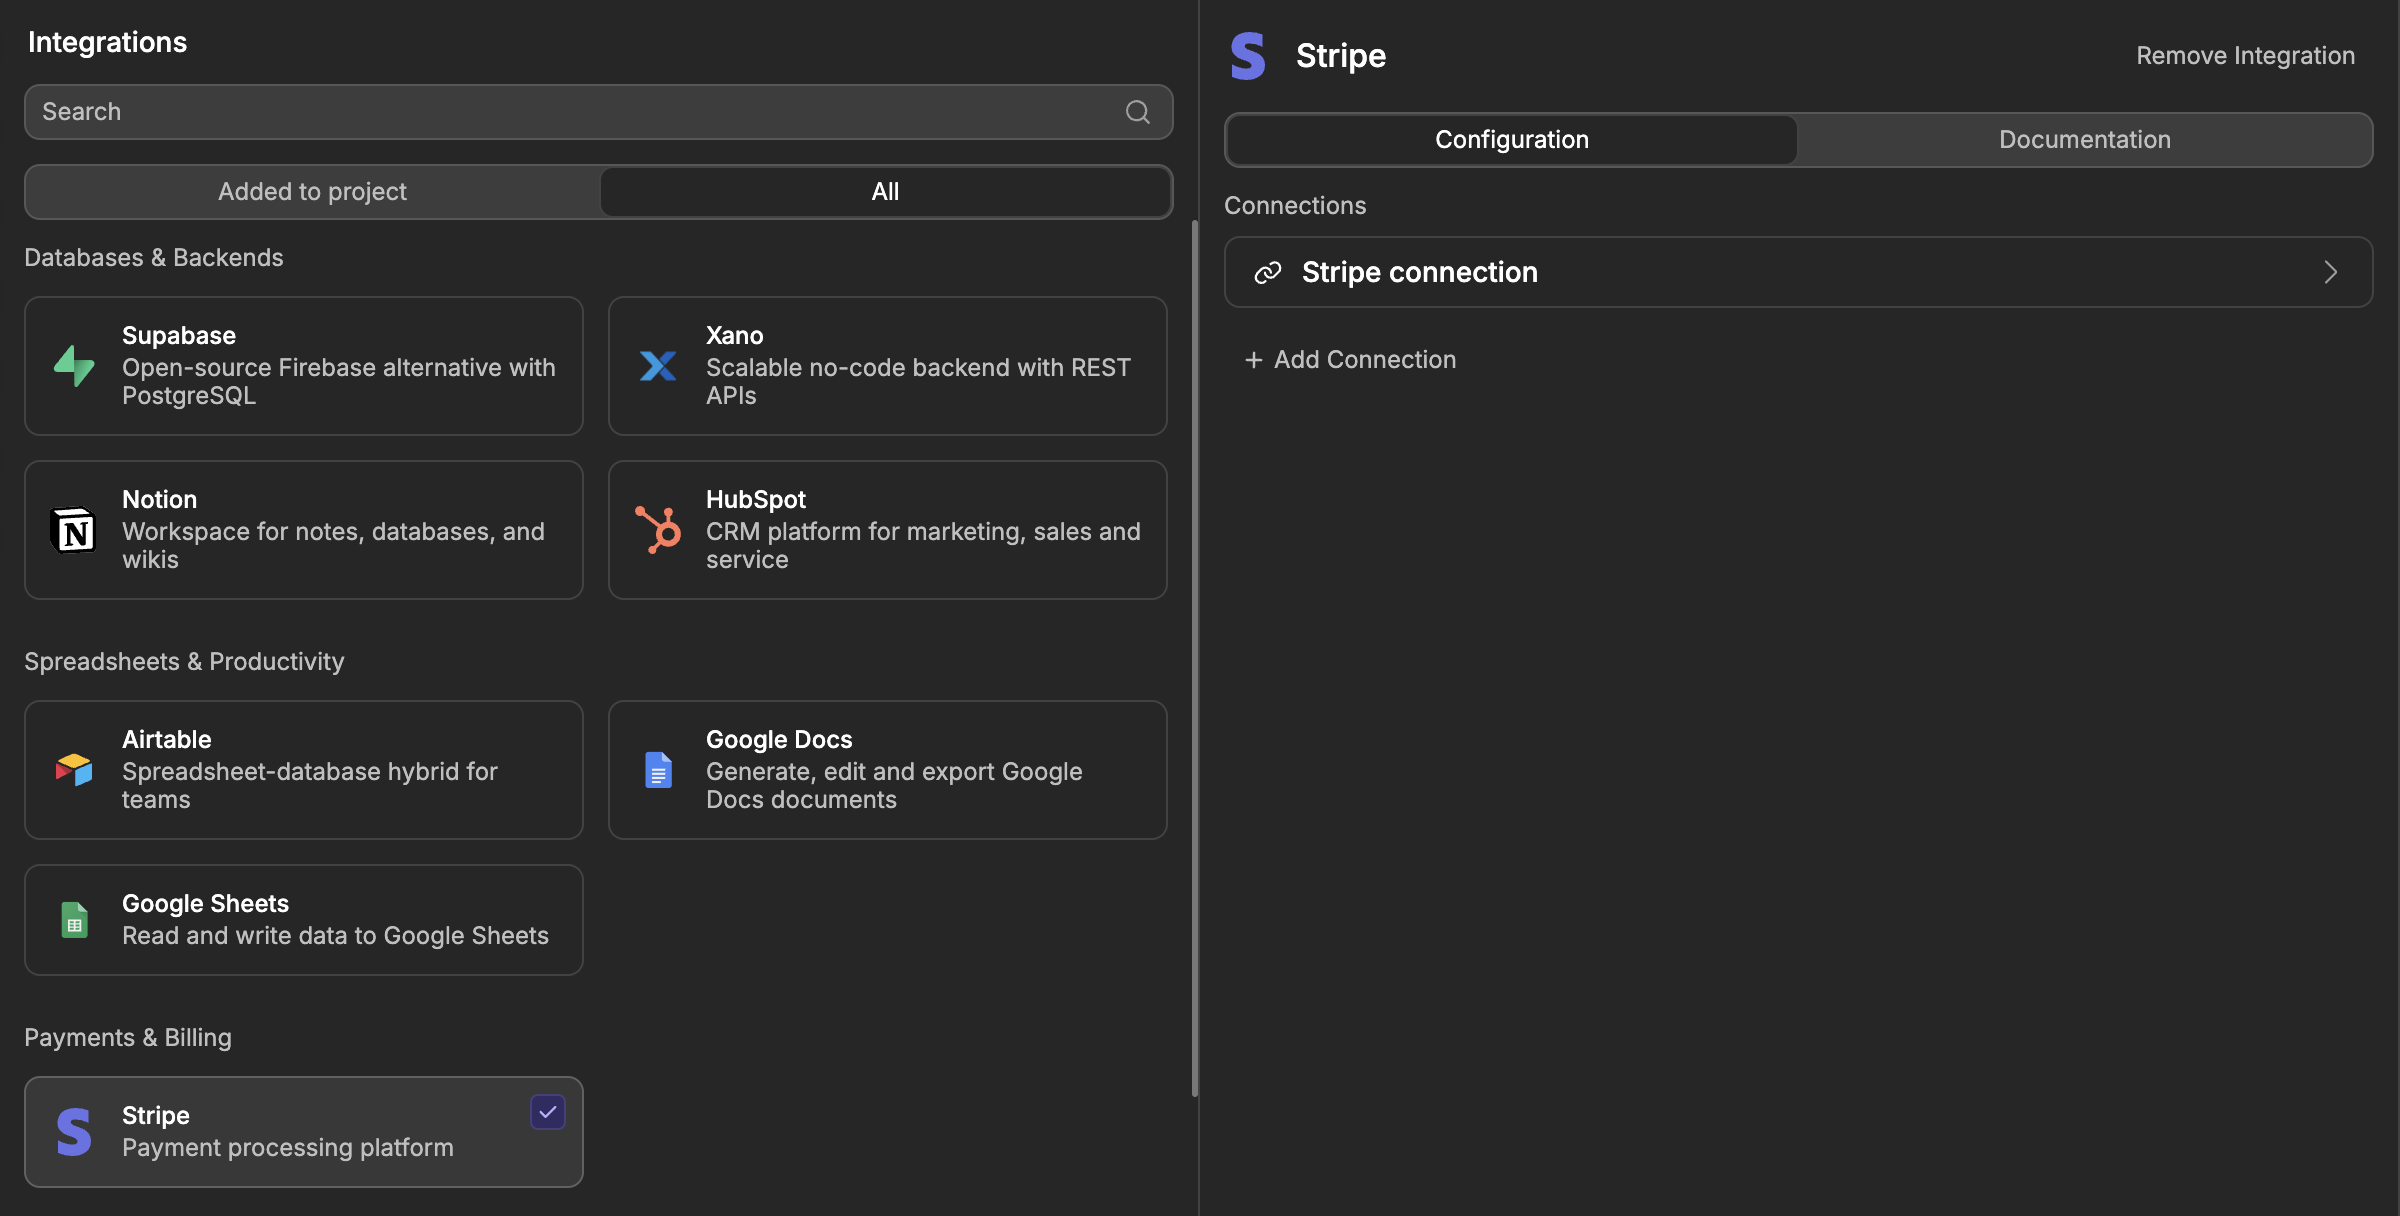
Create a connection (e.g. “Stripe – Editor”, “Stripe – Production”).
For each environment you use (Editor, Staging, Production), fill in:
- Publishable Key — paste the Publishable key.
- Secret Key or Restricted Key — paste the Secret key (or a restricted key with the right permissions).
Use the
Environmentswitch at the top of the block to move from one environment to the next.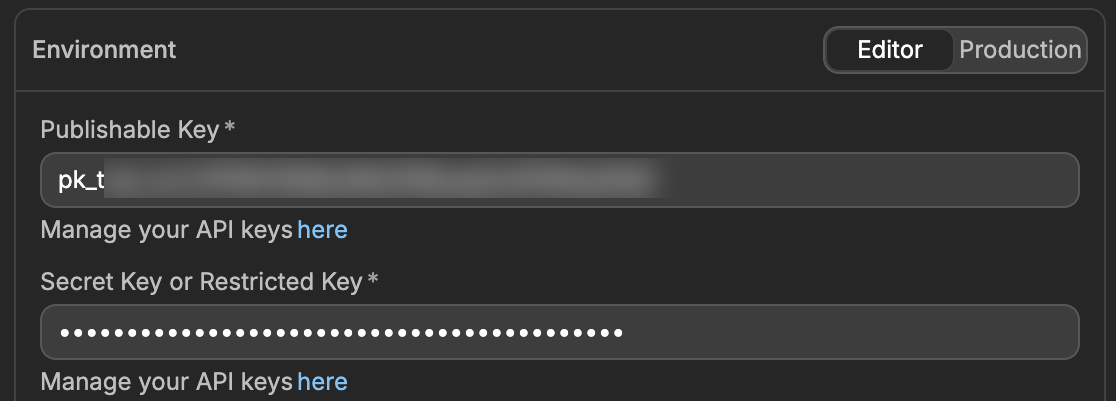
3. Test the connection
In the API Endpoints tab of the Backend Workflows subtab in Data & API (or in a backend workflow), add an action.
Open
Stripein the action menu. Stripe actions are grouped by resource (Customers,Products,Prices,Invoices,Refunds,Subscriptions,Checkout,Payment Intents): openProductsand pick List Products.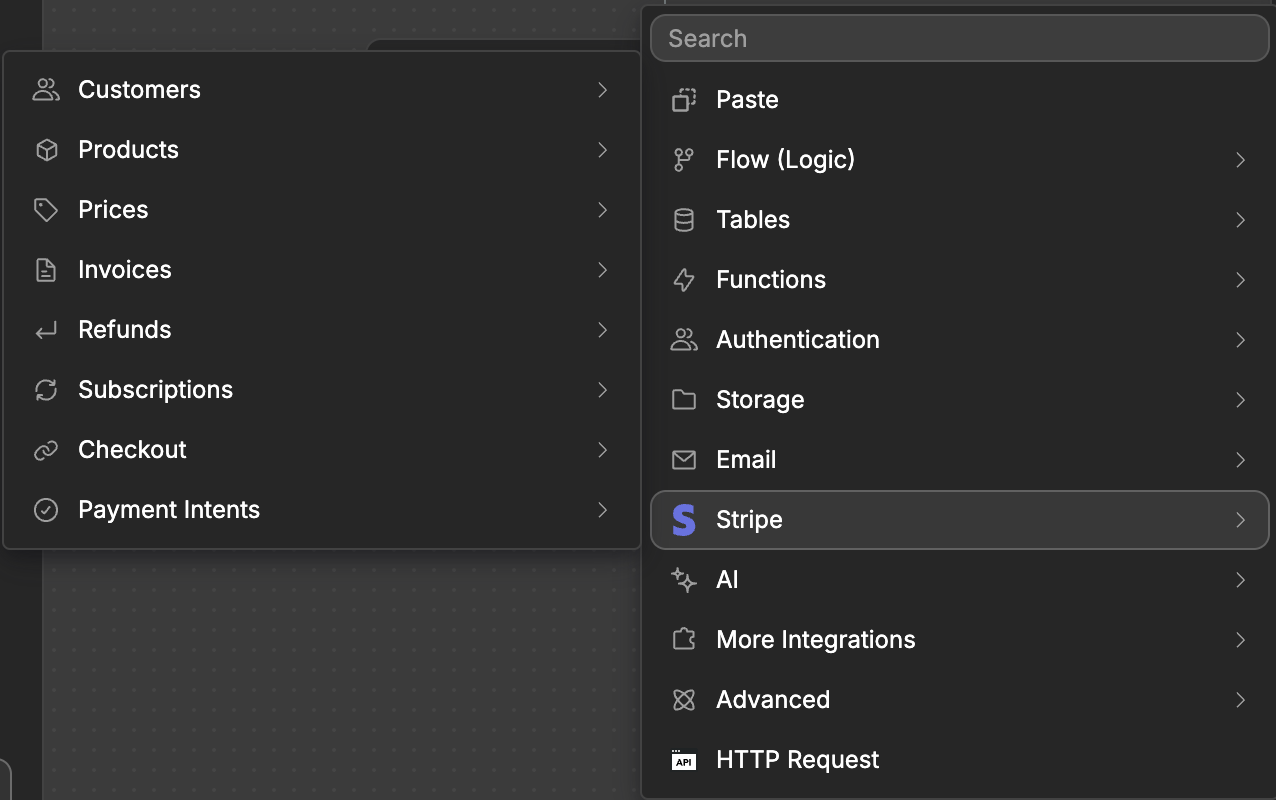
Select your Stripe connection and run the action (or publish and call the API).
If you see a list (even if empty), the connection works.
If something fails, check Errors and FAQs and the pitfalls below.
Common pitfalls
Using a live key in the editor (or a test key in production)
If the key environment doesn’t match where you’re testing, Stripe calls can fail or return unexpected data. Use pk_test_ / sk_test_ for testing and pk_live_ / sk_live_ for production.
Amounts are in cents
Actions like Create Payment Intent and Create Price use the smallest currency unit. For USD, 1000 means $10.00.
Your restricted key does not have the required permissions
If you use a restricted key, give it access to the Stripe resources you use (e.g. Payment Intents, Customers, Products, Subscriptions, Invoices). Otherwise requests can return 403.
Payment Intent cannot be canceled
Stripe only allows canceling a Payment Intent in certain states. If cancel fails, check the Payment Intent status in Stripe and your flow.
Limitations and what’s not in the editor
- Setup Intents (saving a card for later without charging) are supported by the backend but are not in the workflow action picker. You’d need a custom API that calls the backend.
- Charges and Payment Methods (create, attach, detach, list) exist in the backend but are not in the Stripe integration actions in the editor. Prefer Payment Intents and Checkout for new flows.
Everything else is in the action picker, including the full lifecycle for customers, products, prices, invoices and their line items, invoice items, subscriptions, payment intents, refunds, and checkout sessions. See the Actions reference for the complete list.