

Appearance
Intro to API Endpoints
API Endpoints are secure workflows that run in the backend of your application, and cannot be edited in any way by your users. This means they are ideal for when you need to run secure logic.
Start from scratch or use a template
When you create a new API Endpoint, you can either:
- Build it from scratch, or
- Start from a template
Templates are useful when you want a working starting point for a common use case instead of building every action yourself.
SECURING TEMPLATES
If you start with a template, please ensure you set up the necessary security rules on the API you create from the template.
Most templates by default come with an 'Auth' restriction, meaning only users who are signed into your app will be able to access the API.
However, please do your own due dilligence and make sure you set up whatever security rules you wish to have in place for your use case.
Frontend workflows vs API Endpoints
Frontend workflows
Frontend workflows (AKA workflows in the Interface tab) run in the user's browser. This makes them useful for performing actions such as updating variables and controlling UI behavior such as showing/hiding elements.
However, frontend workflows are not secured, meaning malicious users could access and edit the workflow via browser tools.
This means any actions that need to be secured, such as retrieving user-specific data, or making an API request that requires sending a private token should not be done in the frontend.
API Endpoints
API Endpoints run on the backend server of your application and cannot be edited by potential malicious users. This makes them the right place for anything that must be secured, like adding to tables, reading protected data, or using secrets (API keys).
You can set exactly what security you require for your API Endpoints, such as restricting access to only authenticated users, or only allowing access to users with a specific role.
UNDERSTANDING FRONTEND VS BACKEND
If you would like to learn more about why there is the seperation of the frontend and backend in web applications, check out our dedication article on frontend vs backend →
Core parts of API Endpoints
Input Parameters
Input parameters allow dynamic values to be passed into your API Endpoints, so the values can then be used in the logic of the API Endpoint. You add and manage them from the Parameters (optional) block at the top of the API Endpoint.
To add an input:
- Select the
Parameters (optional)block at the top of the API Endpoint - In the right panel, click
Add Parameterto create a new parameter - Enter a clear
Name(e.g.,email,price,include_email) - Choose a
Type - (Optional) Set a
Test valueto use when you test run the API Endpoint
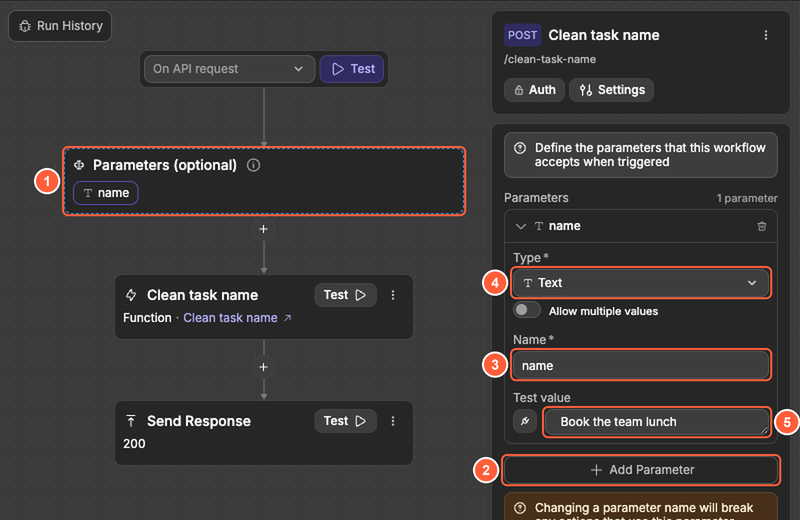
You can bind these inputs inside your actions using the bind icon so values flow into inserts, updates, HTTP payloads, and conditions.
RENAMING PARAMETERS
Actions reference parameters by name. If you rename a parameter later, any actions that used the old name will break until you remap them.
Security
Control who can call your API Endpoint from the Security panel. To open it, click the access button at the top of the API Endpoint (it shows Public or Auth).
- Choose the access level — Either
Public(anyone can call the endpoint, use only for non‑sensitive logic) orAuthenticated(only signed‑in users can call it) - (Optional) Limit by roles — Pick
Match anyorMatch all, then select which roles are required. - (Optional) Click
Add middleware for more controlto add Middleware workflows that run before the main actions. Use this for things like "user belongs to the same project" or "owns the record."
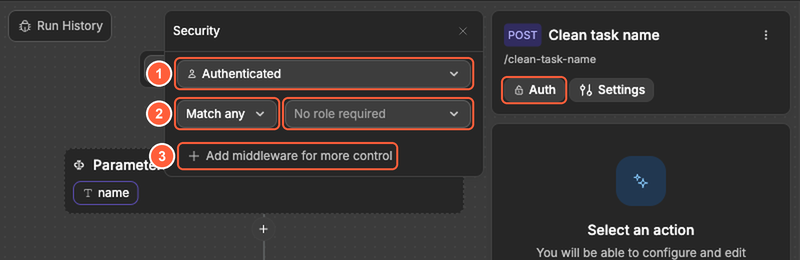
Learn more about securing API Endpoints →
Workflow actions
Actions are the core pieces of logic your API Endpoint executes.
To add an action:
- Click
Add an action(or the+between two actions) - Pick a category and action
- Map inputs and configure options
- Use
Testto run the step and inspect results
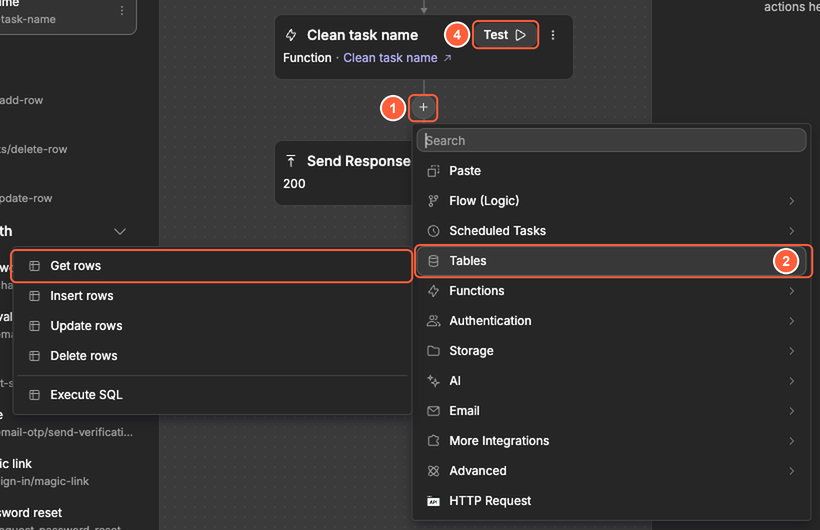
Learn about all available actions →
To generate text, images, or embeddings, add an action from the AI category. Learn more about AI Gateway →
API Endpoint response
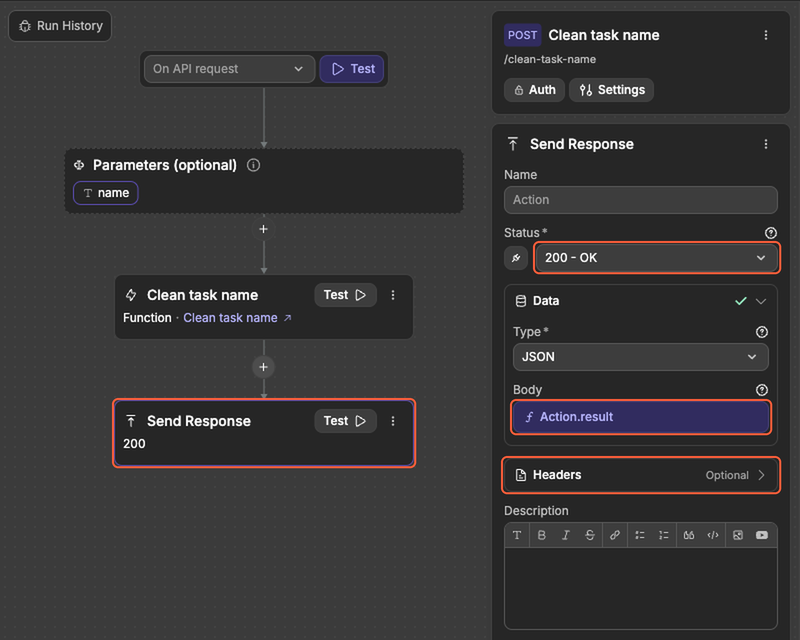
API Endpoints always return a response, allowing you to use the response data in your interface. This could mean creating further logic around what the API Endpoint returns, or simply showing the data returned in your UI.
To define what you want the response from your API Endpoint to be, you can use the Send Response action, in the Flow (Logic) category:
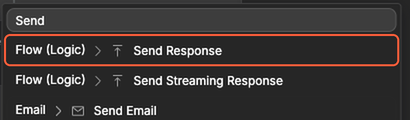
In this action, you can fully customize not only the data that is returned, but also advanced parts of the configuration, such as the status code and headers.
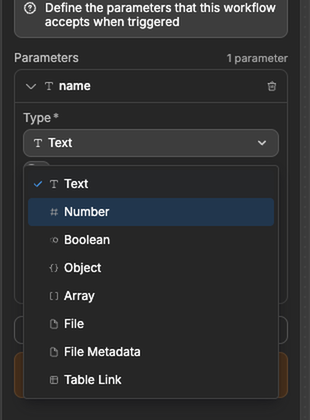
Types of input parameters
Input parameters are crucial to allowing users to dynamically work with your API Endpoints.
You can choose between these types: Text, Number, Boolean, Object, Array, File, File Metadata, and Table Link.
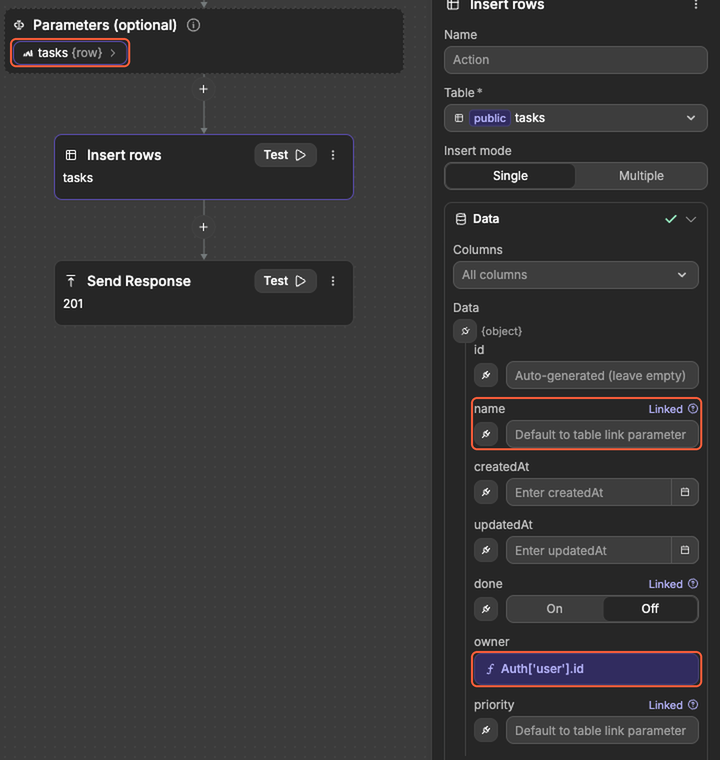
Using input parameters in actions
Once input parameters exist in your API Endpoint, you can use them inside bindings of your actions. For example, in an Insert rows action, you could use the values passed in the input parameters to populate the data of the new record. With a Table Link parameter, the matching columns are filled from the parameter (they show Linked):
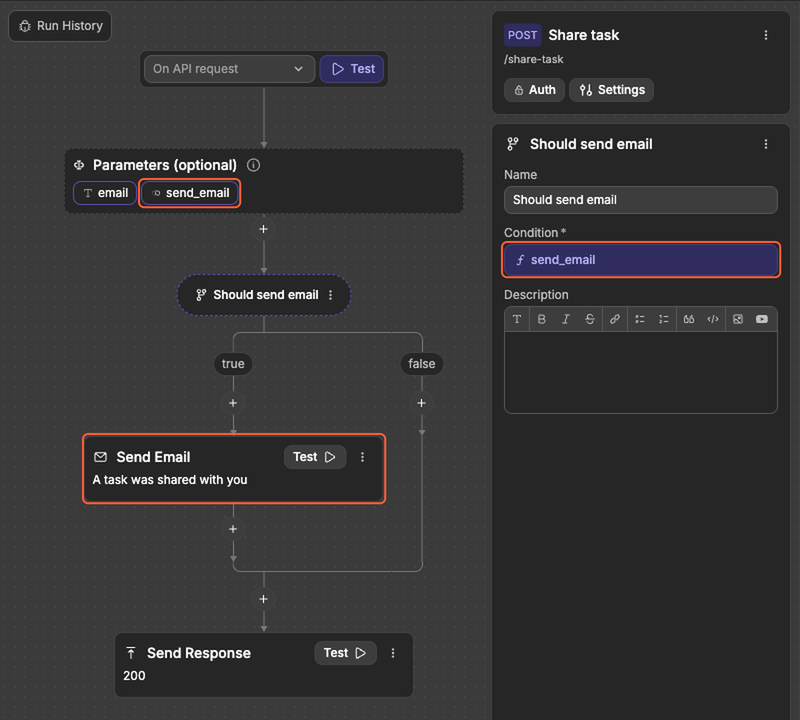
You can also use inputs in conditions (e.g., to only run logic when send_email is true):
Viewing run history
When you’re viewing an API Endpoint, you can click Run History to see recent runs of that endpoint.
This is useful when you want to understand what was sent to your API Endpoint, what it returned, and whether it failed (and why).
CONTINUE LEARNING
Create a write operation and return the updated record.