

Appearance
Send Email
The Send Email action sends an email from a backend workflow. It is built into WeWeb, so you don't need an account with an email provider or an API key to use it.
Use it for the emails your app sends automatically: a confirmation after a form is submitted, a welcome email after sign up, a password reset link, a verification code, or a notification to your team.
Because the action runs on the server, visitors can't see or change what is sent. You decide the recipient, subject, and content in the workflow, and pass in only the values that change, such as the visitor's name.
Adding the action
- Open the
Data & APItab, then open theBackend Workflowssubtab. - Open the API Endpoint or Event Trigger that should send the email.
- Click
Add an action, open theEmailcategory, and selectSend Email.
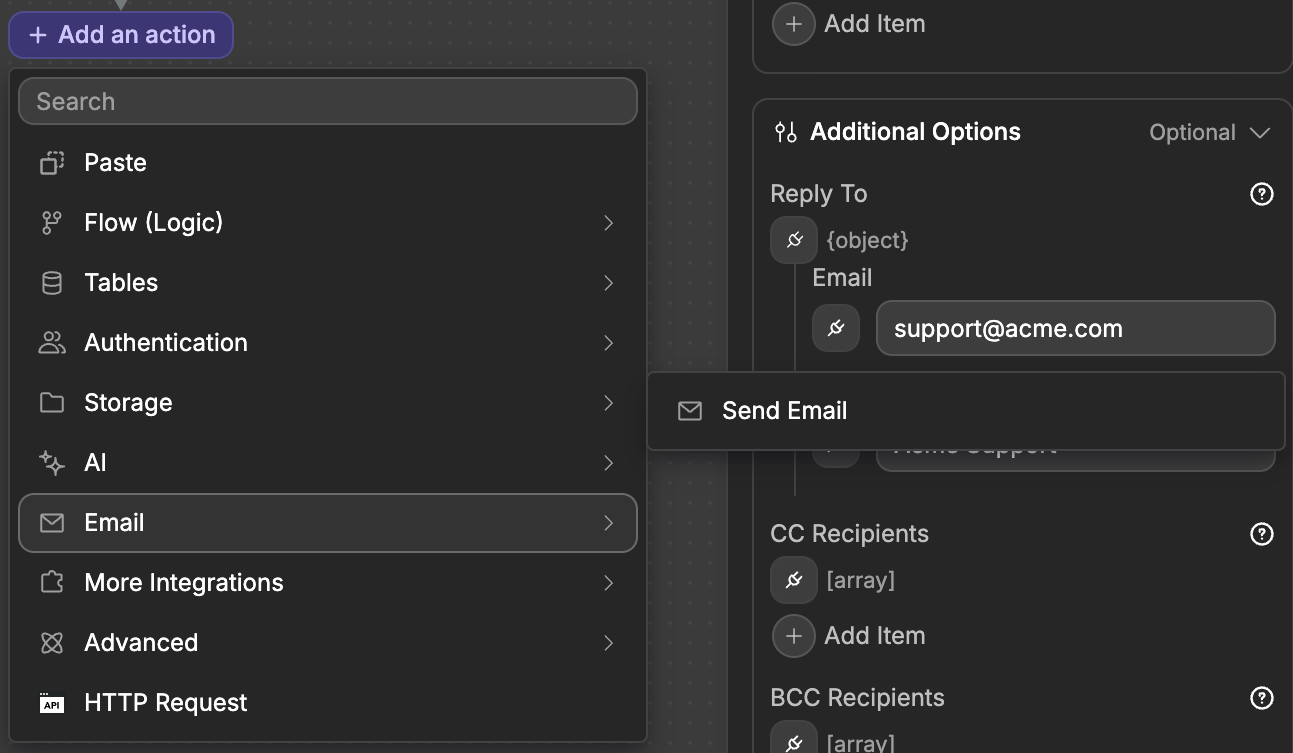
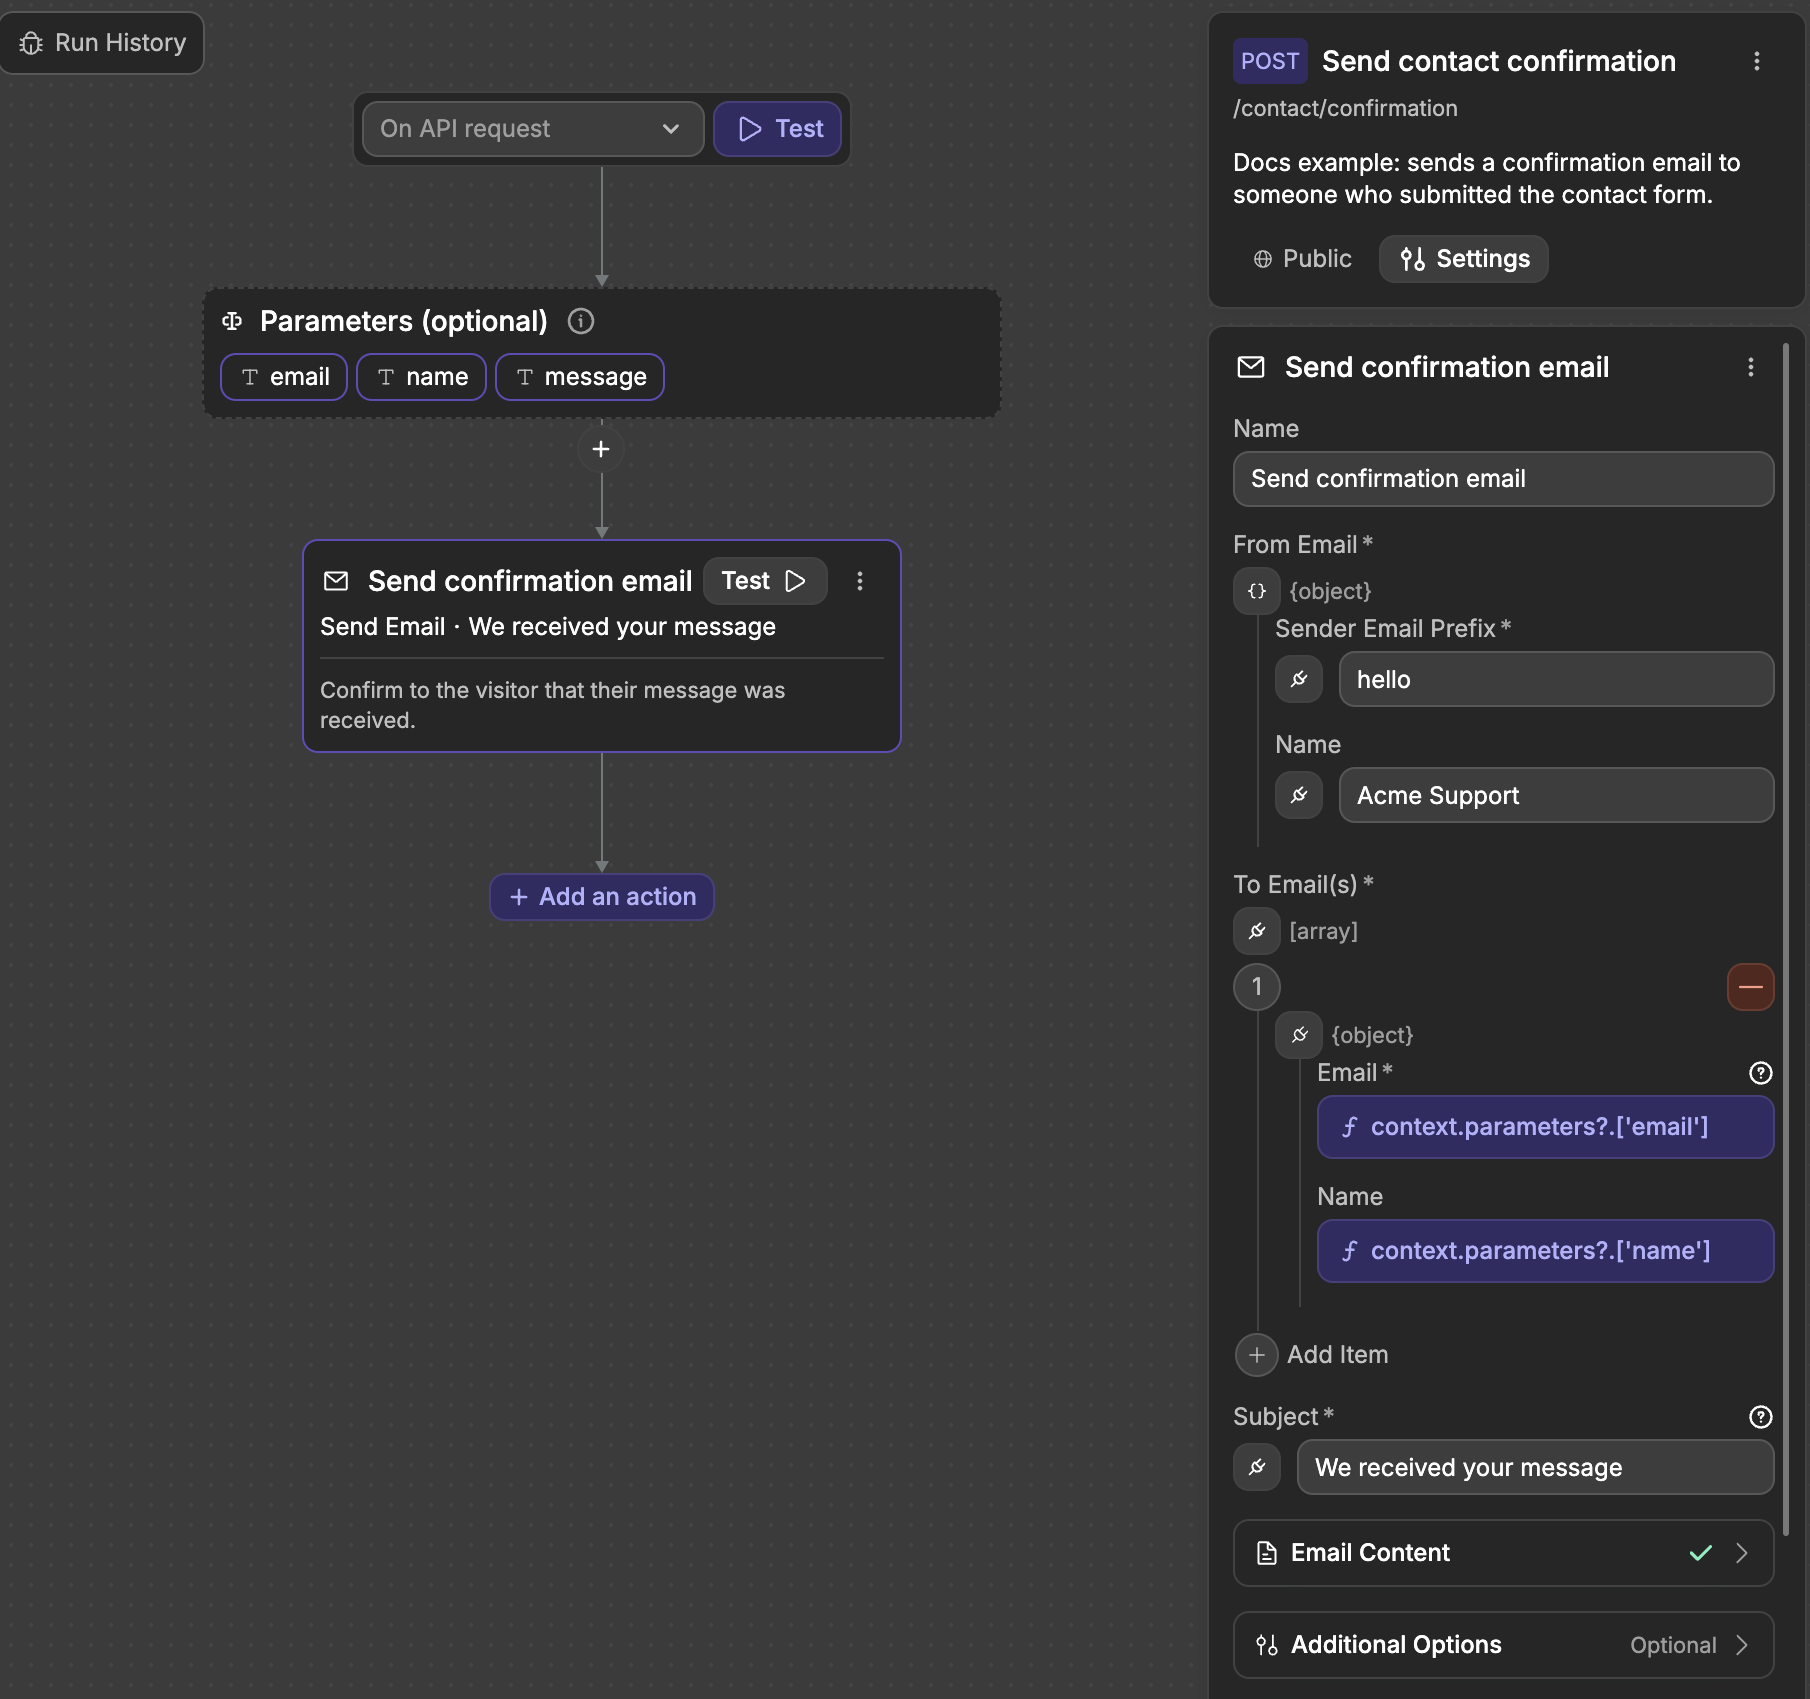
The configuration appears in the right panel. Required fields are marked with *.
START FROM A TEMPLATE
For common emails, you don't need to start from scratch. When creating an API Endpoint, the Send Notification Email template gives you a ready-made email workflow. The auth Event Triggers (such as On after sign up, On password reset requested, or On OTP requested) also have templates that use Send Email.
Sender
From Email sets who the email comes from:
Sender Email Prefix: The part of the address before the@, for exampleno-reply,hello, orsupport. This field is required.Name: The name recipients see in their inbox, for exampleAcme Support. This field is optional.
You only choose the prefix. WeWeb adds the domain for you. By default, emails are sent from from.weweb-apps.io, so a prefix of hello sends from hello@from.weweb-apps.io.
To send from your own domain (for example hello@acme.com), connect a custom email domain in the Settings tab, under Domain Management. Custom email domains are available on Hosting plans.
Learn more about custom domains →
Recipients
To Email(s) is the list of people who receive the email. Each item has:
Email: The recipient's address. This field is required.Name: The recipient's name. This field is optional.
Click Add Item to add more recipients, or bind the whole list to a value from your workflow. When you bind it, the list must look like this:
json
[
  { "email": "sarah@example.com", "name": "Sarah" },
  { "email": "tom@example.com" }
]
In most cases, you'll bind Email to a parameter of your API Endpoint (for example, the email the visitor typed in a form) or to data from the Event Trigger (for example, the email of the user who just signed up).
Subject
Subject is the subject line of the email. It is required and can be up to 998 characters long.
You can type it directly, like We received your message, or bind it to include dynamic values, like the order number.
Email content
The Email Content section holds the body of your email.
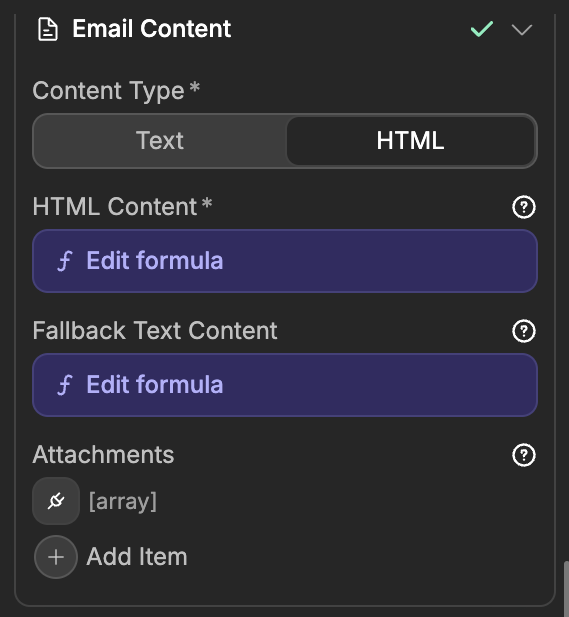
Content type
Choose between two content types:
Text: A plain text email, with no formatting. This is the default. Fill inText Content.HTML: A formatted email with headings, links, colors, or images. Fill inHTML Content.
Plain text is the fastest way to get an email working. Use HTML when the look of the email matters, for example for a branded welcome email.
When you choose HTML, you can also fill in Fallback Text Content. This plain text version is sent with the HTML one, for recipients whose email app doesn't display HTML.
Here is a simple HTML example that includes the visitor's name:
html
<p>Hi {{name}},</p>
<p>Thanks for reaching out. We received your message and will reply within 2 business days.</p>
<p>The Acme team</p>
Here, {{name}} stands for a dynamic value. To insert it, bind HTML Content and build the text in the formula, with the name parameter where the name should appear.
KEEP HTML EMAILS SIMPLE
Email apps display HTML less reliably than browsers. Use simple layouts and inline styles (style="..." on each tag) rather than complex CSS.
Attachments
Attachments lets you add files to the email, like an invoice or a report. Each attachment has:
Filename: The name the recipient sees, with its extension, for exampleinvoice.pdf.File Content: The file itself. It can be a file (for example, afileparameter of your API Endpoint), base64 text, or a data URI (data:application/pdf;base64,...).MIME Type: The kind of file, chosen from a list (PDF, Word, Excel, PowerPoint, ZIP, JSON, XML, text, CSV, HTML, PNG, JPEG, GIF, SVG, or WebP).Disposition:Attachment(The default) adds the file as a download.Inlineshows the file inside the email, which is useful for images.Content ID: Only shown forInlinefiles. Give the file an ID, likelogo, then show it in your HTML with<img src="cid:logo">.
The whole email, attachments included, can't be larger than 30 MB.
Additional options
The Additional Options section is optional.
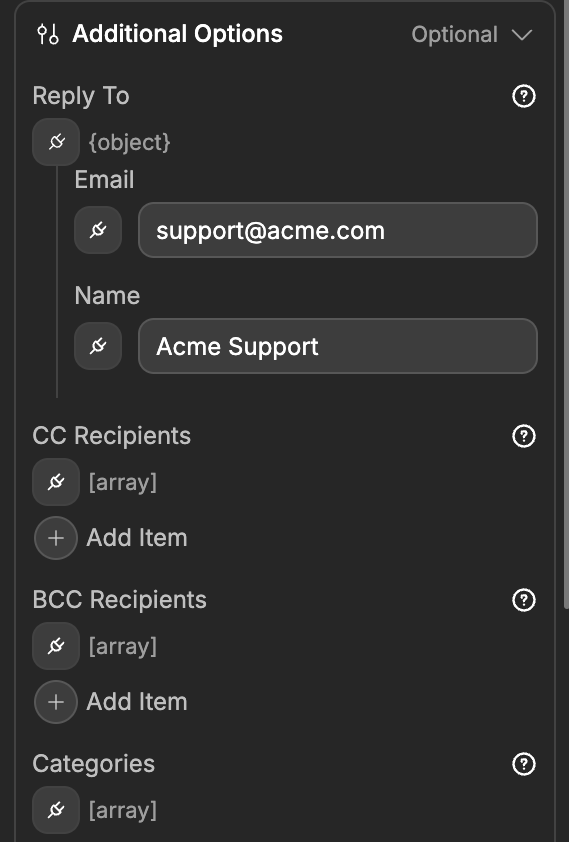
Reply To: The address that receives replies, with an optional name. For example, send fromno-replybut have replies go tosupport@acme.com. If you leave it empty, replies go to the sender address.CC Recipients: People who receive a copy of the email. Other recipients can see them.BCC Recipients: People who receive a hidden copy. Other recipients can't see them.Categories: A list of labels to organize your emails, for example["Onboarding", "Welcome"].
CC Recipients and BCC Recipients use the same format as To Email(s): a list of items with an Email and an optional Name.
Result
When the email is accepted for sending, the action returns an object like this:
json
{
  "statusCode": 202,
  "body": "",
  "headers": {
    "x-message-id": "m0c20EsJSYe2zFSkxEyGJQ",
    "...": "..."
  }
}
A statusCode of 202 means the email was accepted and is on its way. It does not confirm that it reached the inbox: delivery can still be delayed, or the email can land in spam.
If the email can't be sent, the action fails and the workflow stops. To handle this yourself, for example to return a clear error to your interface, place the Send Email action inside a Try/Catch.
Example: confirm a contact form submission
Let's send a confirmation email to anyone who fills in your contact form.
- Create an API Endpoint with three parameters:
email,name, andmessage. - Add a
Send Emailaction. - In
From Email, setSender Email PrefixtohelloandNametoAcme Support. - In
To Email(s), bindEmailto theemailparameter andNameto thenameparameter. - Set
SubjecttoWe received your message. - In
Email Content, chooseHTMLand bindHTML Contentto a short message that includes thenameandmessageparameters. Add aFallback Text Contentwith the same message in plain text. - In
Additional Options, setReply Totosupport@acme.com, so that replies reach your team. - Click
Teston the action to send a test email to yourself.
In your interface, call this API Endpoint when the contact form is submitted, and pass the values the visitor entered.
Learn more about calling an API Endpoint from your interface →
Common issues
The content is required
If the action fails with a message like Unless a valid template_id is provided, the content parameter is required, the email has no content. This usually happens when Text Content or HTML Content is bound to a value that is empty when the workflow runs.
Test your binding with real values, and make sure the parameter or variable it uses is filled in.
The email doesn't arrive
First, check that the action returned a statusCode of 202. If it did, the email was sent: check the recipient's spam folder, and check the recipient address for typos.
Email apps tend to trust emails sent from a domain that matches your app. For emails your users rely on, like password resets, consider connecting a custom email domain.
Replies go to a no-reply address
If you send from a prefix like no-reply, set Reply To to an address your team reads. Otherwise, replies go to the sender address.
CONTINUE LEARNING
See how to use the Send Email action for auth emails, like email verification, password resets, and magic links.