Appearance
Loader
Loaders are a great way to improve a user's experience on your web-app.
There are two main types of loaders:
- Loaders on page change, to let the user know they are indeed being redirected after clicking on a lick
- Loaders during a process, to let the user know their action worked and the data is being fetched or a file is being uploaded for example
Loaders on page change
When a user navigates from one page of your app to another, you can now show them a subtle loader to let them know their click triggered a page change:
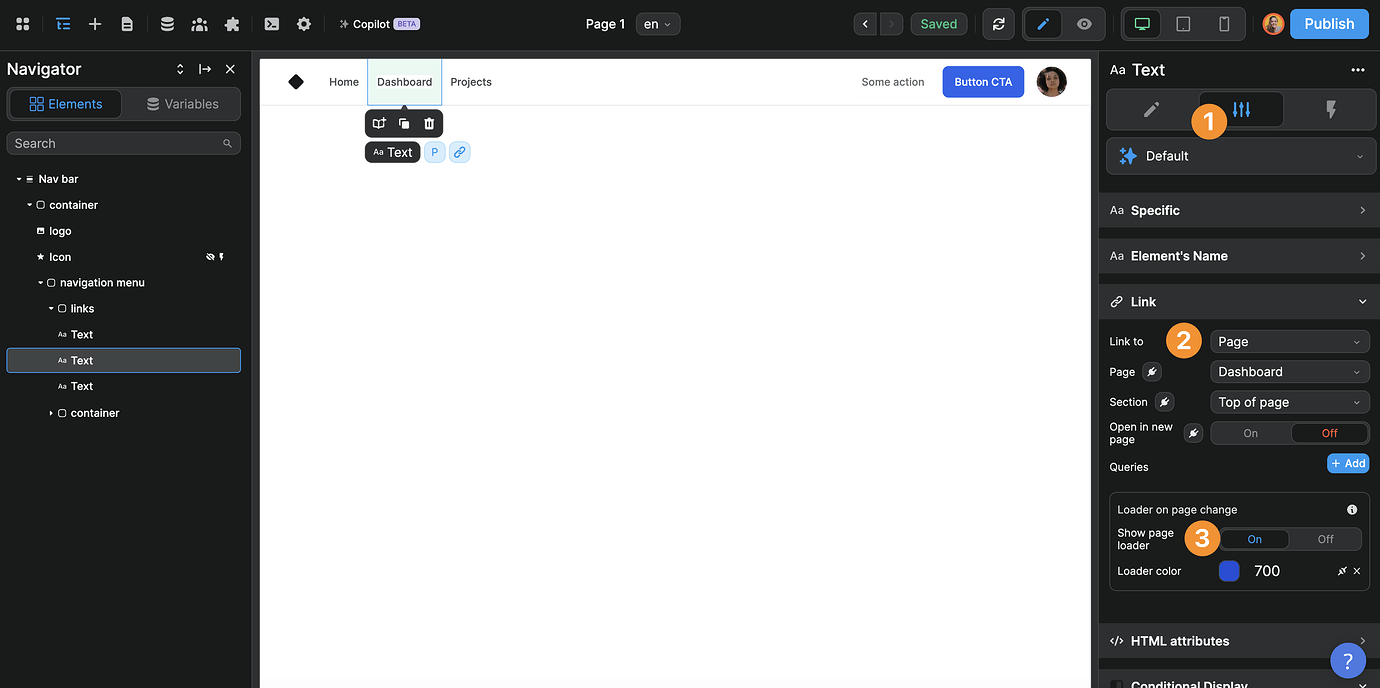
This option is available:
- When using the "Link" setting on an element as shown above, and
- When using the "Change page" action in a workflow.
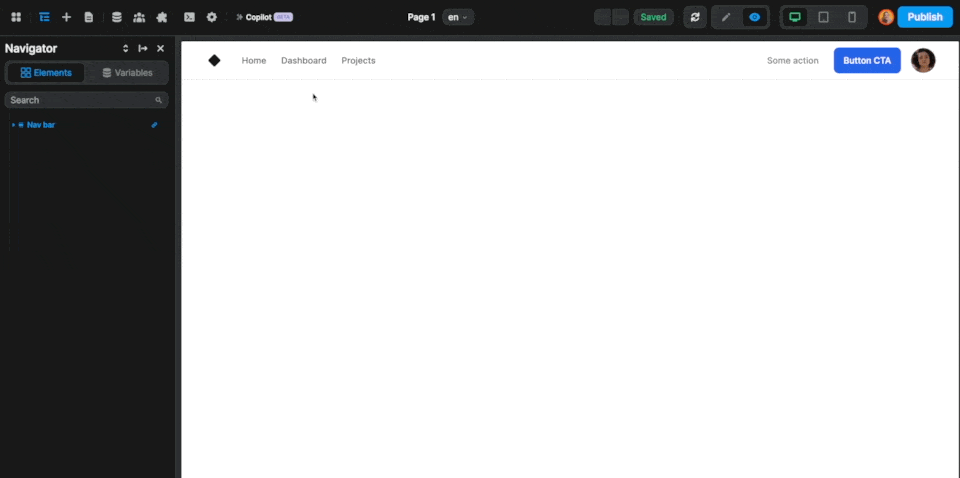
It will look something like this:
If you want more control over when and how the loader appears, you can use the dedicated "Page loader" action in a workflow.
In the example below, we decided to display the loader for 3 seconds before changing page:
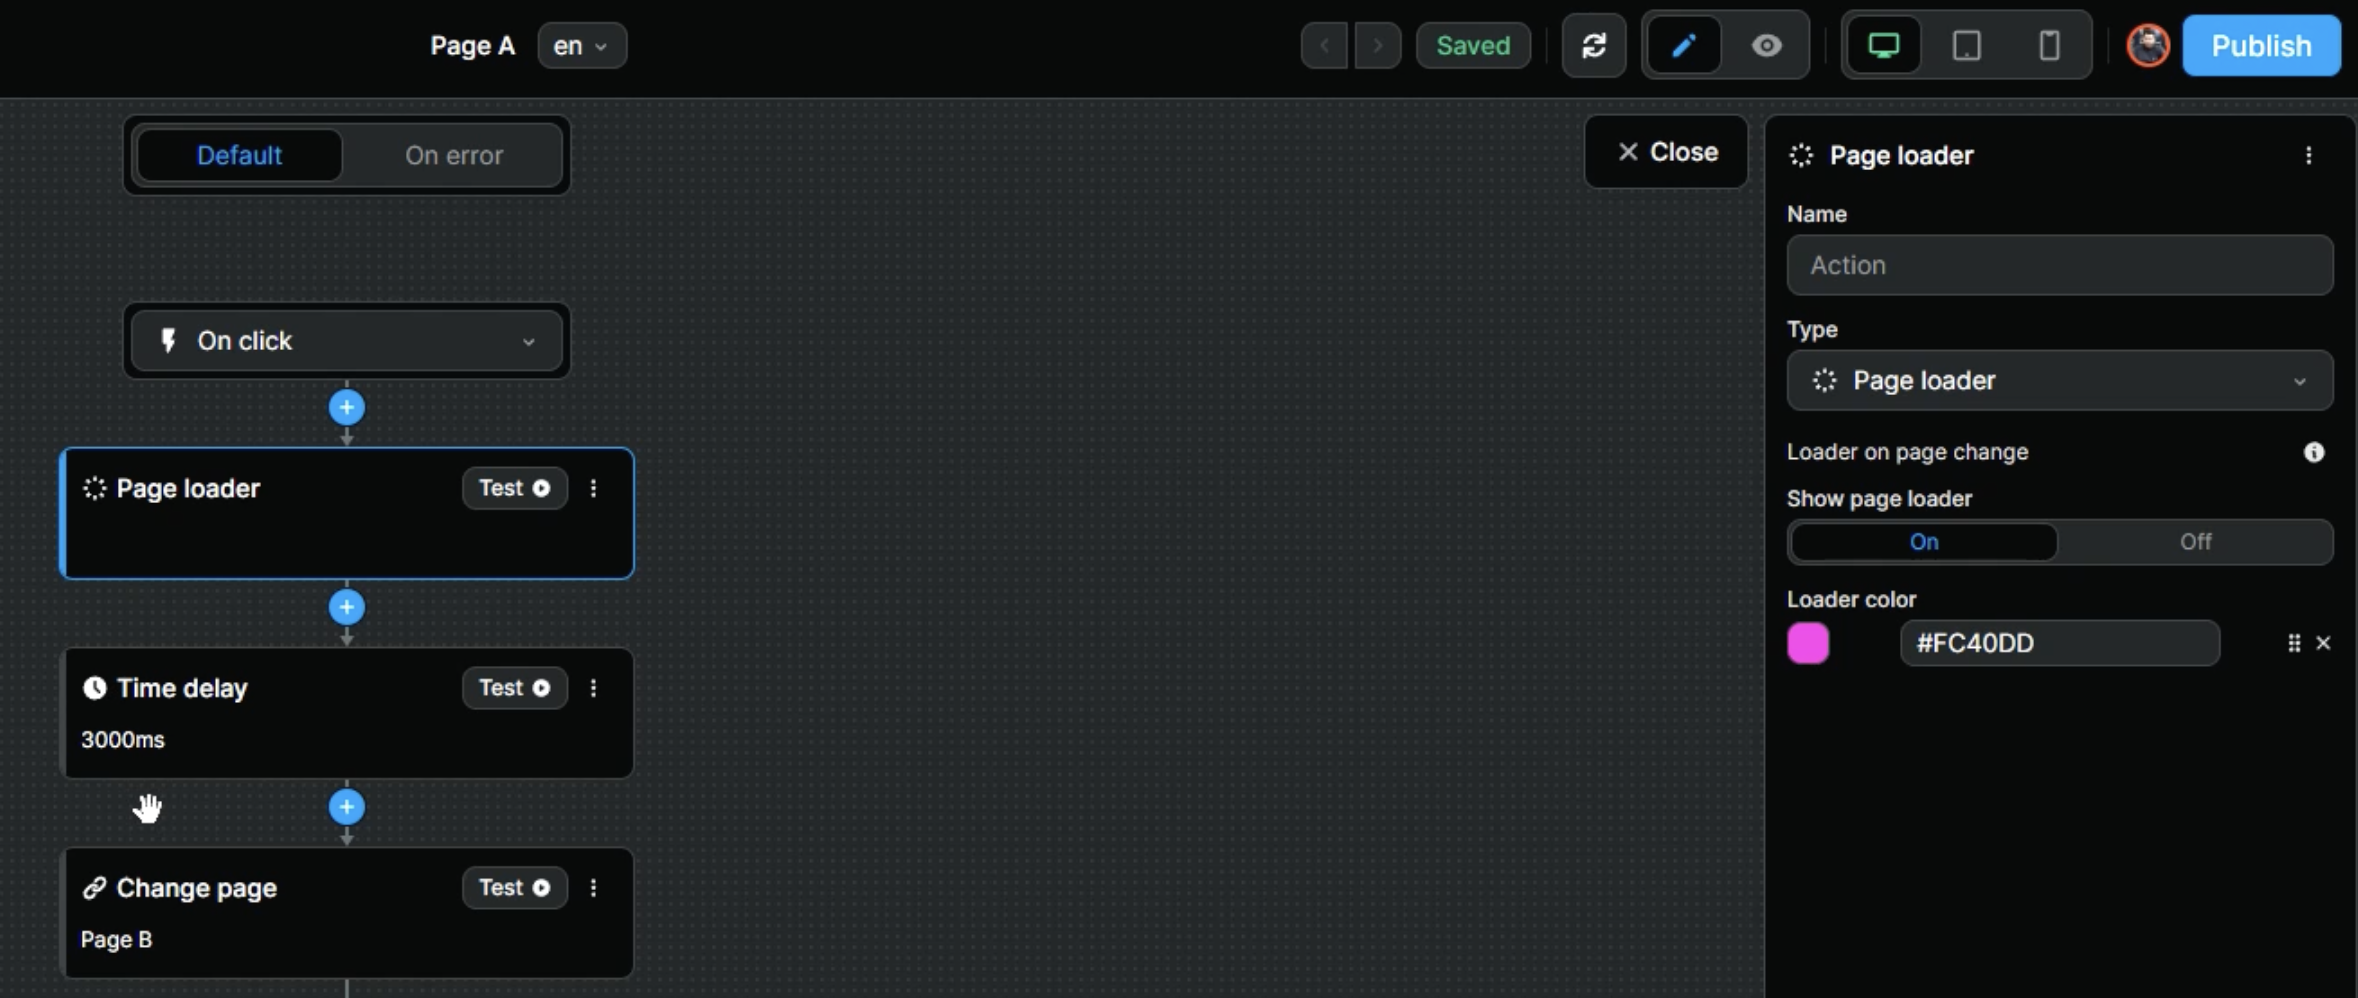
This can be useful when you have a workflow that you know will take time in the background.
TIP
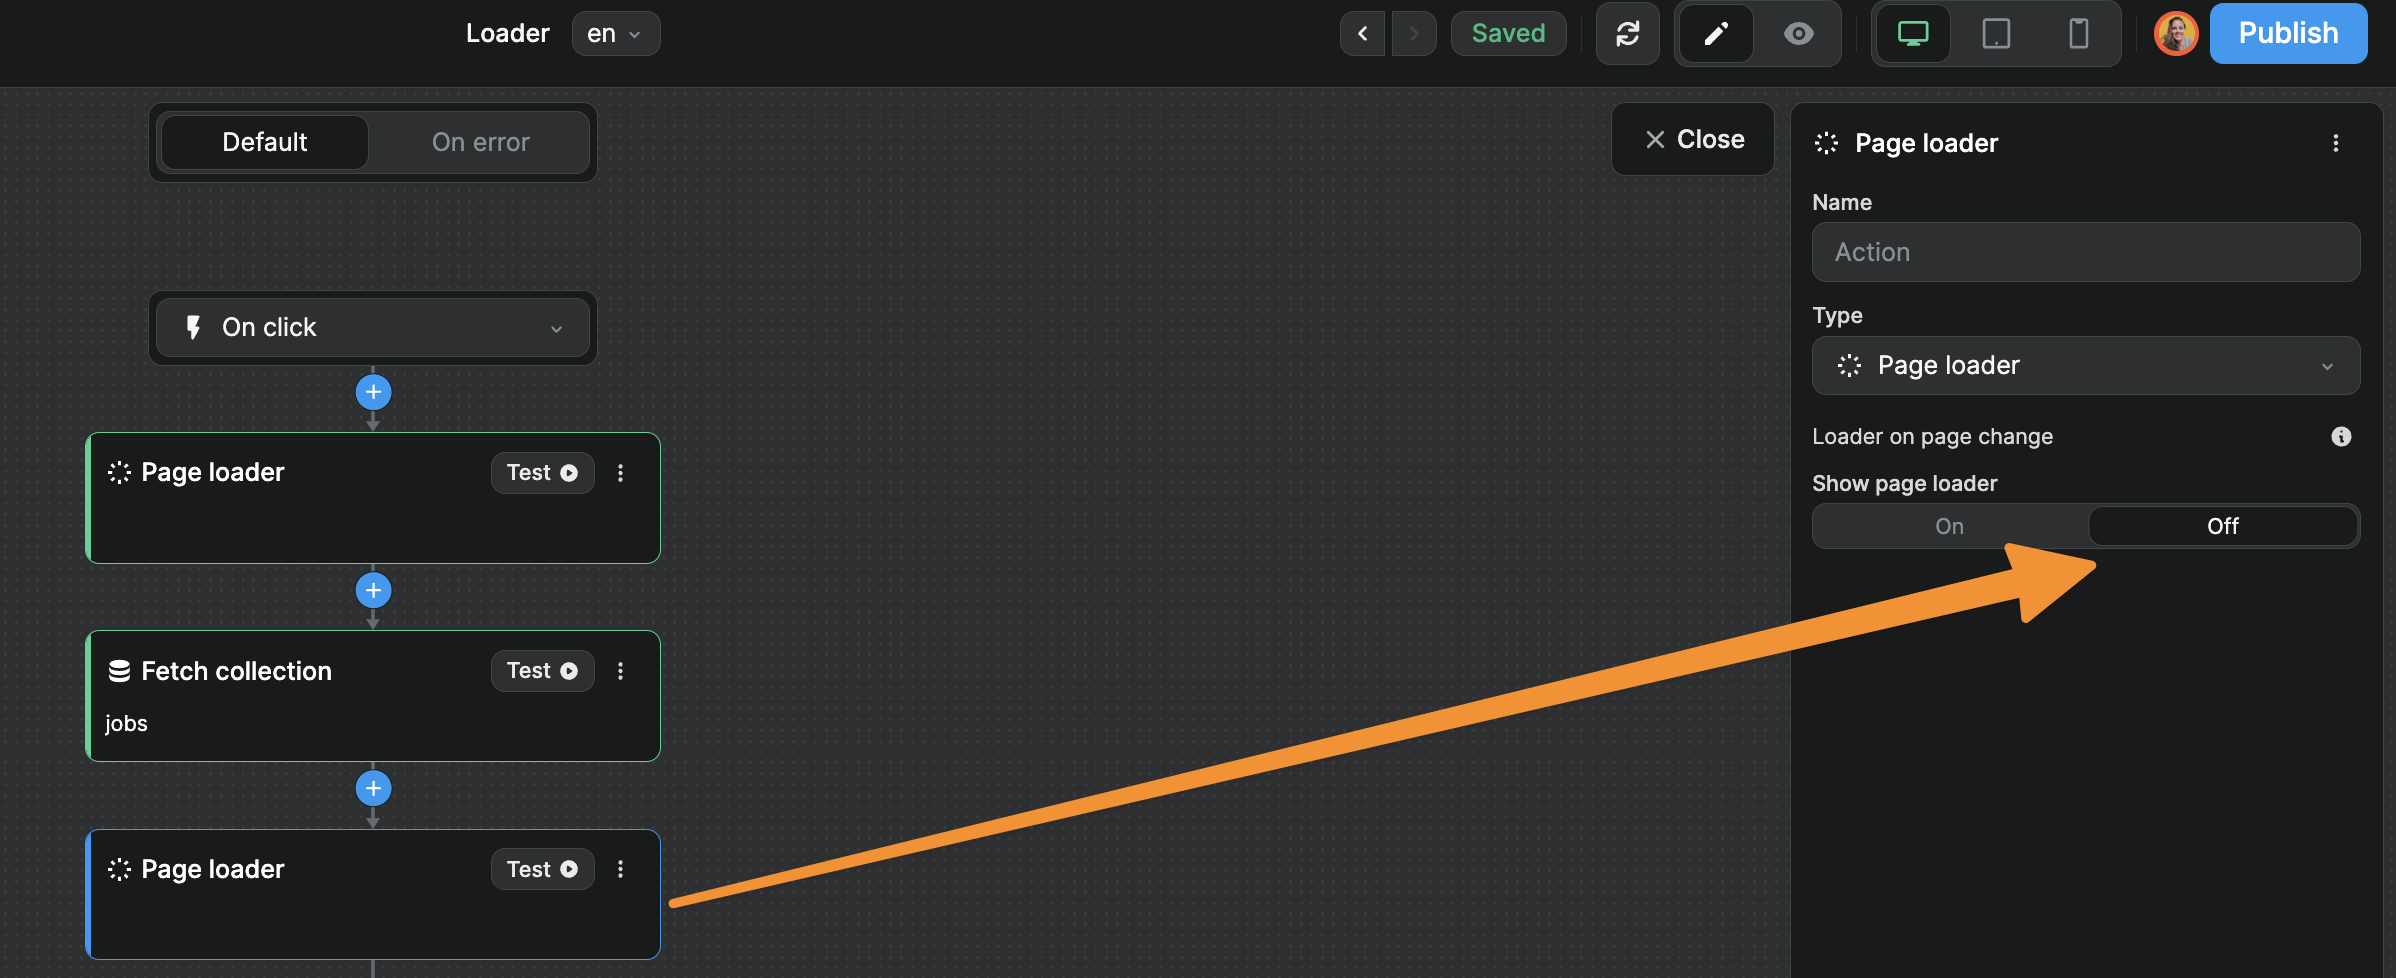
By the way, you could also use this "Page loader" action without changing page.
In the example below, we have a workflow on a click that displays a loader, then fetches a table view, and hides the loader once the table view has been fetched:
Loaders on table view load
At times, your app will be waiting for data from your backend to display in the user interface.
When that happens, it is a best practice to display a loader on the page.
This lets the user know that nothing is broken, they just need to wait a second for the data.
There are two steps to do this in WeWeb:
1- add an Loader element where you want it on the page,
2- define when you will show or hide the Loader, using the CSS display property or conditional rendering.
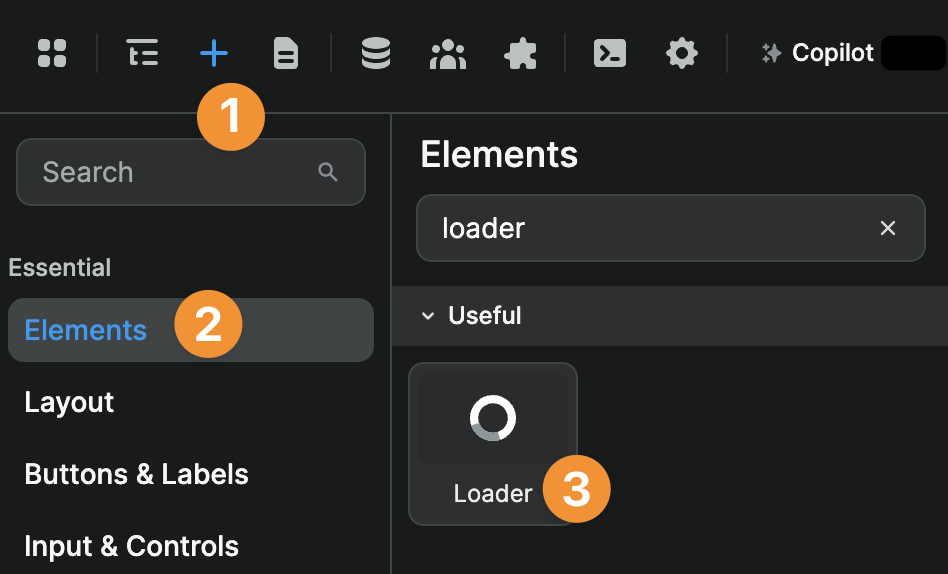
Add a Loader element
You can find the Loader Element in the Add > Elements menu:
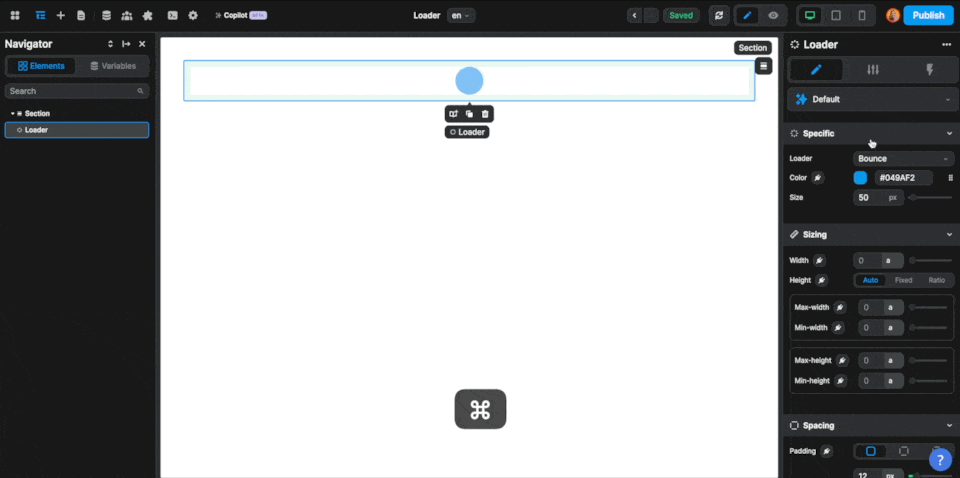
Once you have dragged and dropped the element on the page, you can choose the type of Loader you would like and style it like you would any other element:
Bind the Loader to a condition
Once you have a Loader element on the page, you'll most likely want to display it when certain conditions are met, i.e. when the conditions are true or false.
These conditions depend on your use case. Let's look at a couple of examples.
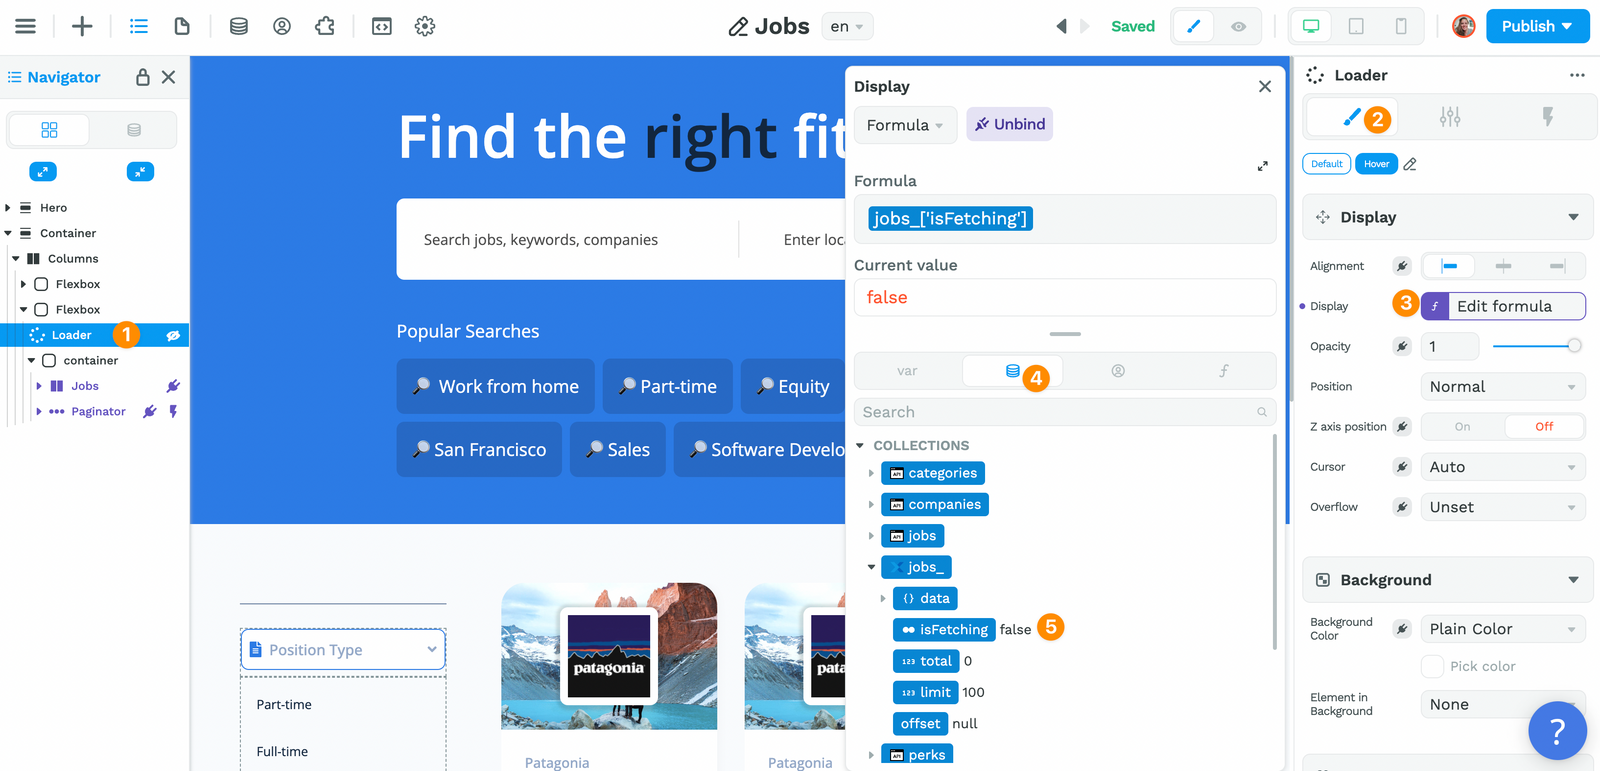
Example 1 – Waiting for data from a Table view
This is a common use case for the Loader element: you are waiting for data from an external source.
If the display depends on a Table view being fetched, you can bind the Loader element to the isFetching variable of that Table view:
You will do something similar on the container with the elements you want to hide while the date is being fetched.
Except in this case, you will bind it to the opposite of the isFetching variable by using the not no-code formula:
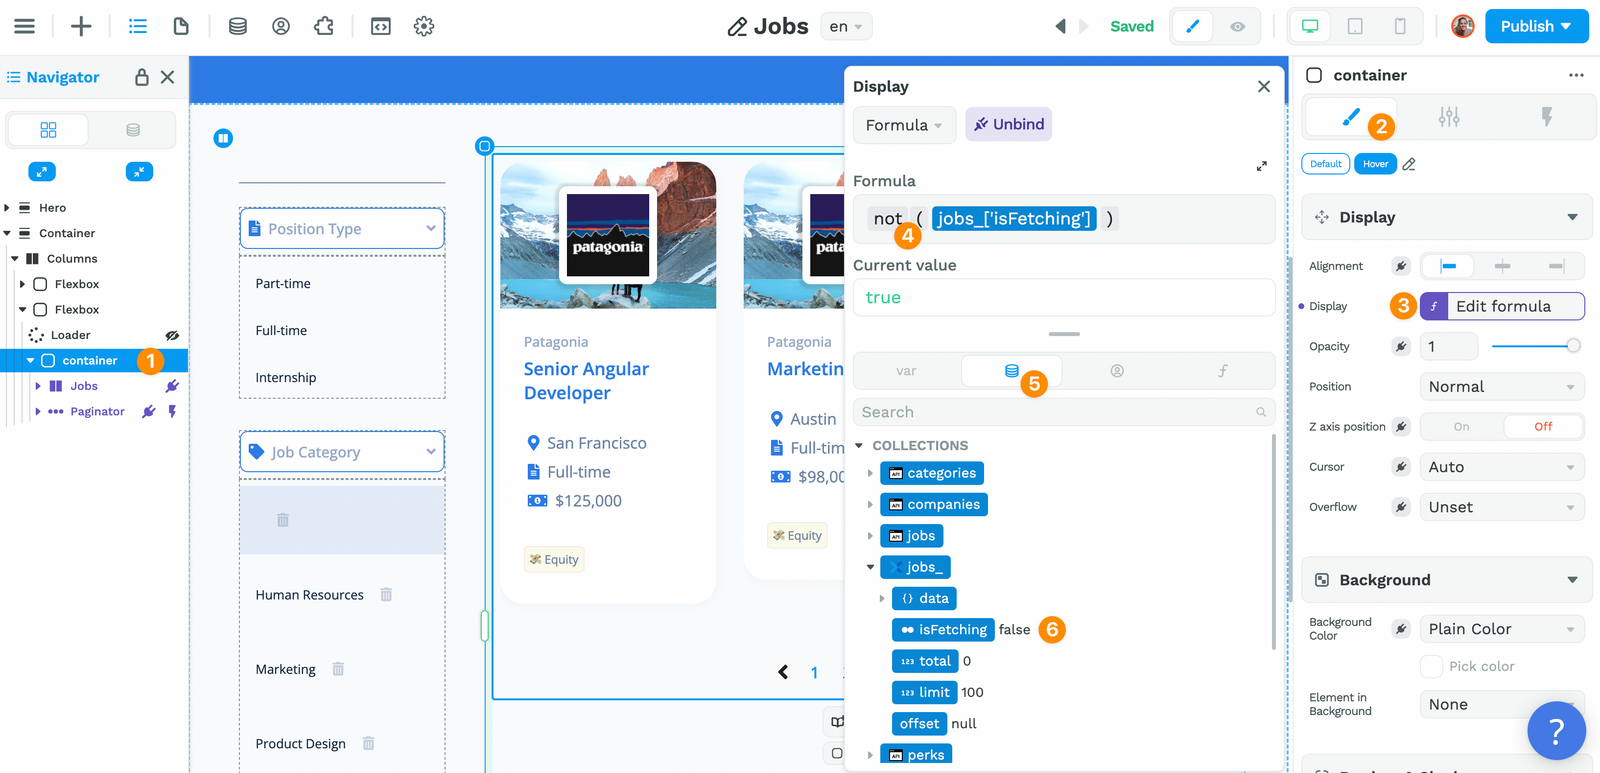
What we are saying is that:
- If the Table view has been fetched already – so
isFetchingisfalse - Then we want to display the container with the data.
TIP
In the examples above, we are binding the condition of the Loader to the CSS display property. Another option would be to bind the condition to the Conditional rendering setting.
Example 2 – Loader for a Workflow in Progress
This can be very helpful when you have a workflow with a For Loop iterator that takes a bit of time for example.
If you need to display a Loader while a workflow is in progress, you'll need to create a variable that is a Boolean, i.e. a variable that returns true or false:

In the example above, we called our variable workflowInProgress and set it to false by default because, by default, workflows are inactive. They are triggered by an event.
Then, you can add a display and hide action where you change the workflowInProgress variable at the beginning and end of your workflow.
Since it's a boolean bariable with a default value of false, you could use the not no-code formula as shown below:
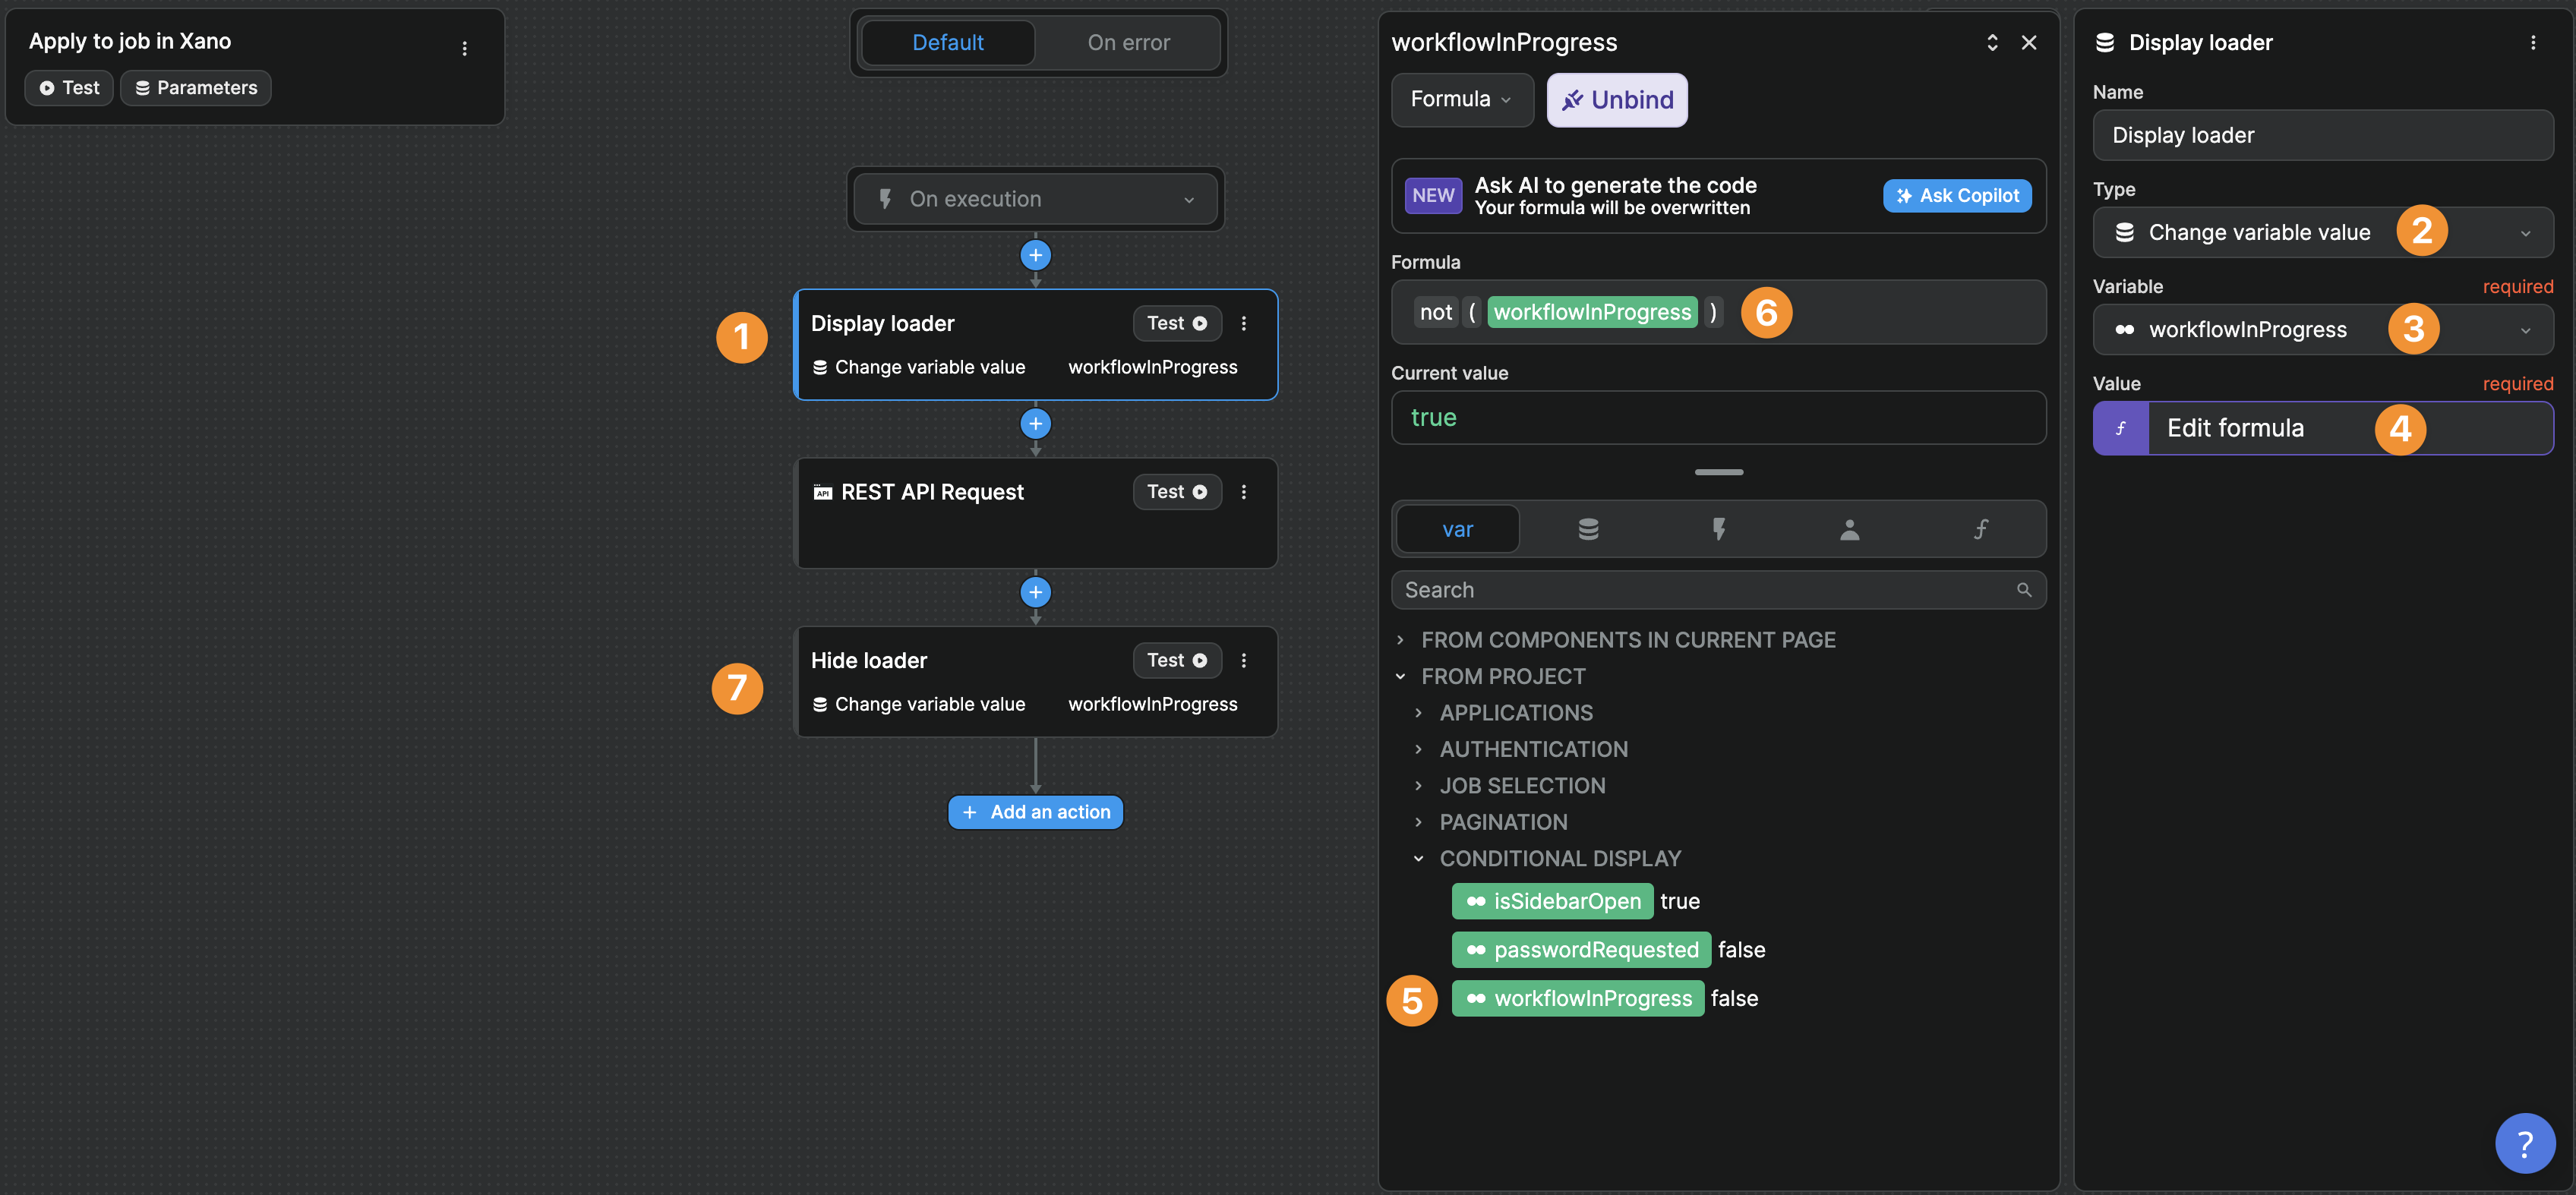
Once that's setup, you can bind the display properties of the Elements you want to show or hide to that Variable 🙂
TIP
In the example above, we grouped the boolean variables related to conditional display in one folder.
Another approach we love: instead of creating a boolean variable for each workflow, create an object variable that you update with the name of the current workflow.