Appearance
Academy
Want to learn how to use the WeWeb Editor effectively? Check out our Build a proof of concept course which provides hands-on experience with the editor and its features.
Intro to the editor
The WeWeb Editor is where you build your projects.
It is made up of 4 sections:
- the top navigation menu,
- the canvas in the middle,
- the left panel, and
- the right panel.
Topbar

The topbar is where you can:
- go back to your dashboard or access project settings
- manage pages and page languages to your project
- add elements, libraries, plugins, and users to your web app
- manage your connected Supabase backend
- access PWA settings, project assets, and custom code
- navigate between changes (undo/redo/refresh)
- see who is currently editing the project
- view different breakpoints (screen sizes)
- switch between
AIandEditmode - preview the application
- publish the app
Project settings
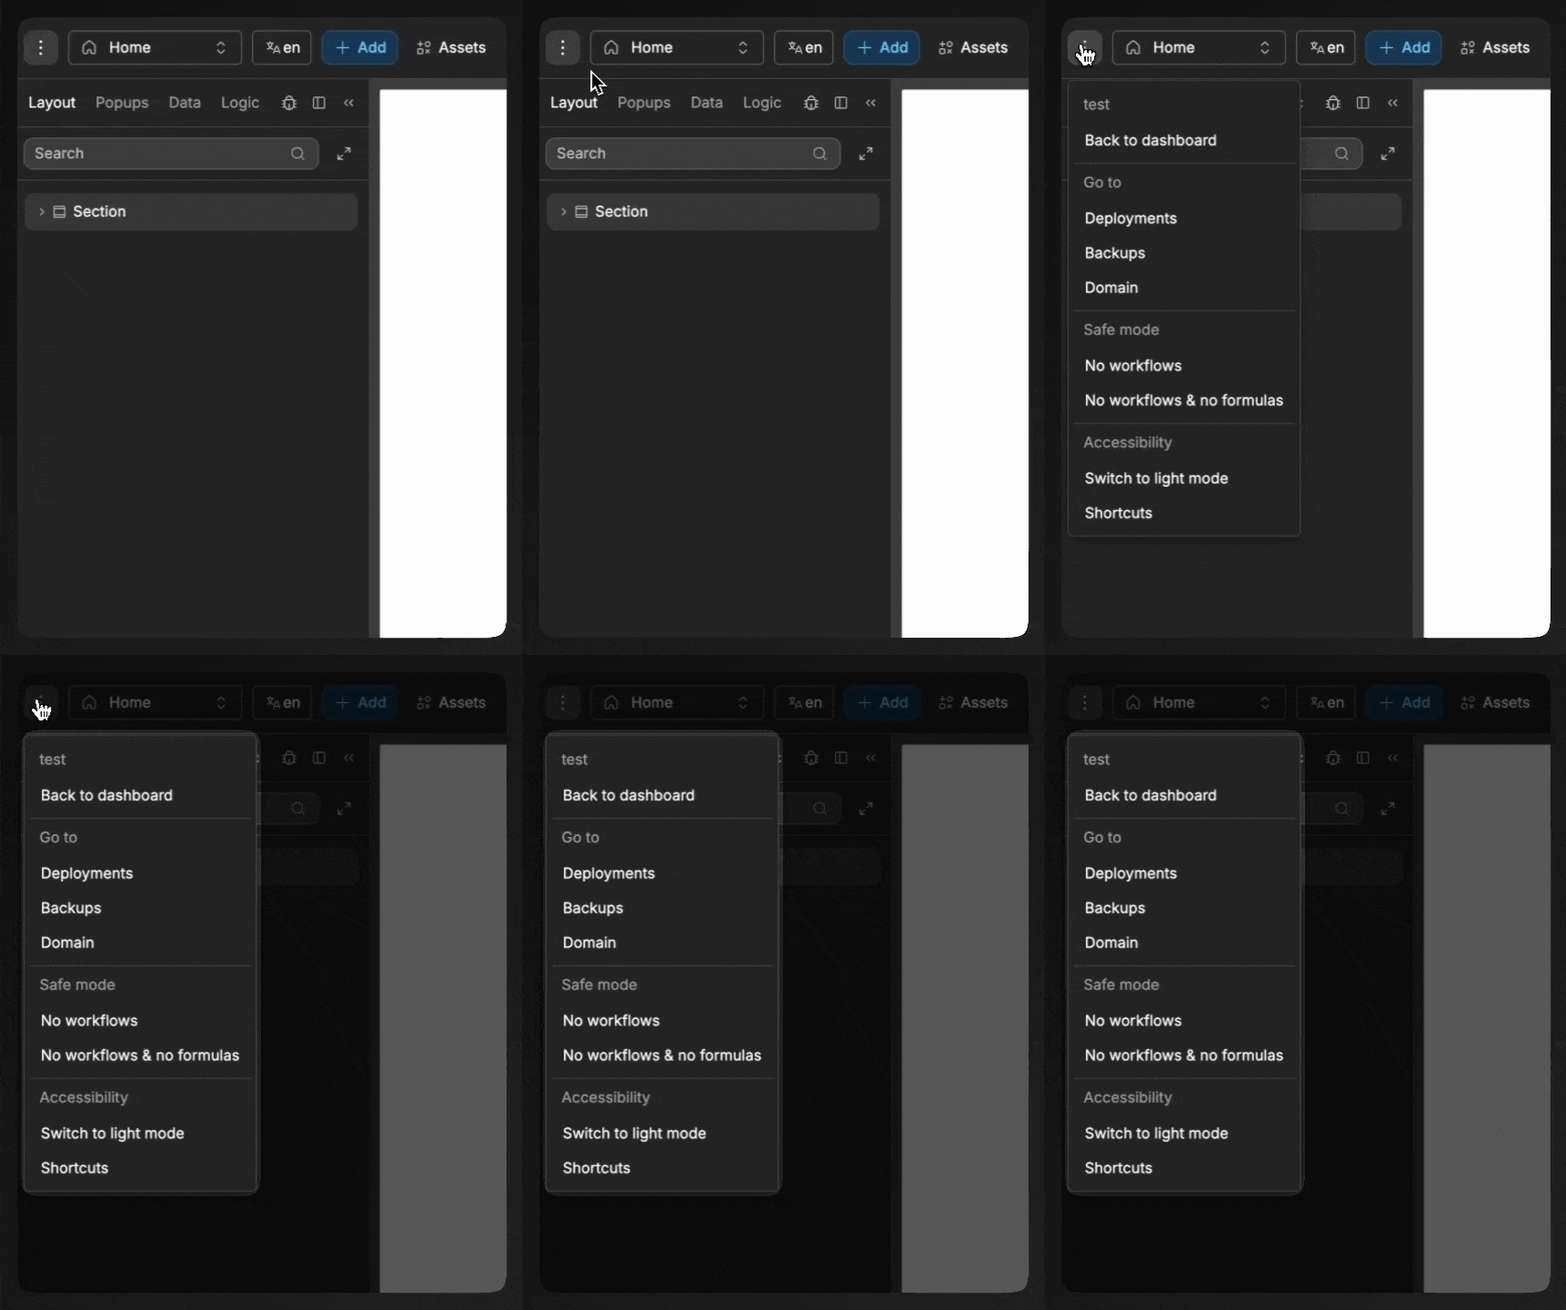
Here you can:
- view available shortcuts
- navigate to project settings
- navigate back to your dashboard
- switch the editor to light or dark mode
Pages
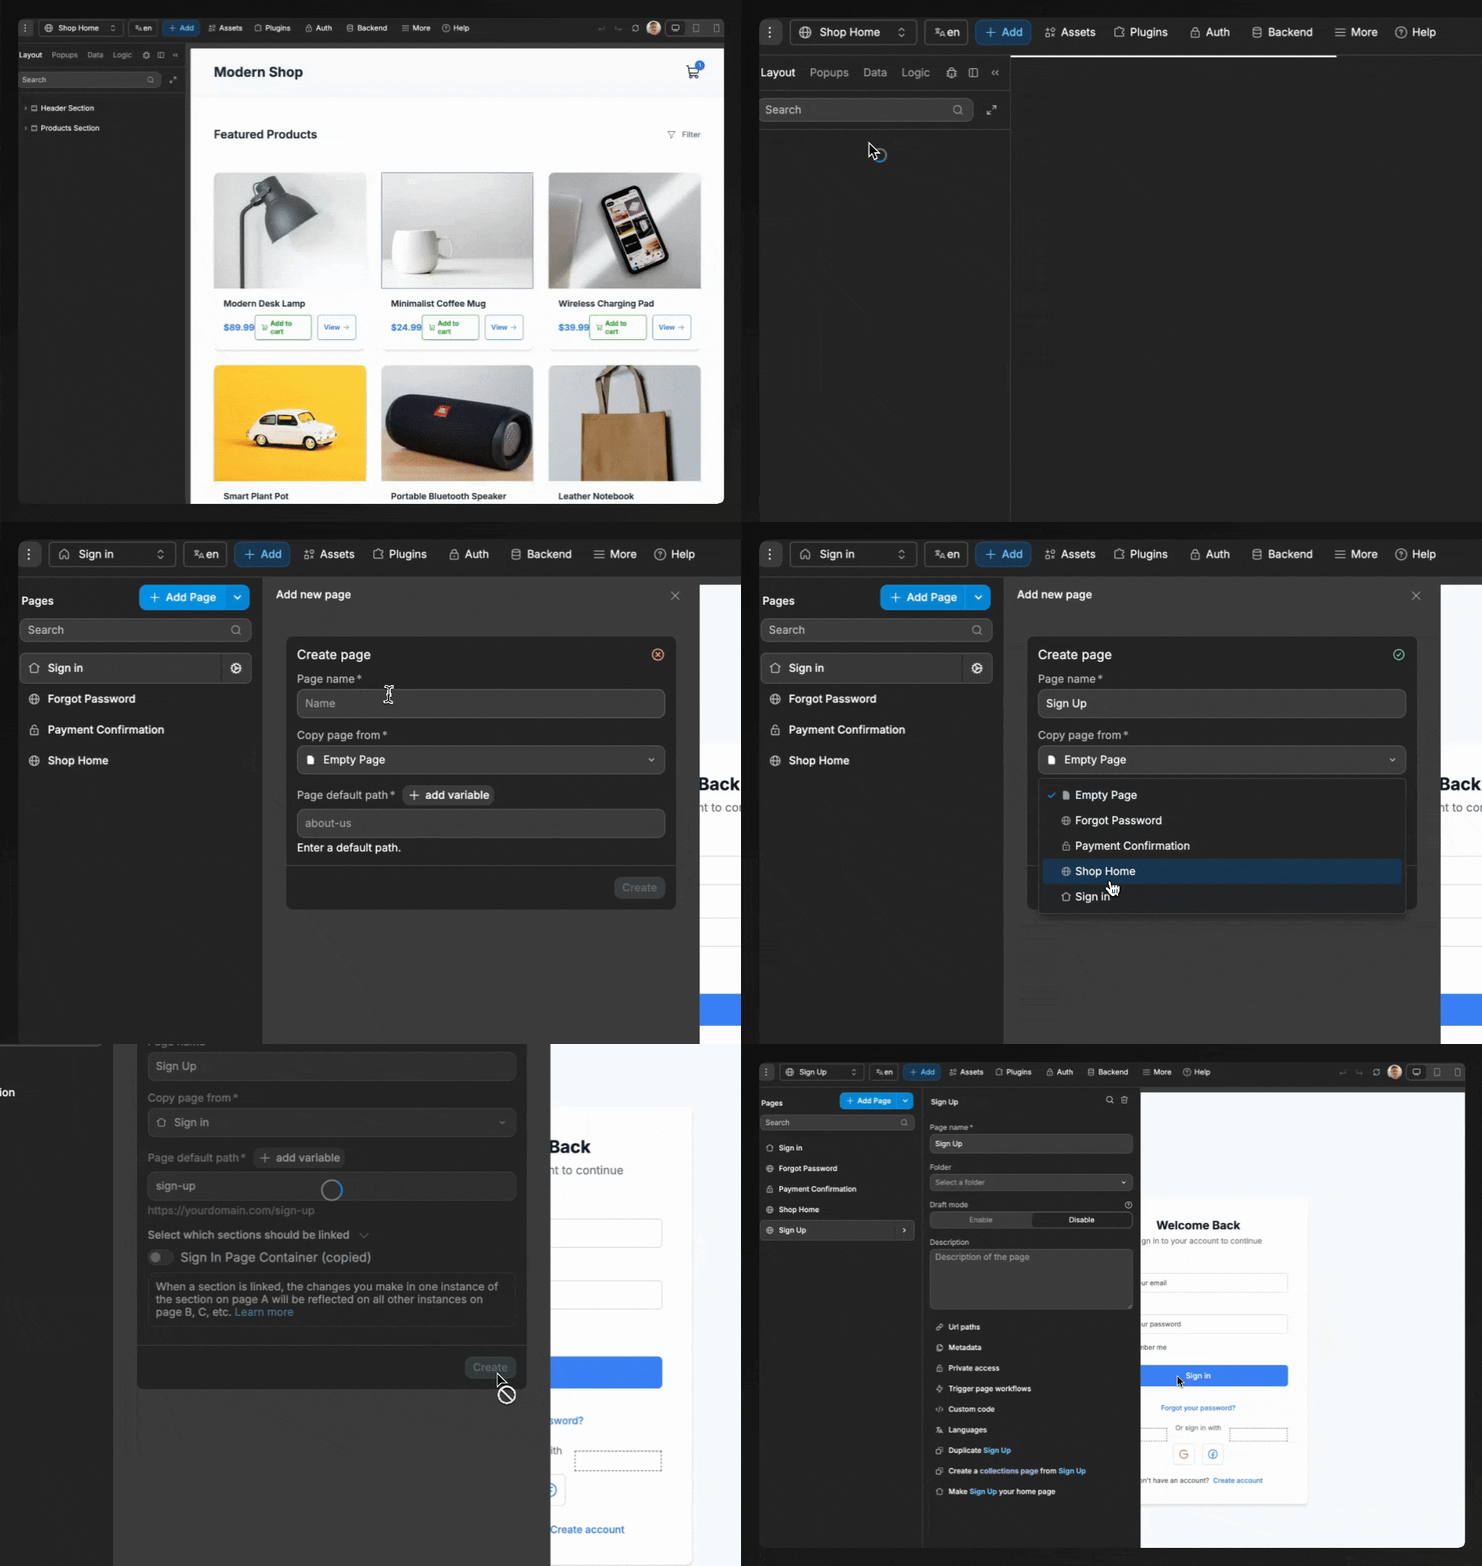
This is where you can:
- see the list of pages in your app,
- create new pages, and
- navigate between pages in your app.
TIP
When creating a new page, you can save time by copying it from another page and choosing which sections are linked:
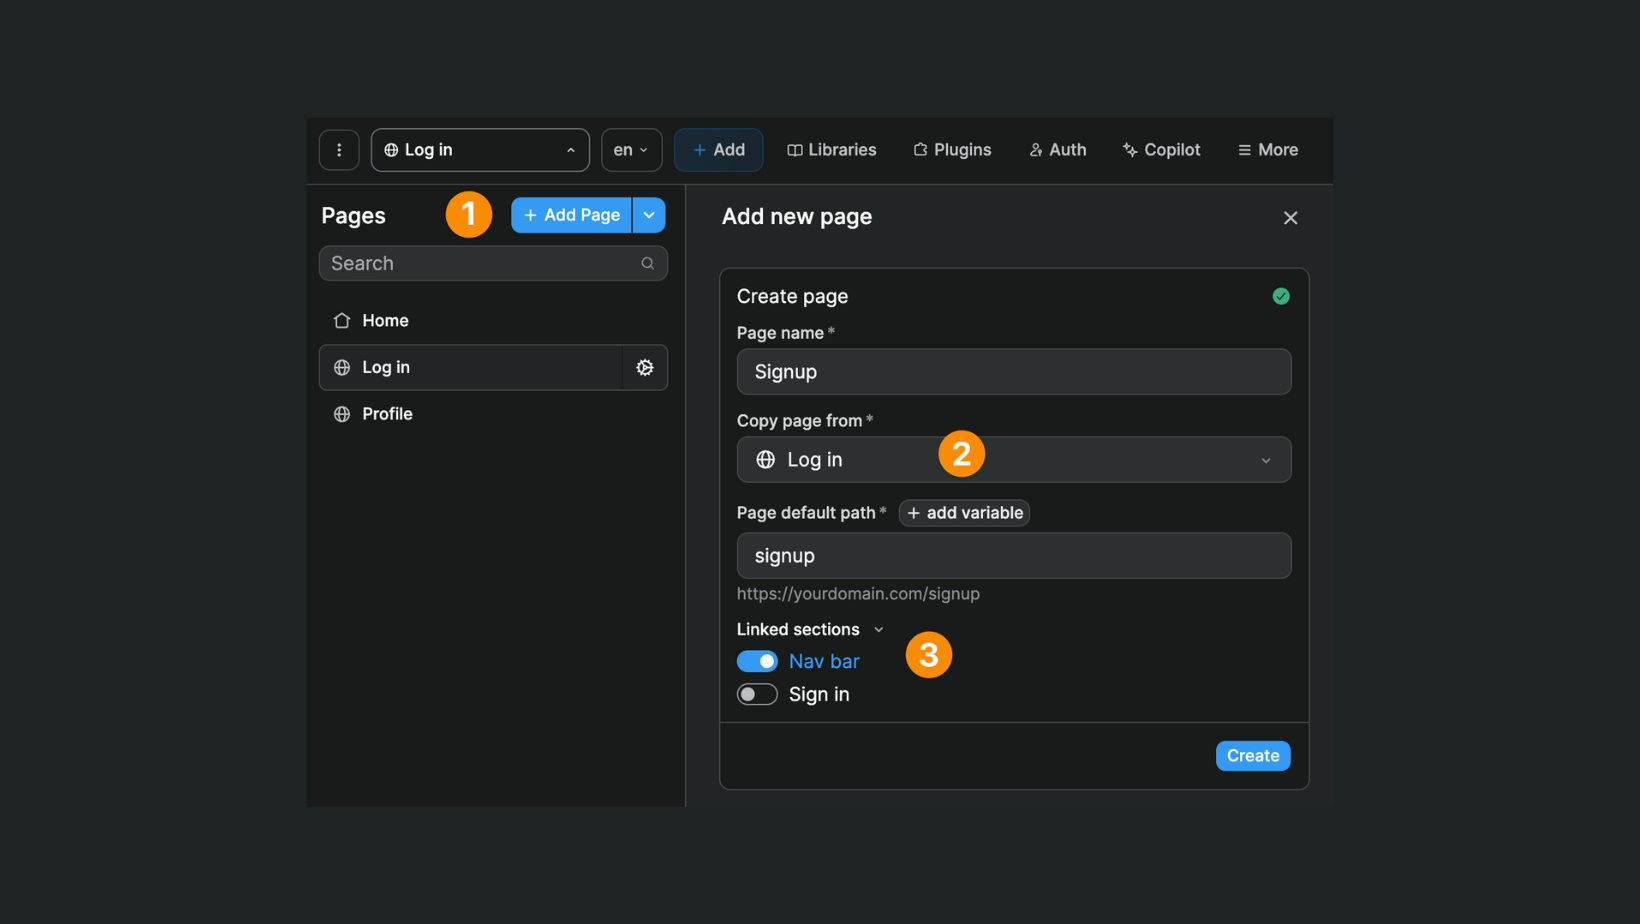
The changes you make in linked sections will be reflected on all the pages that use that linked section.
Learn more about leveraging multi-page sections to improve your WeWeb app's performances.
Languages
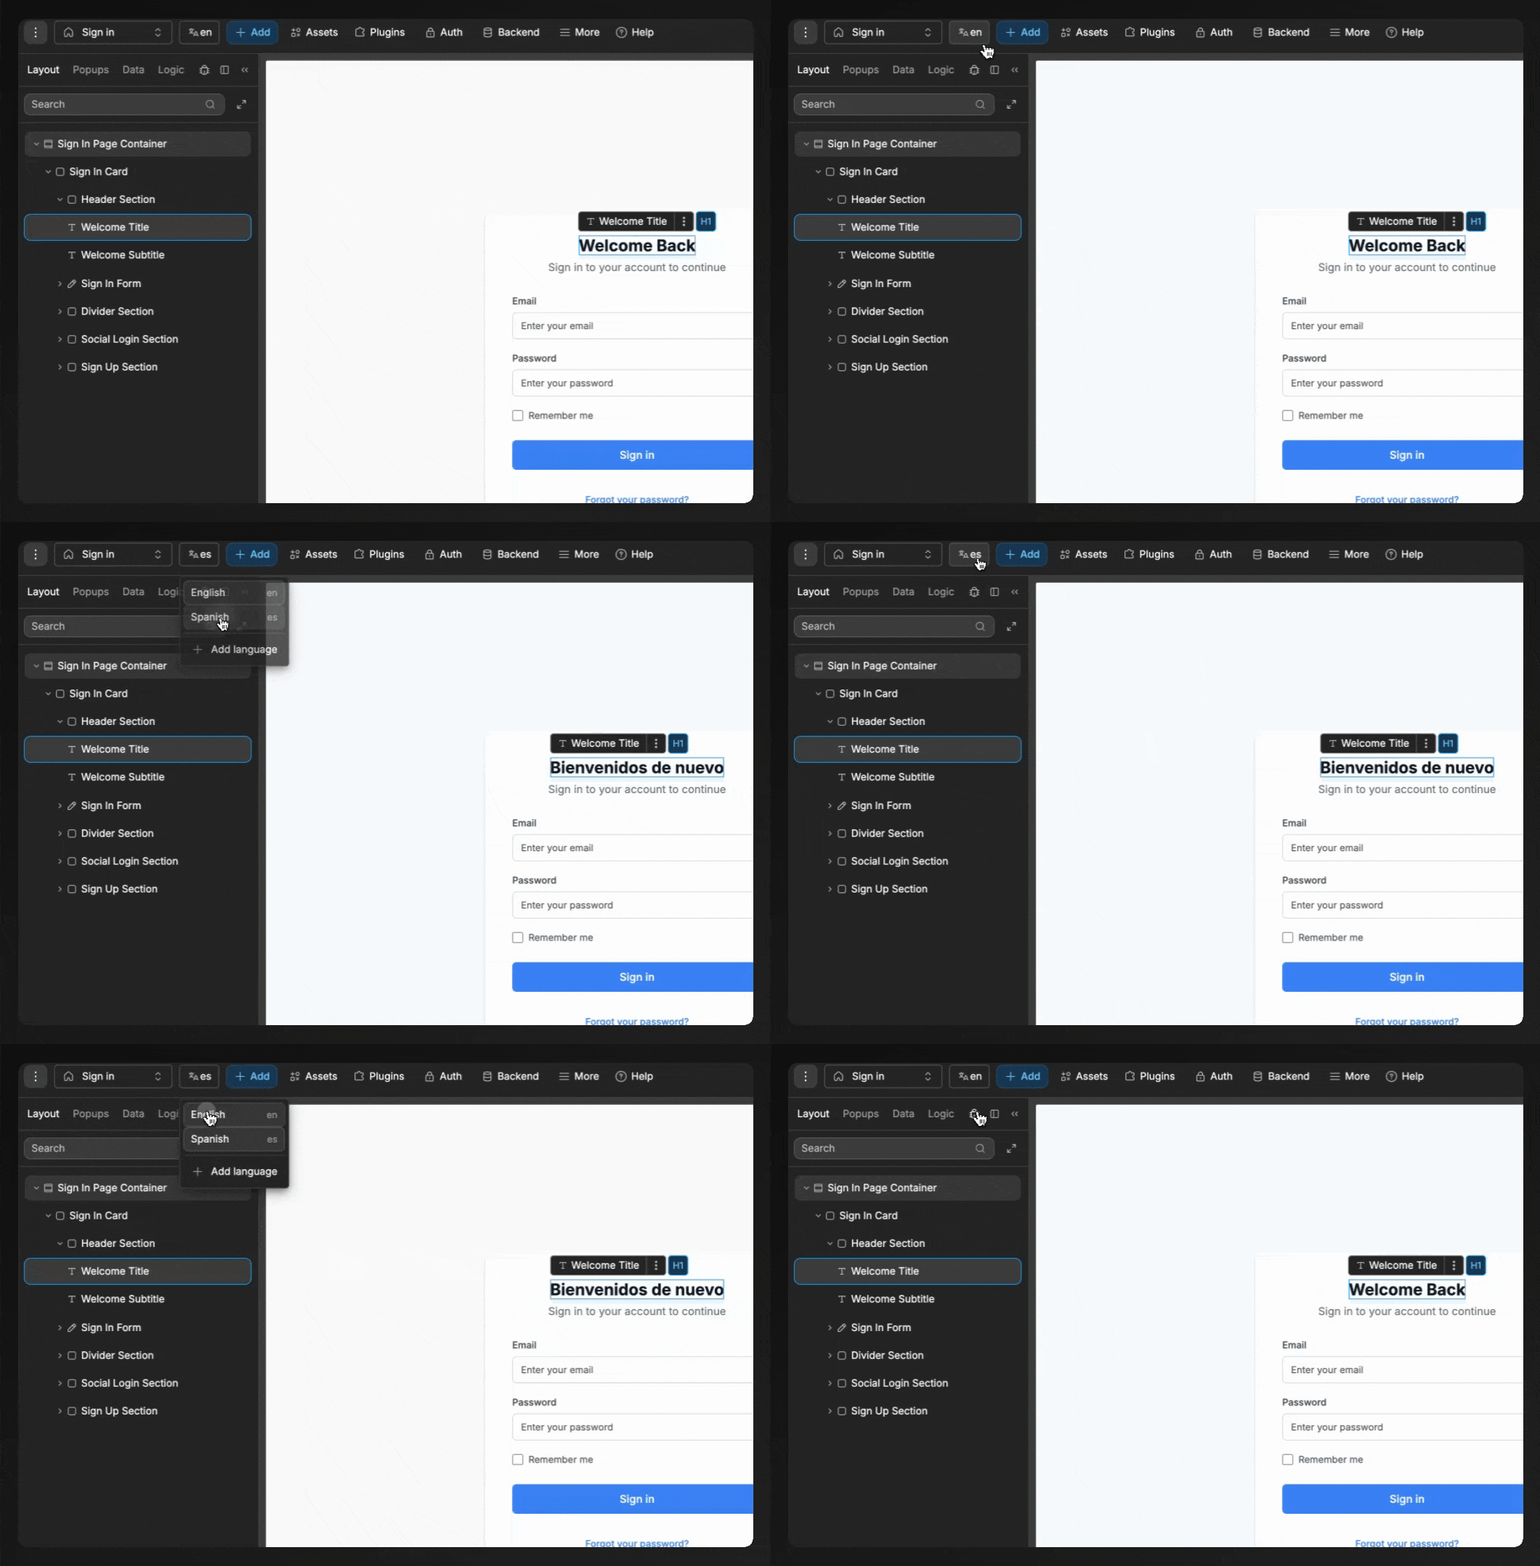
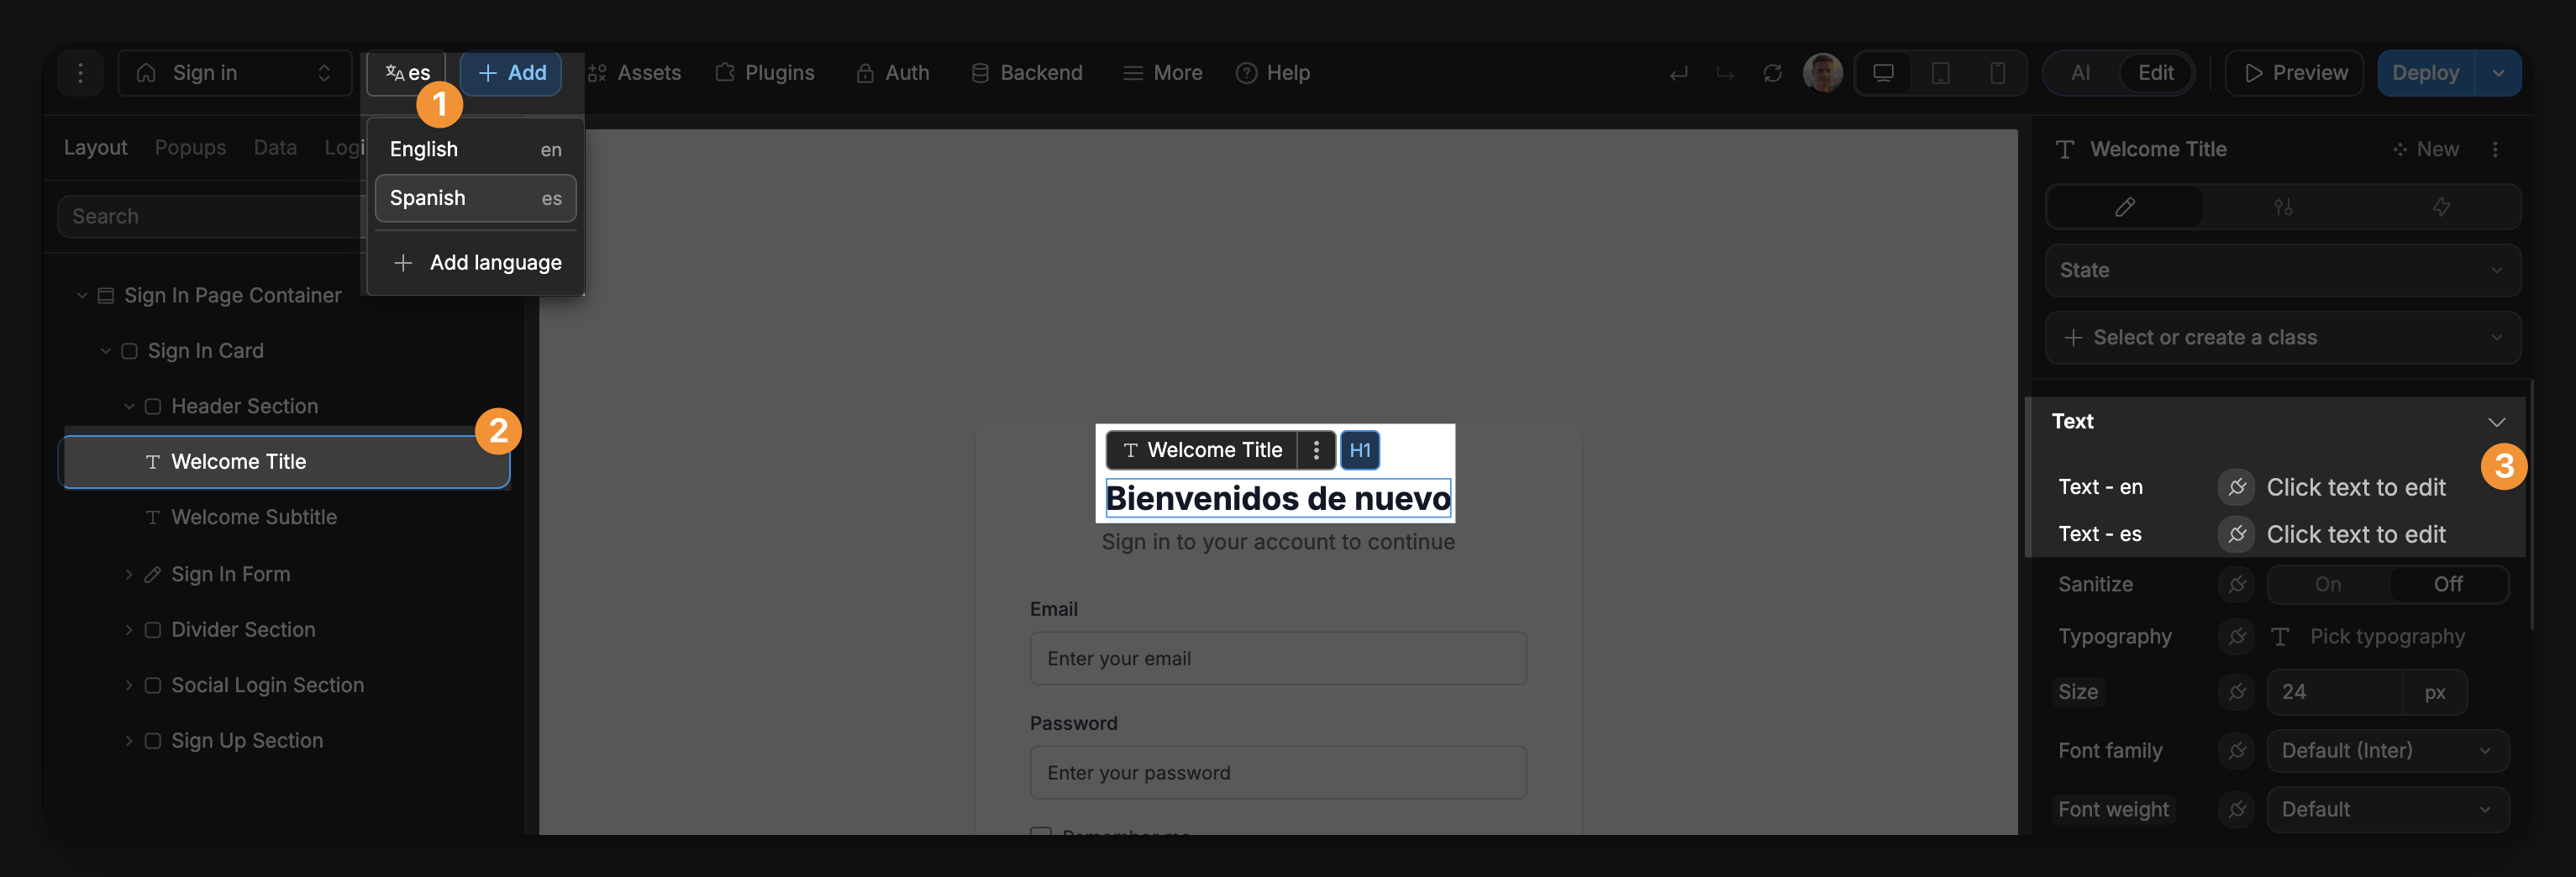
Here you can toggle between languages to see how text content will vary depending on your user's browser language.
To enable this feature, you will first need to:
- add a language to the project, and
- enable it on all relevant pages (you can choose to enable a language on some pages only)
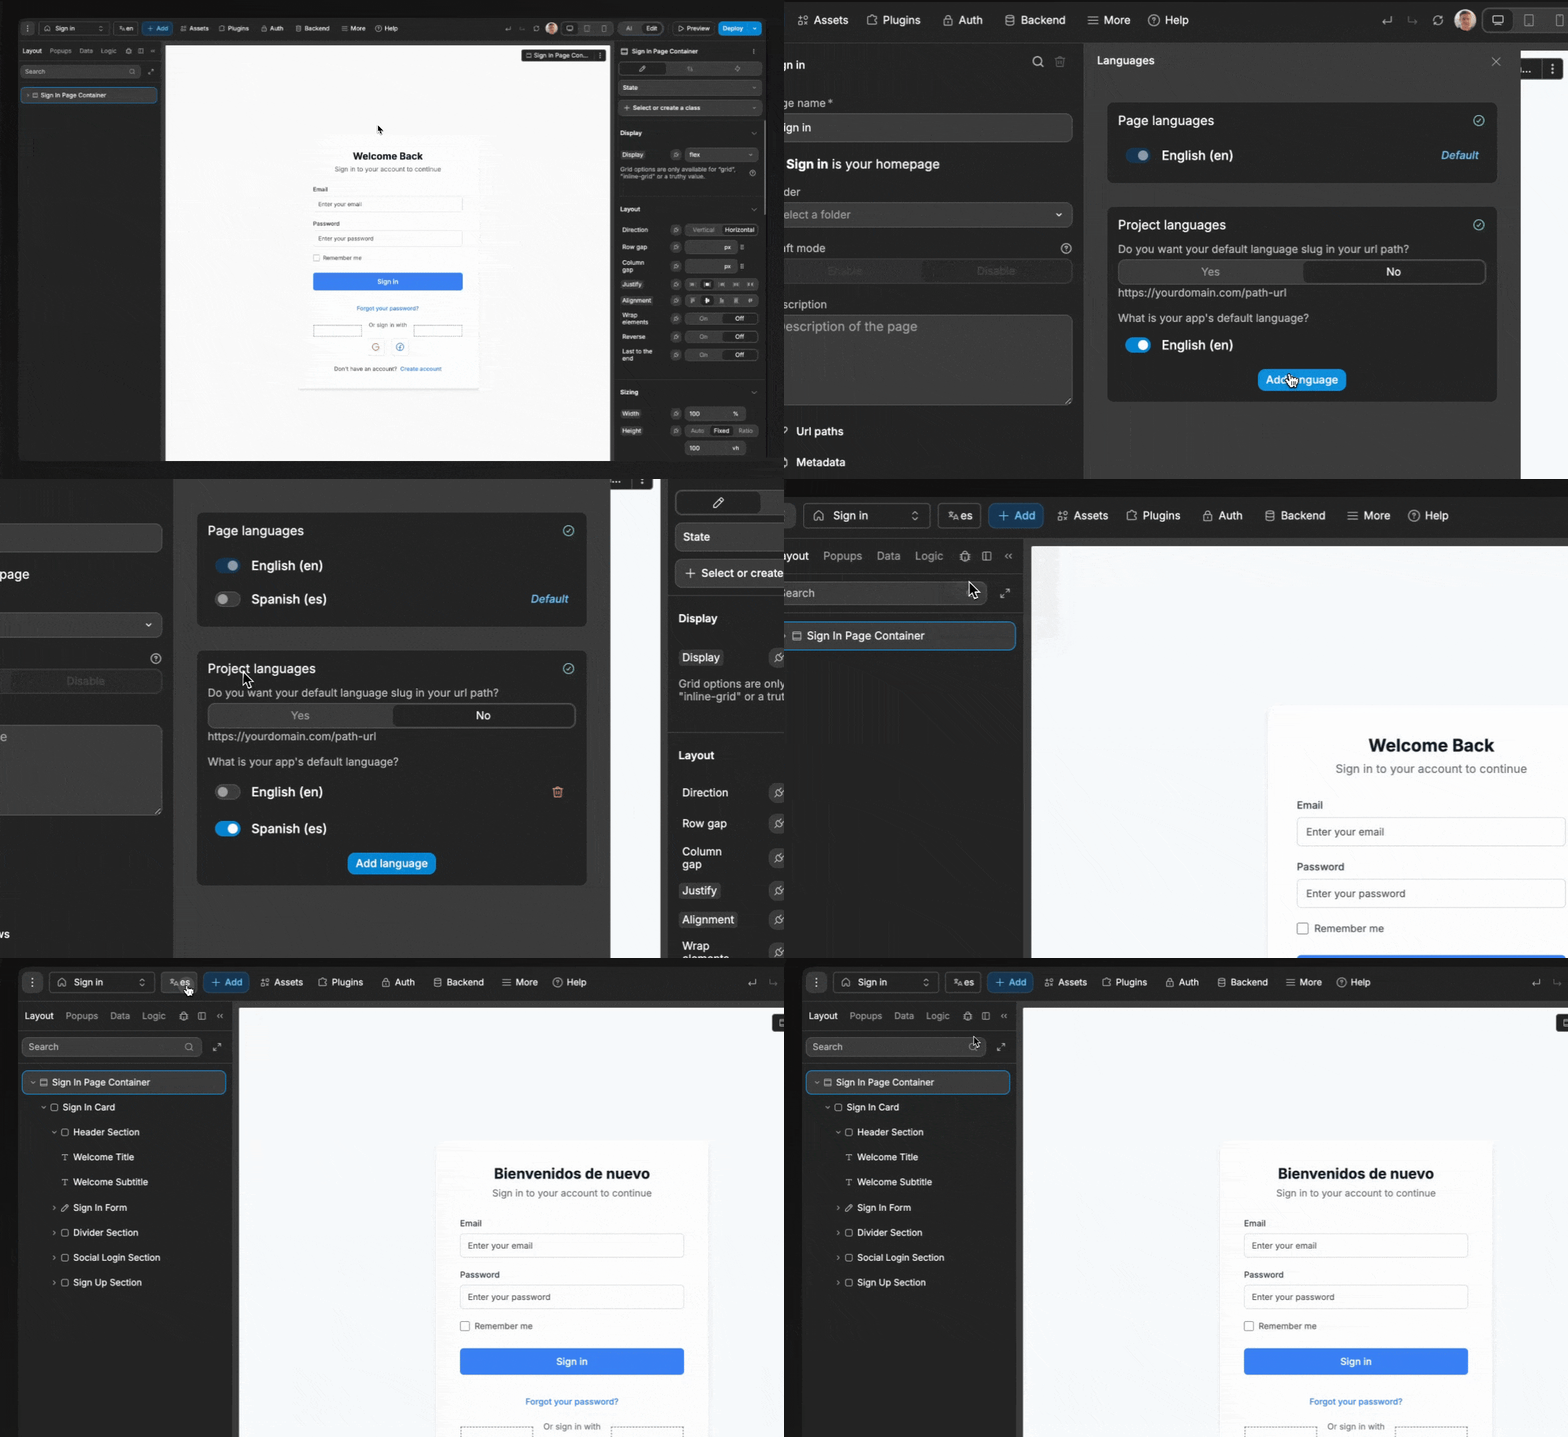
TIP
For each language you add to the page, you can set the text content of every text element specifically for that language:
Add panel
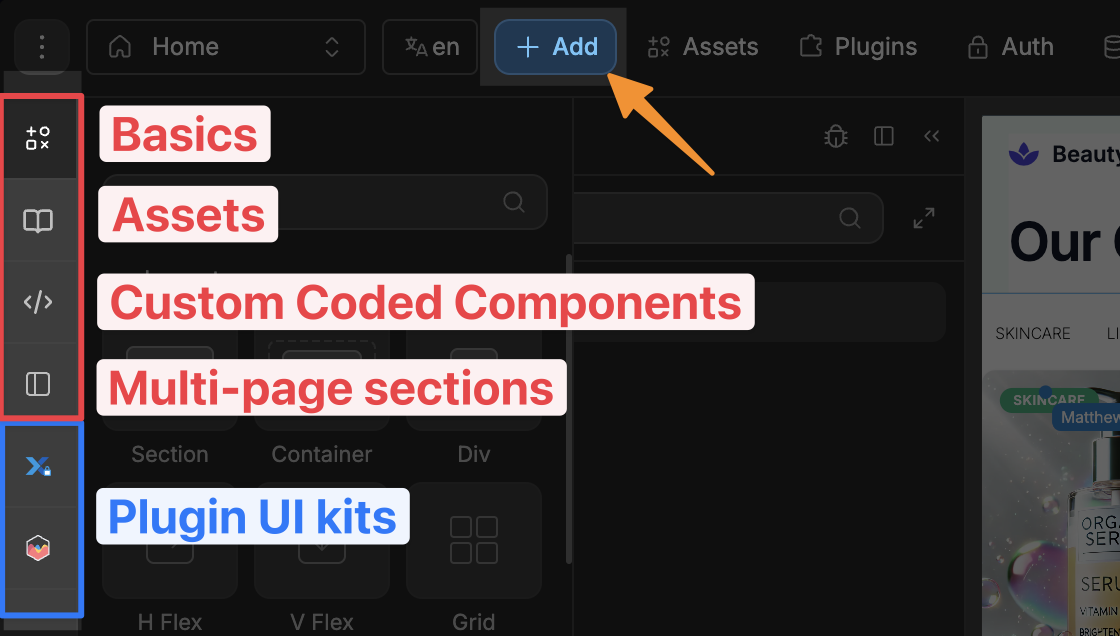
In the Add menu, you will find 4 categories of items:
- basics: the native elements available in WeWeb.
- assets: components & templates from the libraries available in your project.
- custom coded components: the custom coded components of your project.
- multi-page sections: list of sections being used throughout the project.
- plugin UI kits: UI blocks that are specific to plugins used in the project (e.g. charts, login forms).
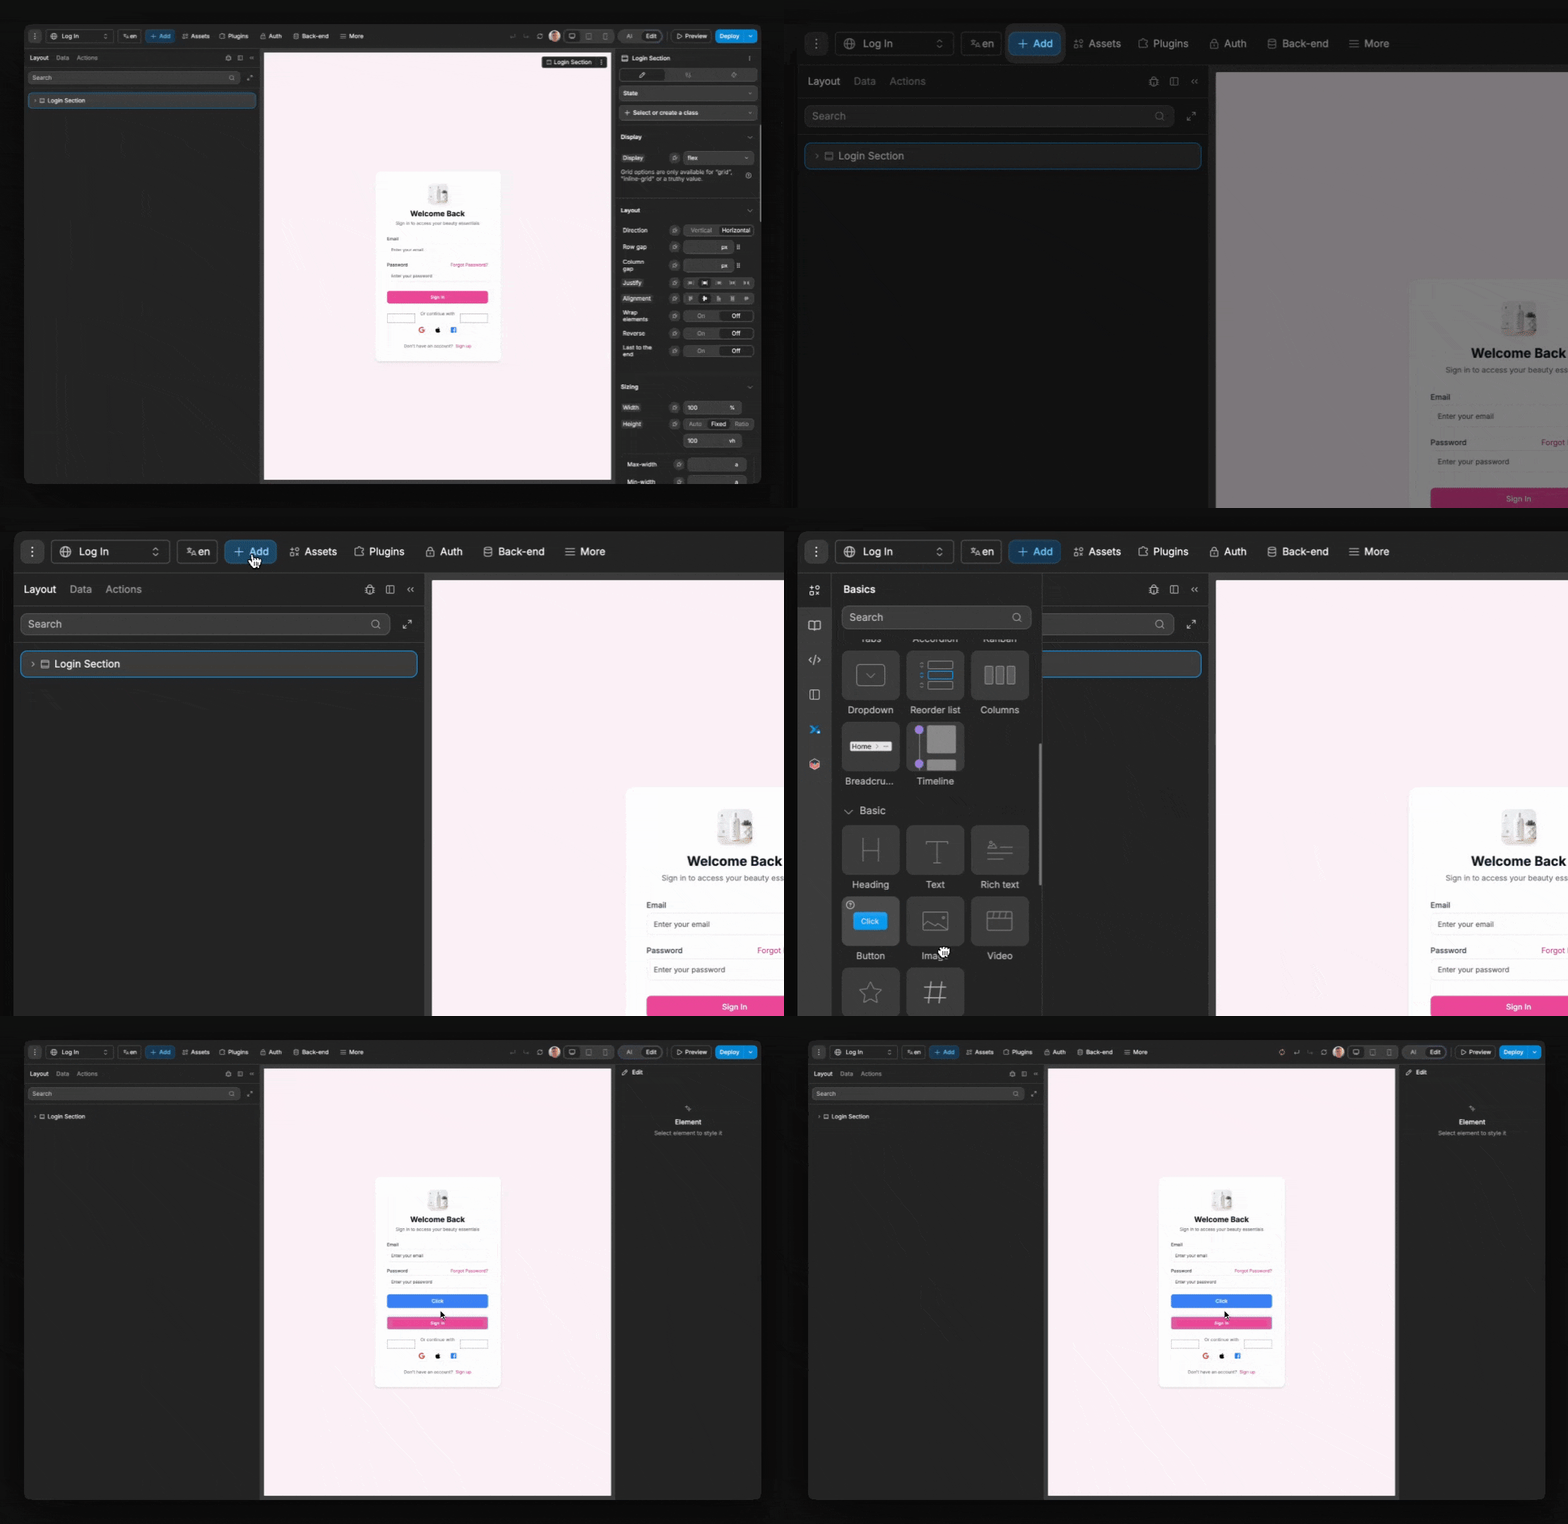
You can drag-and-drop elements from the add menu onto the canvas:
CONTINUE LEARNING
The Add Panel is the first core piece of the building process, as it is where you add elements to the page:
Assets
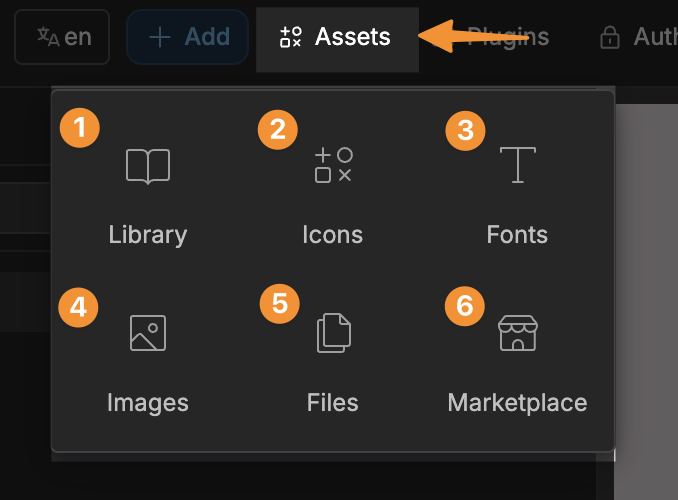
In the Assets menu, you will find access to:
- the library of your project, such as your UI kits and saved colors. Learn more about libraries.
- icons of your project. Learn more about icons.
- fonts of your project. Learn more about fonts.
- uploaded images of your project. Learn more about images.
- uploaded files of your project. Learn more about files.
- a link to the WeWeb marketplace, where you can download public libraries. Learn more about the marketplace.
TIP
To use an external library in a project, it needs to have been shared in your workspace, and Added in the project.
Learn more about using UI libraries in WeWeb.
Plugins
The Plugins menu is where you will find:
- the plugins that have already been added to the project, and
- all available WeWeb plugins.
There are currently 3 categories of plugins:
- data sources, like Xano, Supabase, REST API, and more
- authentication systems, like Auth0, OpenID, JSON Web Tokens, and more
- extensions, like Stripe, Charts, Mapbox, OpenAI, and more
To add a plugin, simply navigate to the plugin category of your choice, select a plugin and click on the Add button: 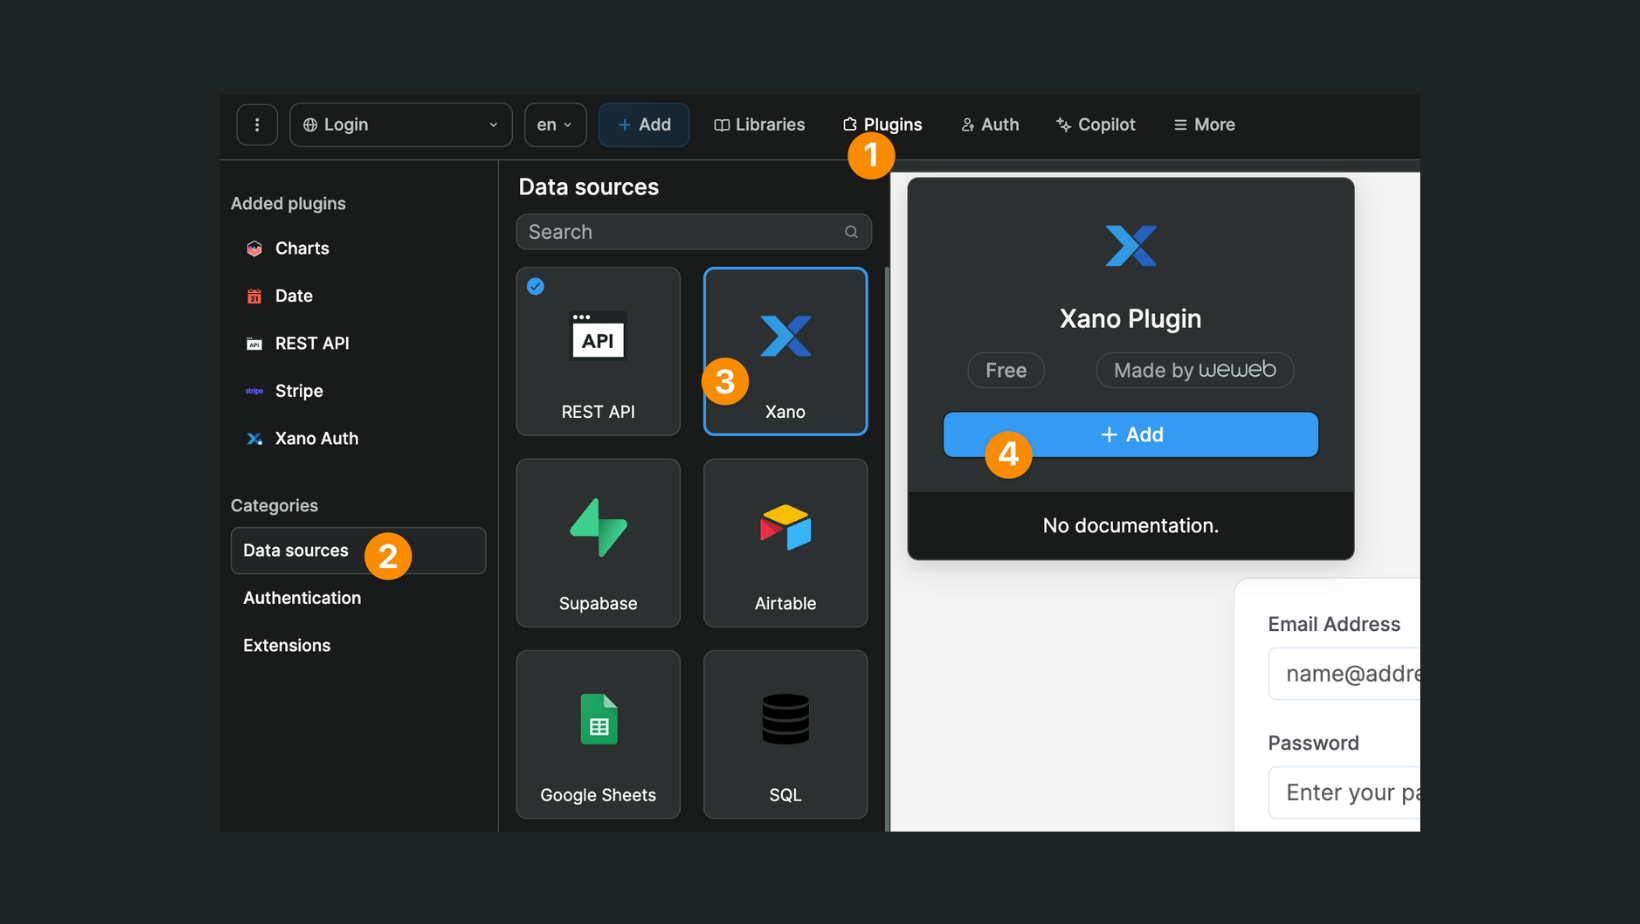
Learn more about using plugins in WeWeb.
TIP
We don't add popular plugins like charts and dates to every project by default because, under-the-hood, each plugin loads a JS library.
As in traditional web development, we refrain from adding unneeded libraries to your no-code apps.
Auth
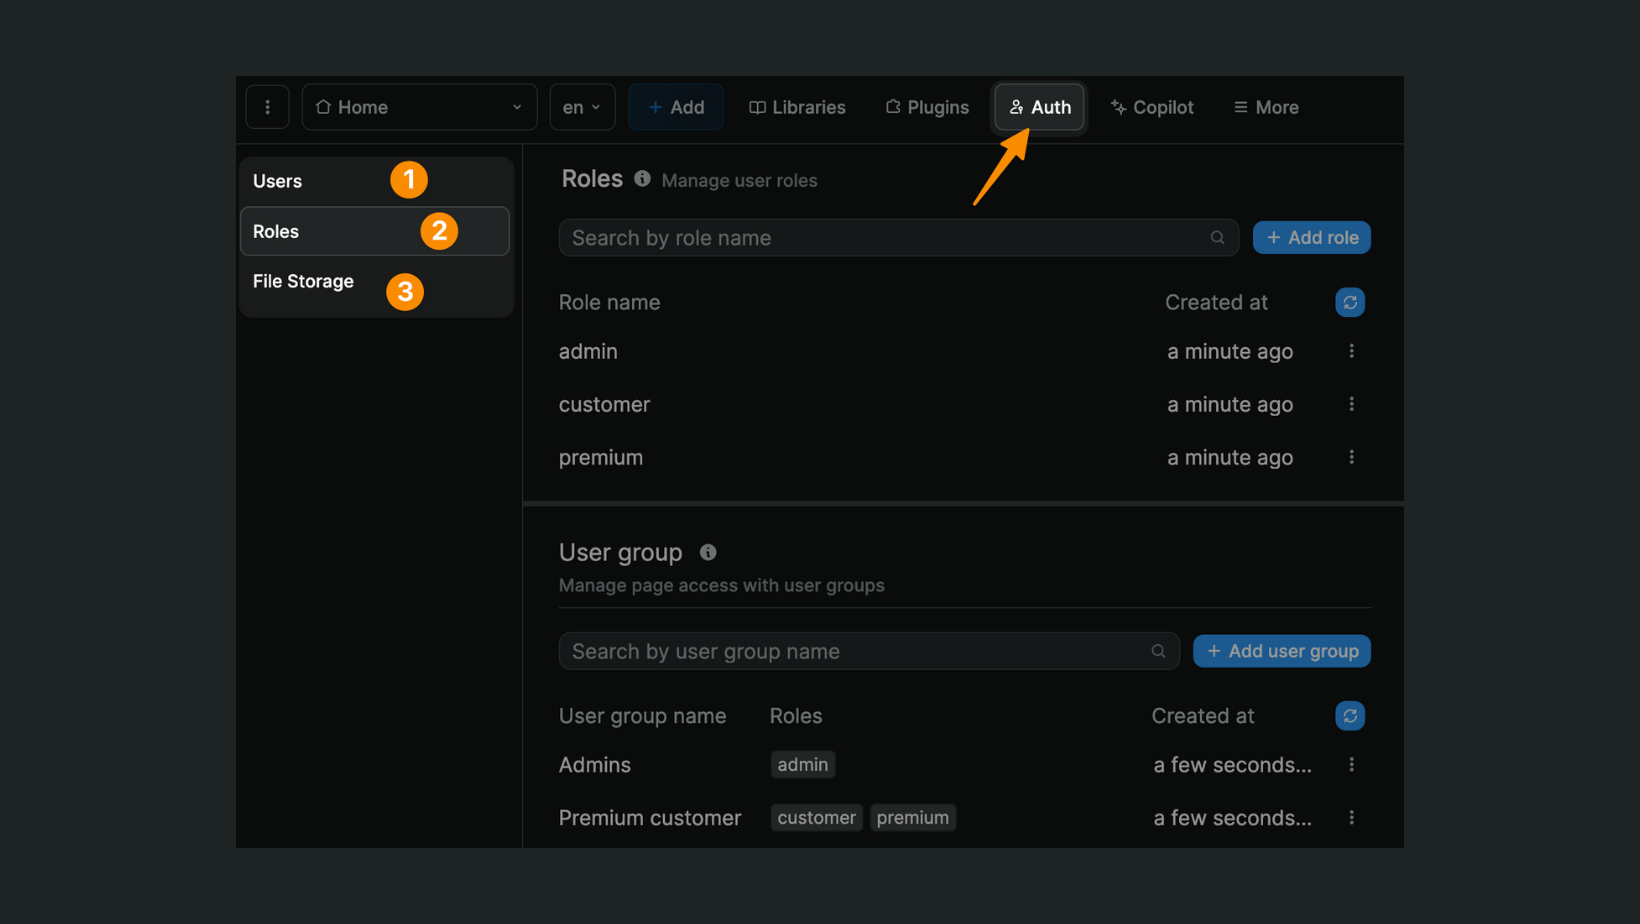
In the Auth menu, there are three sections:
userswhere you can import, export, or view users of your approleswhere you can add user roles and user groups to handle user permissionsfile storagewhere you can see the files uploaded by app users
Learn more about working with authentication plugins in WeWeb.
Back-end
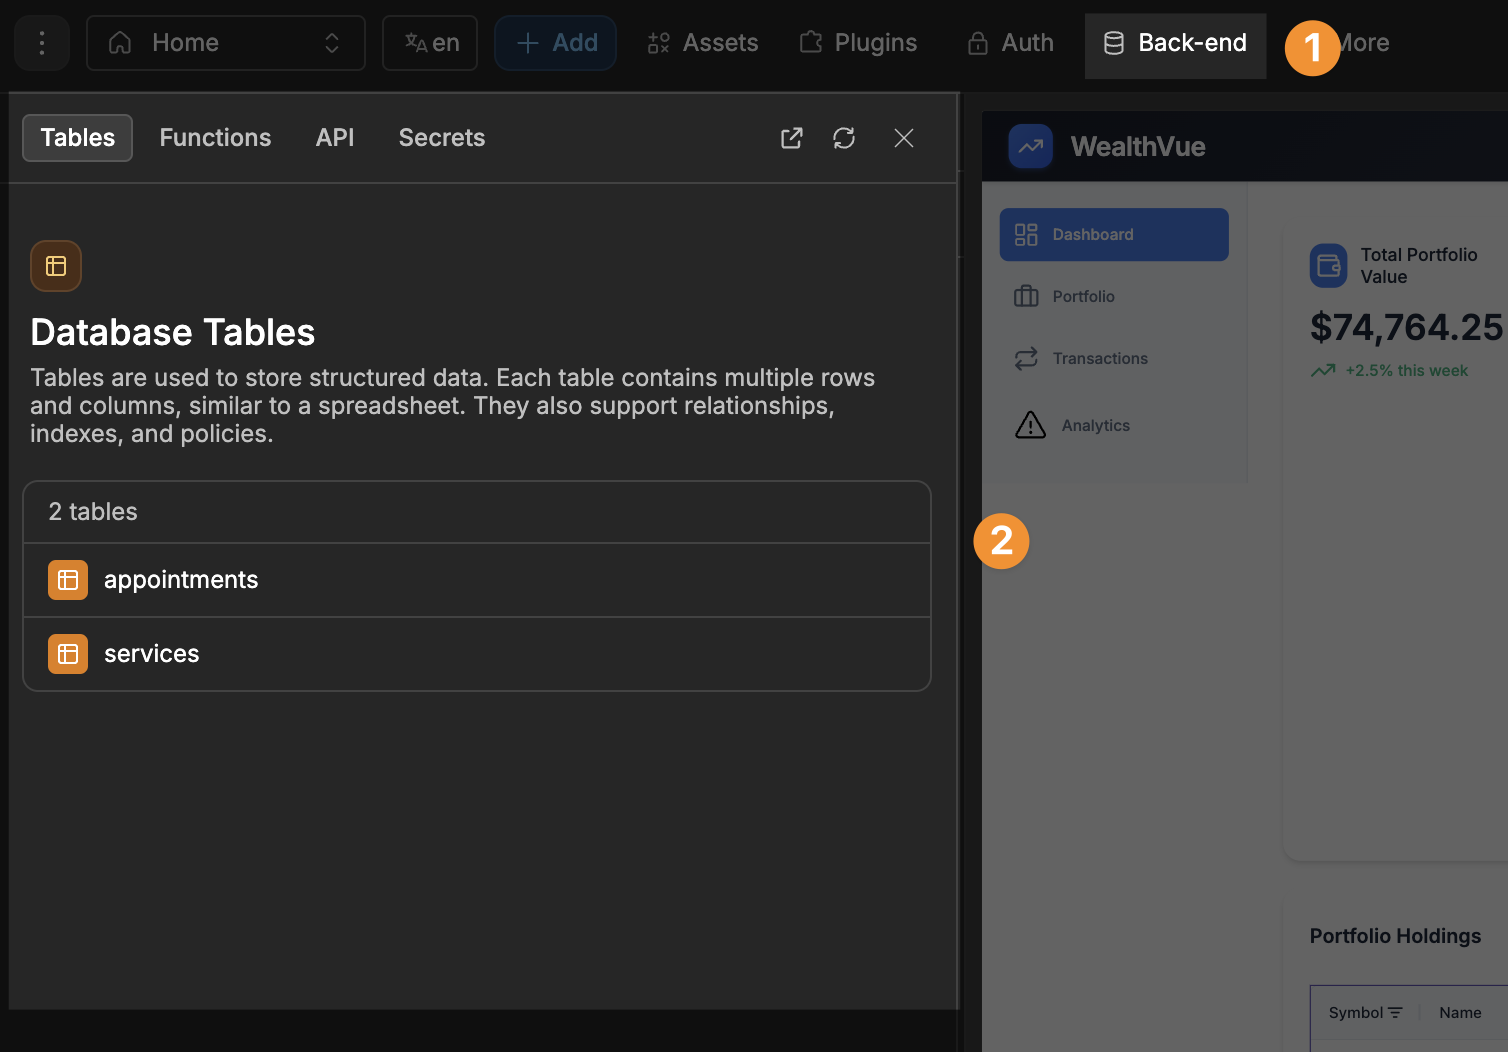
The Back-end panel is where you can manage key parts of your integrated backend directly from the WeWeb editor.
Currently, only Supabase is supported.
Learn more about the back-end panel.
More
In the more menu, you will find features that apply at app level:
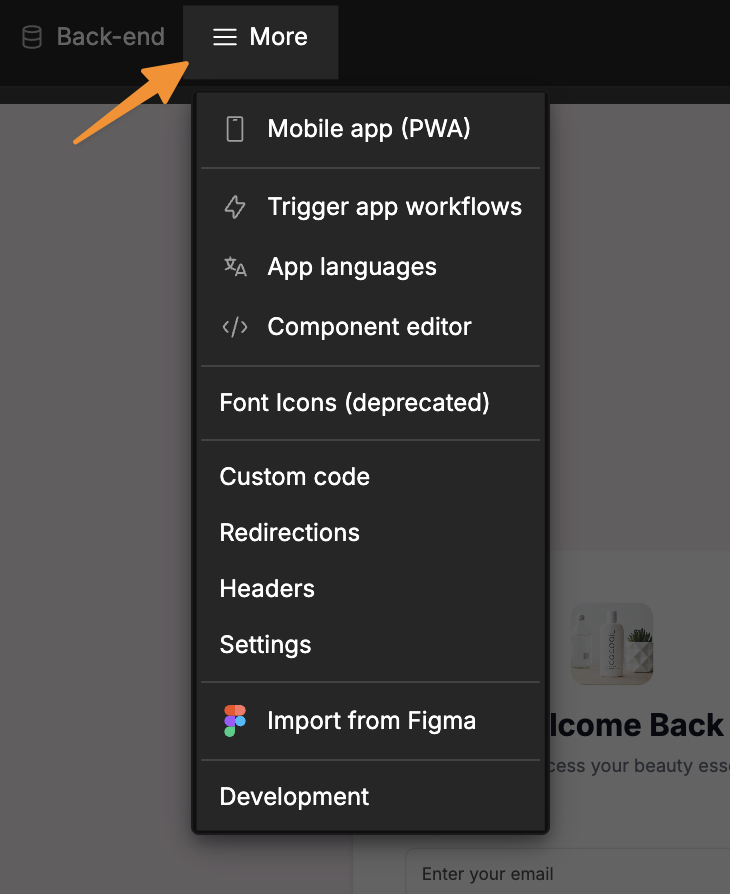
This is where you can:
- define the manifest for the PWA version of the app,
- trigger workflows at app level,
- add languages to your project,
- edit the custom coded components of your project,
- add custom code at app level,
- add redirections, and a base tag,
- add custom headers,
- access app settings,
- import designs and styles from Figma. Learn more,
- access WeWeb developer tools.
Learn more about WeWeb app settings.
Canvas
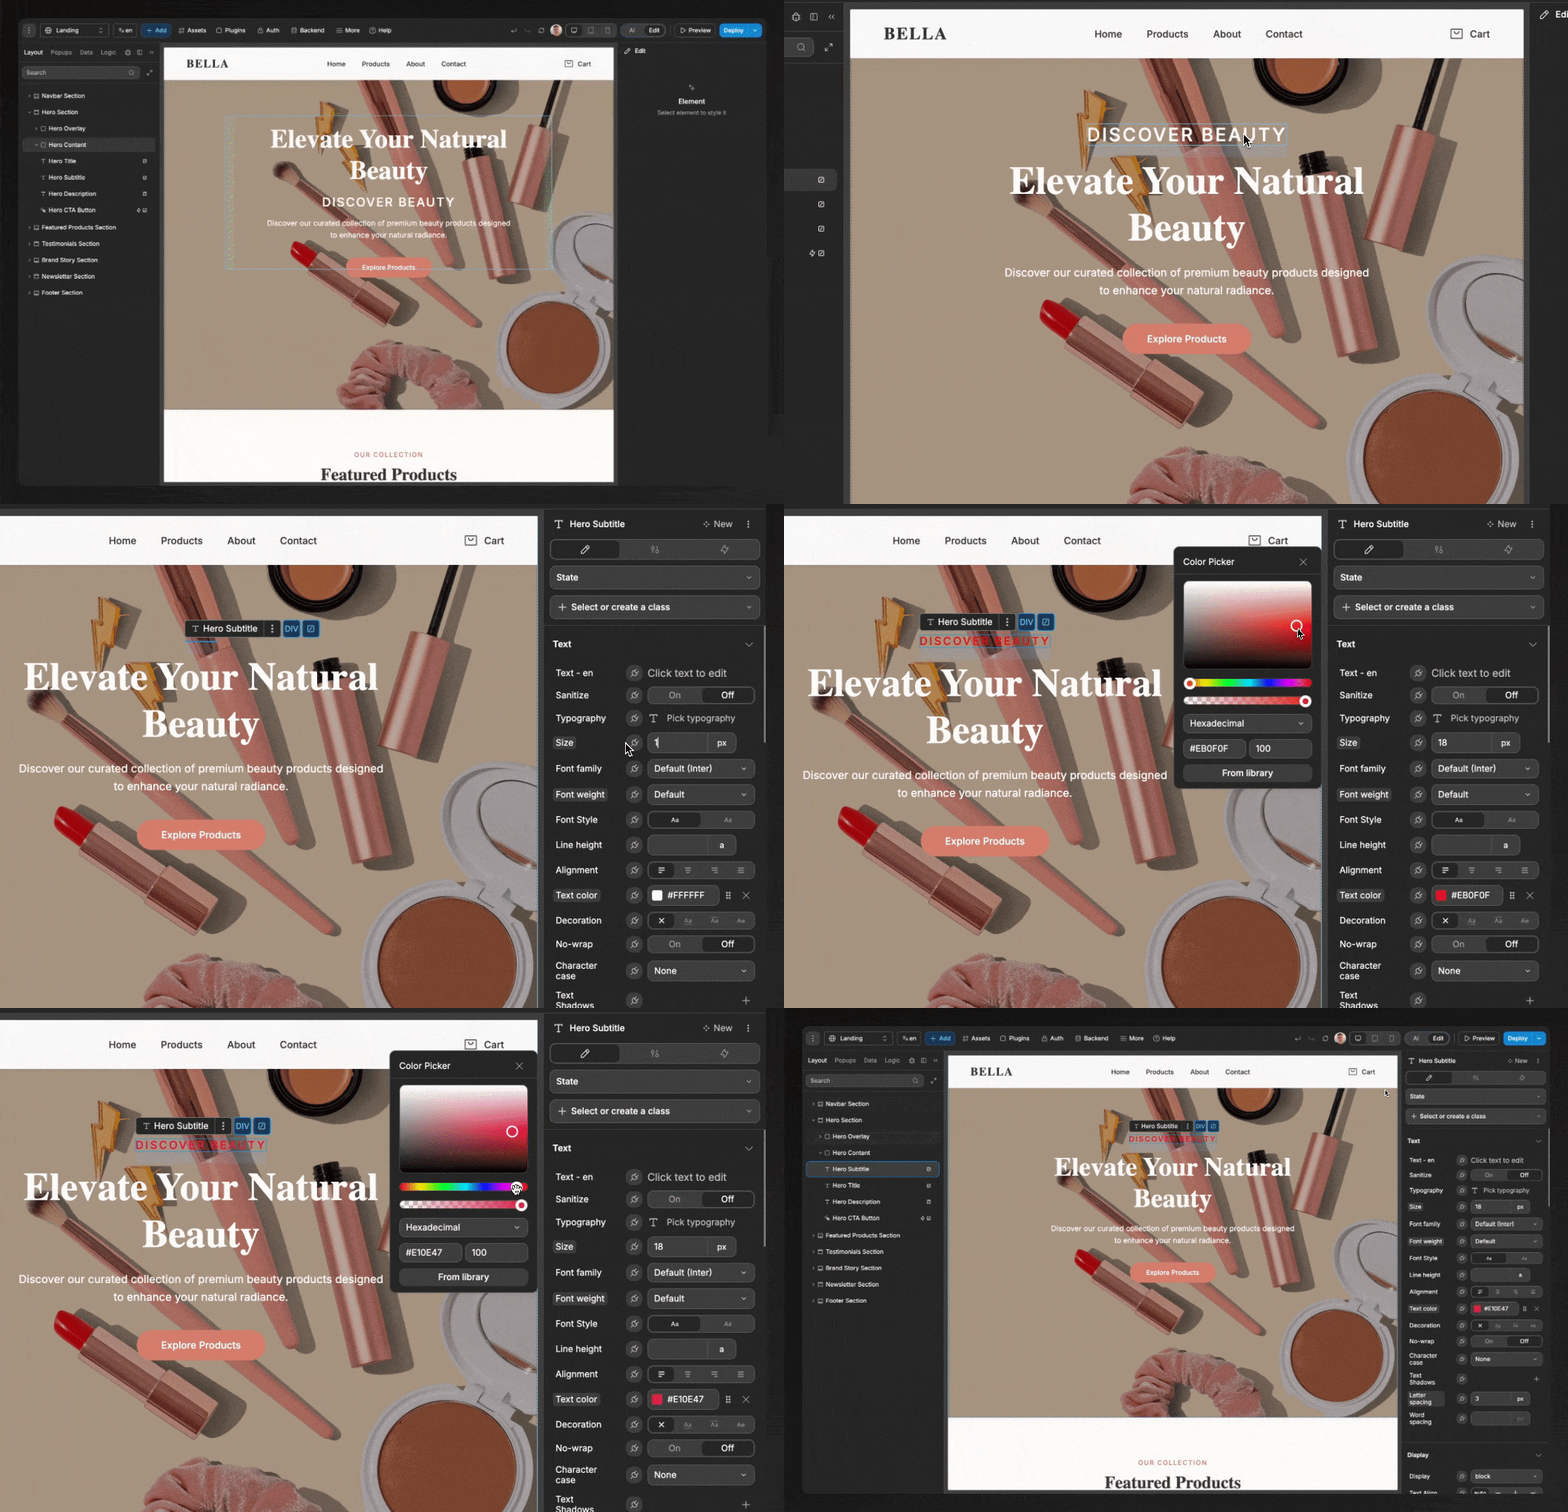
The canvas is the central workspace where you build and visualize your application in real-time.
You can select elements, move them around, and directly edit content:
The box model
Crafting layouts in WeWeb revolves building around the box model.
Think of every element on your page as a box with four layers:
- the content (like text or images)
- padding (space inside the box)
- border (an outline around the padding)
- margin (space outside the box)
Learn more about the box model →
Responsive design
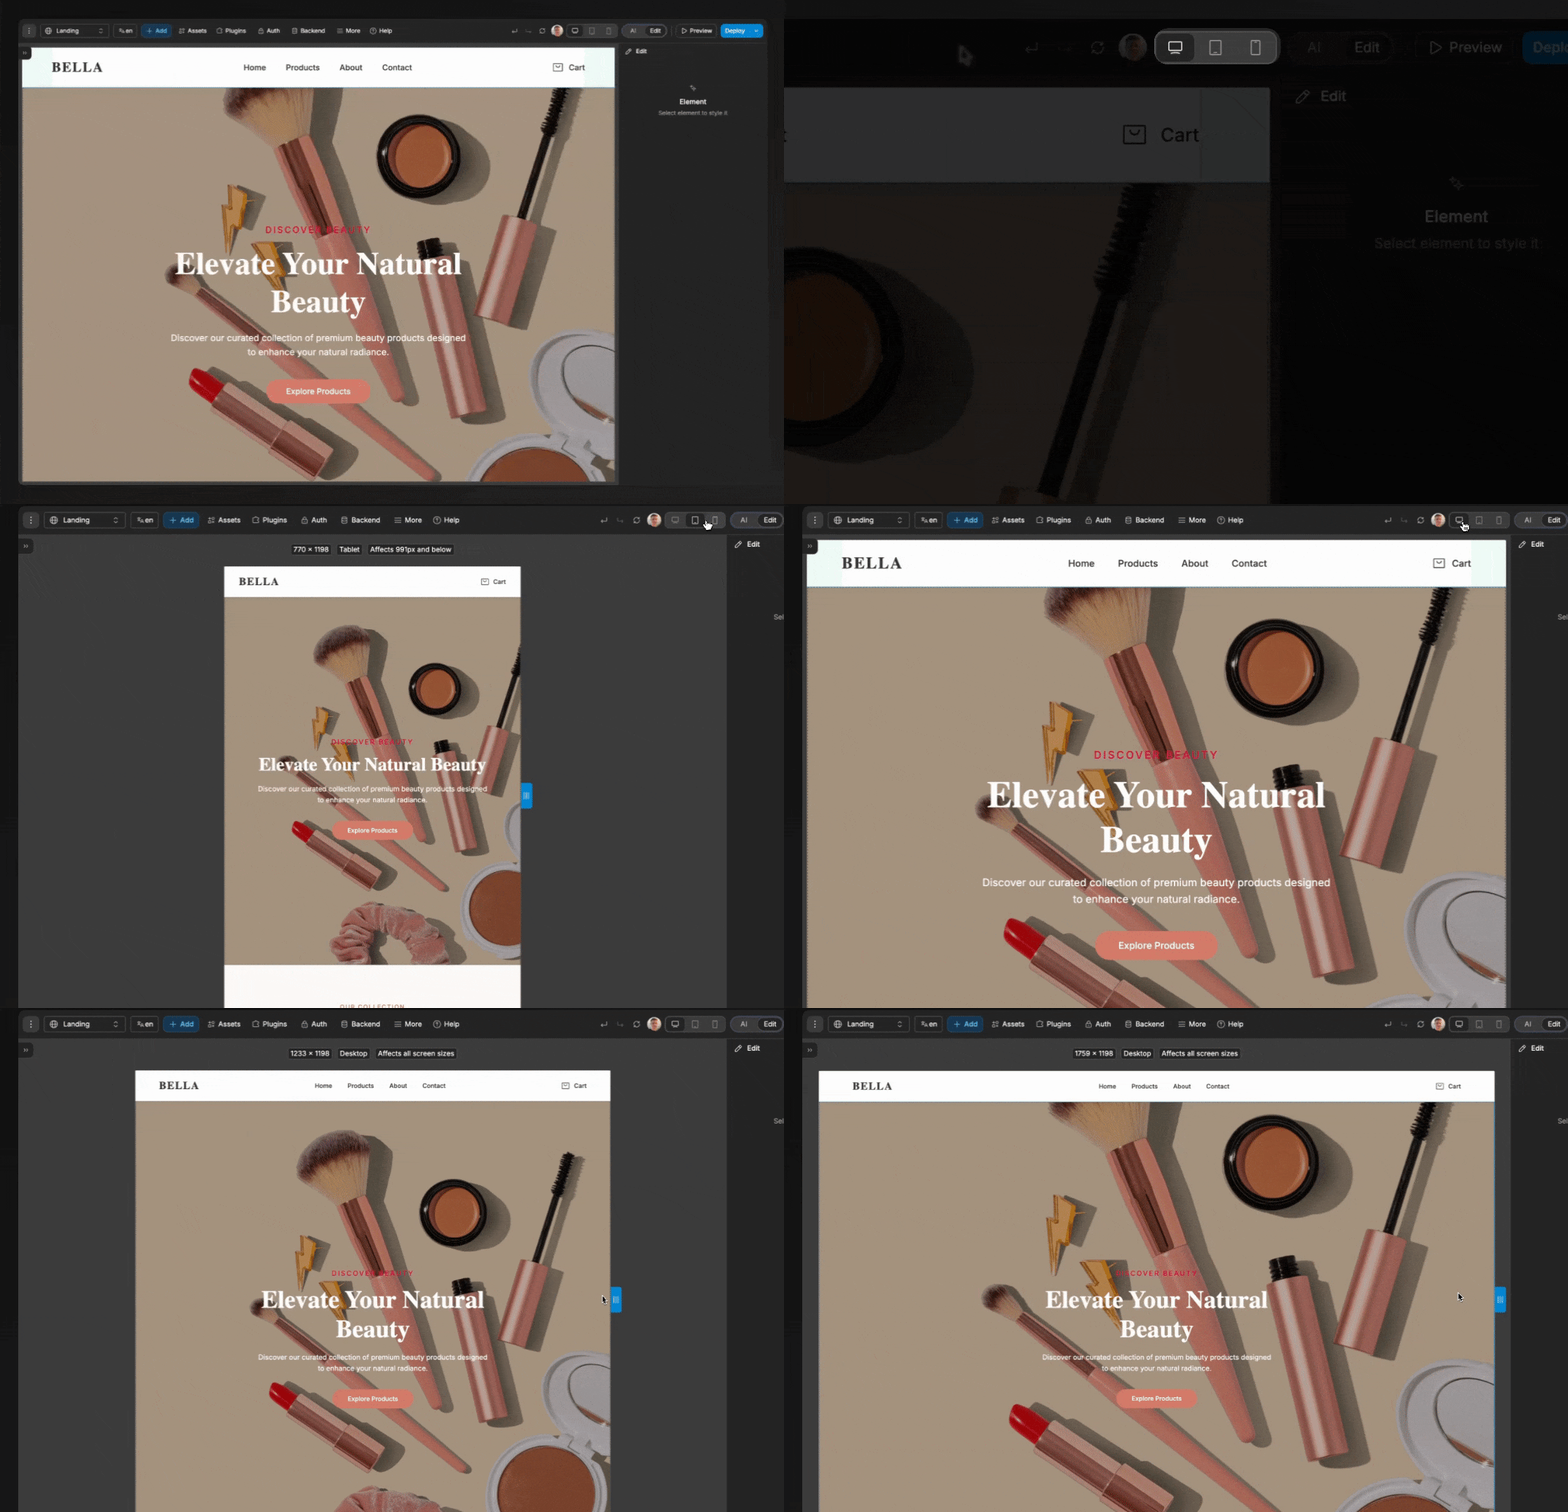
To help build responsive designs, you can edit and preview the canvas views – desktop, tablet, mobile – and publish when you're ready:
Left panel
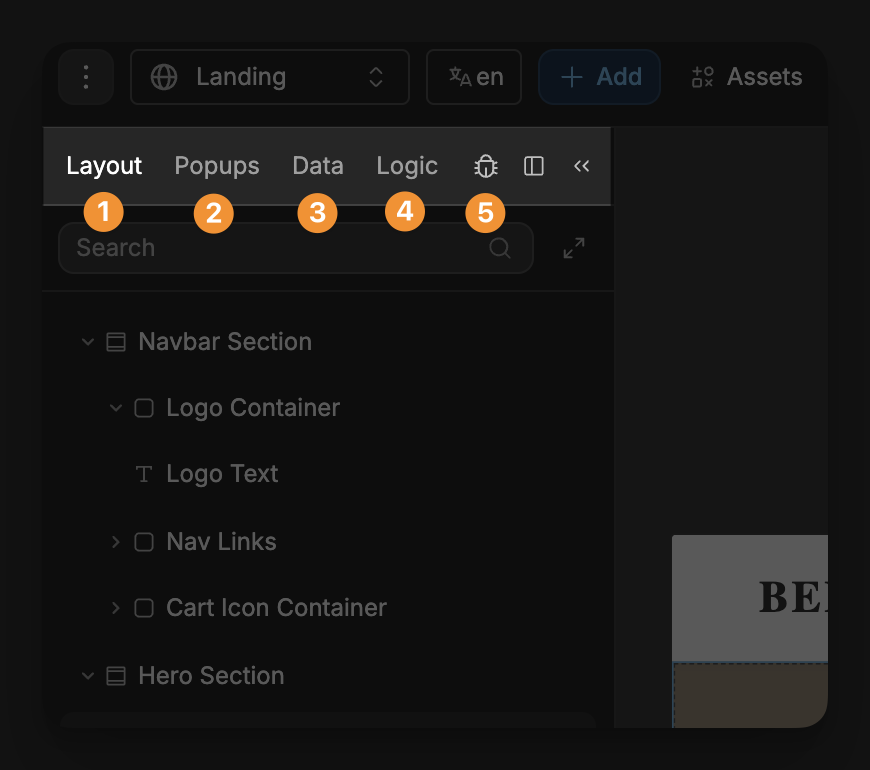
In the left panel of the WeWeb editor, you will find:
- the element tree of the page you're on in the
Layouttab - the popups of your project in the
Popupstab - the data collections and global variables in the
Datatab - the global workflows and formulas in the
Logictab, and - the debugger tab with app logs and the current state of variables
Layout tab
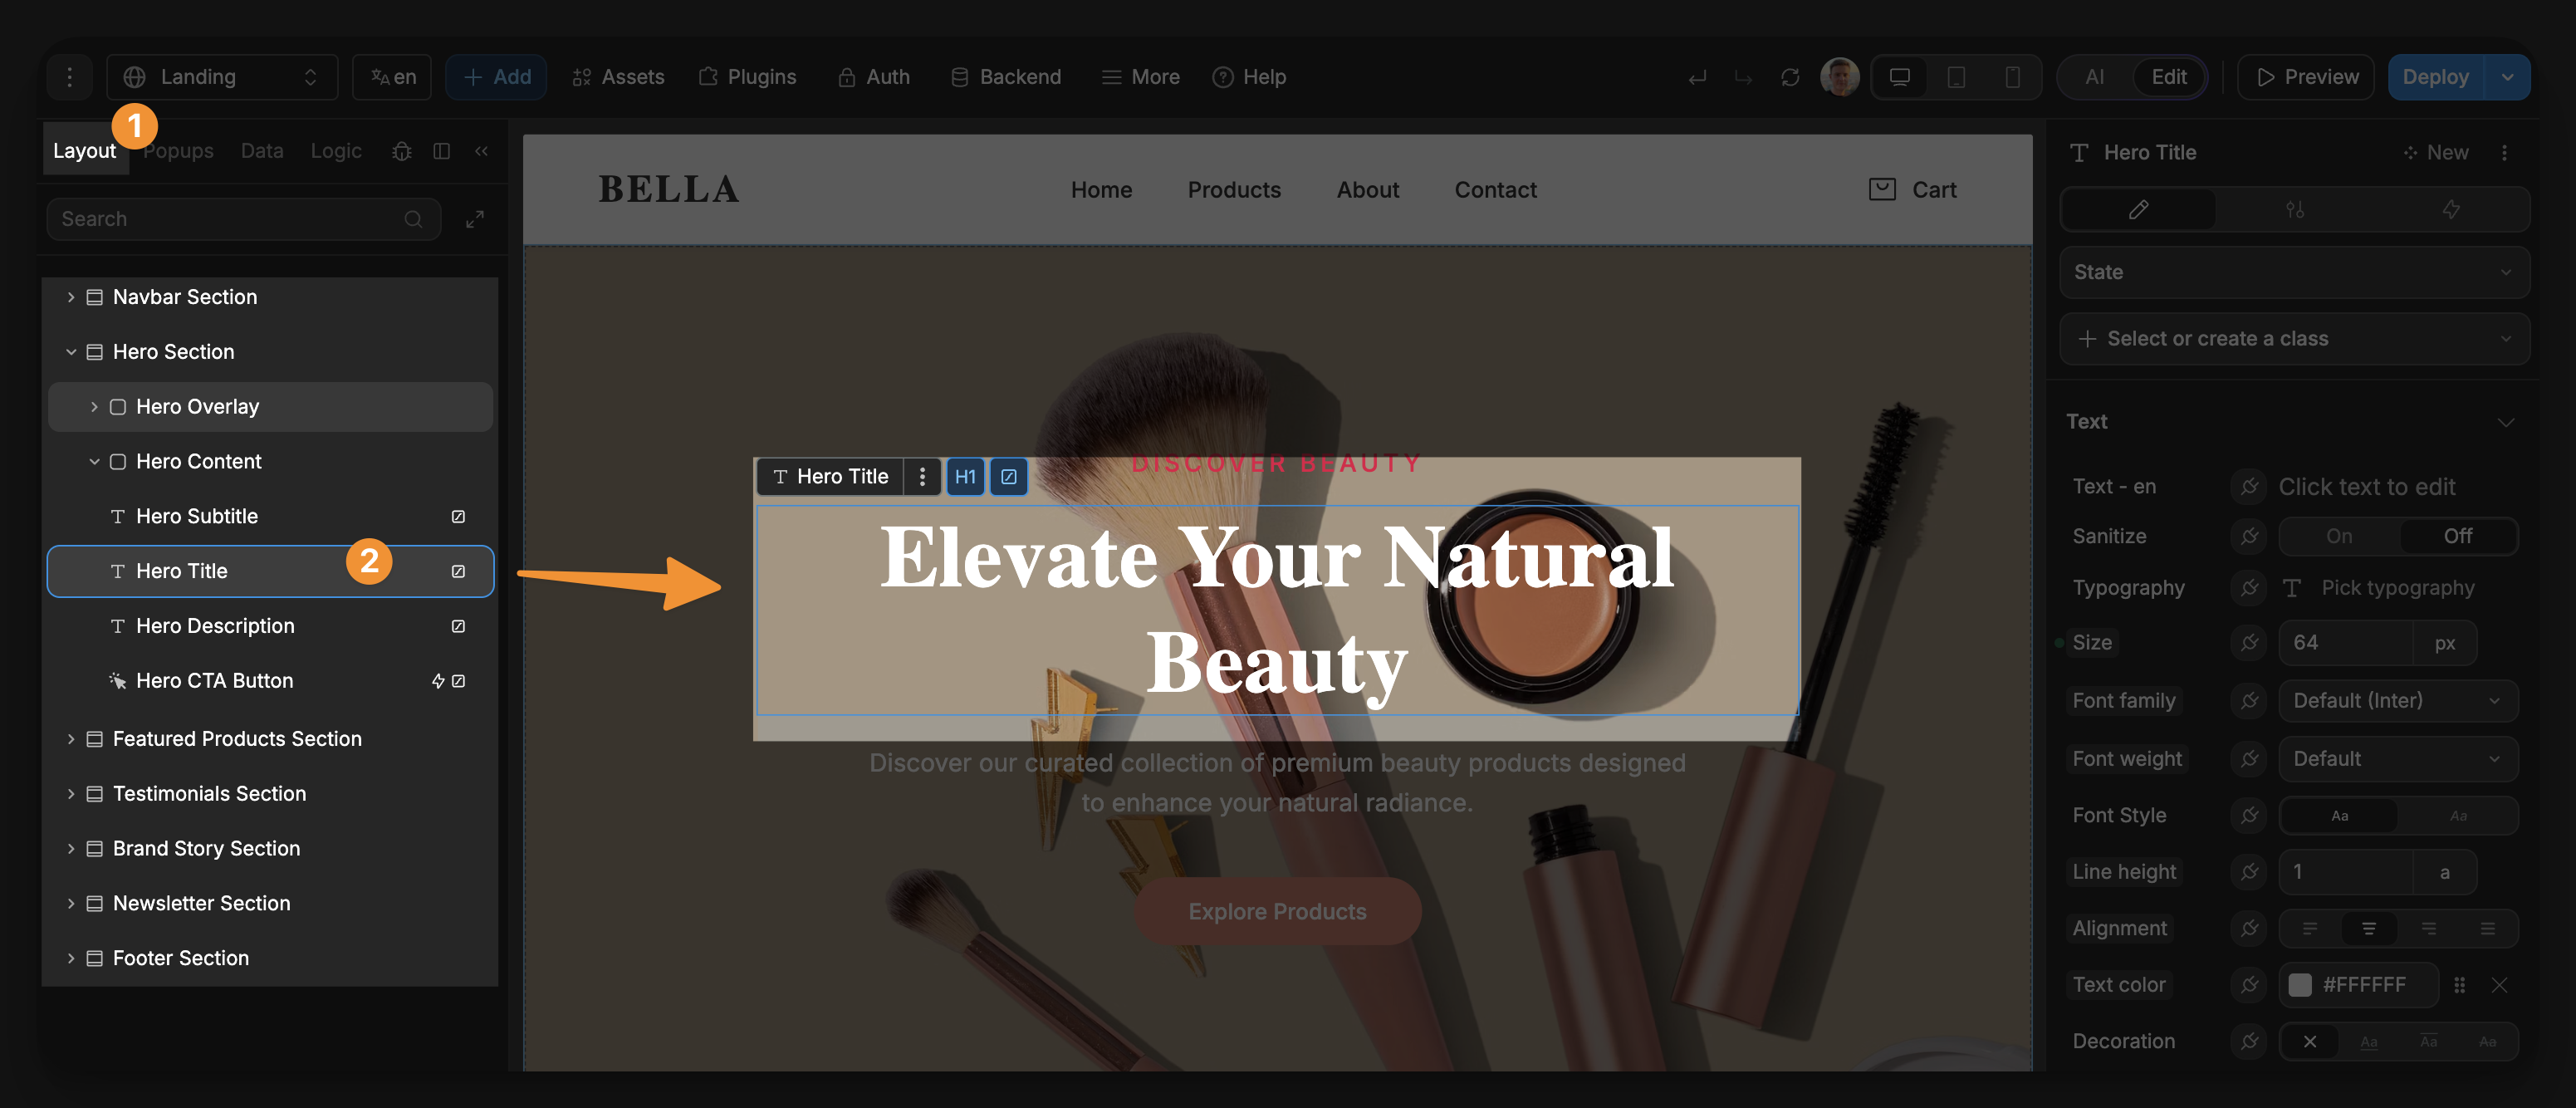
In the Layout tab, you will see the element tree of the page you are currently on.
In the example below, you can see we are on the Landing page and selected the Hero Title element in our element tree.
As a result, the element is selected on the canvas and we can edit its properties in the right panel:
Layout tree icons
To help you quickly understand what’s configured on each element, the layout tree shows small icons on the right side.
Lightning Bolt Icon: indicates the element has one or more workflows attached.

Plug Icon: indicates the element has data bound to one or more properties (for example, repeat items, text, or a style value).

Eye Icon: indicates conditional rendering or display logic is set on the element (for example, show/hide based on a condition).

Sqaure Icon: indicates an animation is configured on the element.

Popups tab
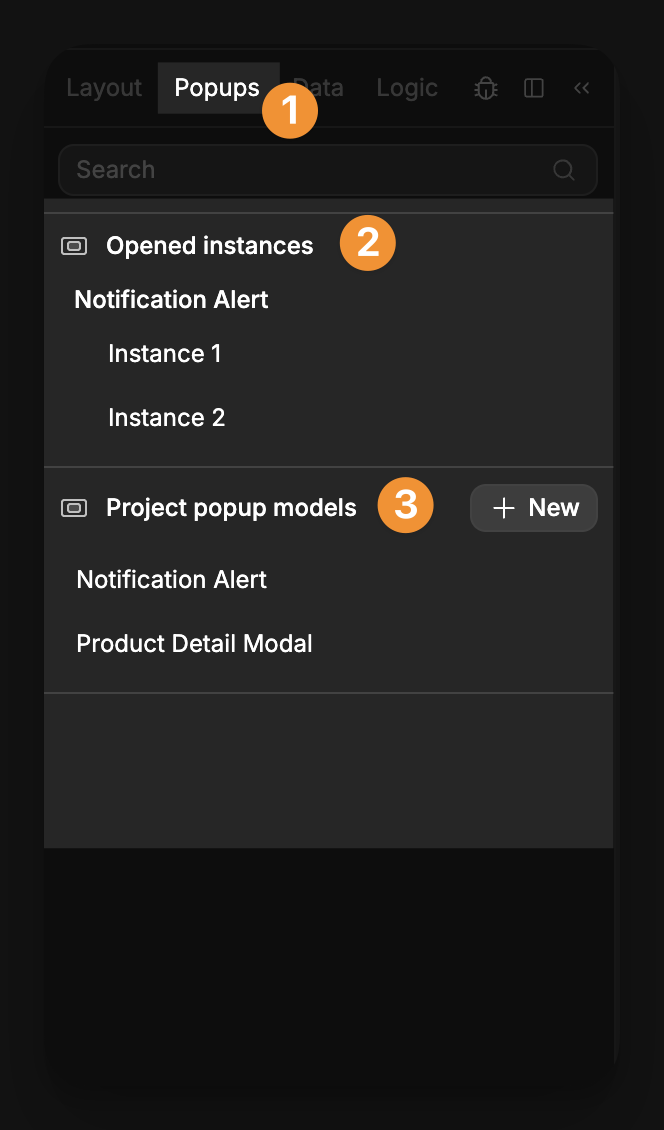
In the Popups tab, you can create and manage popups for your application. Popups are UI elements that appear above the main content to display information, capture user input, or provide notifications.
Key features of the Popouts tab include:
- see which popup instances are currently open during preview or editing
- create new popups from various templates (modal, toast, alert, sheet)
- view and manage all popups in your project
TIP
Popups in WeWeb are treated as dedicated components with their own management system, making them highly reusable across your application.
Data tab
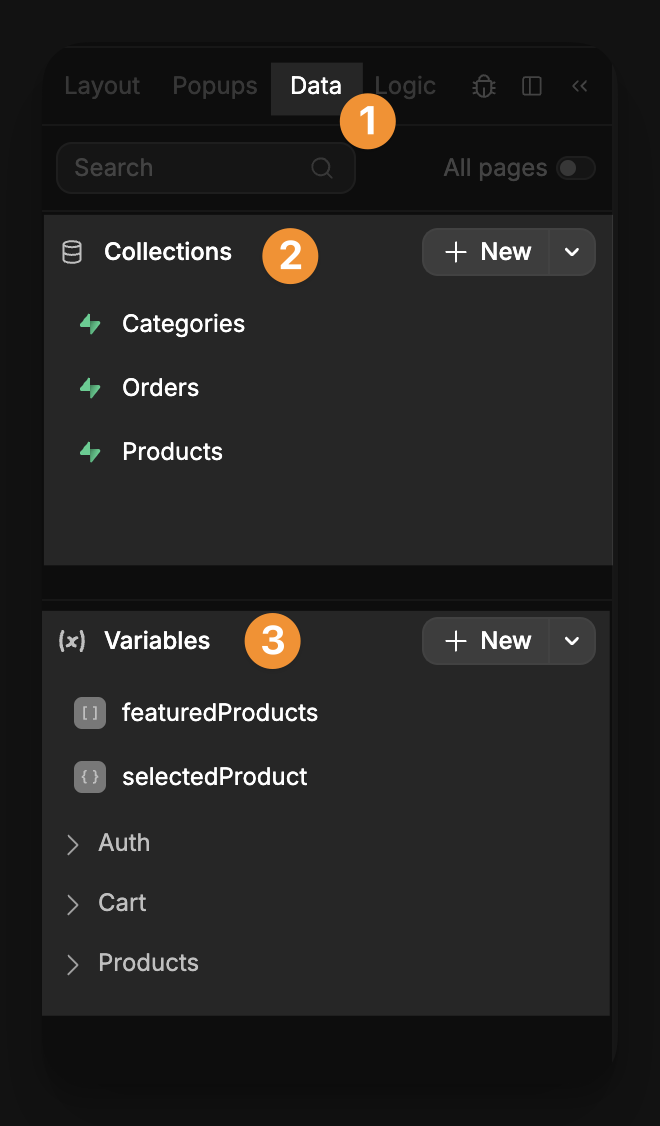
In the Data tab, you can:
- see all the collections available in the project or used on the current page,
- create new collections and variables, and
- update or delete existing ones.
TIP
Collections and variables are essential tools to build dynamic web applications in WeWeb.
Learn more about working with collections and variables in WeWeb.
Logic tab
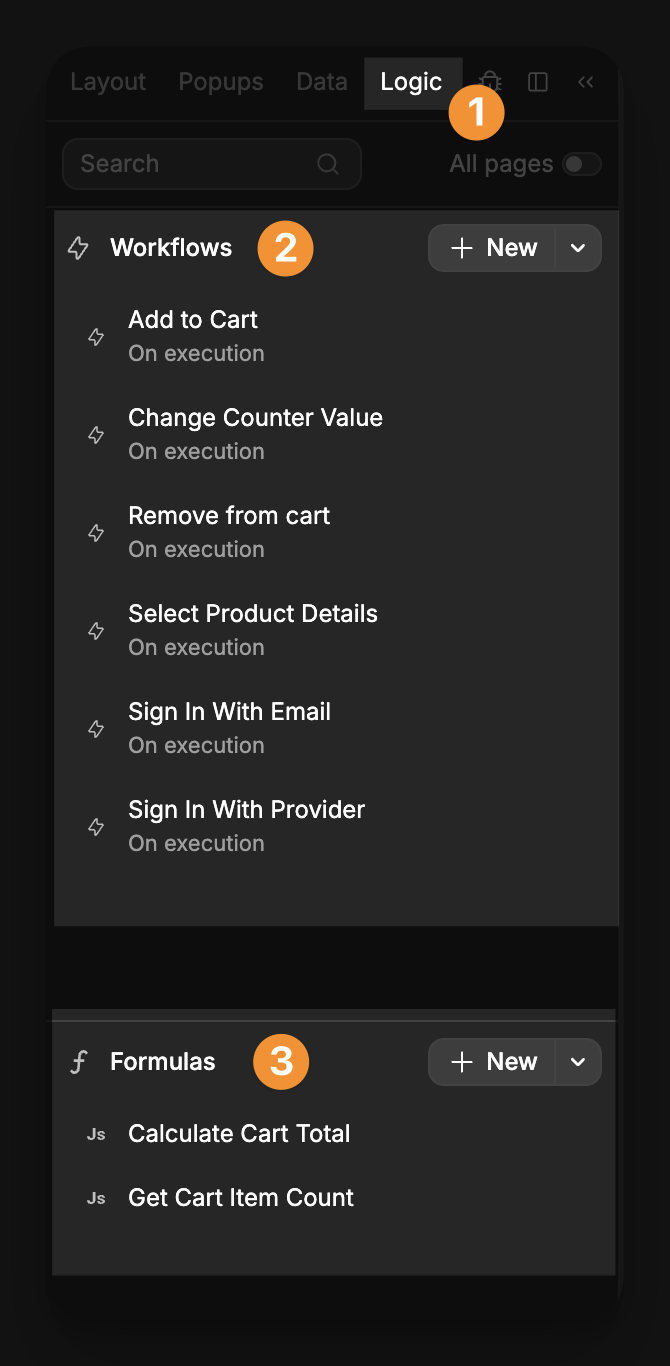
In the Logic tab, you can create, edit, and delete global workflows and formulas that you can then use throughout your project.
TIP
Workflows and formulas are essential tools to build dynamic web applications in WeWeb.
Learn more about working with workflows and formulas in WeWeb.
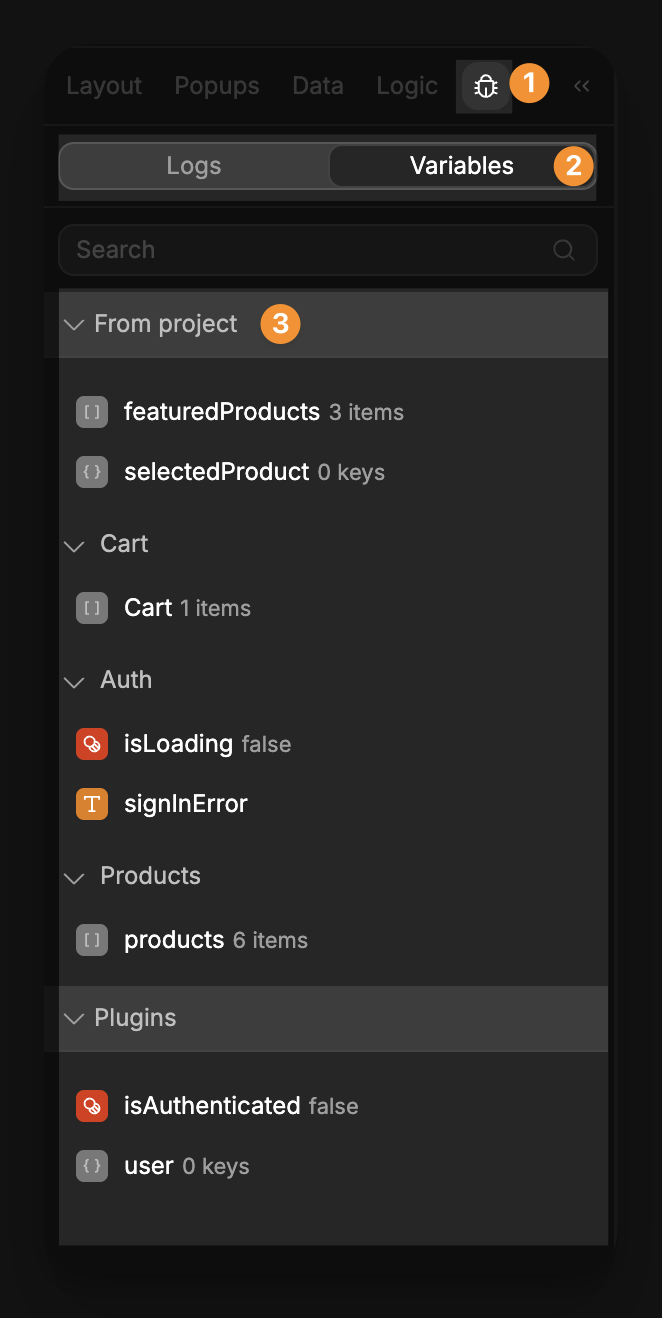
Debugger tab
In the debugger tab, you will find:
- the logs of what is happening in your application, and
- the current values of global variables
Right panel
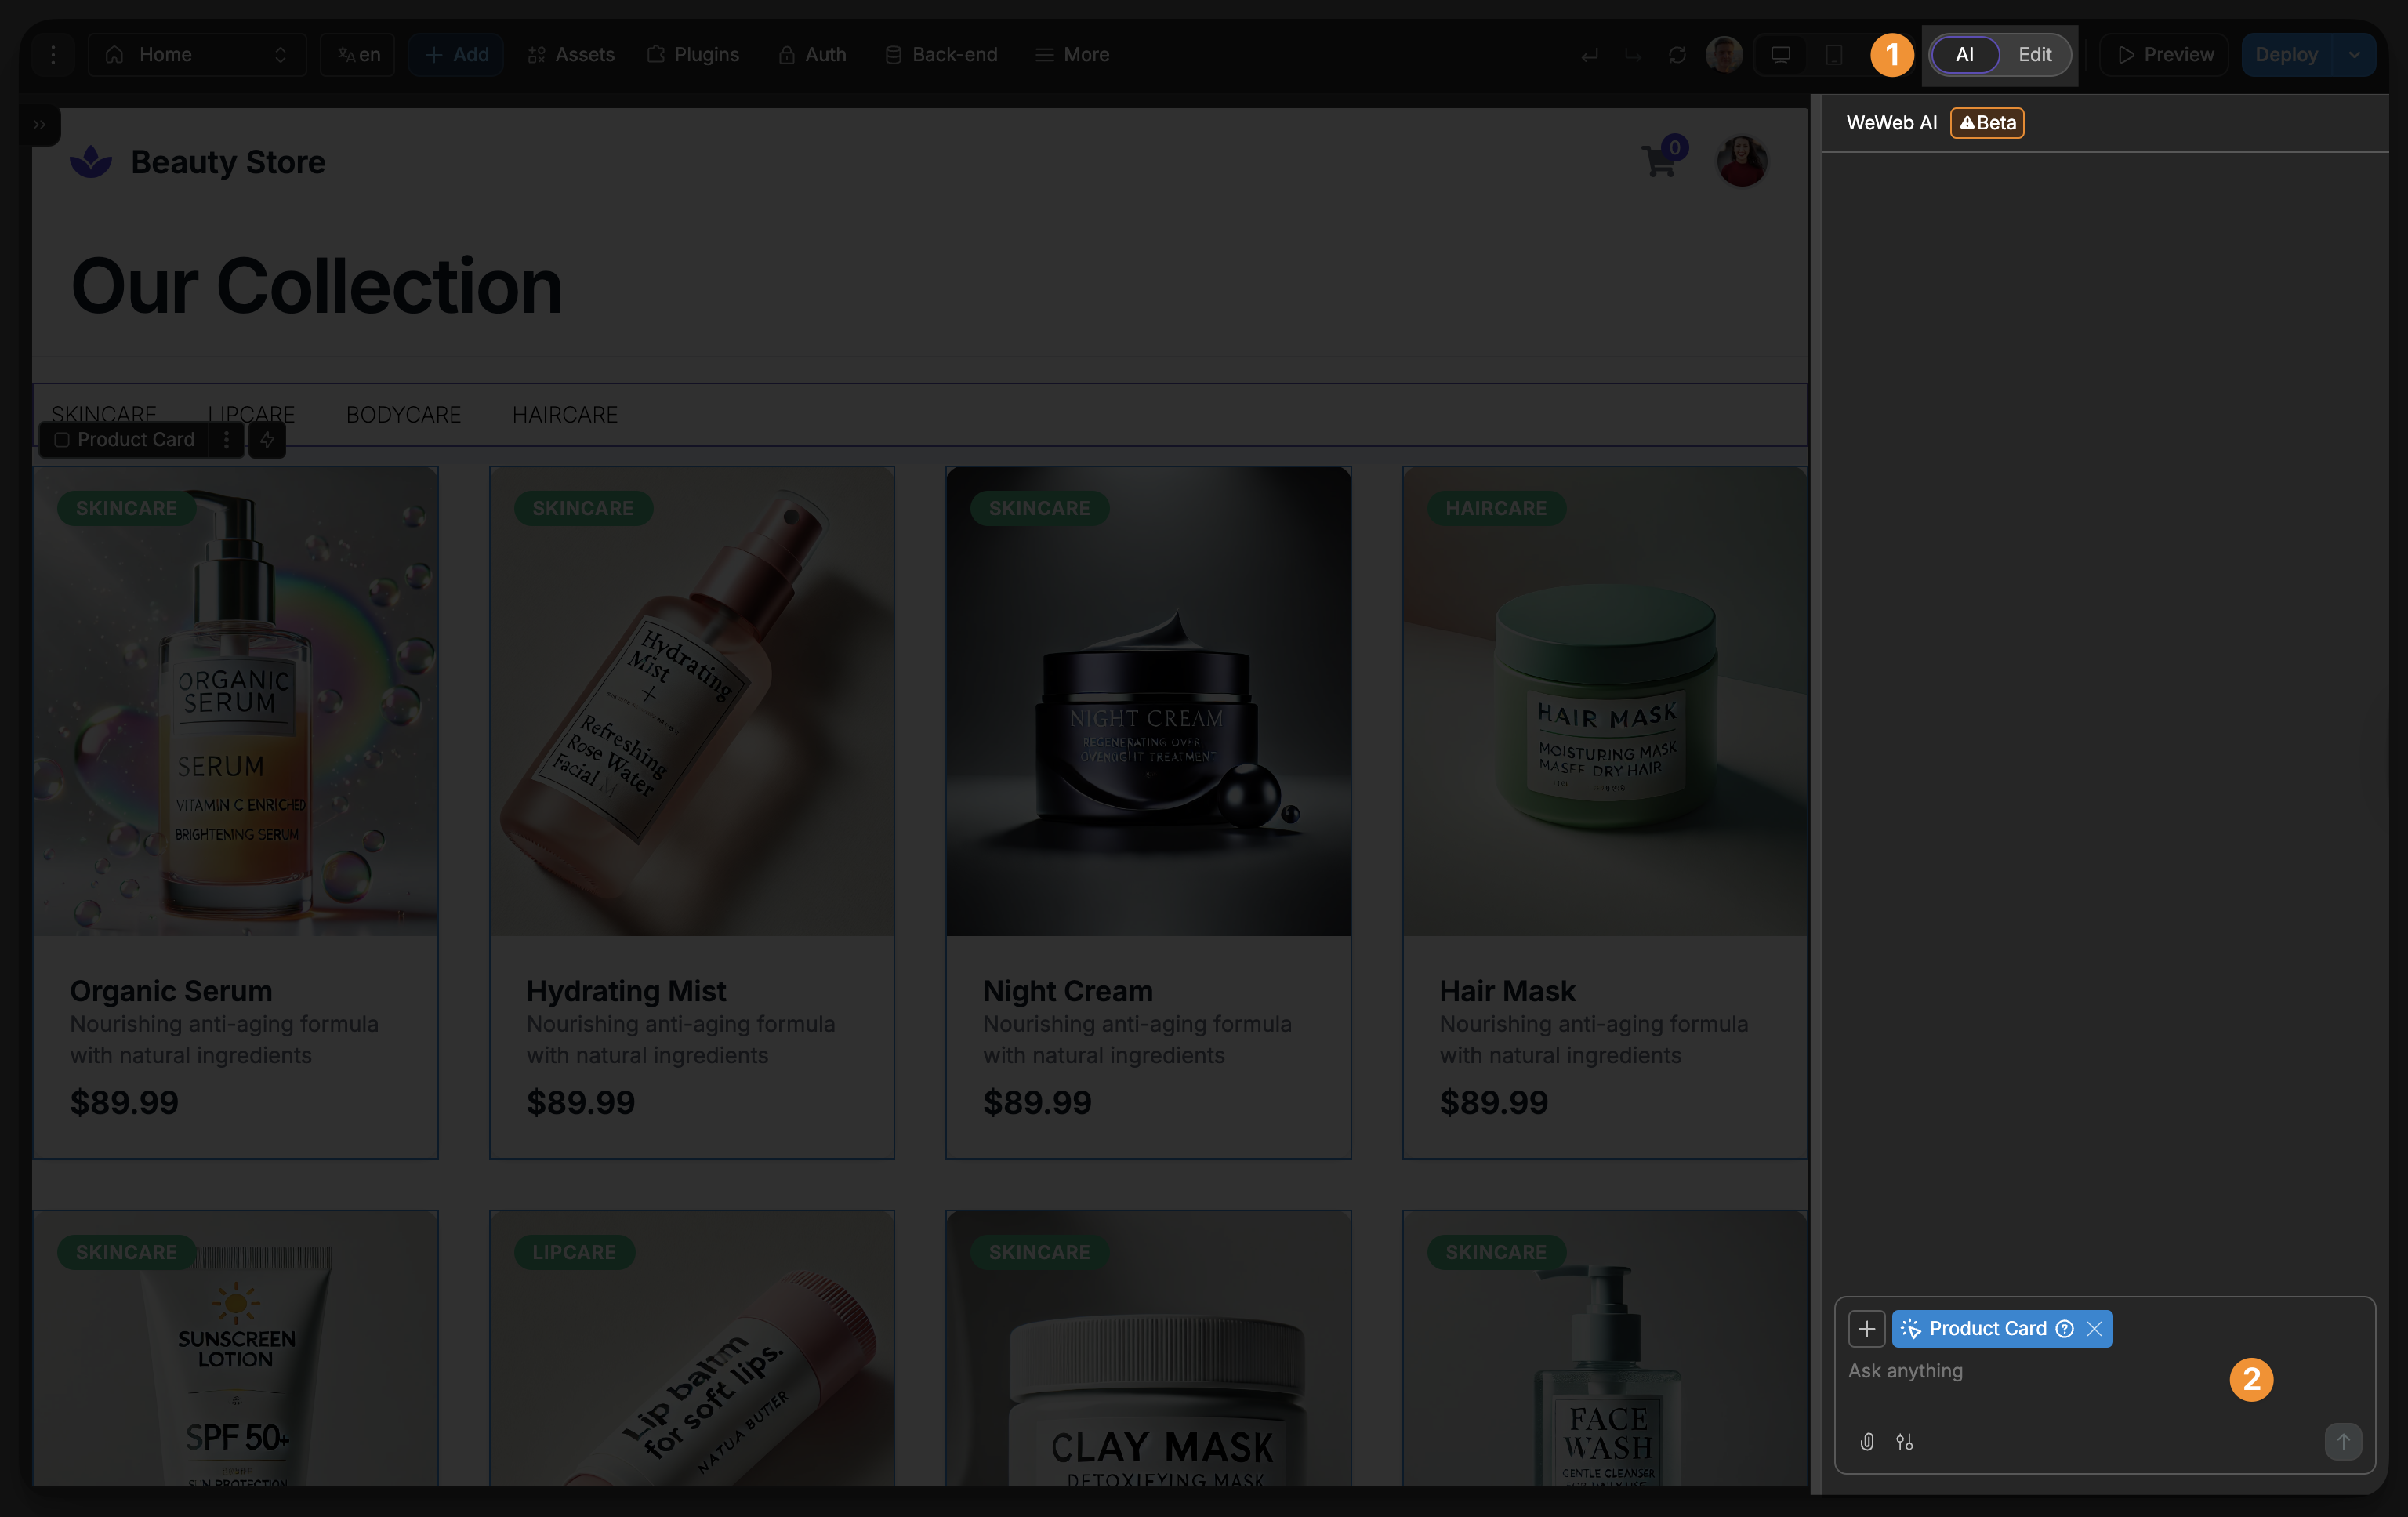
The panel on the right has two modes that you can toggle between:
- edit mode - for styling and configuring elements
- AI mode - for accessing WeWeb AI
Right panel (Edit)
The edit mode of the right panel gives you precise control over the element that is selected on the page.
It allows you to:
- style the element,
- bind data to the element,
- change settings that are specific to that type of element,
- add no-code workflows on the element.
Style
The styling panel is where you can change the styling properties of elements.
![]()
See a full breakdown of all available styling properties
TIP
Whenever you change the styling of an element from the style panel, you are actually changing the CSS of the element
Bind data
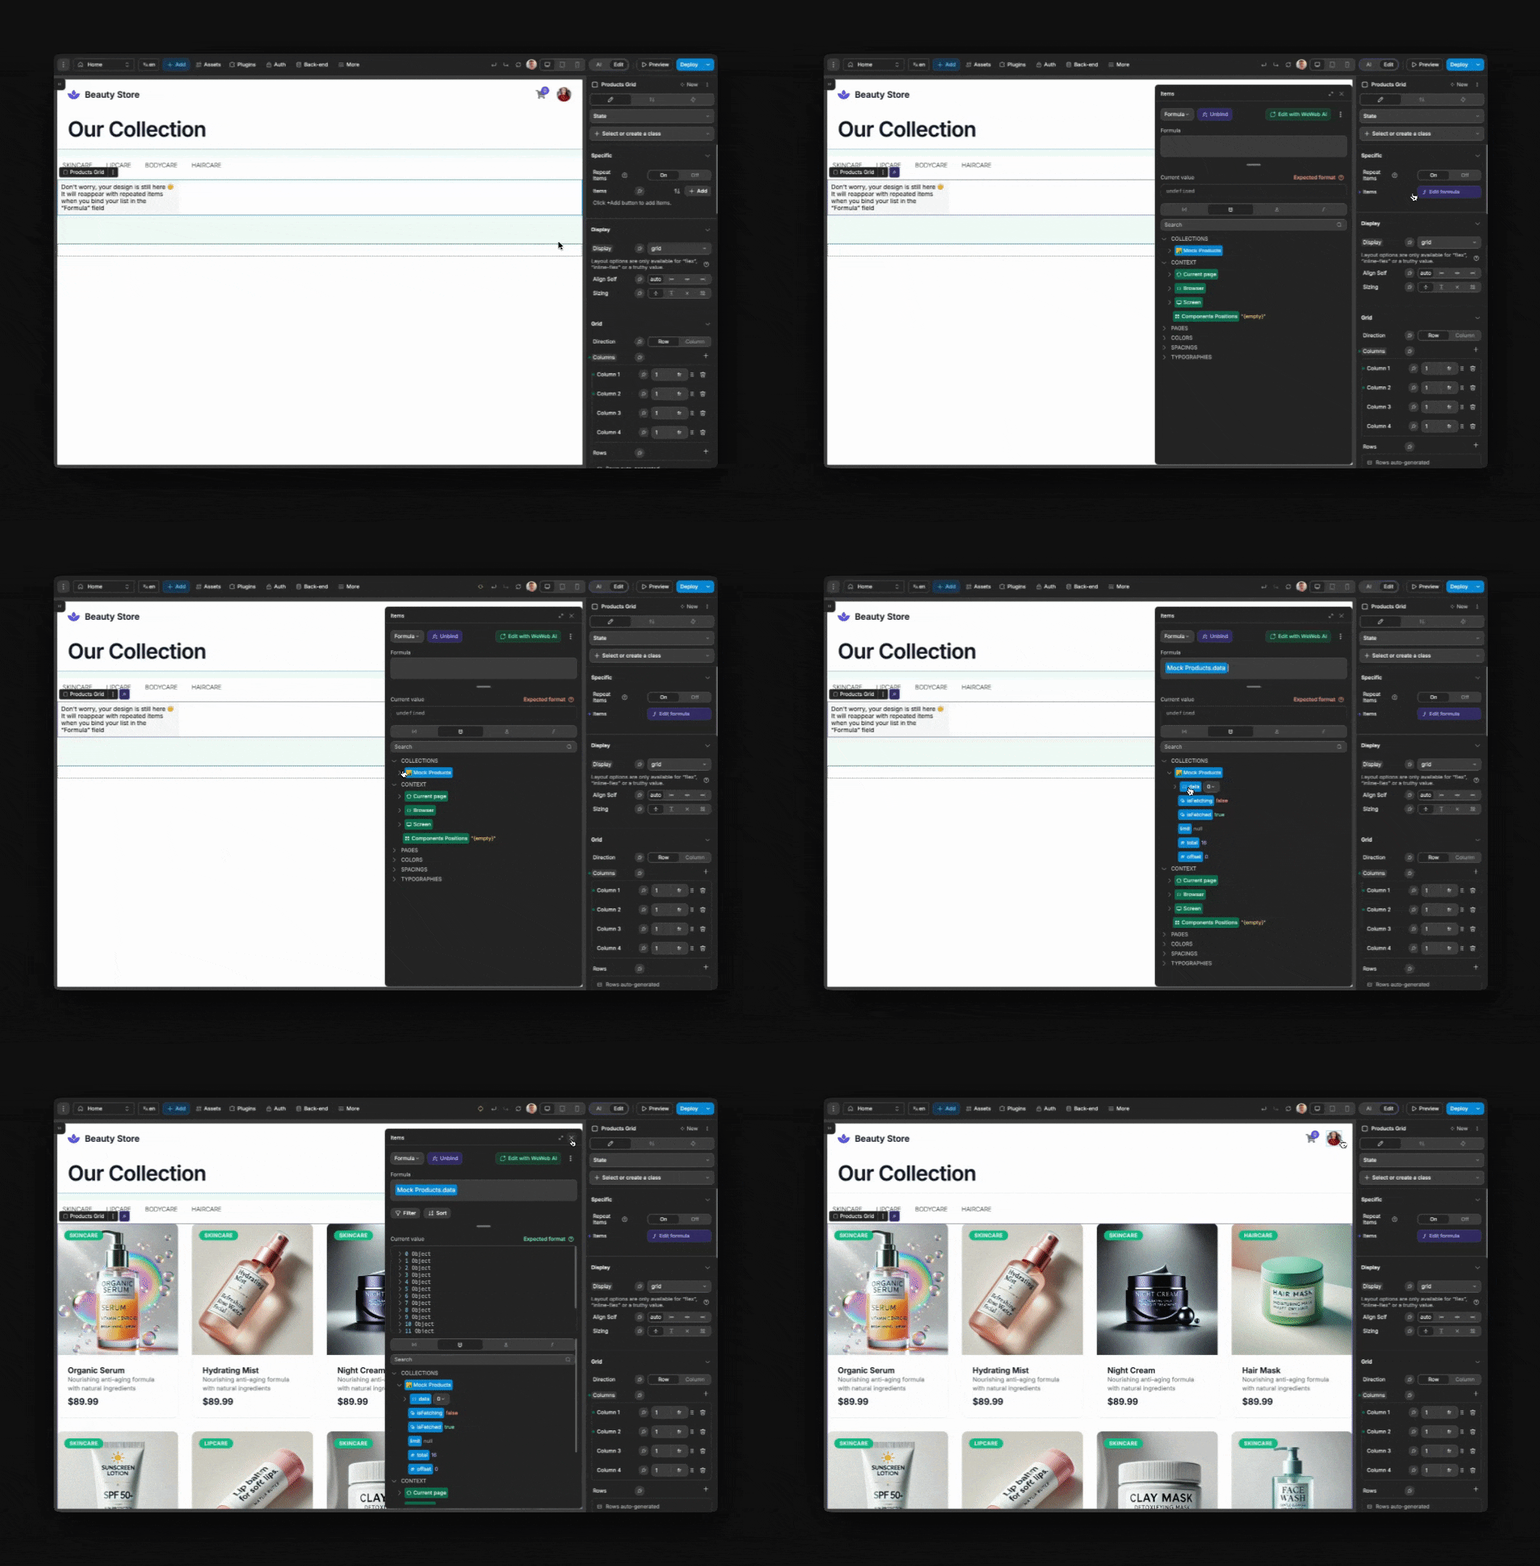
You can bind data to almost every property in WeWeb.
This means you can bind something like a styling property, or even the repeating of items.
In the example below, we bound a list of products to a Collection List, resulting in the product card being created for every item in the list:
TIP
When you bind the repeating of elements, you will only see a single element in the layout tree. However, the element will actually be repeated for each item in your bound list.
Learn more about binding data in WeWeb.
Settings
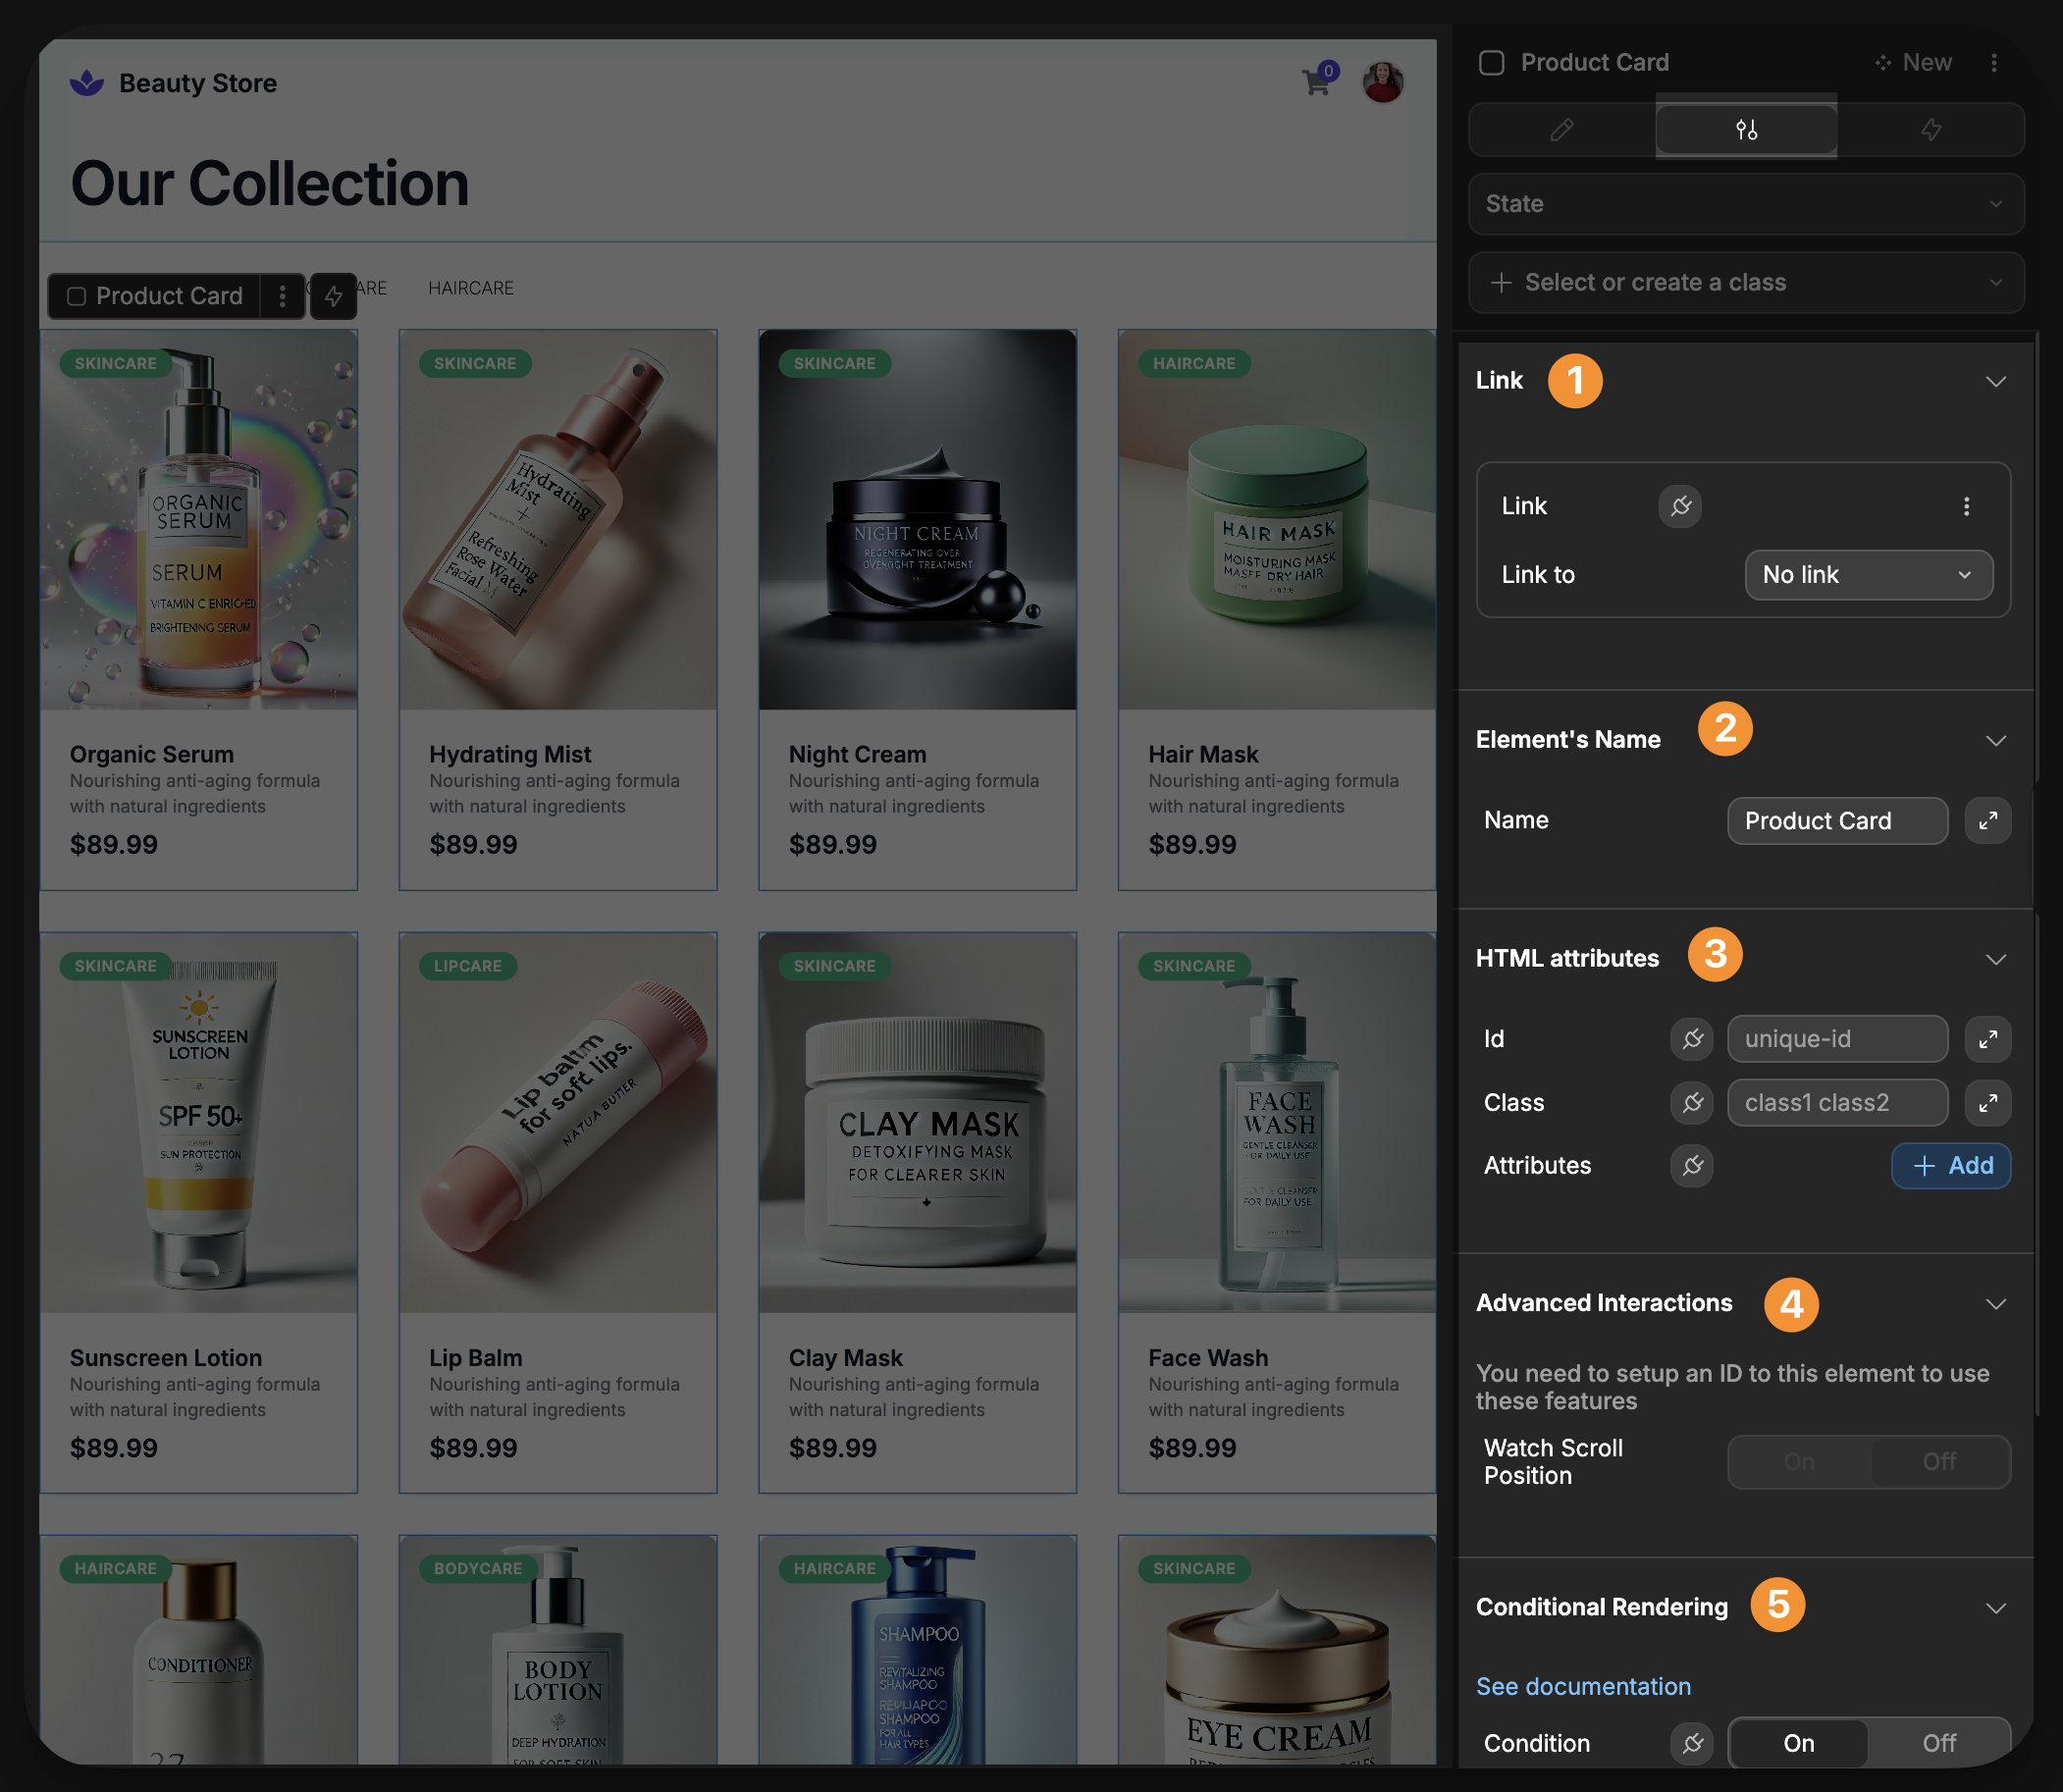
In the settings tab of the right panel, you can:
- link to another page or URL on click of the selected element
- name the selected element
- add an id, class, or attribute to the HTML of the selected element
- control whether the scroll position of the selected element is watched
- set the conditional rendering of the selected element. Learn more about conditional rendering
Workflows
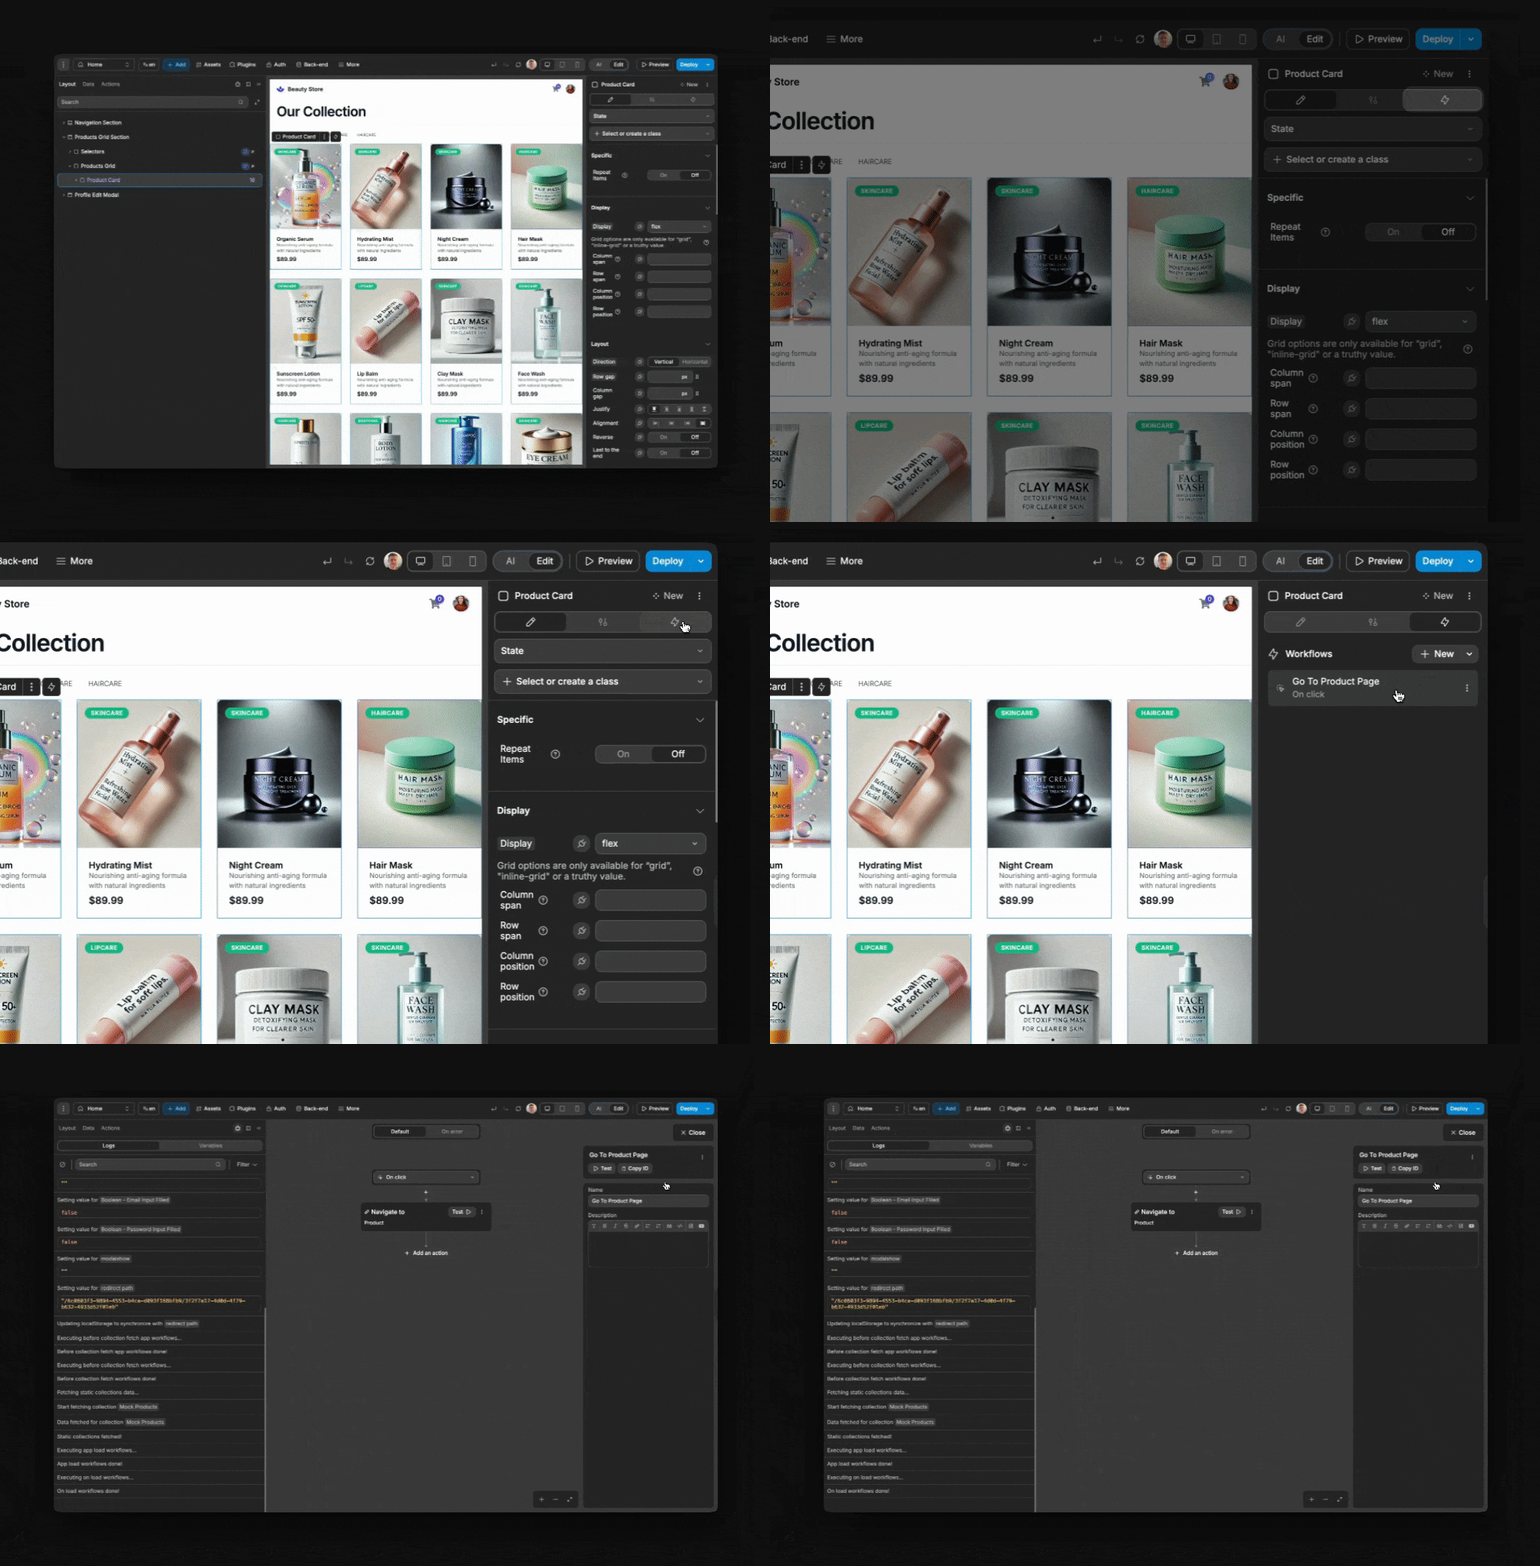
Workflows are core to the logic and functionality of your web applications.
In the workflows tab of the right panel, you can add new workflows to an element and access all existing workflows of the element:
TIP
Workflows allow you to execute actions when a certain trigger happens on the element, like changing the value of a variable on click.
Learn more about workflows
Right panel (AI)
The AI mode of the right panel provides direct access to WeWeb AI, which is an integral feature of the editor. It serves as an intelligent assistant that helps you create every aspect of your web application through natural conversation.
With WeWeb AI, you can:
- generate responsive layouts and designs
- build workflows
- generate tables and APIs for your backend
- create formulas
- generate custom components
To begin learning about how to leverage WeWeb AI, check out the intro to WeWeb AI documentation.

