Appearance
Understanding the box model
THE SAME PRINCIPLES
The video below was not created by us (WeWeb) and explains the box model in the context of traditional code. However, all the same principles apply when working with layouts and styling in WeWeb's visual editor.
What is the box model?
The box model is a fundamental concept in web design that represents how elements are displayed on a page. In WeWeb, you don't need to write CSS code, but understanding the box model will help you create better layouts.
Every element on your page is treated as a rectangular box with four components:
- Content - the inner area where text, images, or other elements are displayed
- Padding - the space between the content and the border
- Border - the line that surrounds the padding
- Margin - the space outside the border that creates distance from other elements
How to work with the box model in WeWeb
In WeWeb, you can manipulate all parts of the box model through the Style tab without writing any code:
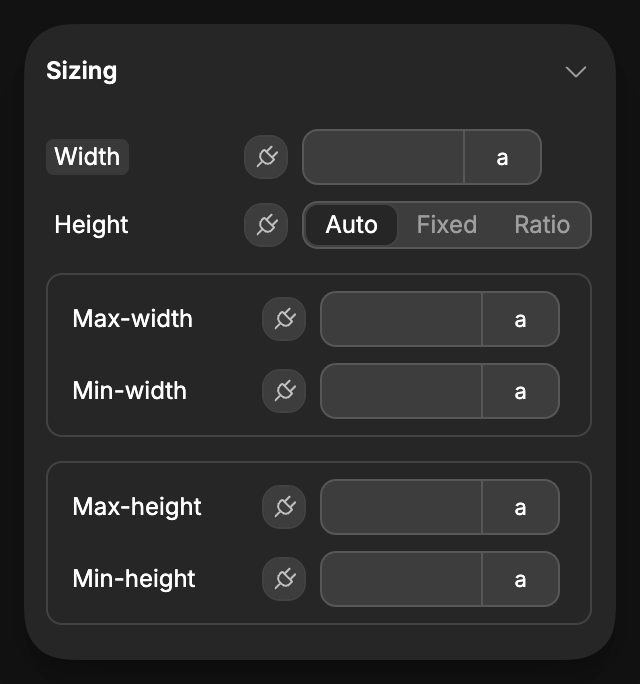
Content area
Control the content area by adjusting:
- Width and height properties
- Max/min width and height
Spacing (Padding and Margin)
You can control both padding (space inside an element) and margin (space outside an element) under the Spacing section in the Style tab:
Understanding the difference
- Padding adds space inside the element, between the content and the border
- Margin adds space outside the element, creating distance from other elements
Control options
For both padding and margin, you have three control options (labeled 1, 2, and 3 in the interface):
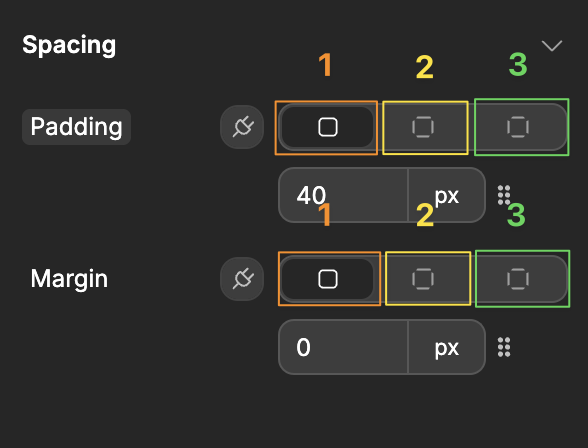
- All sides equally - Apply the same spacing to all four sides at once
- Horizontal/Vertical pairs - Control left/right and top/bottom pairs separately
- Individual sides - Set specific values for each side (top, right, bottom, left)
This flexible system allows you to create precise spacing for your elements without writing any CSS code.
Borders
Style the outline of an element with border properties in the Borders & Shadows section:
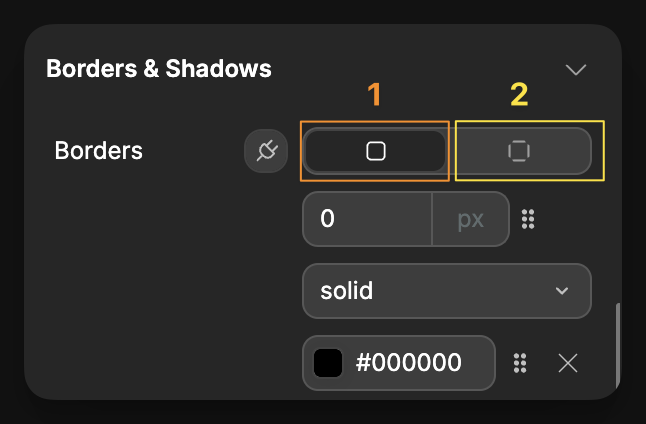
Control options
For borders, you have two control options (labeled 1 and 2 in the interface):
- All sides equally - Apply the same border to all four sides at once
- Individual sides - Set specific border properties for each side (top, right, bottom, left)
Additional border settings allow you to customize:
- Border width (in pixels)
- Border style (solid, dashed, dotted, etc.)
- Border color
- Border radius (for rounded corners)
This approach gives you complete control over how your element's borders appear without needing to write CSS code.
Common layout challenges
Overlapping elements
If elements are overlapping unexpectedly, check:
- Margin values (might be negative)
- Position settings (absolute positioning can cause overlaps)
Unexpected spacing
If you're seeing too much space between elements:
- Check margin settings
- Look for default margins on elements like paragraphs
- Consider using a container to group elements
Element sizing issues
If an element isn't the size you expect:
- Verify the width/height settings
- Check padding values
- Consider if the parent container is constraining the element
Debugging the box model
To better understand how elements are sized and positioned:
- Select the element on the canvas
- Look at the
Styletab to see all applied properties - Temporarily add a border to visualize the element's boundaries