Appearance
Intro to workflows
Workflows are sequences of actions that automate tasks in your WeWeb application. They allow you to create dynamic, interactive experiences by defining what happens when specific events occur - such as a user clicking a button, submitting a form, or when a page loads.
Understanding workflows
Every workflow consists of two main components:
- Trigger — The event that starts the workflow (e.g., a button click, page load, or form submission)
- Actions — The sequence of steps that WeWeb performs when the trigger occurs
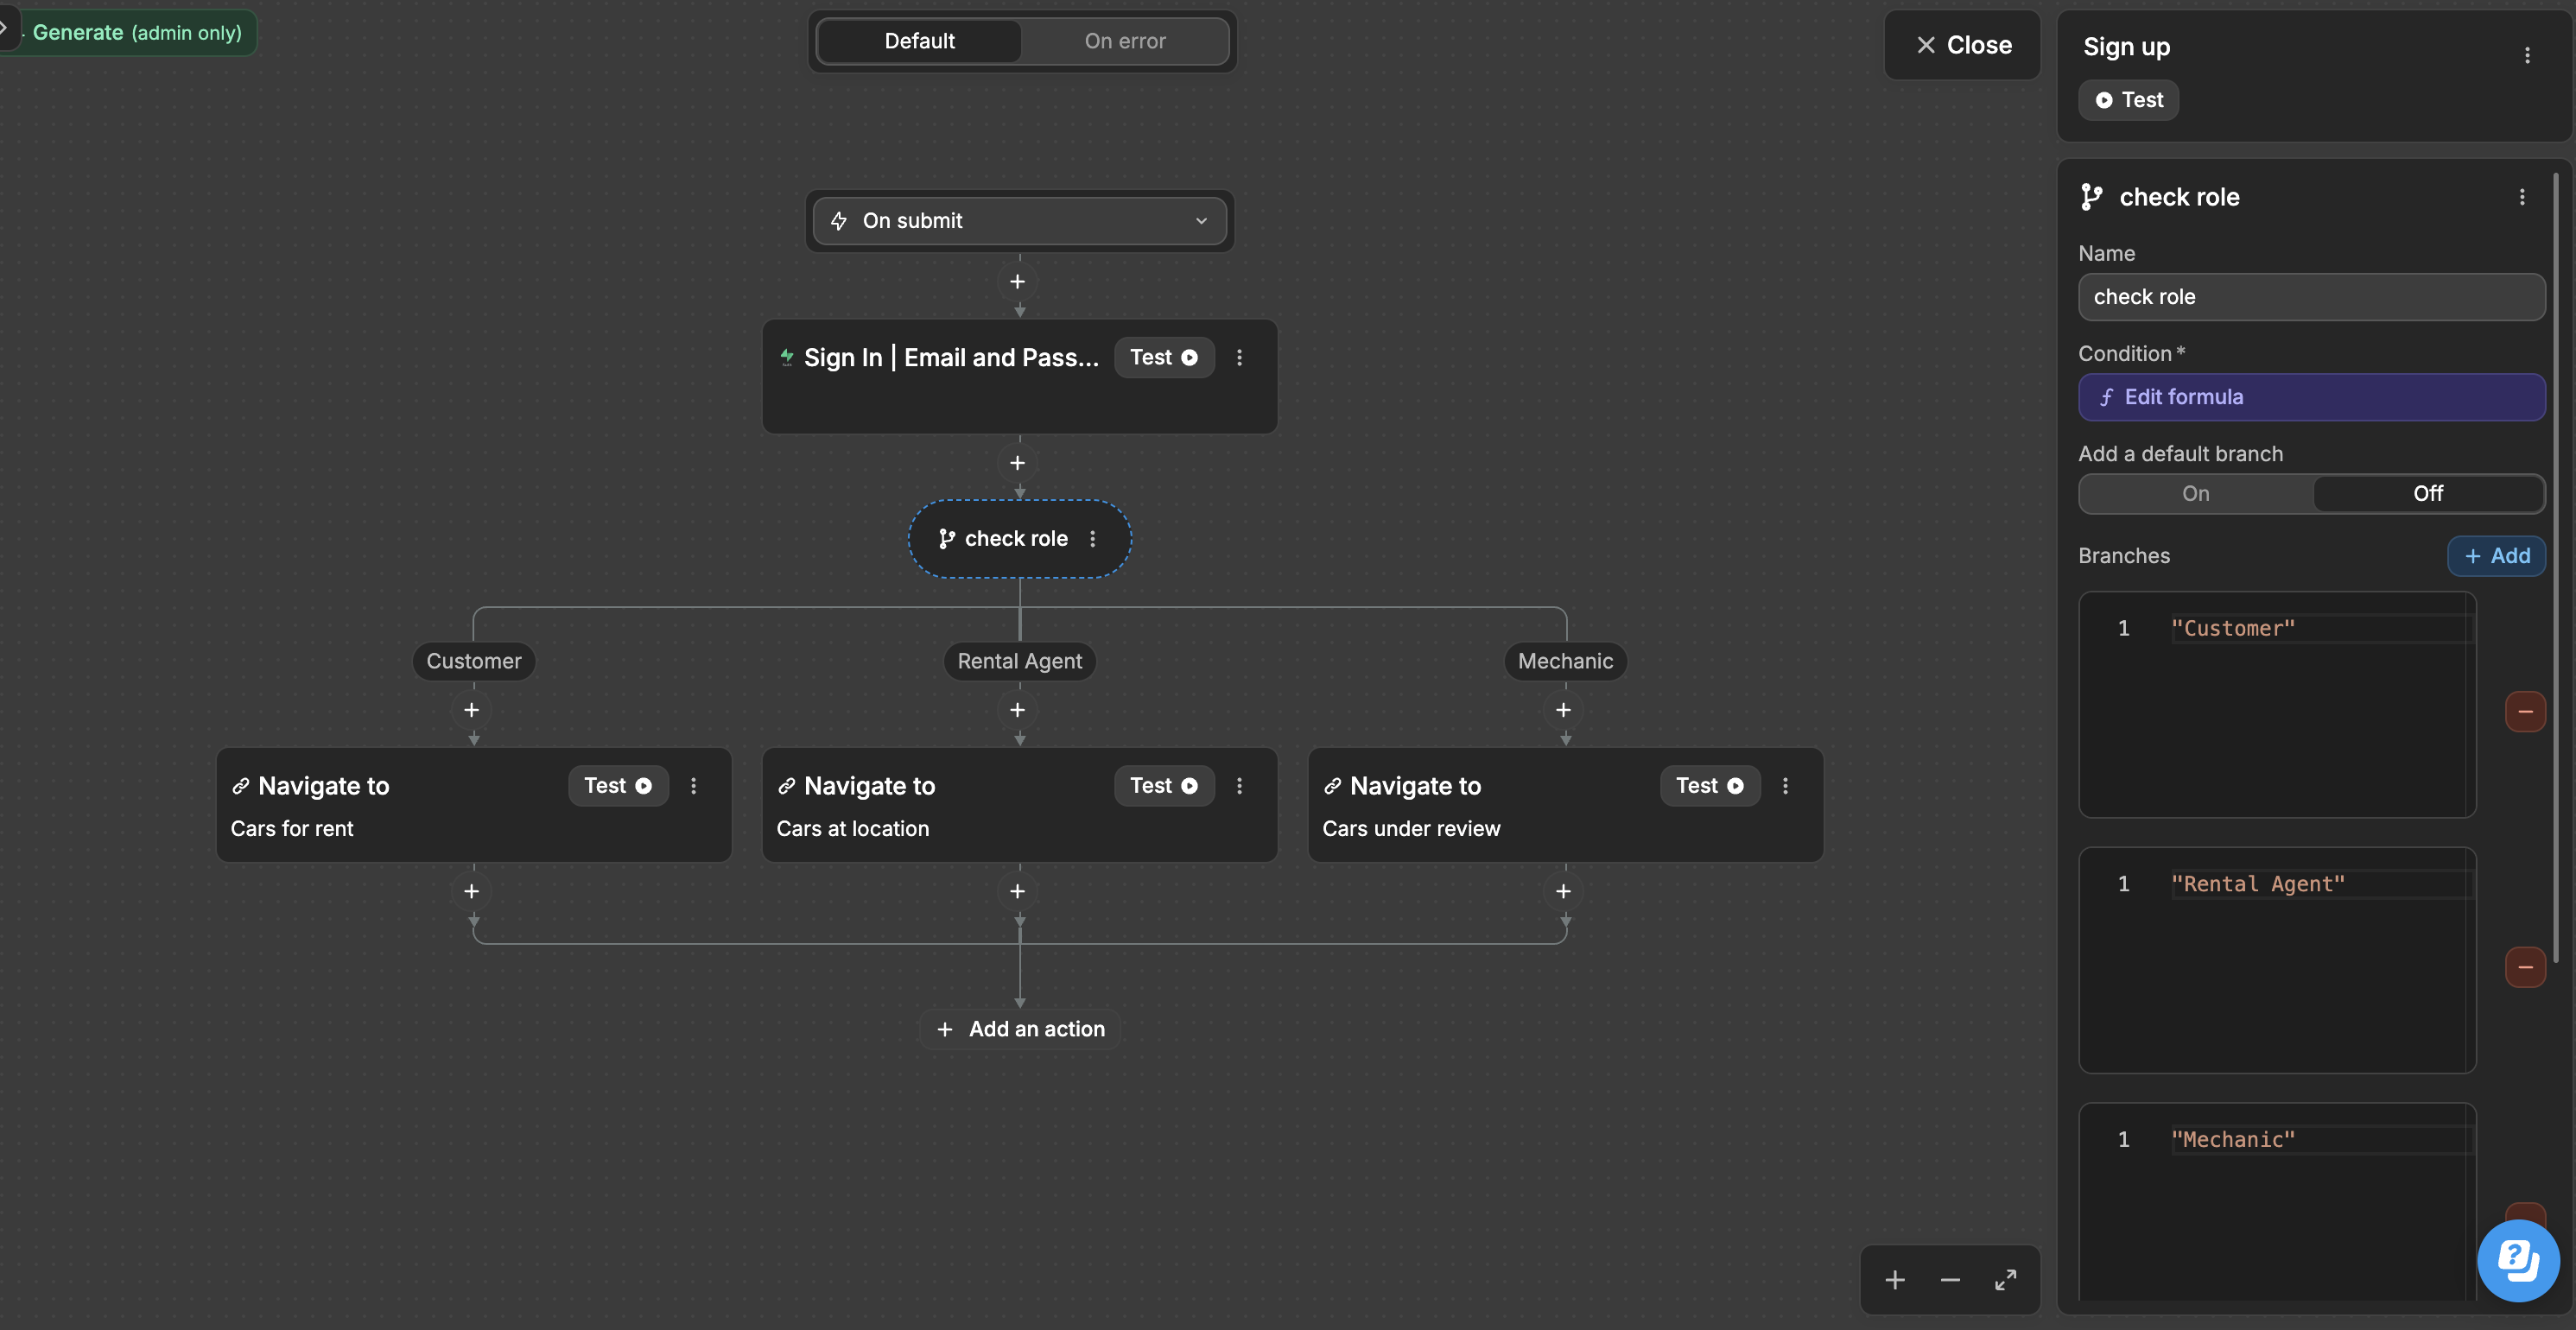
For example, when a user submits a sign in form (On submit) trigger, you might want to:
- Sign the user in
- Check their role
- Navigate them to the appropriate page
Creating your first workflow
To create a local workflow:
- Select the element you want to add a workflow to
- In the right panel, open the
Workflowstab - Click
Newto create a new workflow - Open the trigger select
- Select the trigger you want to use
- Click
Add an action - Select the action you want to add to the workflow
- Configure the action
- Once created, you can test the workflow in
Preview - In the
Debugpanel, open theVariablestab to see real-time changes - Click the element to trigger the workflow created
In this example:
- We select an element (in this case, a button)
- Create a new workflow on the element
- Select the trigger to use (
On click) - Define the actions (increment the value of our
Counter Valuevariable) - Test the workflow in
Previewmode (with the live value of the variable open in theDebugpanel)
Types of workflows in WeWeb
WeWeb offers four different types of workflows, each with its own scope and purpose:
Local workflows
Local workflows are attached to specific elements and are triggered by interactions with those elements. They're perfect for handling element-specific actions, like validating input fields or toggling visibility.

Functions
Functions are defined once in the Workflows tab in the left panel of the Interface tab and can be reused throughout your application. They help you maintain consistency and reduce duplication by centralizing common workflow logic.
Functions are ideal for:
- Complex logic that needs to be reused in multiple places
- Standardized processes like user authentication or data validation
- Workflows that might need to be updated across your application
TIP
When you find yourself creating similar workflows in multiple places, consider converting them to reusable workflows. This makes maintenance easier and ensures consistent behavior throughout your application.
Learn more about how to create and reuse reusable workflows
Page Trigger workflows
Page Trigger workflows apply to an entire page and can be triggered by page-level events such as page load or page scroll. They're useful for page-specific initialization or cleanup tasks.
To access Page Trigger workflows:
- In the left panel of the
Interfacetab, open theWorkflowstab - In the
Workflowspanel, select thePage Triggerstab - Choose which page you want to add workflows to from the dropdown
- Click
Newto create a new page workflow
Page Trigger workflows are especially useful for:
- Loading data when a page initializes
- Setting up page-specific variables
- Tracking page views
App Trigger workflows
App Trigger workflows operate at the application level and run across your entire website. They're ideal for site-wide functionality like authentication checks or analytics tracking.
To access App Trigger workflows:
- In the left panel of the
Interfacetab, open theWorkflowstab - In the
Workflowspanel, select theApp Triggerstab - Click
Newto create a new app workflow
App Trigger workflows are perfect for:
- Site-wide analytics
- User preference management
- Feature flags and site-wide settings
Managing workflows
As your application grows, managing workflows becomes increasingly important:
Finding reusable workflows
To find a project workflow in the editor:
- In the
Interfacetab, open theWorkflowsicon in the left sidebar - Select the
Functionstab - Use the search bar to find the workflow by name
You can also open a workflow from the Execute workflow action picker when building interface workflows.
This helps you track reusable logic and avoid breaking functionality when making changes.
Naming conventions
Always use clear, descriptive names for your workflows:
✅ Good: "ValidateUserInput", "SendWelcomeEmail", "UpdateCartTotal"
❌ Bad: "NewWorkflow", "Workflow1", "MyWorkflow"
Consistent naming makes debugging easier and improves team collaboration.
Best practices for workflows
- Keep workflows focused — Each workflow should handle a specific task
- Use reusable workflows for reusable logic — If you find yourself duplicating workflows, create a reusable version
- Error handling — Set up error workflows to gracefully handle failures
- Testing — Use the
Debugpanel to verify your workflows behave as expected - Documentation — Add comments to complex workflows to explain their purpose
Interface Workflows vs APIs
Workflows in the Interface section run in the user's browser and are great for UI logic. For secure operations (like creating records in tables, validating input, or using secrets), create an API in the Data & API tab and call it from your workflow.
CONTINUE LEARNING
Ready to dive deeper into workflows? Learn about the different types of triggers available: