Appearance
Adding interactivity to your app
After adding elements to your page and styling them, the next step is to make your app interactive. Interactivity is what transforms a static webpage into a dynamic application that responds to user actions.
The building blocks of interactivity
Creating interactive experiences in WeWeb involves three key components:
- Variables — Store and track changing information
- Workflows — Execute a set of actions when a trigger occurs, like a button click or hovering over an element
- Binding — Connect your variables to visual elements
Let's explore each of these components and how they work together.
Creating variables
Variables are containers that store information in your application. They allow you to keep track of changing data, like:
- A user's name or account details
- The number of items in a shopping cart
- Whether a dropdown menu is open or closed
- The current step in a multi-step form
How to create a variable
Here's a short interactive tutorial on creating a variable:
The steps are:
- In the left panel of the
Interfacetab, open theVariablestab - Click
Add Variableto create a new variable - Give your variable a name
- Choose a variable type (Text, Number, Boolean, etc.)
- Optionally set a default value
- Decide if you want the variable preserved on navigation or saved in local storage
Your changes save automatically as you edit the variable.
Common variable types
- Text — For storing words, names, descriptions
- Number — For counters, prices, quantities
- Boolean — For true/false states (on/off, visible/hidden)
- Object — For storing complex grouped data, like a user's information
- Array — For lists of items
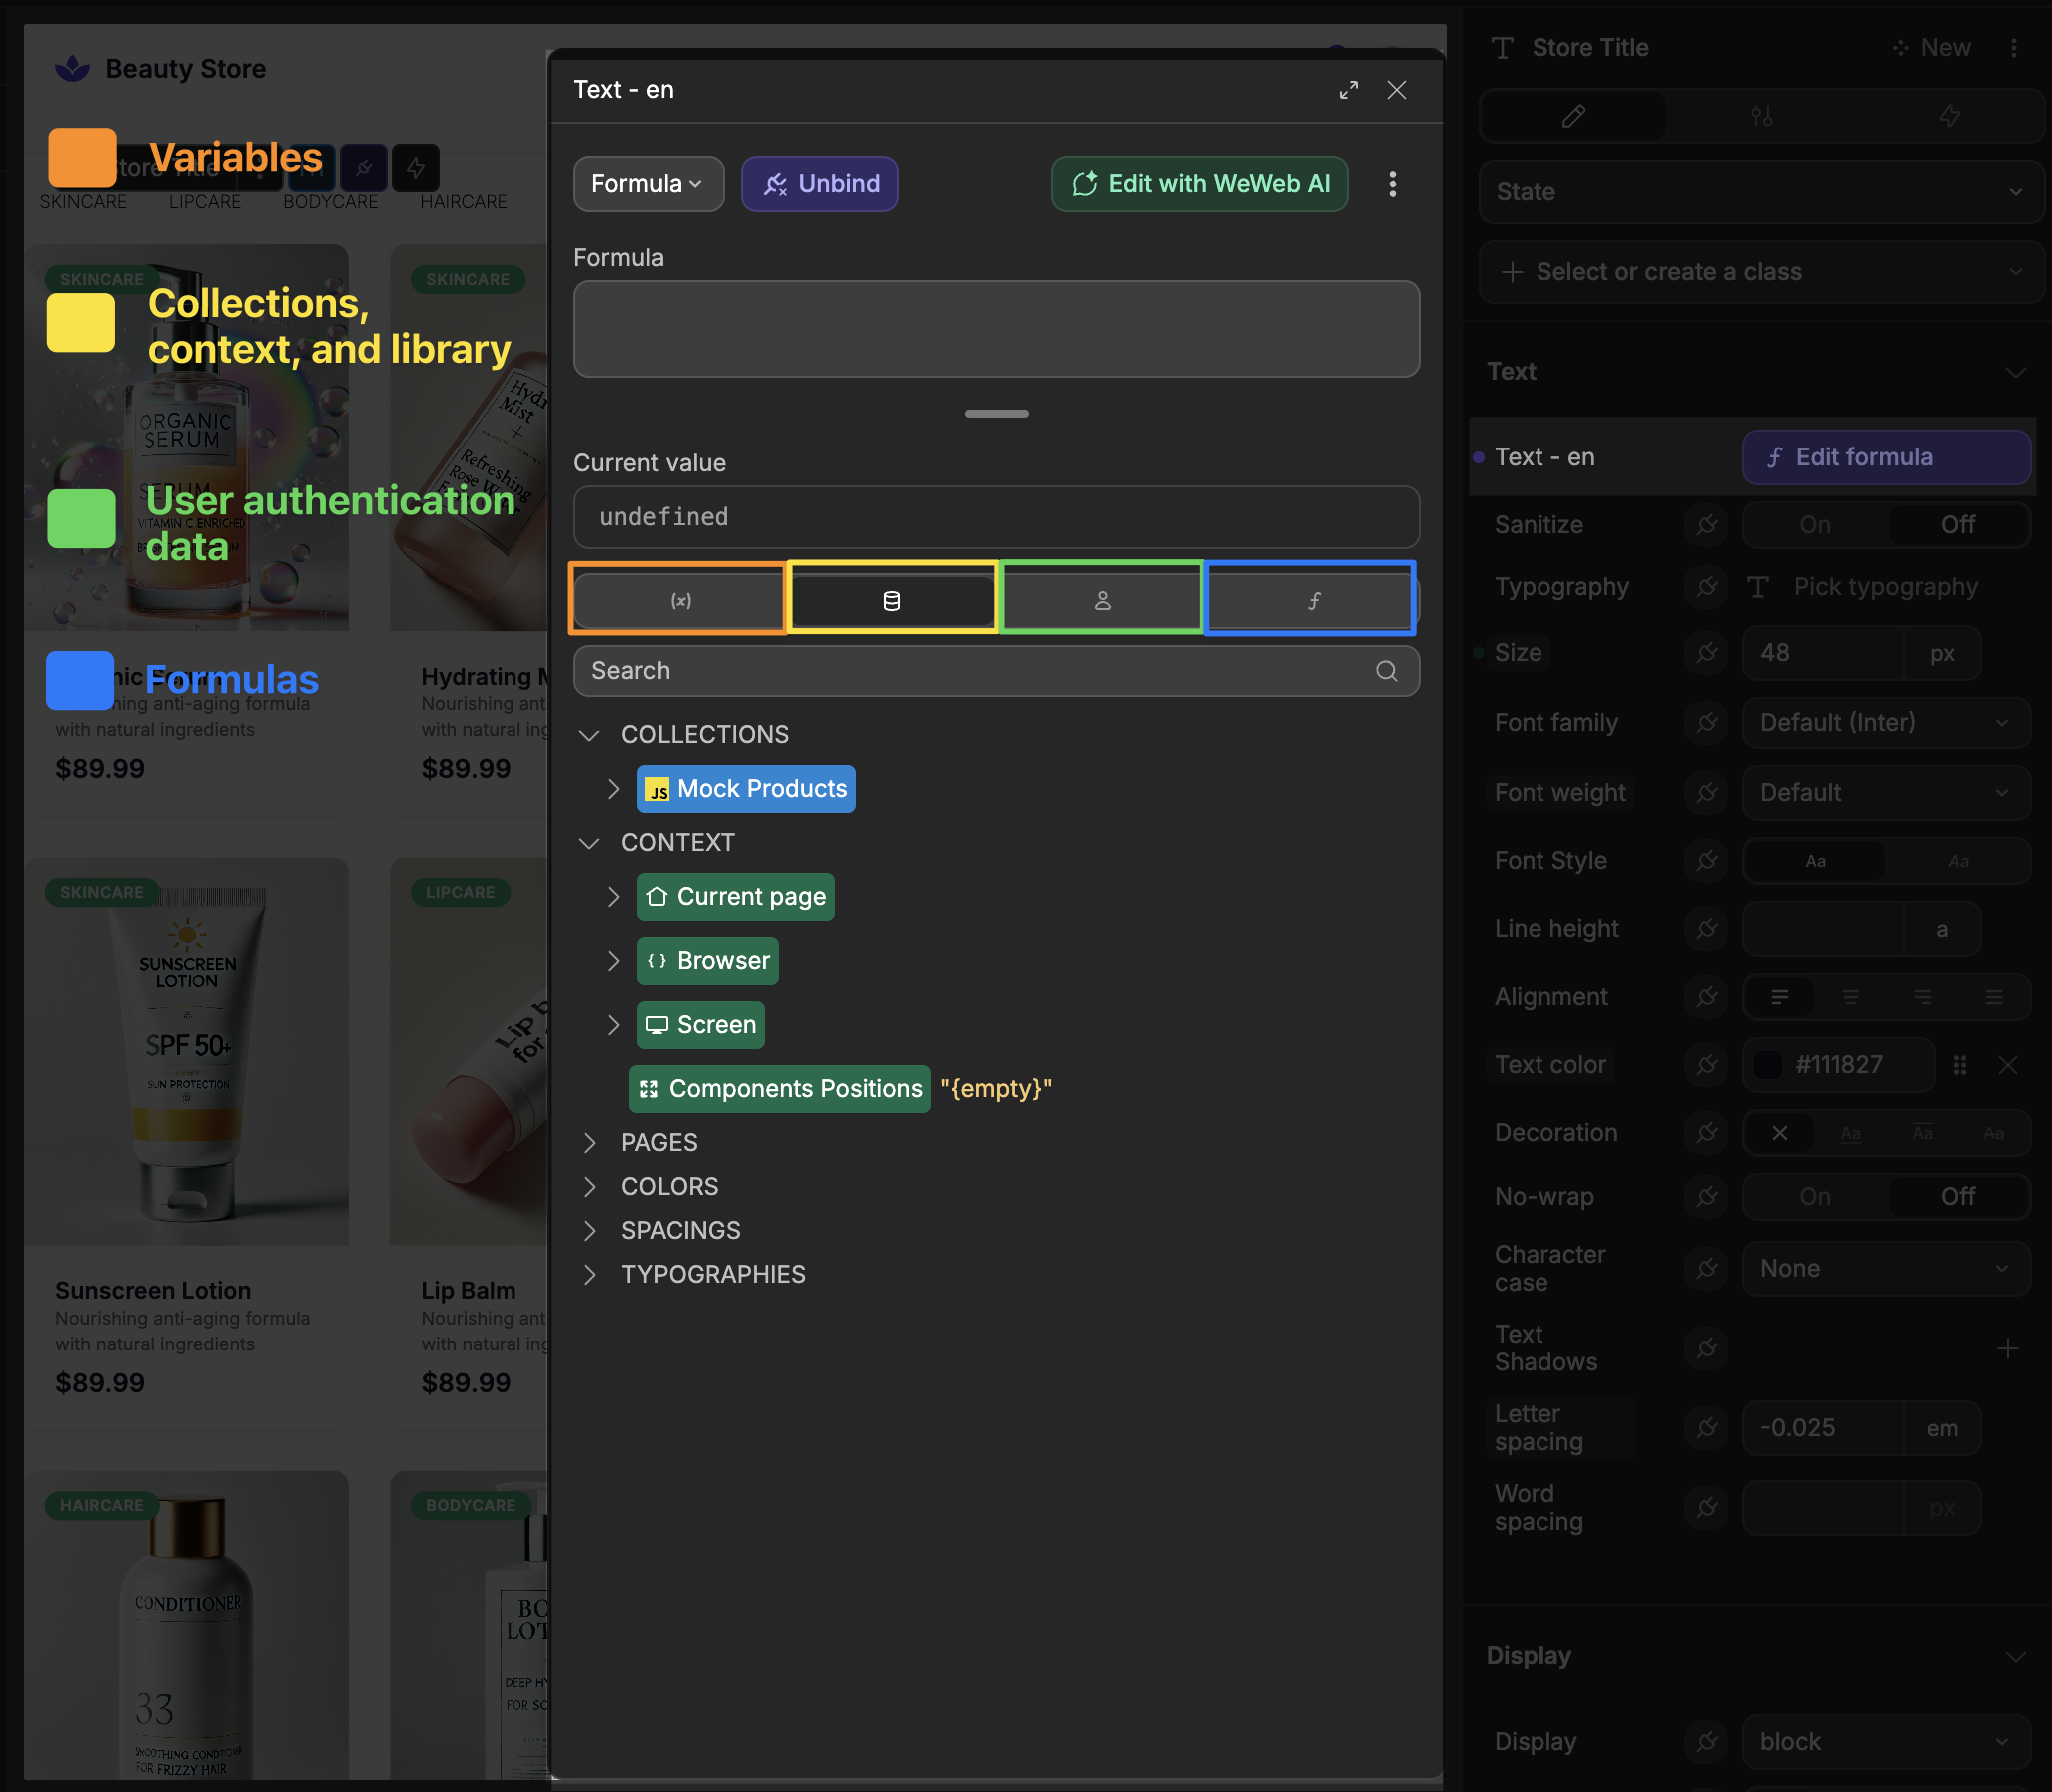
Binding properties to create dynamic experiences
Binding connects your variables (or table views) to your UI elements, creating dynamic experiences that change based on user interactions or data.
How to bind properties
To bind a property in WeWeb, click on the plug icon beside the property:
You'll then see the formula window, where you can bind any formula or data:
 -->
-->
Here's how to bind a text element to display a user's name:
- Click on the text element you want to bind.
- Click the binding icon beside the text content property.
- In the binding window, open the
Authenticationtab. - Expand the
userdata object. - Select the
namefield. - View in
Preview.
Binding styling properties
You can also bind styling properties to create visual feedback based on data or user interactions. Here's an example of conditionally displaying a warning message:
- Click on the warning element.
- Click the binding icon beside the display property.
- Select the value of the checkbox.
- Click on
Preview. - When the checkbox is clicked, the warning appears.
What you can bind
Almost any property in WeWeb can be bound to variables:
- Content — Change text, images, or other content
- Styling — Modify colors, sizes, or visibility
- Repeating items — Show multiple elements from a list
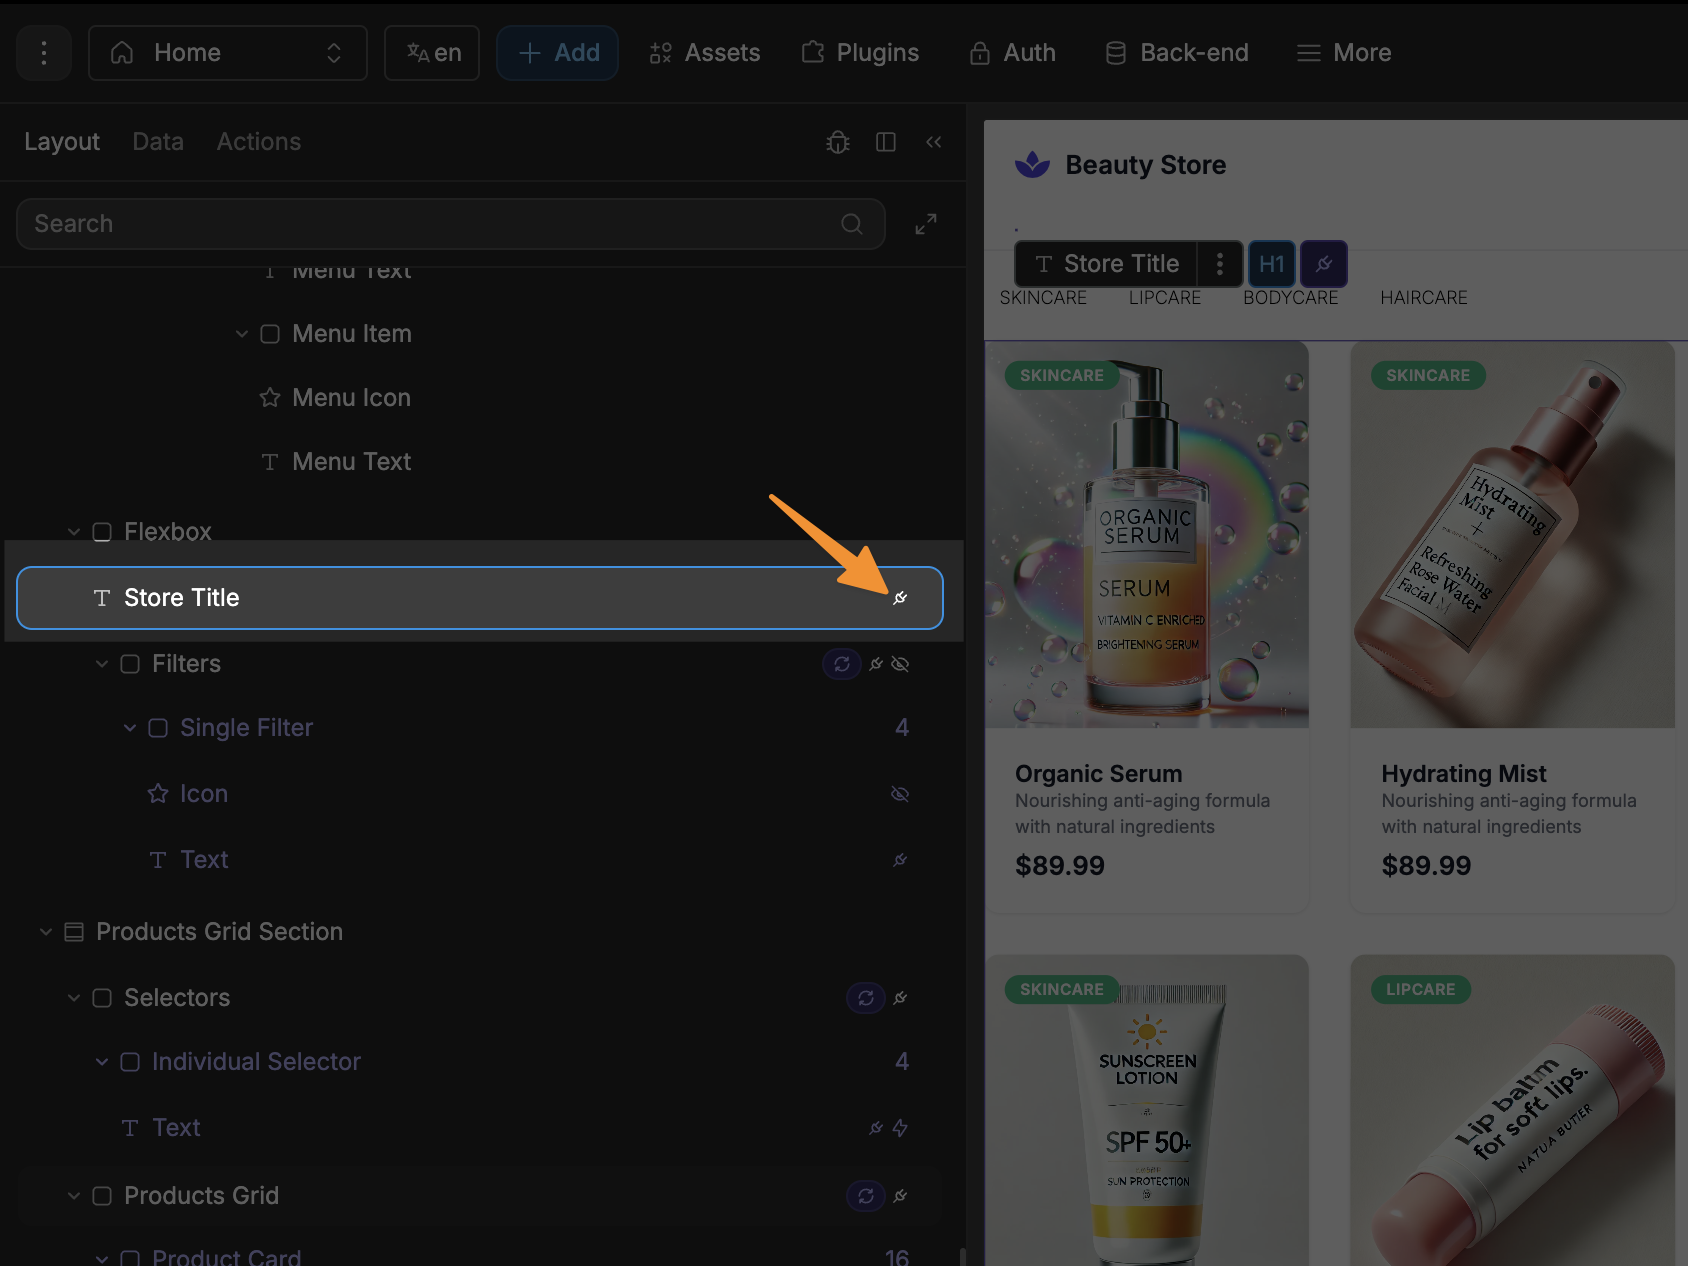
VISUALLY IDENTIFYING BOUND PROPERTIES
Bound properties can always be identified by their purple visual appearance:

OR
You can also identify when an element has a bound property, as it will have a plug icon beside it in the layout tree:
Advanced example: styling based on user input
Here's a more complex example where we change the background color of an input field based on password length:
- Select the element you want to style.
- Open the binding menu of the property you want to style.
- Click on
Edit with WeWeb AI. - Input your prompt.
- Pass in the relevant data.
- Submit.
- Once the formula is generated, test in
Preview.
In this example, we're using WeWeb AI to create a binding that changes the input's background color to green when the password is long enough and red when it's too short.
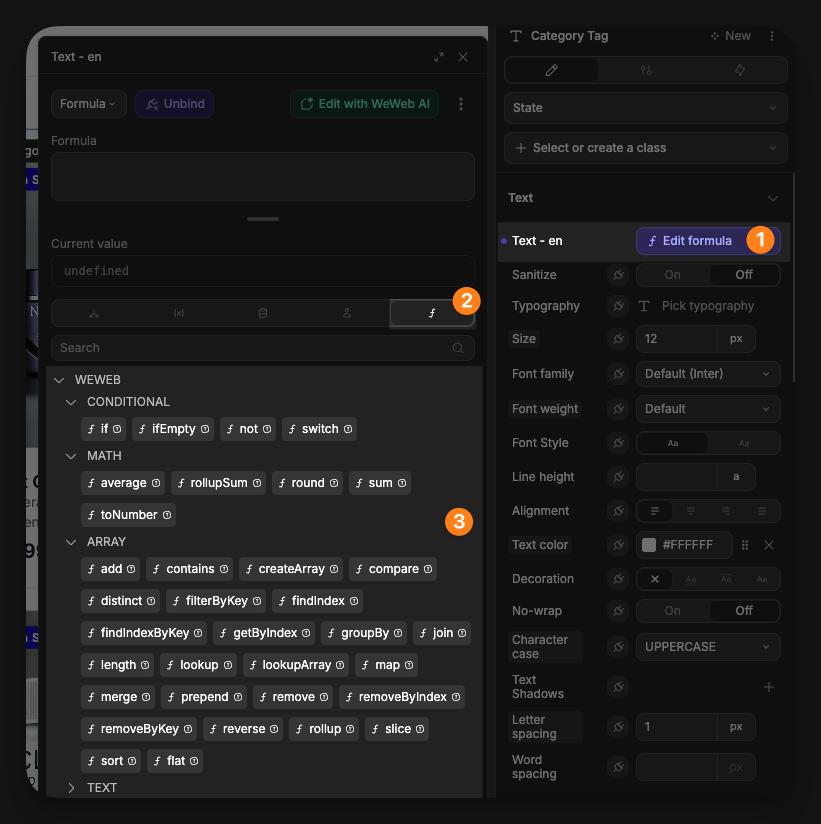
Using formulas to transform data
Formulas are powerful tools that allow you to manipulate and transform data in your application. They act as the logic layer between your data and how it's displayed or used.
What are formulas?
Formulas in WeWeb let you:
- Transform data (like formatting text, dates, or numbers)
- Create conditional logic (if/else statements)
- Perform calculations
- Combine multiple pieces of data
To use formulas:
- Open the binding window by clicking the plug icon
- In the binding window, open the
Formulastab - Select from available formulas or write custom JavaScript
Examples of formula use
- Displaying a user's full name by combining first and last name
- Showing "In stock" or "Out of stock" based on inventory numbers
- Formatting currency values properly
- Calculating totals or percentages
Formulas can be used directly in bindings, or created as global formulas to reuse throughout your application.
Building workflows
Workflows define what happens when users interact with your app. They consist of triggers (what starts the workflow) and actions (what happens next).
Creating a simple workflow
Here's an interactive tutorial on creating a workflow, where:
- We select an element (a button)
- Create a new workflow on the element
- Select the trigger to use (
On click) - Define the actions (increment a counter variable)
- Test the workflow in Preview mode
Common triggers
- On click — When an element is clicked
- On change — When text is entered in an input
- On submit — When a form is submitted
Common actions
- Change variable value — Change a variable's value
- Navigate to — Go to another page
- Table View: Fetch — Retrieve records from a table view in Data & API
Best practices for interactive elements
When adding interactivity to your WeWeb app:
- Use descriptive variable names — That clearly indicate what they store
- Provide visual feedback — To users when their actions trigger changes in the app
- Test your interactions — Frequently to ensure they work as expected
- Use project workflows — For functionality you'll reuse across your app
CONTINUE LEARNING
Now that you know how to add basic interactivity to your app, learn how to choose the right backend for your application: