Appearance
Import Figma designs
Bring your Figma designs directly into WeWeb with pixel-perfect accuracy, including colors, images, and fonts.
Use the WeWeb Figma plugin
Install and open the WeWeb – Figma to no‑code plugin from the Figma Community. You’ll use it to export a selected frame and copy a JSON representation to your clipboard for importing into WeWeb.
To find and install it in Figma:
- Open a Figma design file.
- Click
Actionsin the toolbar. - Open the
Plugins & widgetstab. - Search the Community for
WeWeb. - Select
WeWeb – Figma to no-codeand save or run the plugin to add it to your account.
ALTERNATIVE: FIGMA MENU
You can also click the Figma menu in the top-left corner, hover over Plugins, then click Manage plugins or Find more plugins to search for and install WeWeb – Figma to no-code.
Understanding Auto Layout
The quality of your import depends heavily on whether your Figma design uses Auto Layout. This concept is crucial for getting the best results.
For the best results, we strongly recommend using Auto Layout in your Figma designs and keeping layers clearly named.
What is Auto Layout?
Auto Layout is a Figma feature that controls how elements inside a frame position themselves relative to one another. Think of it like telling elements how to behave when things change around them.
Without Auto Layout, elements have fixed positions that don't relate to other elements. You can drag elements anywhere within a frame, which works fine in Figma but doesn't translate well to web development.
With Auto Layout enabled, elements position themselves relative to each other. You can control spacing, padding, and alignment, and elements move together as a cohesive unit. This creates layouts that work perfectly on the web.
How to enable Auto Layout
To turn on Auto Layout for any frame in Figma, select your frame and look for the Auto Layout section in the Design panel on the right. Click the Auto Layout button (it looks like a grid icon), then configure the direction (vertical or horizontal), padding, and gap between elements.
WHY AUTO LAYOUT MATTERS
Auto Layout tells your elements how to behave relative to each other, just like they would on a real website. Without it, the import tool has to guess how your design should work, which often leads to layouts that don't look quite right.
Export from Figma with the WeWeb plugin
Once your design is ready, export it from Figma:
- Select the frame you want to export.
- Click
Actionsin the toolbar. - Open the
Plugins & widgetstab. - Select
WeWeb – Figma to no-code. - In the
Exporttab, clickExport to WeWeb. - Wait for the analysis to finish.
- Click
Copy to Clipboard.
You now have a JSON export ready to paste into WeWeb.
ALTERNATIVE: RIGHT-CLICK MENU
You can also right-click the canvas, hover over Plugins, and select WeWeb – Figma to no-code.
Import into WeWeb
Now you can bring your design into WeWeb.
- In the WeWeb editor, open the
Interfacetab. - In the left icon sidebar, click the
Figmaicon. - Click the
Figmaicon in theInterfaceleft sidebar to open the import wizard. - Click
Paste from clipboardin the bottom-right of the wizard and paste the JSON you copied from the WeWeb Figma plugin. - Review your design tokens. WeWeb detects colors, typography, spacing, and other tokens from your export. Anything that already exists in your project (for example, a color with the same name) is mapped automatically.
- Review your images. For each image, upload it as a new asset in your project or map it to an image that already exists. Images with matching names are mapped automatically.
- If your design uses Google Fonts, import them in the fonts step.
- Review the summary, then click
Finish.
Your design is added as a new section on the current page.
Map your design tokens
The design tokens step shows every token detected in your Figma export. Check that colors, text styles, and spacing values are mapped to the right project variables before moving on.
Handle your images
The images step lists every image found in your design. Upload new files or link to assets you already have in WeWeb so the imported layout uses the correct images.
Import Google Fonts
If your Figma design uses Google Fonts, the wizard lets you add them to your project during import so text renders with the right typefaces.
Confirm and finish
The final step summarizes what will be imported. When you click Finish, WeWeb inserts the design as a new section on the page you are editing.
Import only your design tokens (optional)
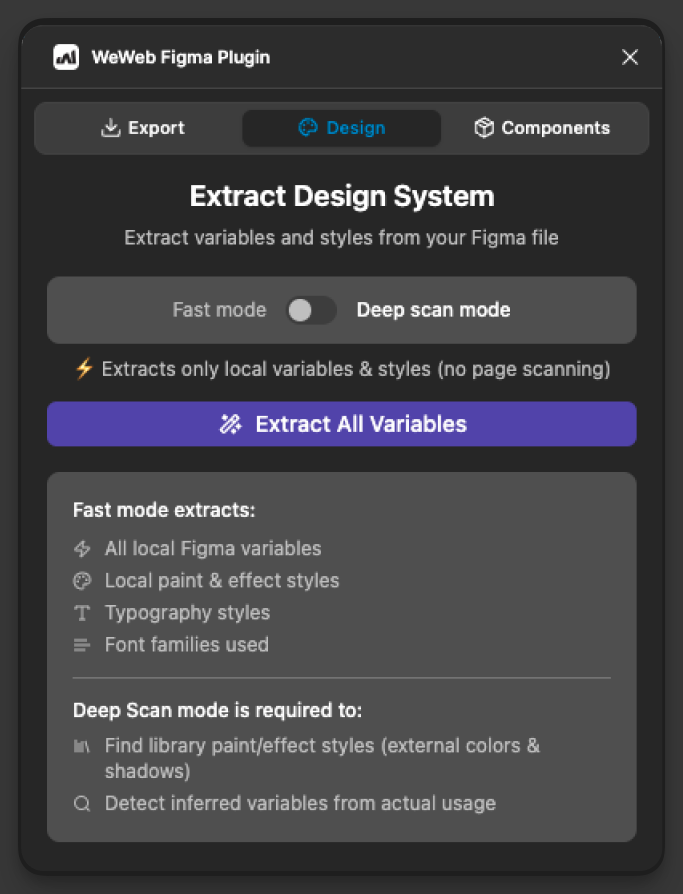
If you only want to import your design system (colors, typography, spacing, shadows) without any layout:
- In Figma, open the WeWeb plugin and go to the
Designtab - Choose
Fast modeto extract local variables and styles, or enableDeep scan modeto search all pages and detect library/external styles - Click
Extract All Variables, thenCopy JSON Data - In WeWeb, click the
Figmaicon in theInterfaceleft sidebar to open the import wizard, then paste from the clipboard — the Images step will be skipped - Finish the wizard to add the variables to your project's library
Fast vs Deep scan
Fast mode reads what is available locally in the file: variables, local paint/effect styles, typography styles, and the font families you used. It’s quick and ideal when all your tokens live in the current file.
Deep scan mode is slower because Figma doesn’t expose tokens from external libraries directly. Deep scan walks through the nodes of all frames in your file. Whenever it finds a token that comes from an external library, it collects it so you can bring it into WeWeb. Use this mode when your design relies on shared/library tokens and you need a complete set.
Map Figma components to WeWeb components
Use your real WeWeb components during import so your pages stay consistent:
- Open the plugin's
Componentstab in Figma - Browse coded and no‑code components from your WeWeb workspace and pick one
- With a Figma component selected, map each WeWeb prop to a Figma component property (for example, map a
labeltext prop or avariant) - Save the mapping. Next time this Figma component appears in an import, the mapped WeWeb component will be used automatically