

Appearance
Project settings
To open a project's settings, go to your WeWeb dashboard and click on the project's card in the Projects tab of your workspace. The project opens on its Deployments tab, with all its settings in the menu on the left:
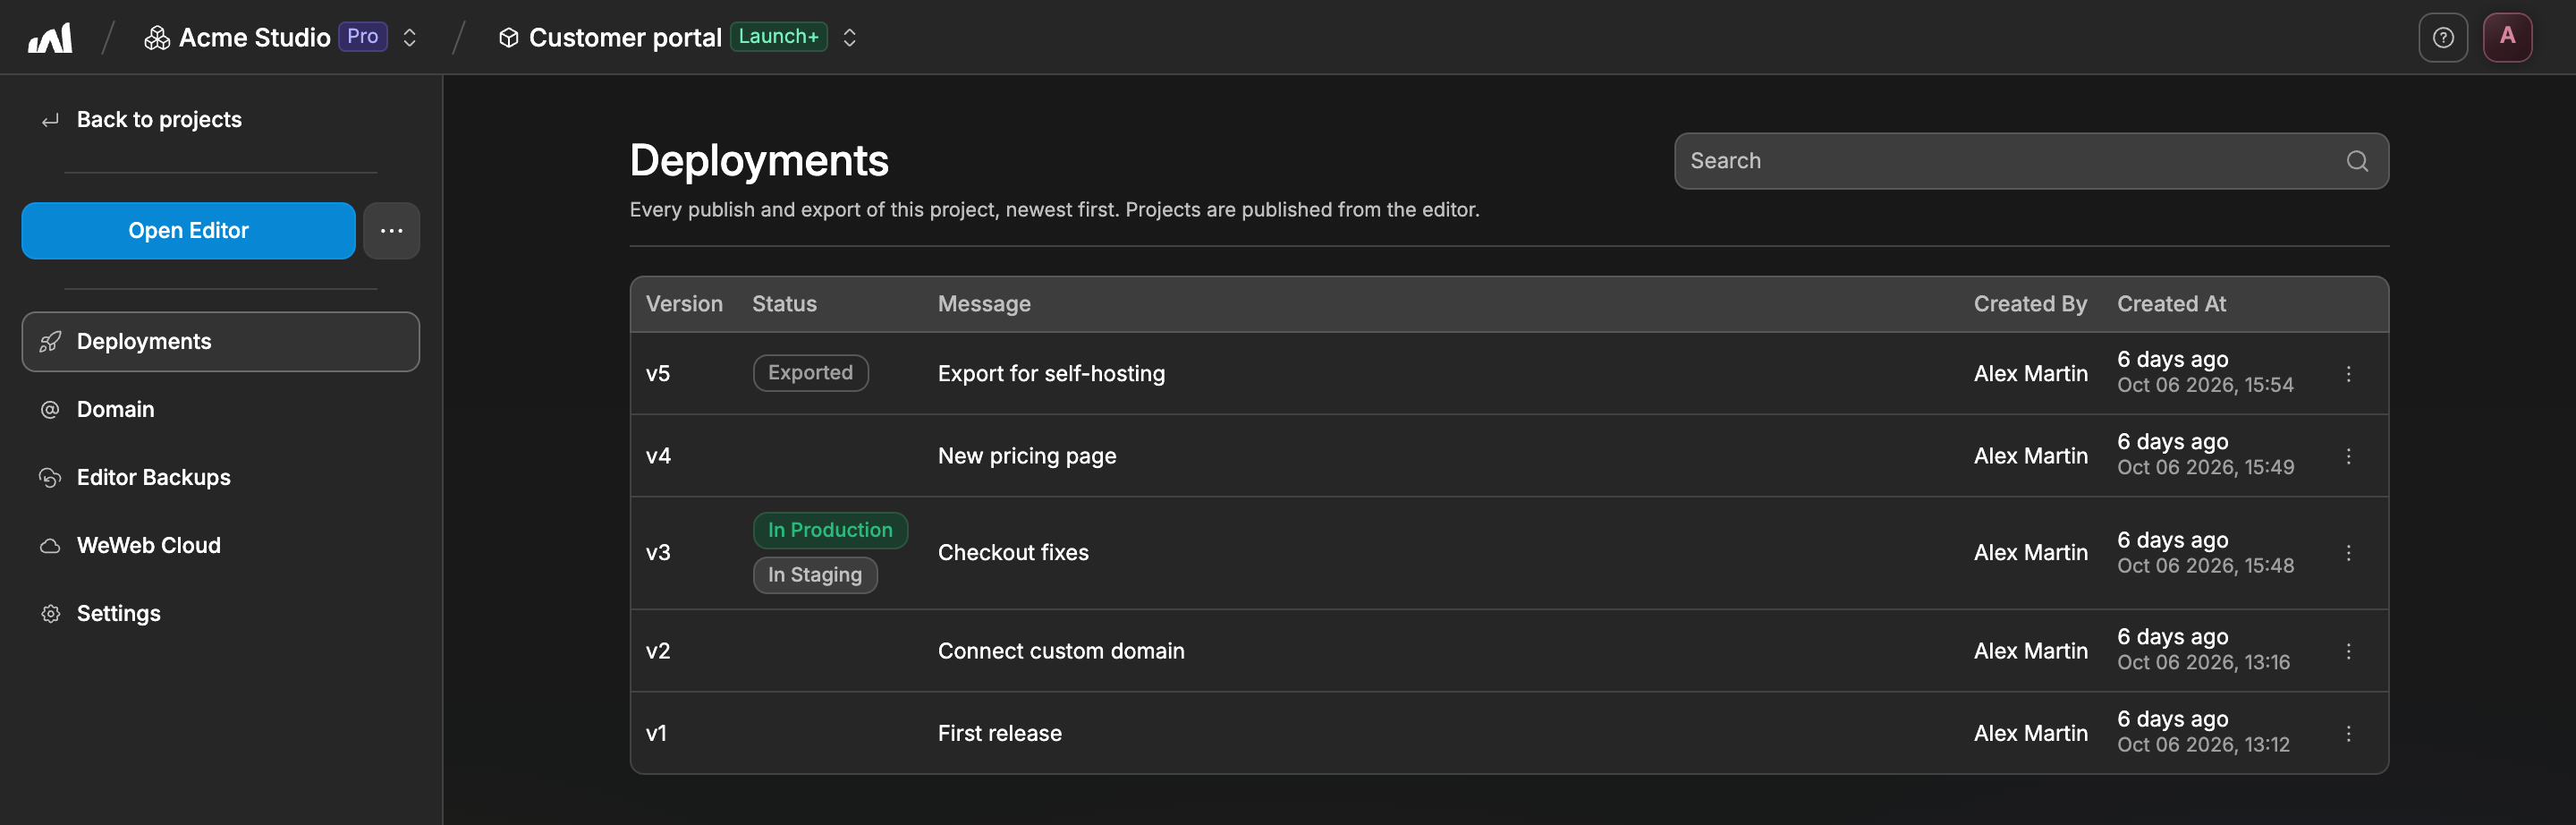
The menu holds 5 tabs:
- Deployments
- Domain
- Editor Backups
- WeWeb Cloud
- Settings
Above the tabs, the Open Editor button opens the project in the editor, and the three dots next to it let you open it in safe mode. Back to projects takes you back to your workspace.
Deployments
The Deployments tab lists every publication and export of your project, newest first. Publishing itself is done from the editor: the Publish button at the top right sends your app to staging or production.
From the three dots at the end of a row, you can read the logs of a publication and restore an earlier version to production. If your plan includes code export, you can also download the files of an export.
Learn more about WeWeb Deployments
Domain
In the Domain tab, you will be able to connect a custom domain to your WeWeb app.
Learn how to add a custom domain to your project
Editor Backups
The Editor Backups tab lists the saved versions of your project's editor. Click Rollback Editor on a row to bring your editor back to that state, even when the editor no longer loads. To create a backup yourself before a risky change, use the Settings tab of the editor.
Learn more about WeWeb Backups
WeWeb Cloud
The WeWeb Cloud tab is where you choose your project's hosting plan. It shows what your project used during the current billing cycle, the hosting plans you can switch to, and the add-ons you can subscribe to.
For example, this is where you go when you're ready to publish on your own domain and want to move away from the Free plan.
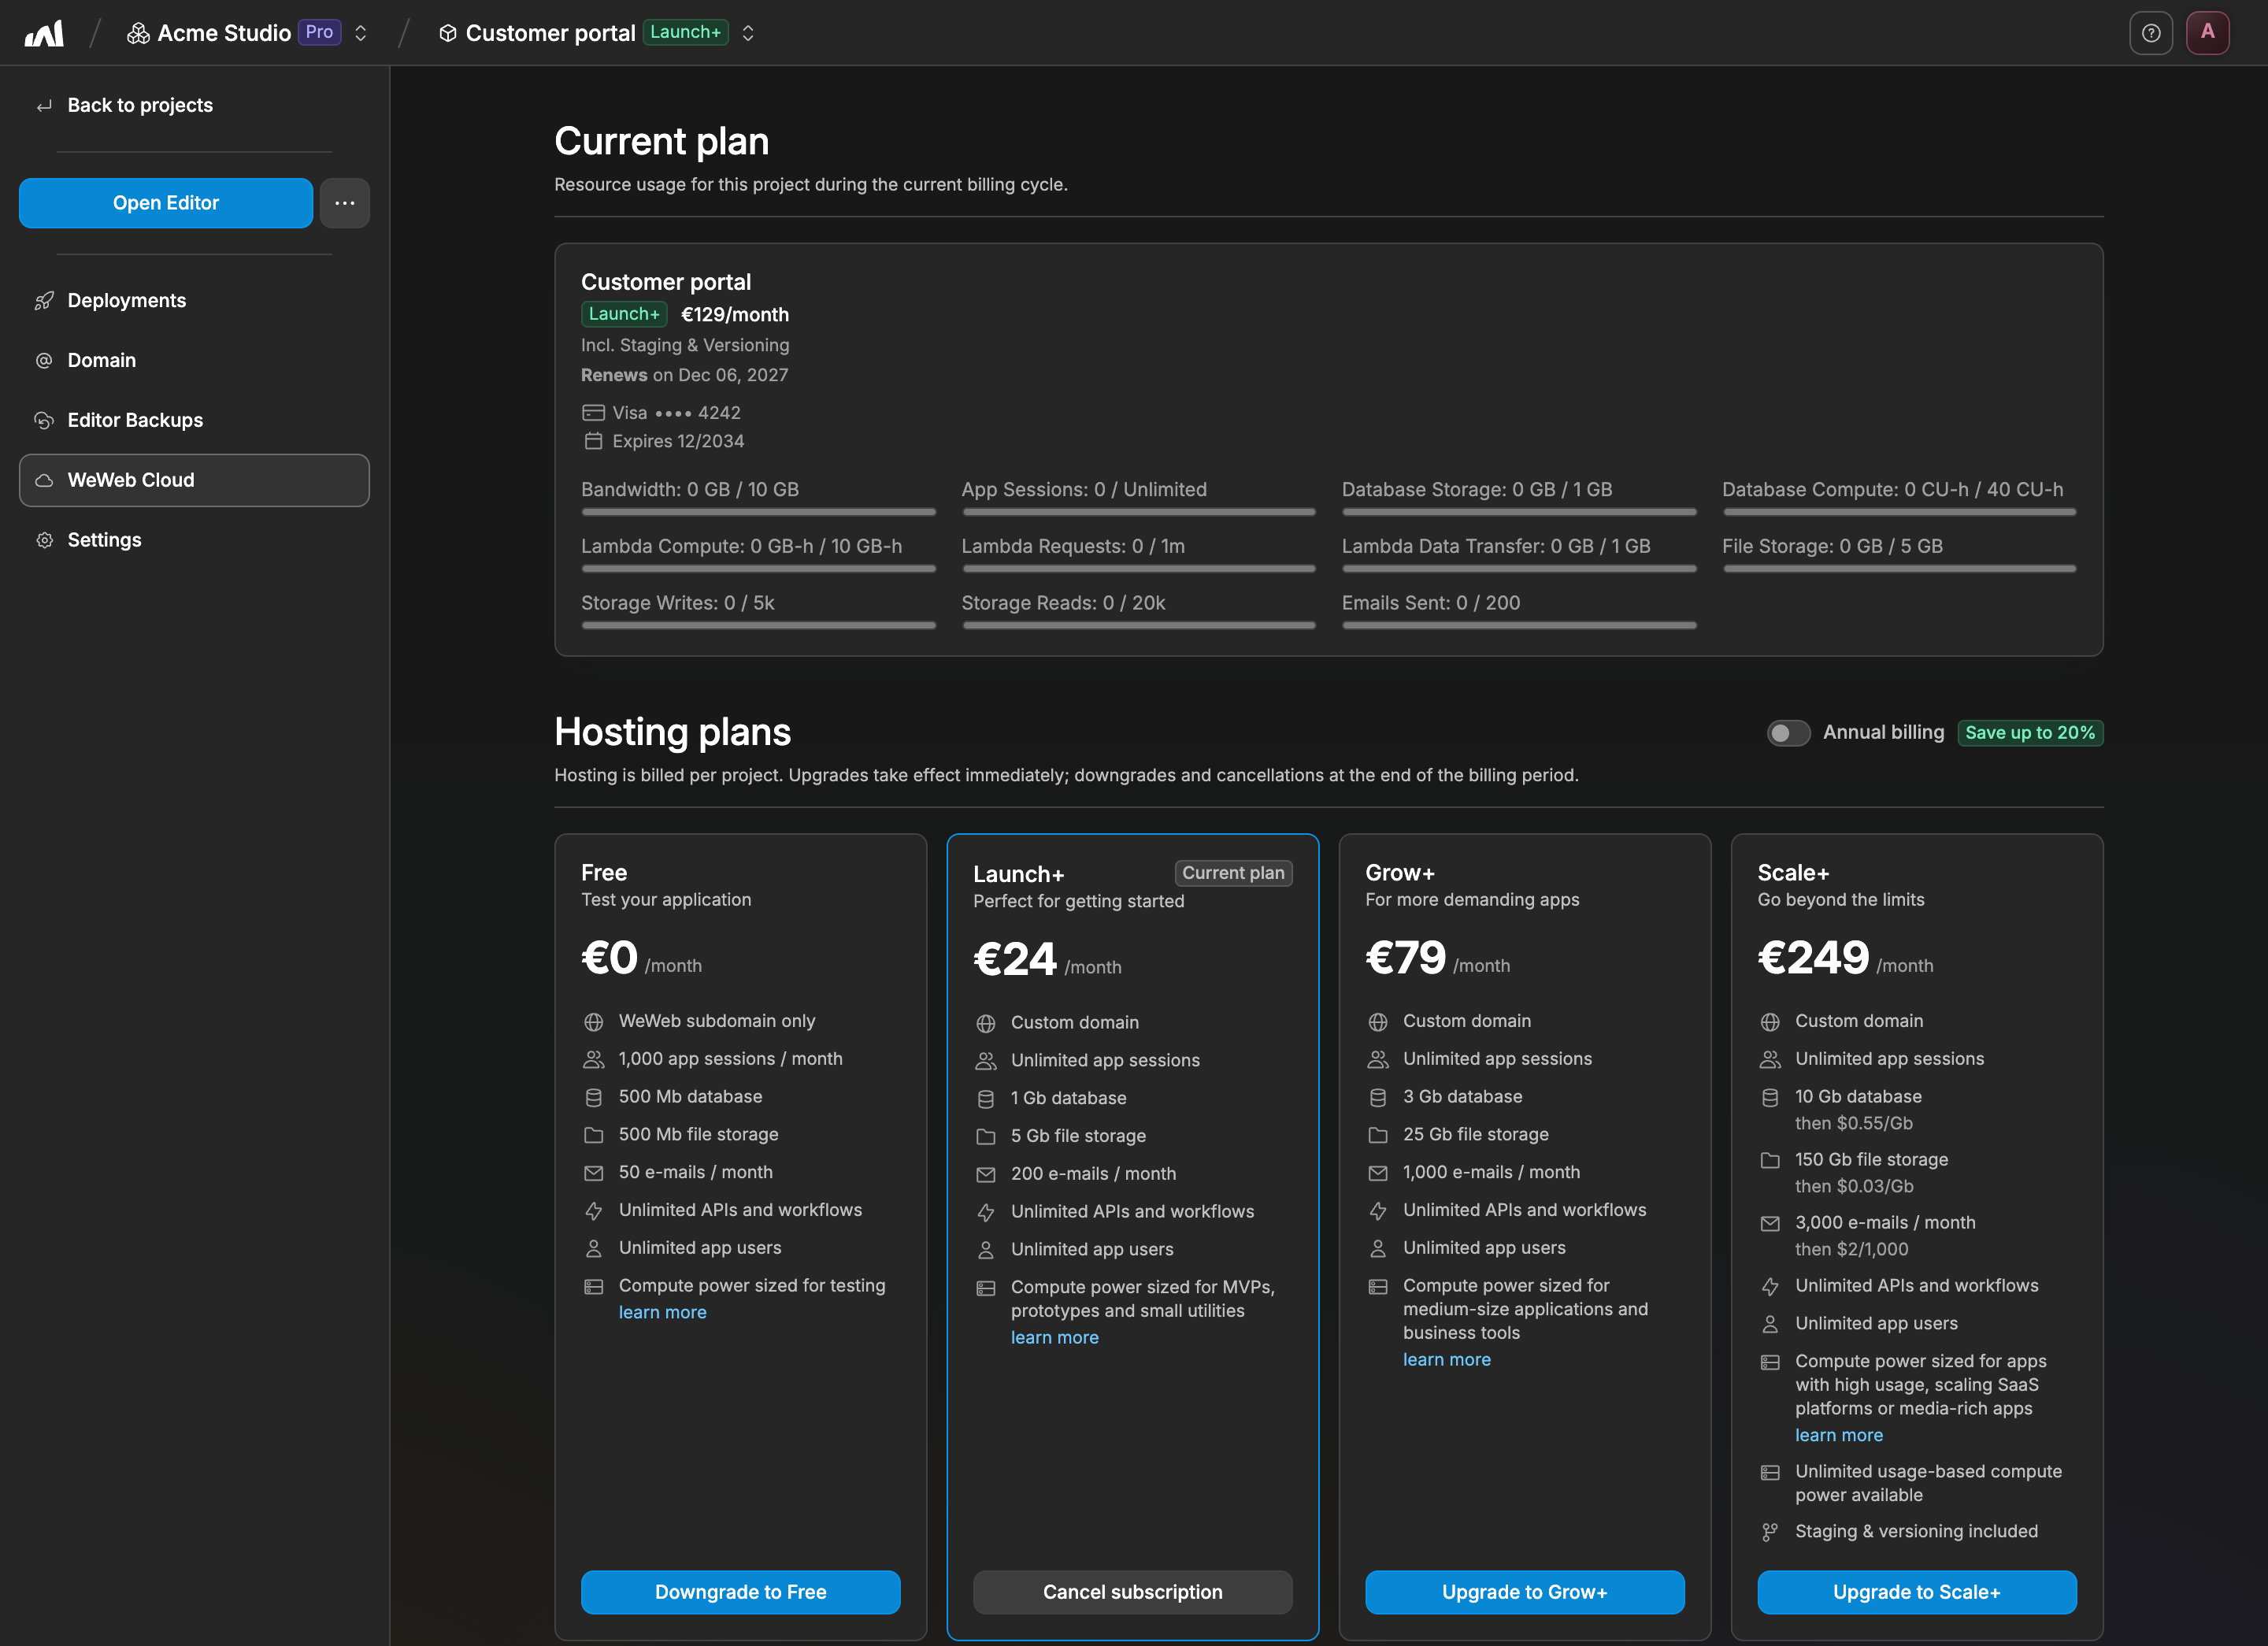
Upgrades take effect immediately. Downgrades and cancellations take effect at the end of the billing period.
TIP
The WeWeb Cloud tab only appears once your workspace has a seat plan, as hosting plans are added on top of it. Only the workspace Owner can change a project's hosting plan.
Settings
In the Settings tab, you can:
- Change the project name and copy the project ID
- Set up a deploy hook, a URL that WeWeb calls after every successful deployment
- Choose the GitHub repositories the project's code is pushed to
- Open the project's self-hosting settings, once your workspace has a weweb-server set up
- Unpublish the project, which takes every deployed version offline and detaches its custom domains
- Transfer the project to another workspace (on the Partner plan)
- Delete the project (beware, this is permanent and we won't be able to recover your project)
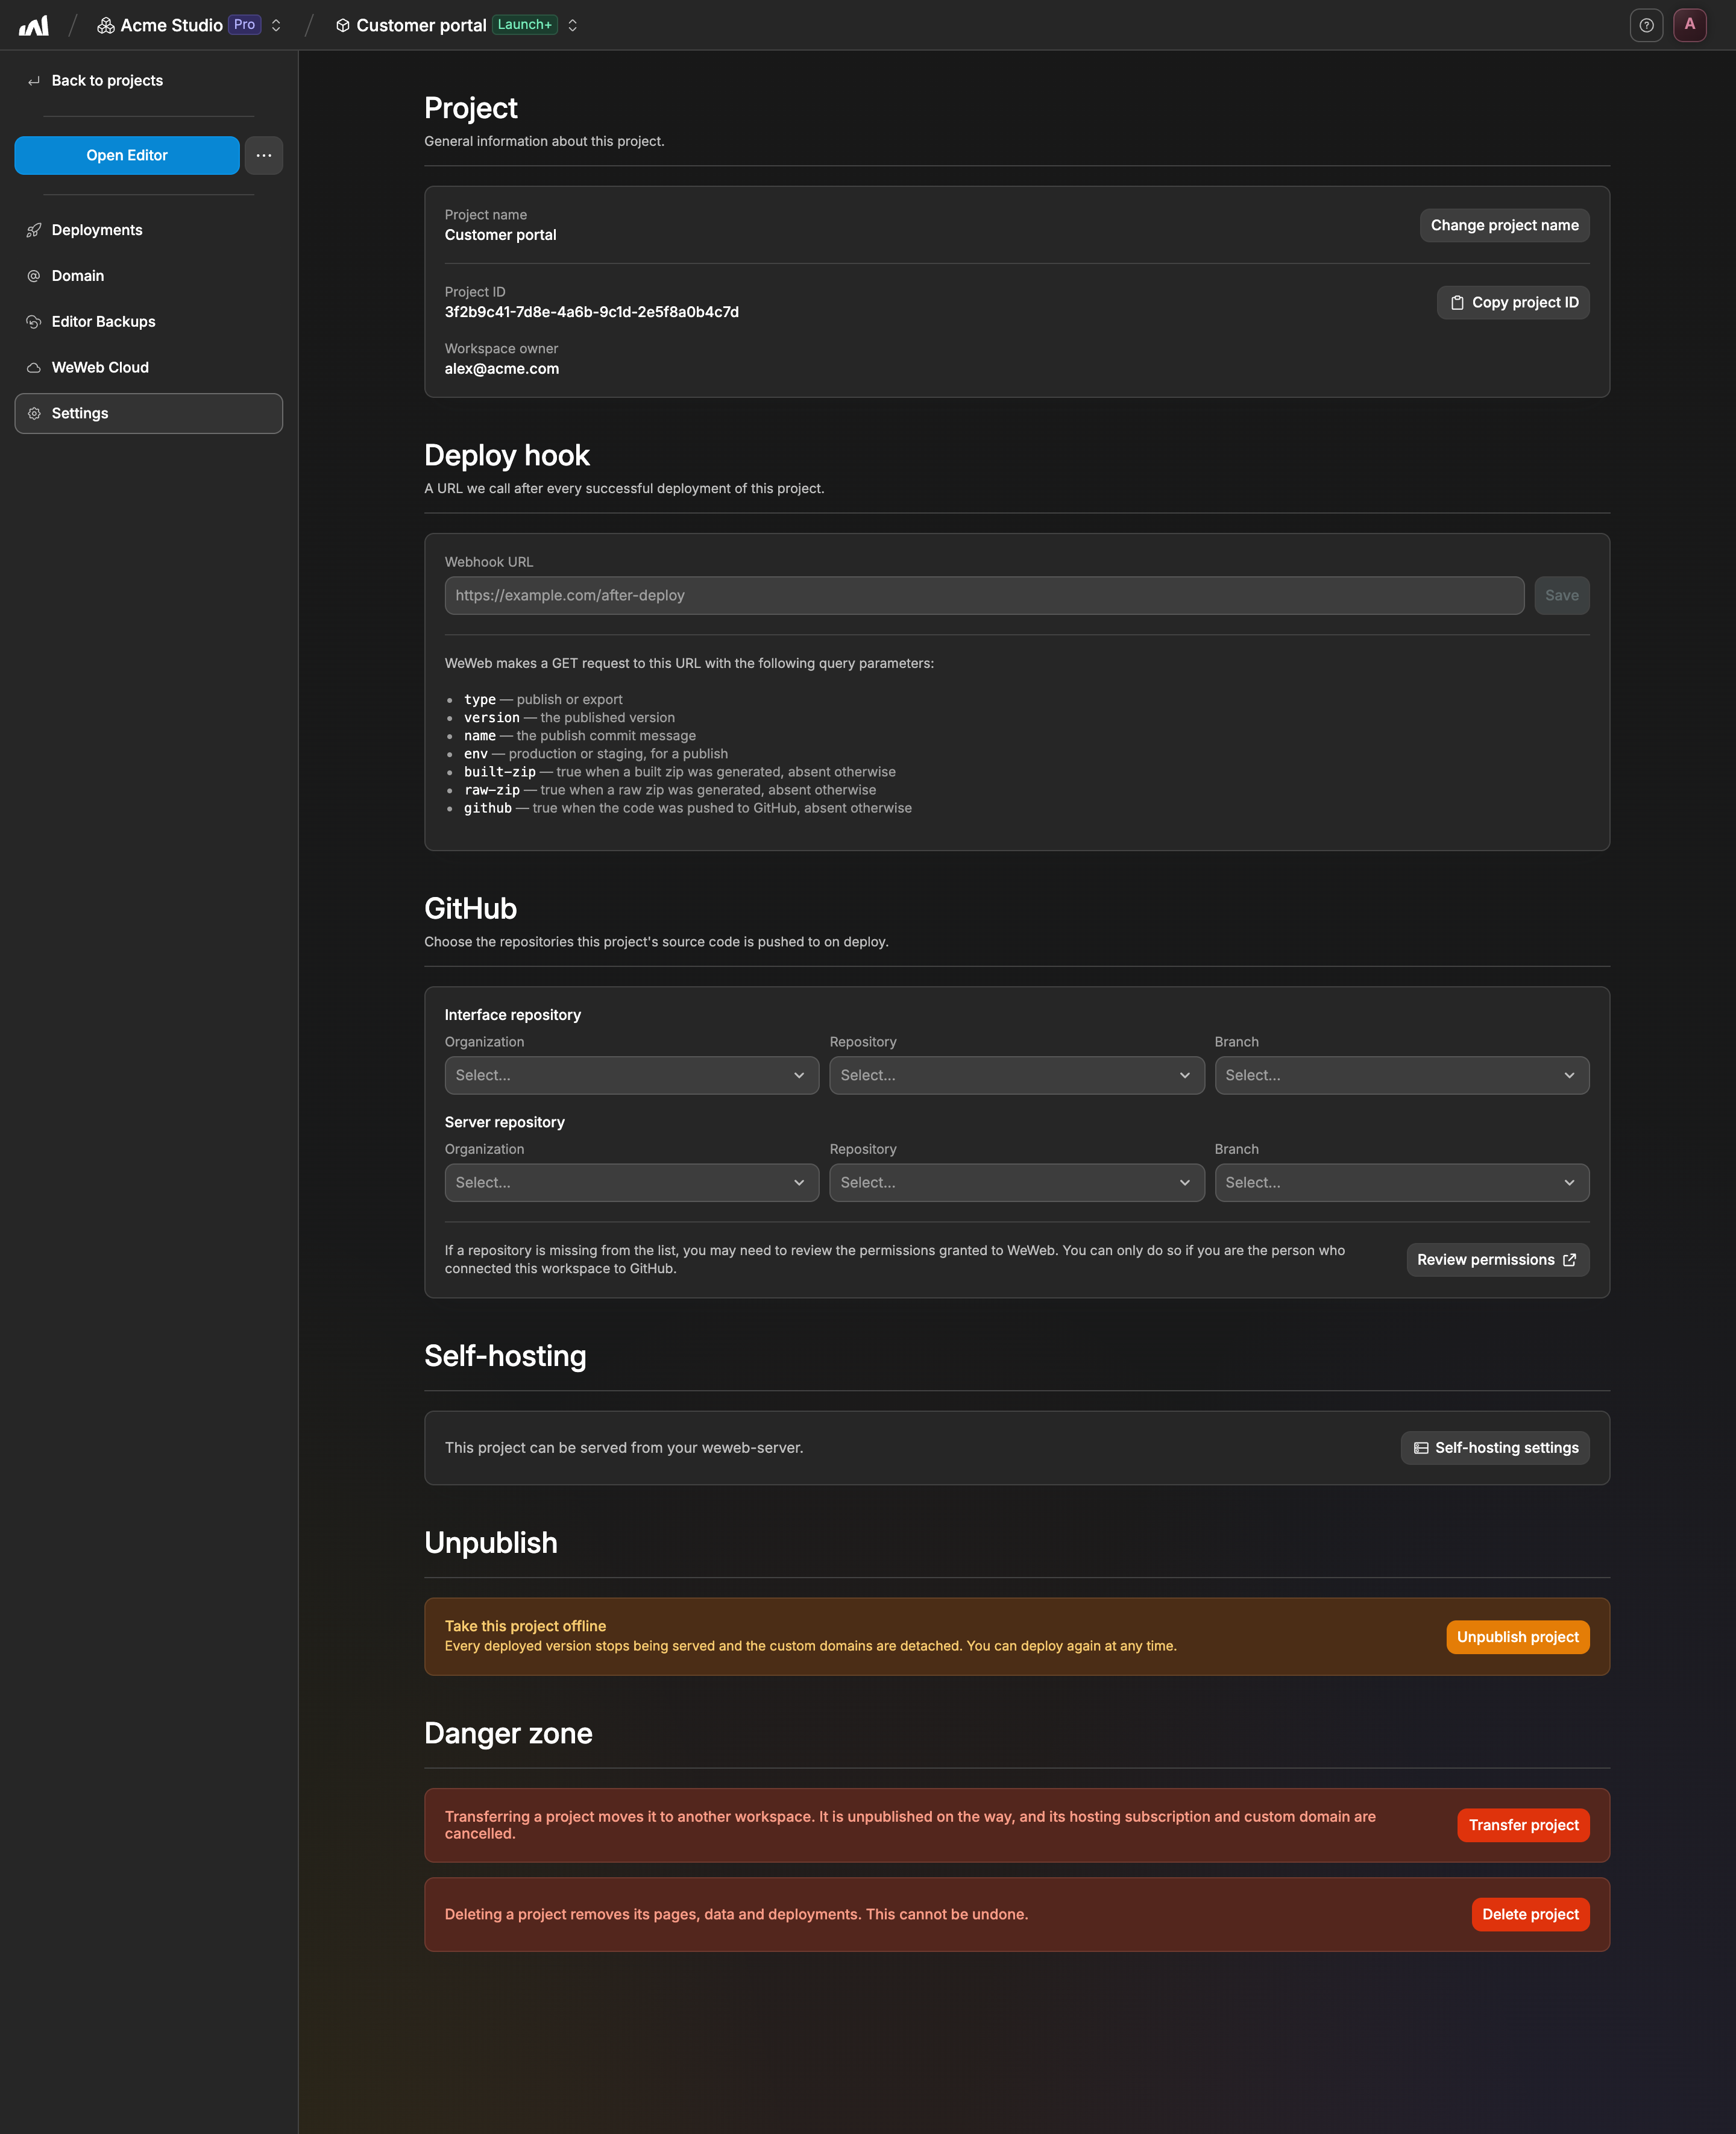
Only workspace Admins and the Owner can change these settings.
Learn more about after deploy hooks and self-hosting.
Safe mode
If your app crashes or behaves strangely when you open a project in the Editor, we recommend opening the project in safe mode.
To open a project in safe mode:
- Open the project from the
Projectstab of your WeWeb workspace - Click on the three dots icon next to the
Open Editorbutton - Choose
Safe Mode: No WorkflowsorSafe Mode: No Workflows & Formulas
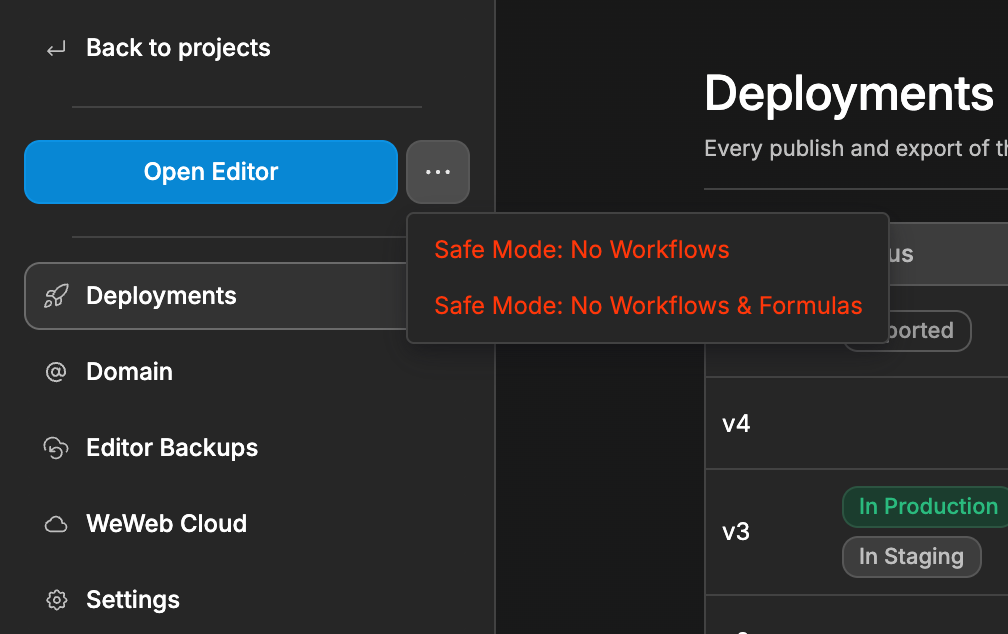
This will allow you to test your project:
- With all workflows disabled, or
- With all workflows and formulas disabled.
This can help you identify what you need to debug in your app.