Appearance
Intro to formulas
Formulas in WeWeb allow you to manipulate and transform data in your application. They are the key to creating dynamic logic that responds to user actions, formats information, and connects different parts of your application together.
Understanding formulas
Formulas are stored calculations that let you work with data in your WeWeb application. Think of them as mini-programs that take some input, process it according to rules you define, and return a result that you can use in your UI or workflows.
Common uses for formulas include:
- Formatting text for display (like dates, currency, or user names)
- Creating conditional logic to change styles or content
- Calculating values based on user input or other data
- Transforming data between different formats
Accessing formulas
To access the formulas:
- Open the binding window for the property you want to bind
- In the binding window, open the
Formulastab - Select any of the available no-code formulas
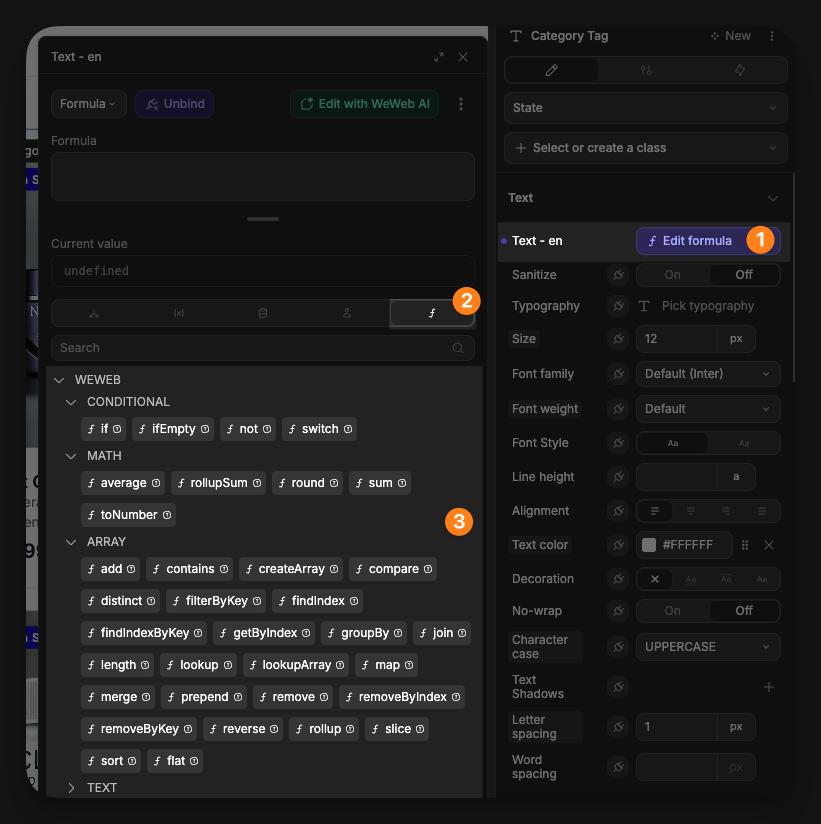
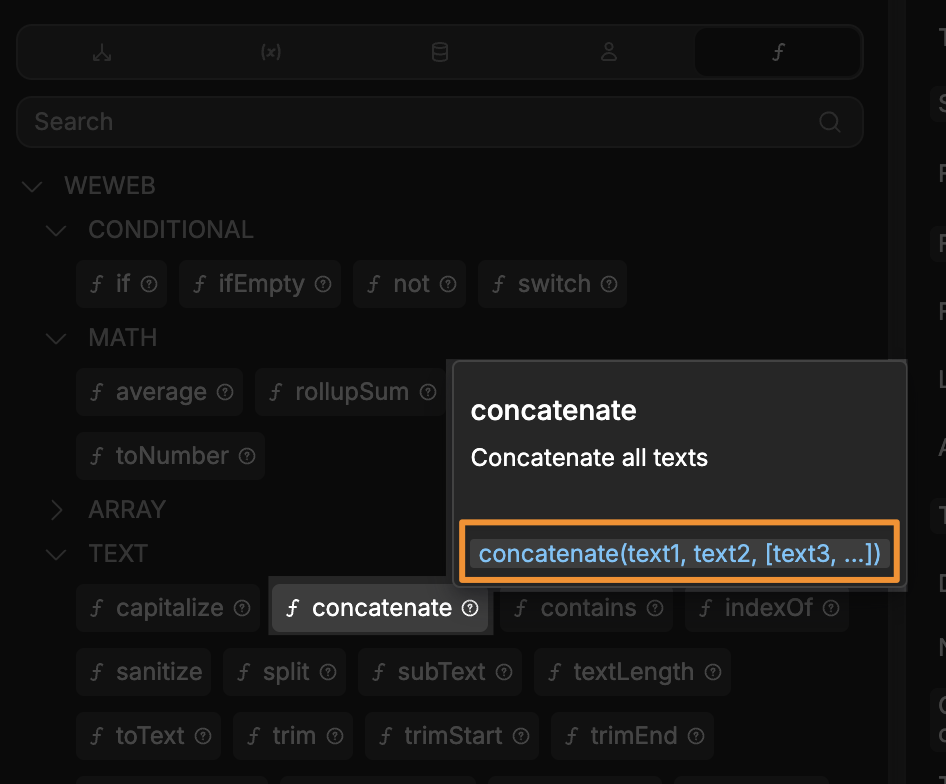
If you are ever curious as to what a formula does, you can hover its respective tooltip to find out more:
JAVASCRIPT UNDER THE HOOD
Behind the scenes, the formula window in WeWeb is powered by JavaScript. This means that alongside WeWeb's native formulas, you can use standard JavaScript expressions, methods, and operators in your formulas.
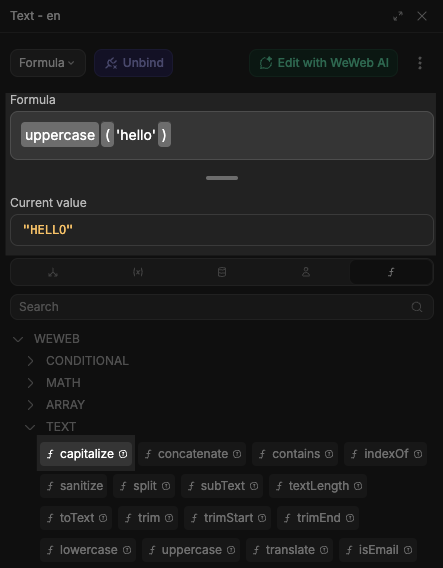
For example, if you wanted to make a piece of text uppercase:
- You could use the native no-code formula:
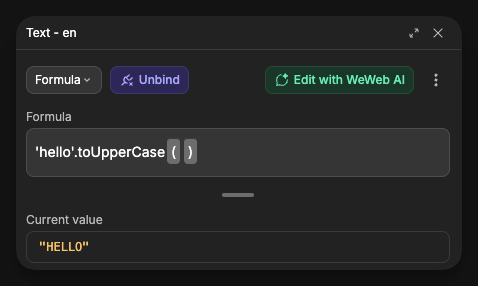
- Or, you could do it using the standard JavaScript expression for making text uppercase:
Using formulas
To use a formula, you need to pass in values inside the parenthesis (). Some formulas require just a single input, and some require multiple inputs.
CHECK FORMULA INPUT
To see what inputs a formula expects, hover over its tooltip.
It will detail exactly how many inputs and what type of inputs it expects:
Single inputs
For example, if using a formula that requires a single input:
- In the binding window, open the
Formulastab - Find the formula you want to use
- Select the formula
- Click inside the parentheses
() - Select the value you want to pass into the formula
Multiple inputs
Or, if using a formula that requires multiple inputs:
- In the binding window, open the
Formulastab - Find the formula you want to use
- Select the formula
- Click inside the first portion of the parentheses
() - Select the value you want to pass as the first input
- Click inside the second portion of the parentheses
() - Select the value you want to pass into the formula
Adding more inputs is as simple as adding whatever values you like and separating them with a comma ,:
Types of formulas in WeWeb
WeWeb offers two main ways to create and use formulas in your application:
Local formulas
Local formulas are created directly within a binding and are specific to that single use case:
- Select the element whose property you want to bind.
- Open the binding window for that property.
- In the binding window, open the
Formulastab to access the native formulas. - Build your formula — for example, use an
ifcondition to return different values based on your data.
Local formulas are limited to the specific place where you create them. If you need the same formula logic elsewhere, you would need to recreate or copy it.
Project formulas
As your application grows in complexity, you'll often need to reuse the same formula logic throughout your project. Project formulas solve this problem by letting you define a formula once and use it everywhere.
To create a project formula:
- In the left panel of the
Interfacetab, open theFormulastab - Click
Add Formulato create a new project formula - Give your formula a descriptive name
- Define the input parameters your formula will accept
- Create the formula logic utilizing those input parameters
- Save the formula
Once saved, the formula is available for use throughout your entire project
Using project formulas
Once you've created a project formula, you can easily use it anywhere in your application:
- Select the element you want to use the formula for
- Bind a property
- In the binding window, open the
Formulastab - Expand
From Project - Select your project formula
- Click inside
() - Select the data you want to pass in as the values of the parameters
In the example above:
- We open the binding window for a property
- In the binding window, open the
Formulastab - Find your project formula in the
From Projectsection - Add the formula, providing any required input parameters inside the parenthesis
()
Project formula input parameter ordering
When using a project formula that requires inputs, it is important to be conscious of the expected order of the inputs and pass them in the same sequence they appear in the creation window.
For example, in this formula:
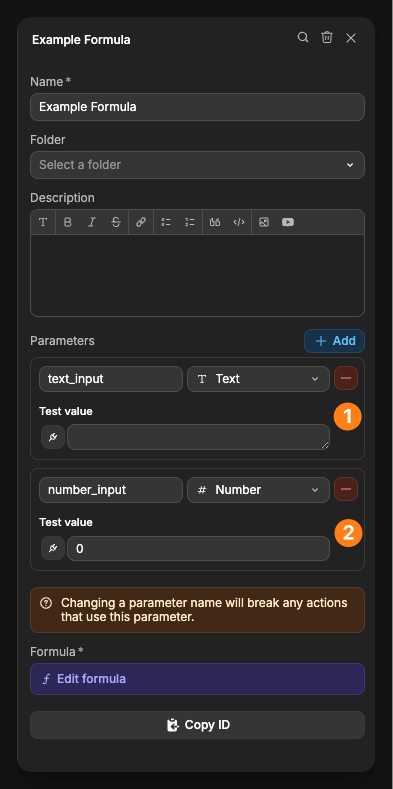
The sequential ordering of the parameters is:
text_inputnumber_input
As such, when using this global formula, the values you pass inside the parentheses will be assigned to the parameters in this exact order:
js
// The first value 'Hello World' is assigned to text_input
// The second value 42 is assigned to number_input
exampleFormula('Hello World', 42)
If you were to reverse the order of the values:
js
exampleFormula(42, 'Hello World')This would cause unexpected results because the number 42 would be assigned to text_input and the string 'Hello World' would be assigned to number_input.
This is why it's critical to know the order of parameters when using project formulas.
When to use project vs. local formulas
Both local and global formulas have their place in WeWeb development:
Use local formulas when:
- The logic is simple and specific to one place
- You're prototyping or testing an idea
- The formula won't need to be reused elsewhere
Use project formulas when:
- You need the same logic in multiple places
- The formula logic is complex
- You want to maintain consistency across your application
- You anticipate needing to update the logic later and want to do it in one place
As a general rule, if you find yourself copying and pasting the same formula multiple times, it's a strong sign that you should convert it to a project formula.
Formula management
In addition to allowing you to re-purpose logic across your project, project formulas give you the ability to track their use across specific pages:

This can be particularly useful when you are trying to debug or refactor logic.
CONTINUE LEARNING
Formulas are a core building block in creating logic. The next core piece is being able to programmatically use them.
That is where workflows come in.