Appearance
Intro to Xano realtime
What is realtime?
Realtime is a feature that allows your app to show live updates instantly, without making incessant API calls.
For example, in a chat window with lots of messages, it wouldn't be efficient to keep checking for new updates through traditional API requests every few seconds.
Xano Realtime is powered by Websockets, which is a technology that keeps a constant connection open, so updates flow continuously between the client (i.e. the user’s browser) and server (in this case Xano) without delays.
✅ Some common use cases for Realtime: chat applications, collaborative tools, and live notification systems.
❌ When not to use Realtime: low interaction applications, high data volume, and complex transactional systems.
Pre-requisites
To start using Xano realtime in a WeWeb project, there are a few pre-requisites:
- Enable realtime in your Xano instance.
- Configure the Xano data source plugin in WeWeb.
- Create a realtime channel in Xano.
Enable realtime in Xano
- Open your Xano workspace dashboard
- Click the three-dot menu (
···) in the upper-right corner of the dashboard - Select
Realtime Settings - Turn on
Realtime status
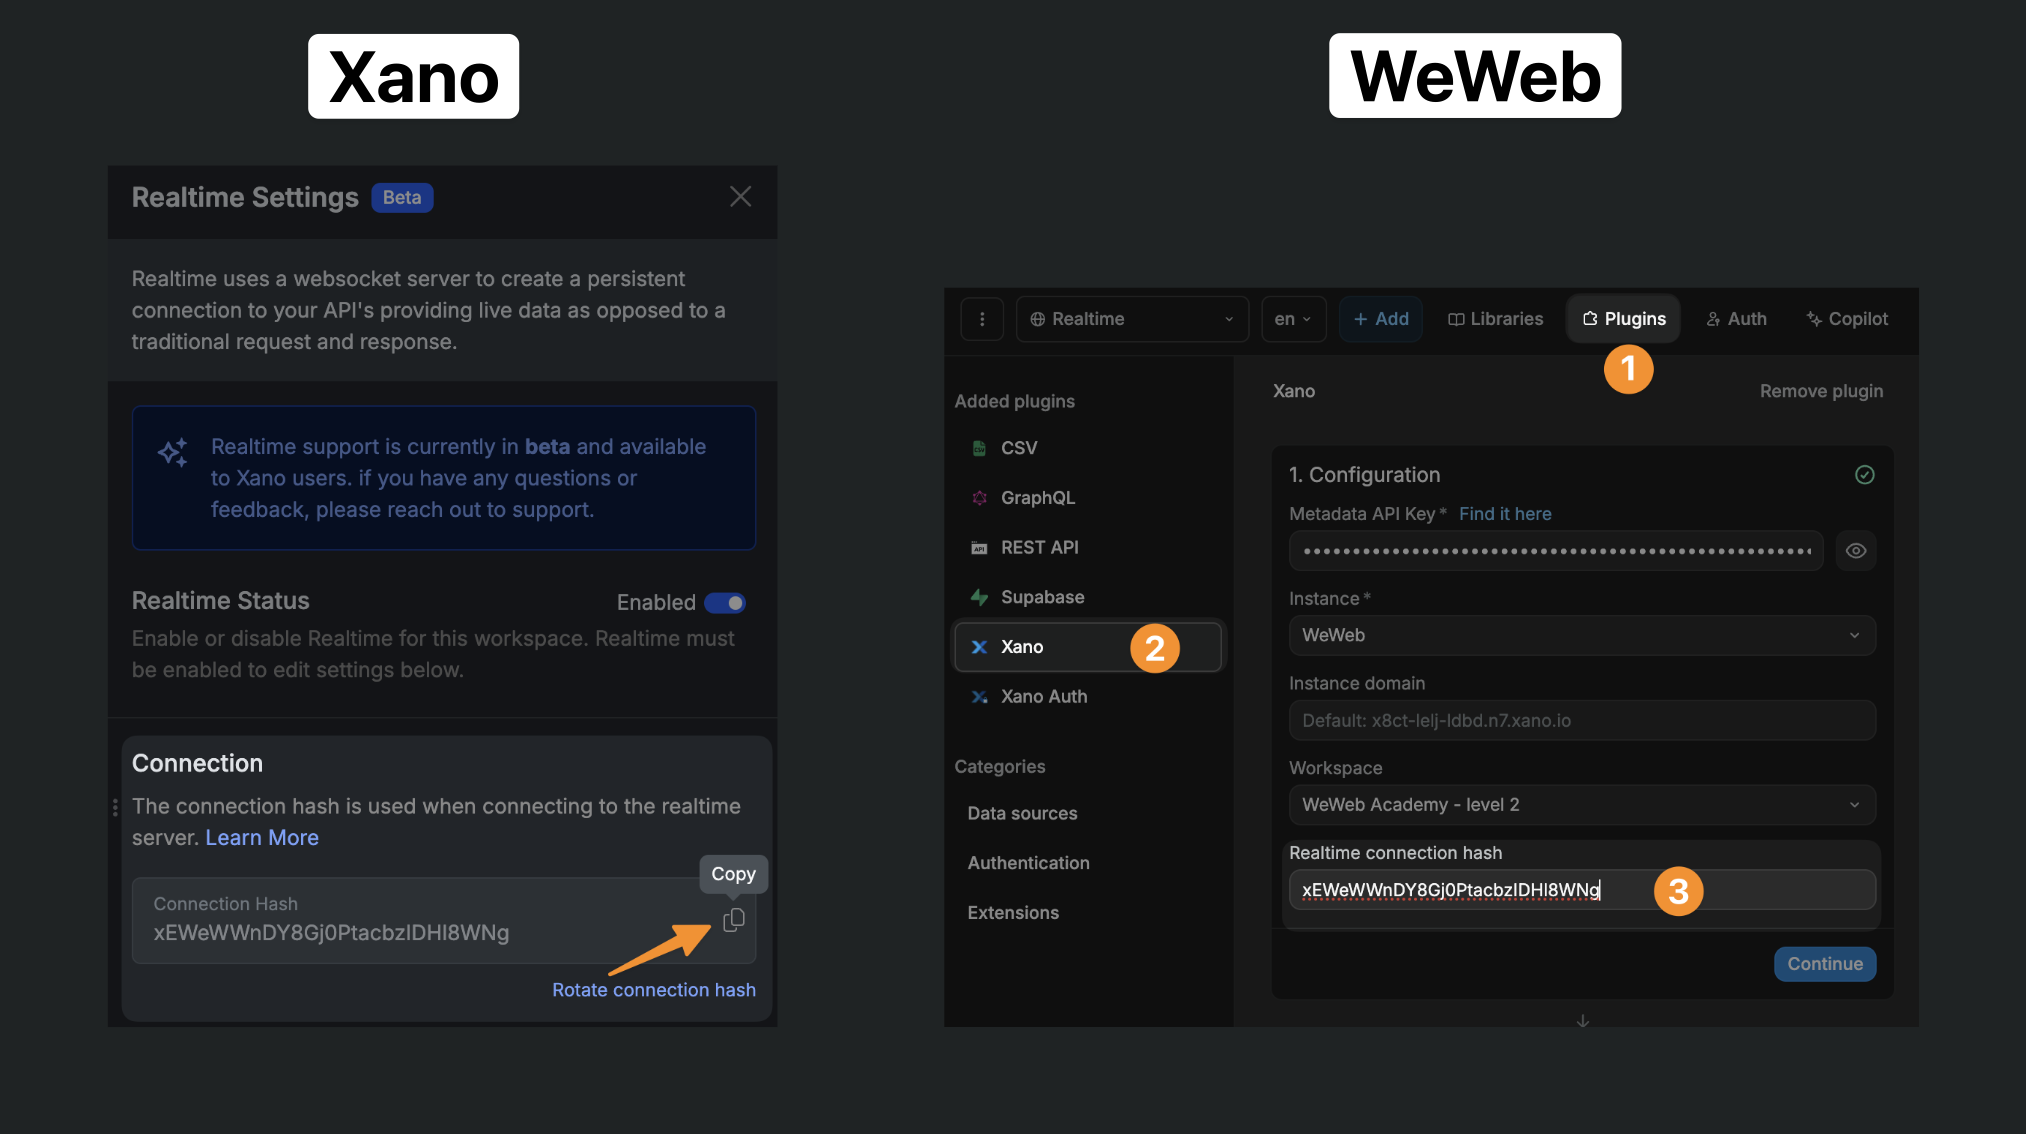
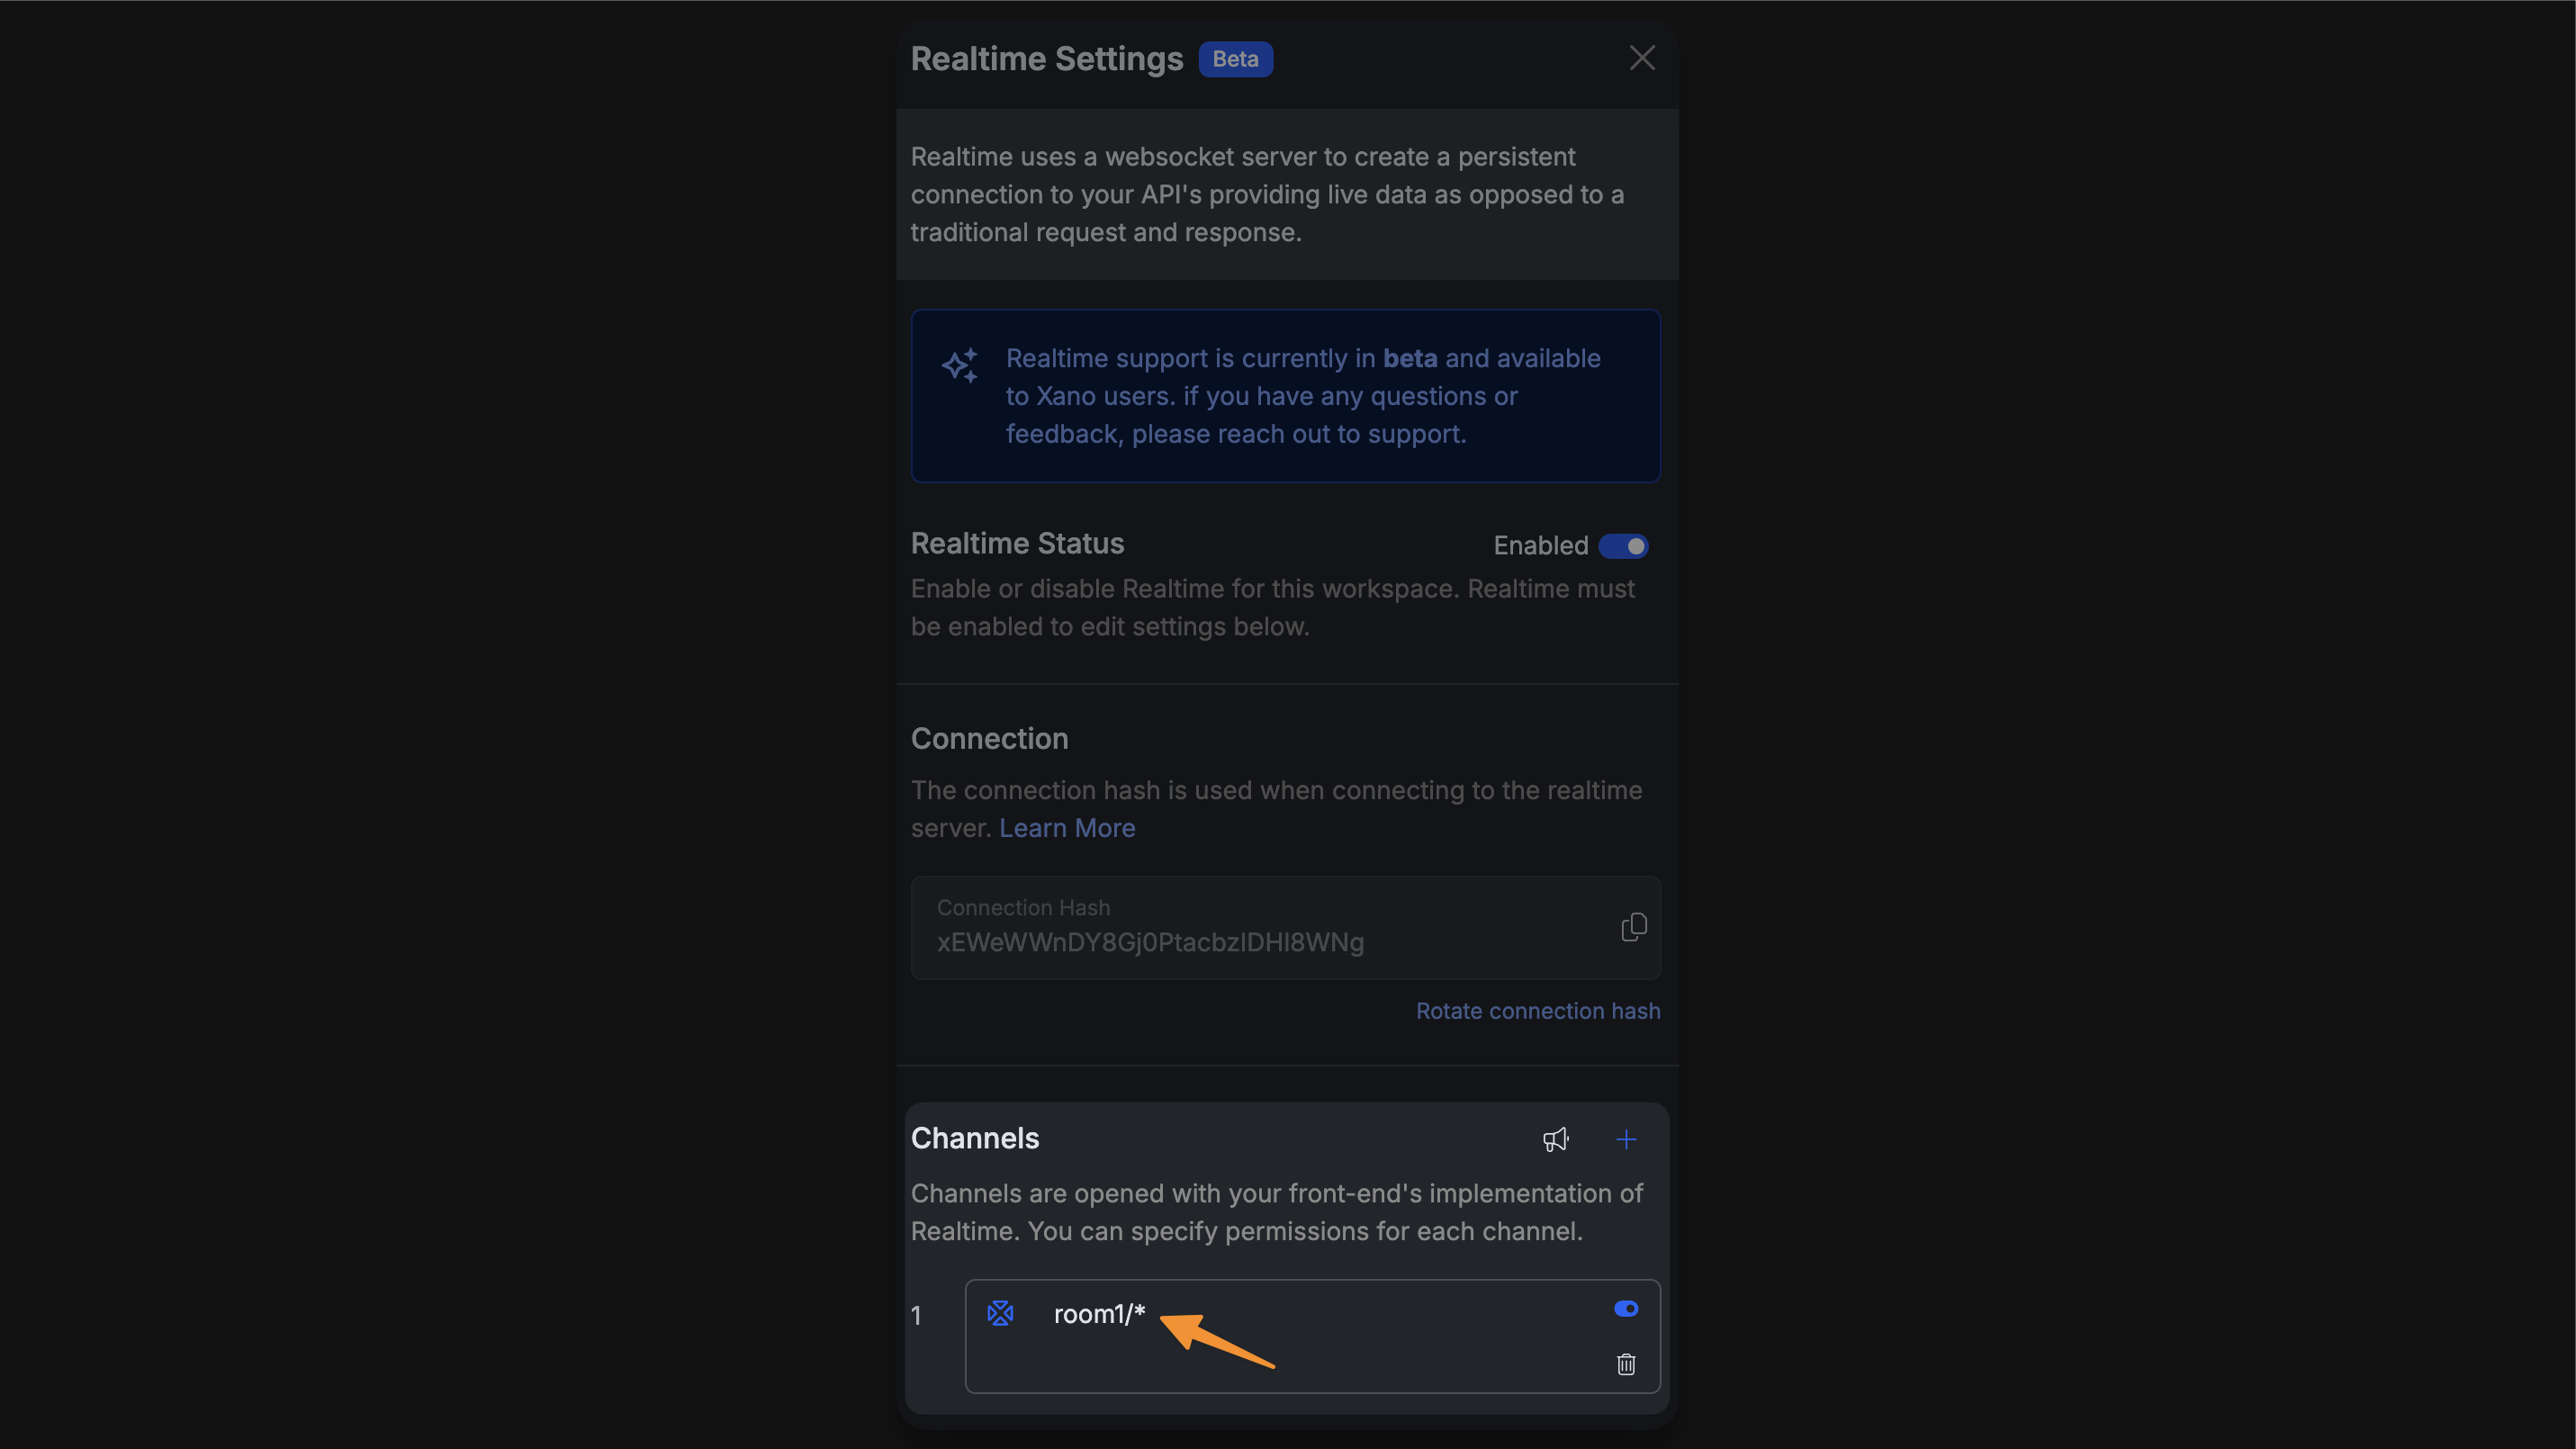
If this is your first time enabling realtime, Xano may take a minute or two to provision the resources. Once it is enabled, copy the Connection Hash shown in Realtime Settings — you will need it when connecting WeWeb.
Enable realtime in WeWeb
Assuming you have already added the Xano data source plugin to your WeWeb project and enabled realtime in your Xano instance, you will be able to connect the realtime server of your Xano instance to your WeWeb project.
To connect your WeWeb project to Xano's realtime server, you will need to add its connection hash to the Xano data source plugin configuration.
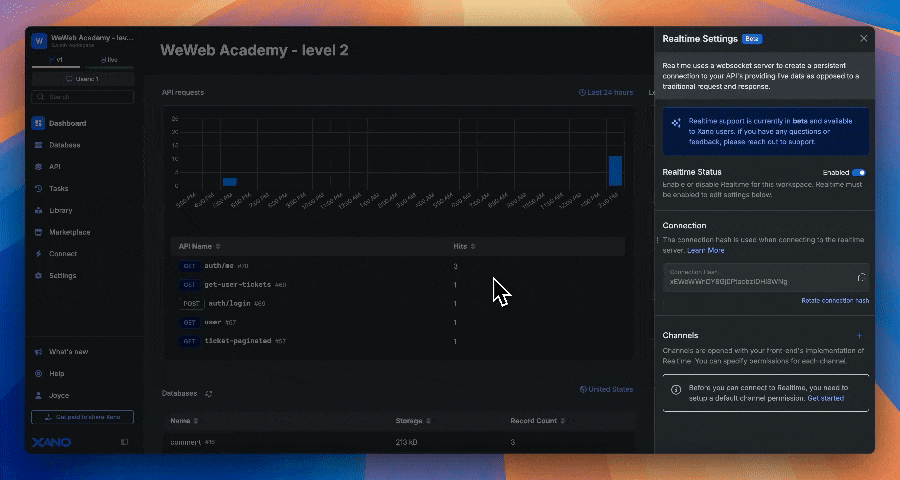
Copy the realtime Connection Hash from Xano's Realtime Settings menu, then in WeWeb open the Integrations subtab in Data & API (or the Integrations panel in Interface), open your Xano connection, and paste the hash into the Connection Hash field:
And voilà! Your WeWeb frontend and Xano realtime server are now connected 😀
Now we can create realtime channels in Xano that our WeWeb frontend can interact with.
Configure channels in Xano
You can think of a channel as a dedicated room where specific real-time interactions or conversations happen.
Let’s go back to the Xano's Realtime Settings to create a public channel. We'll name it room1:
Nested channels
Note that, in the Channel target settings, you can enable nested channels:
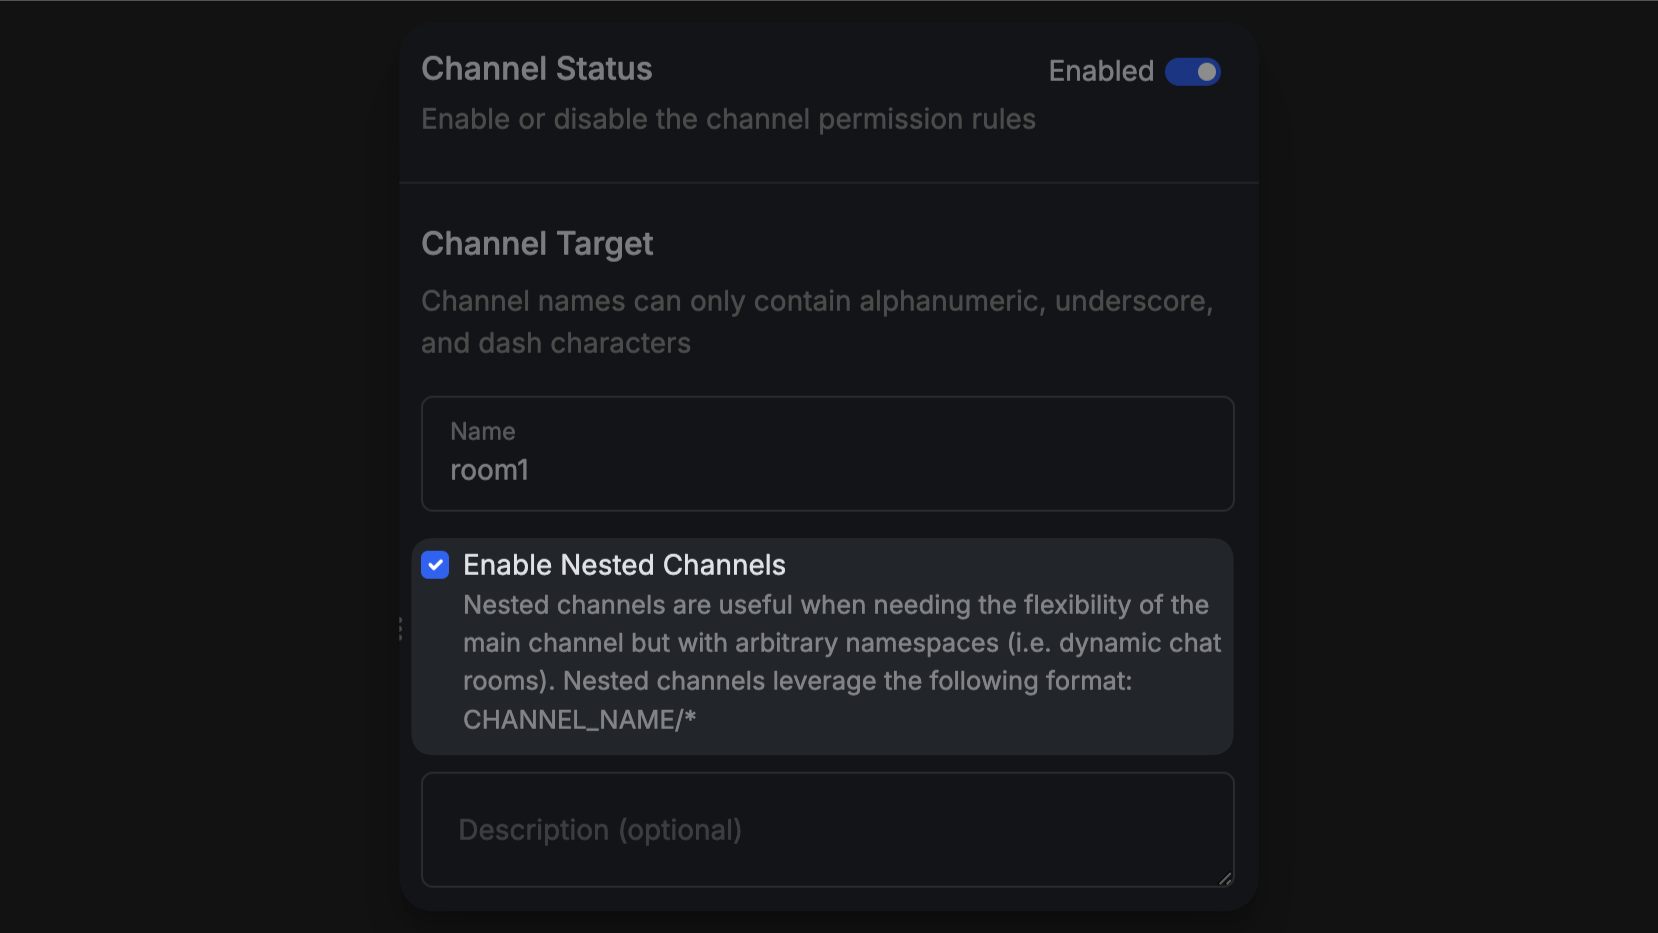
If you enable nested channels, a /* path will automatically be added to your main channel name after you save it:
This allows you to dynamically create and organize sub-channels under the main channel.
For example, in a chat app, you could have chat/*, allowing for chat/sports, chat/tech, etc.
Learn more about leveraging nested channels in Xano.
Permissions
Each channel needs to have permissions defined to ensure that they remain secure and behave in the way that you expect.
For the purposes of this tutorial, we’ll keep it simple and open with the following permissions: 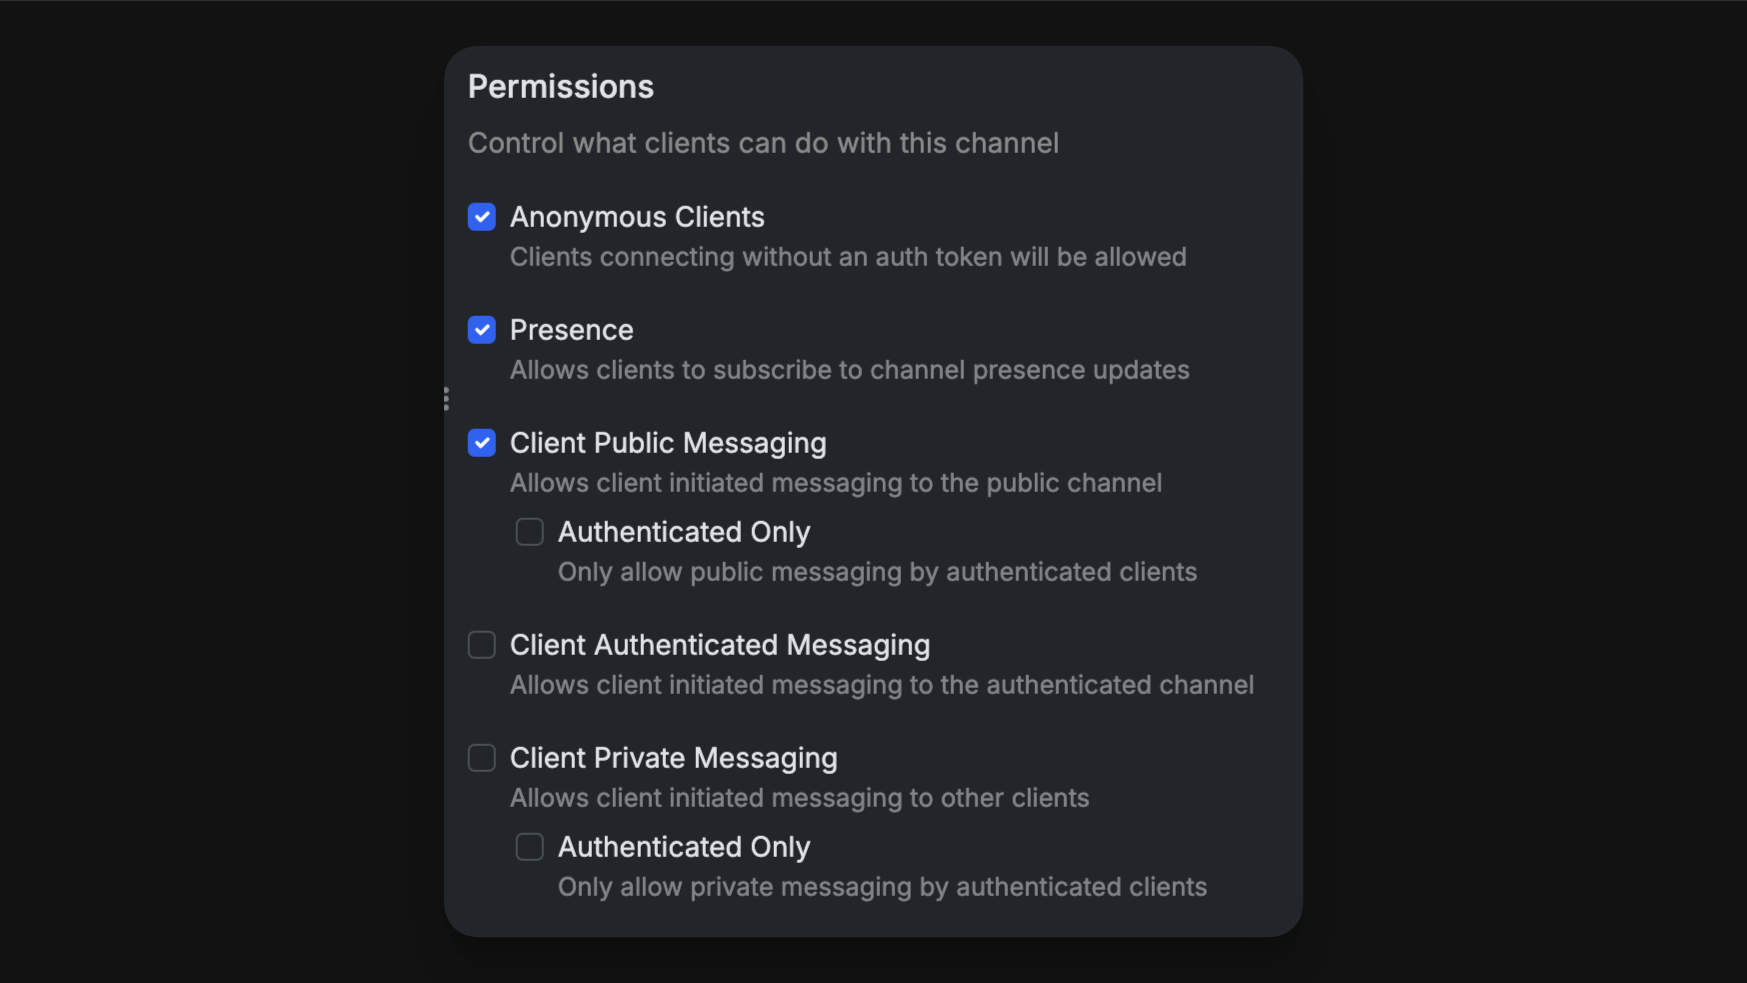
Anonymous Clients: Allow unauthenticated users to connectPresence: Show active users in the channel (useful for checking online users)Client Public Messaging: Let all users send and receive messages
TIP
To build secure apps, we highly recommend that you learn more about Xano's realtime channel permissions.
To do so, please refer to Xano's user documentation on the topic. The section with common use case permissions examples is particularly helpul to get started.
When you're ready, click on Save to create the channel.
Our channel is now live and running. Awesome! But how can we use WeWeb to interact with it?
We'll leverage WeWeb workflows.
Leverage WeWeb workflows
To work with Xano realtime in WeWeb, you can leverage:
- 5 Workflow actions to trigger a realtime event.
- 8 Workflow triggers to listen for realtime events.
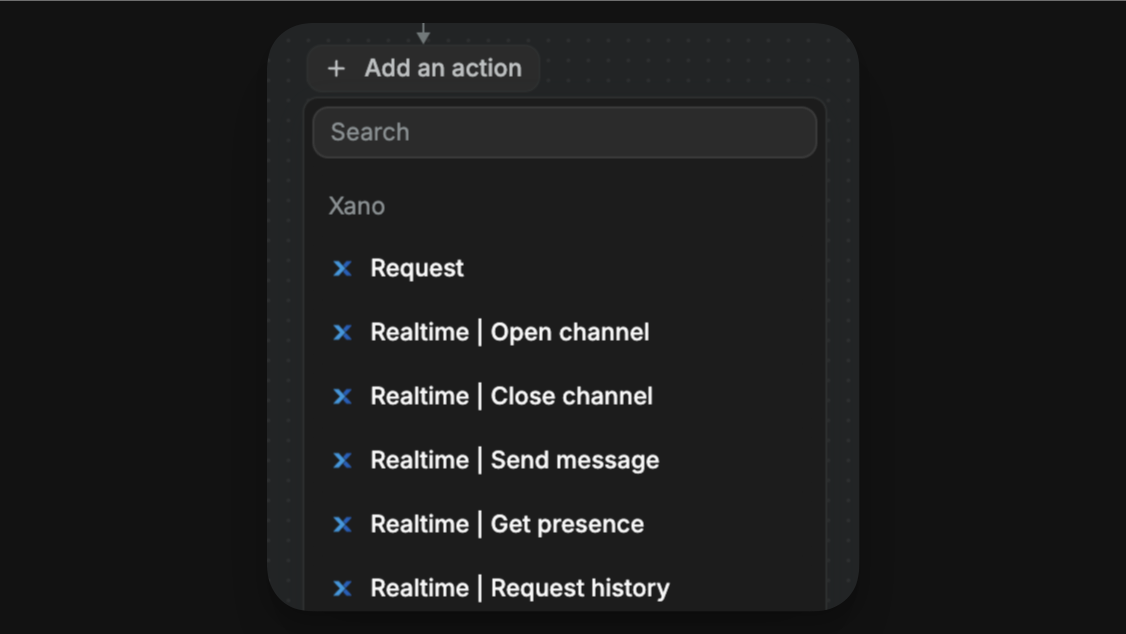
Xano realtime actions
WeWeb’s Xano Realtime integration comes with 5 workflow actions to help us:
Event triggers
In order to update your UI based on activity in the channel, such as user joins, leaves, connection status changes and new messages, you need to listen for realtime events.
You can do this by listening for events at page or app level in WeWeb.
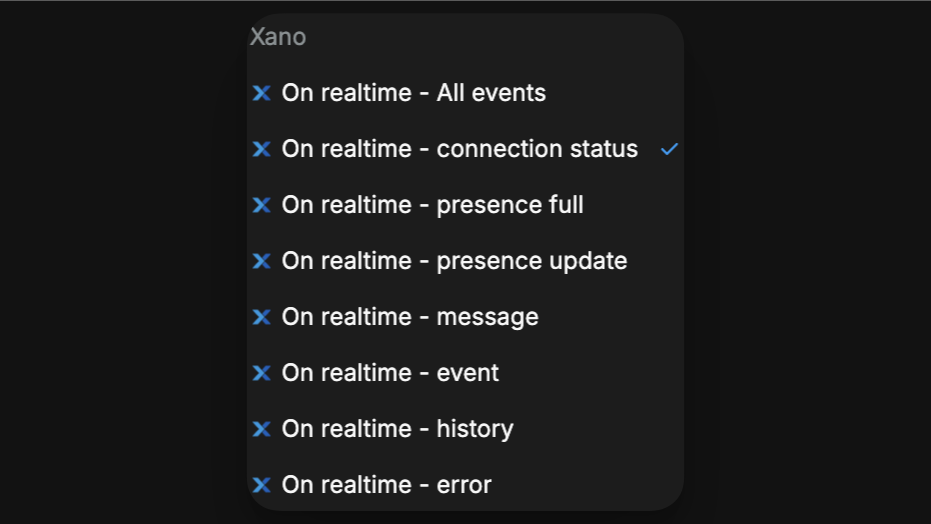
WeWeb’s Xano Realtime integration comes with 8 workflow triggers to help listen to various realtime events:
When one of these workflows "hears" an event, you can access the event's payload from the workflow to get the relevant data:
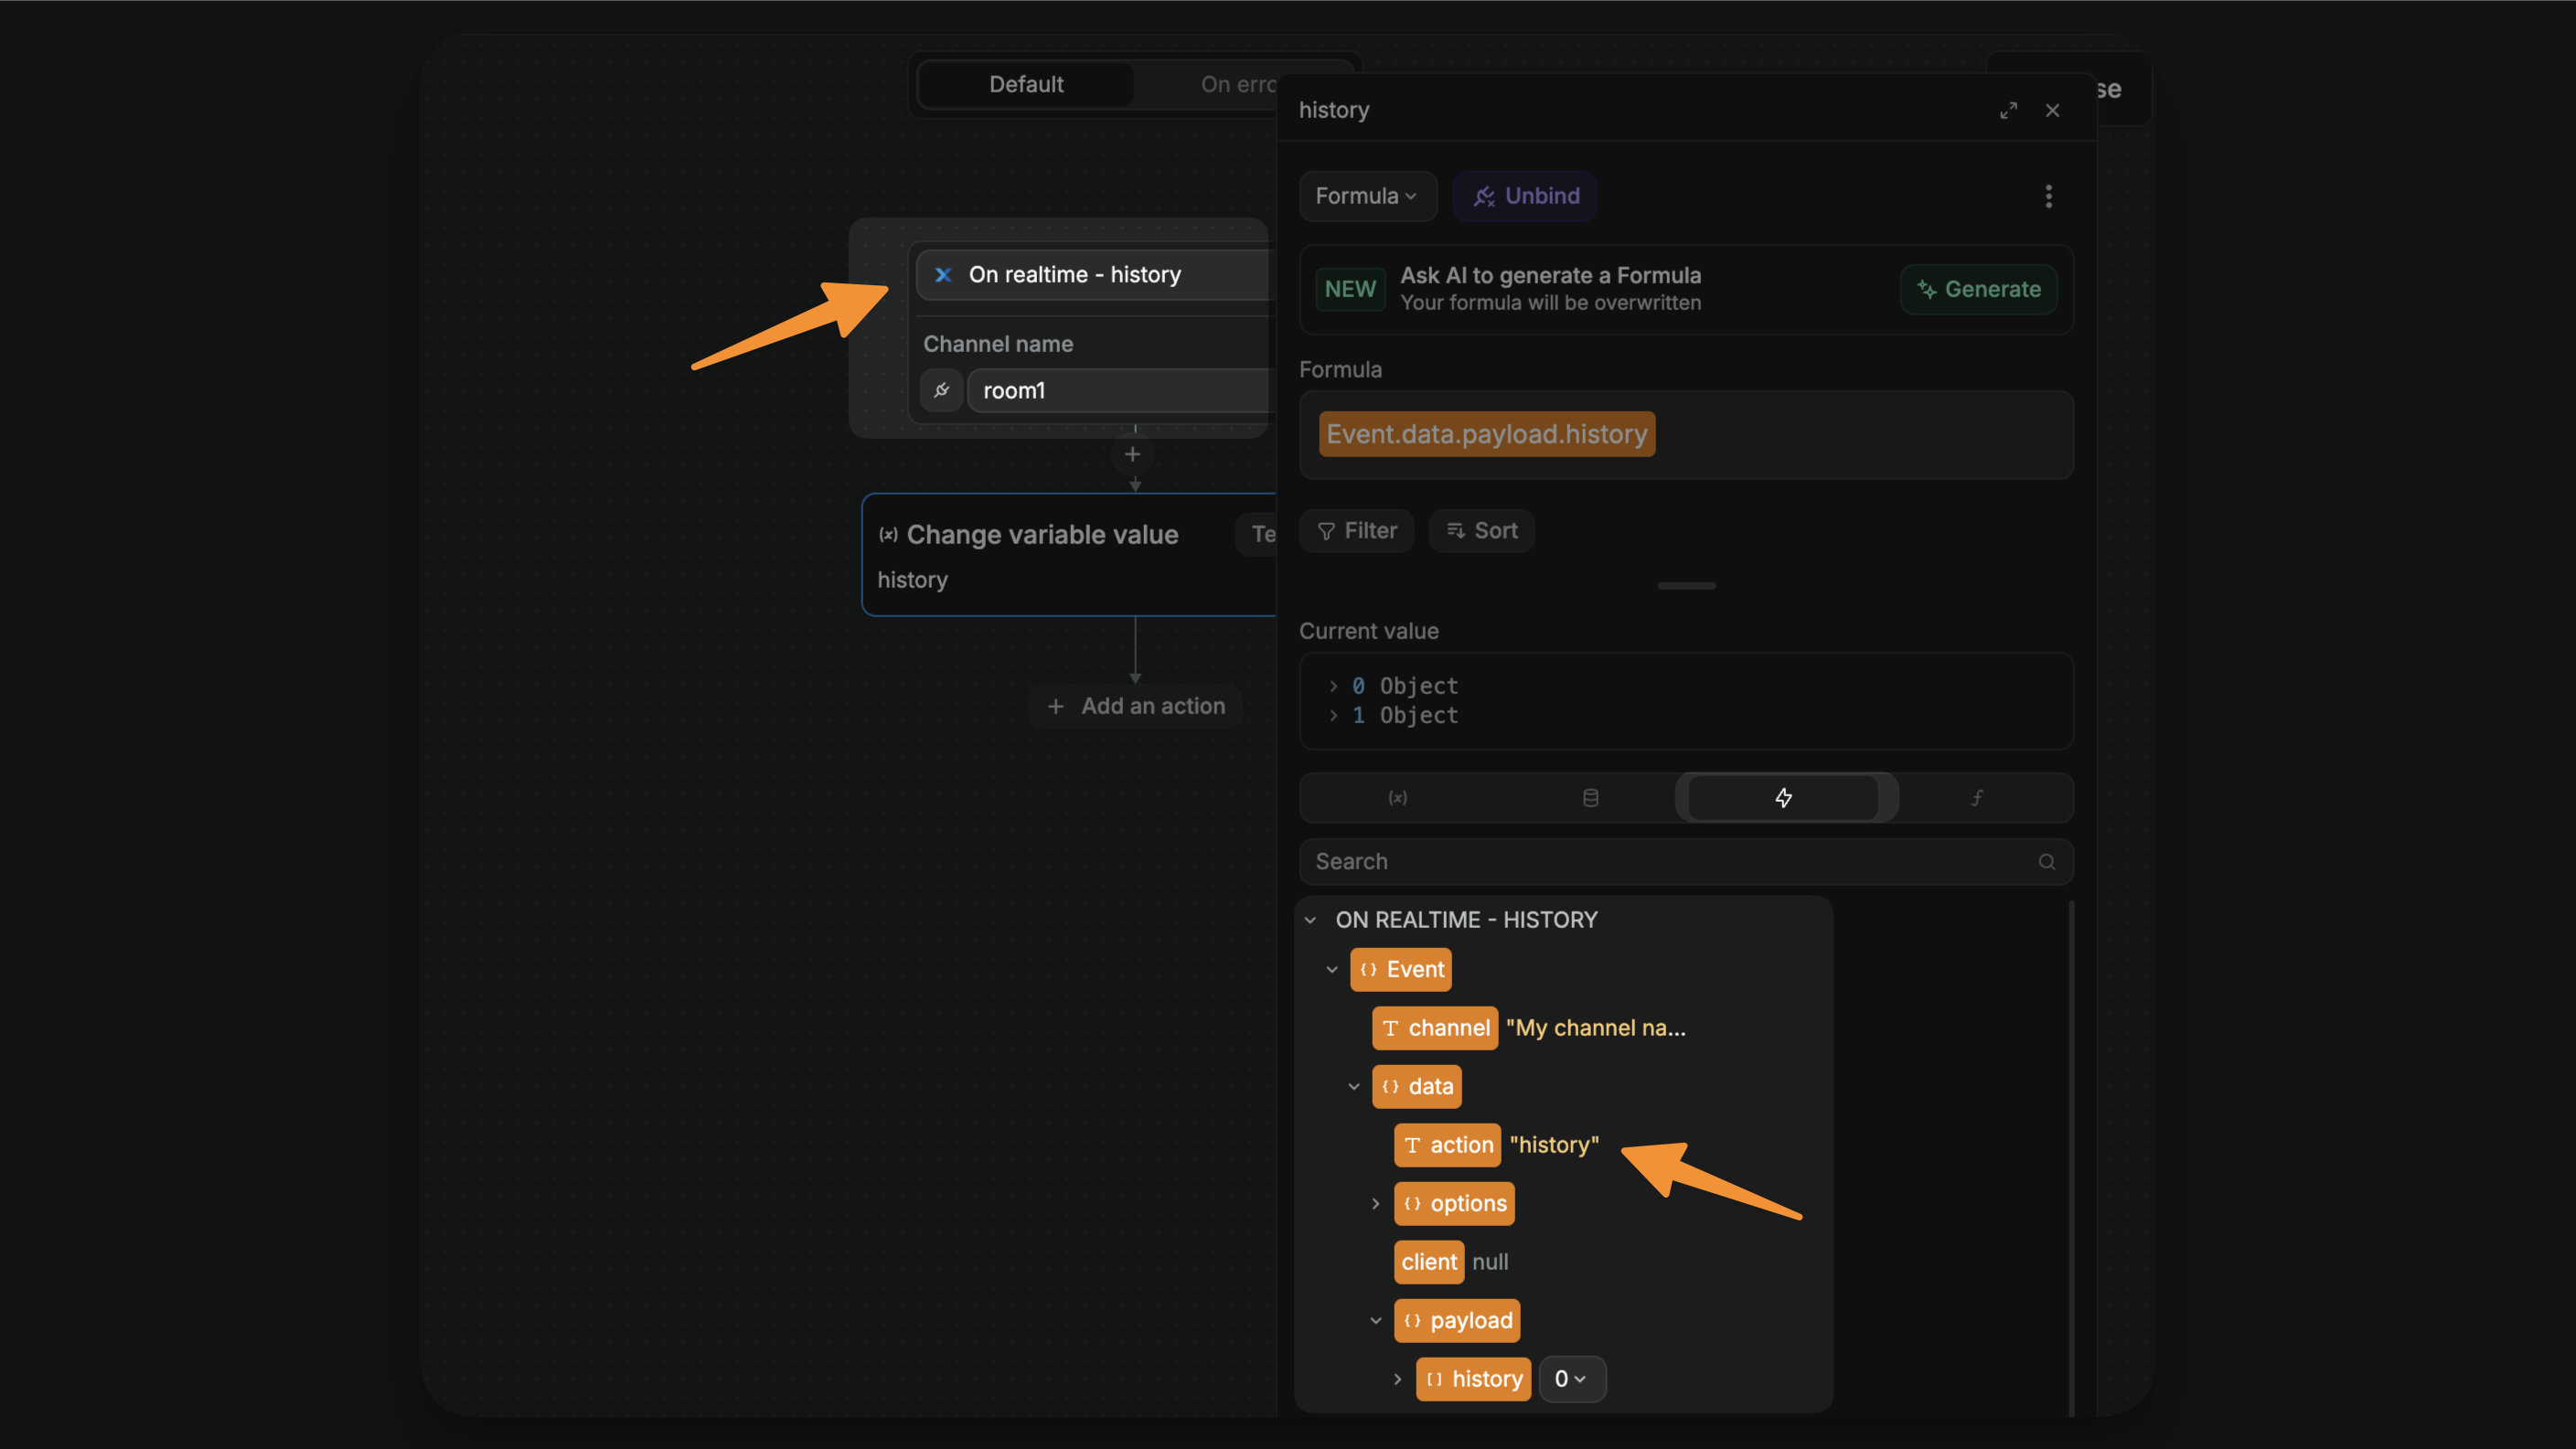
In the example above, you can see the Event object received from Xano when use the On realtime - history trigger to listen to such events.
Here is a list of realtime event types:
connection status: Tells you the status of the connection when you connect to a channel or when you get disconnected involuntarilyerror: Indicates an issue with the connection or interaction.event: Handles dynamic Realtime data.message: Notifies you of new messages.presence full: Provides a one-time list of all users connected to the channel when you join. It will not return the full list again if other users join. You will need to use the Get presence action to retrieve the latest list of active users.presence update: Alerts you when users join or leave.history: Receives history if it was requested using the Request history action
Support chat example
Support chat example
Taking the example of a support chat, here's how you could leverage these actions and triggers.
- At app level, setup a workflow that triggers
On realtime - message. - When a user clicks on the support icon of your website trigger a workflow with:
- The
Open channelaction so they join the chat channel. - The
Get presenceaction so they can see that several support team members are online. - The
Request historyaction so they can see their chat history in the chat modal.
- The
- When a user clicks on the "Send" button of the chat: trigger the
Send messageaction.
The support team members who are in the channel will receive the message instantly.
Next steps
That's the theory.
Learn more about how this works: