Appearance
Stripe
Let's see how you can setup Stripe in WeWeb so that your web-app users can make payments.
Configure the plugin
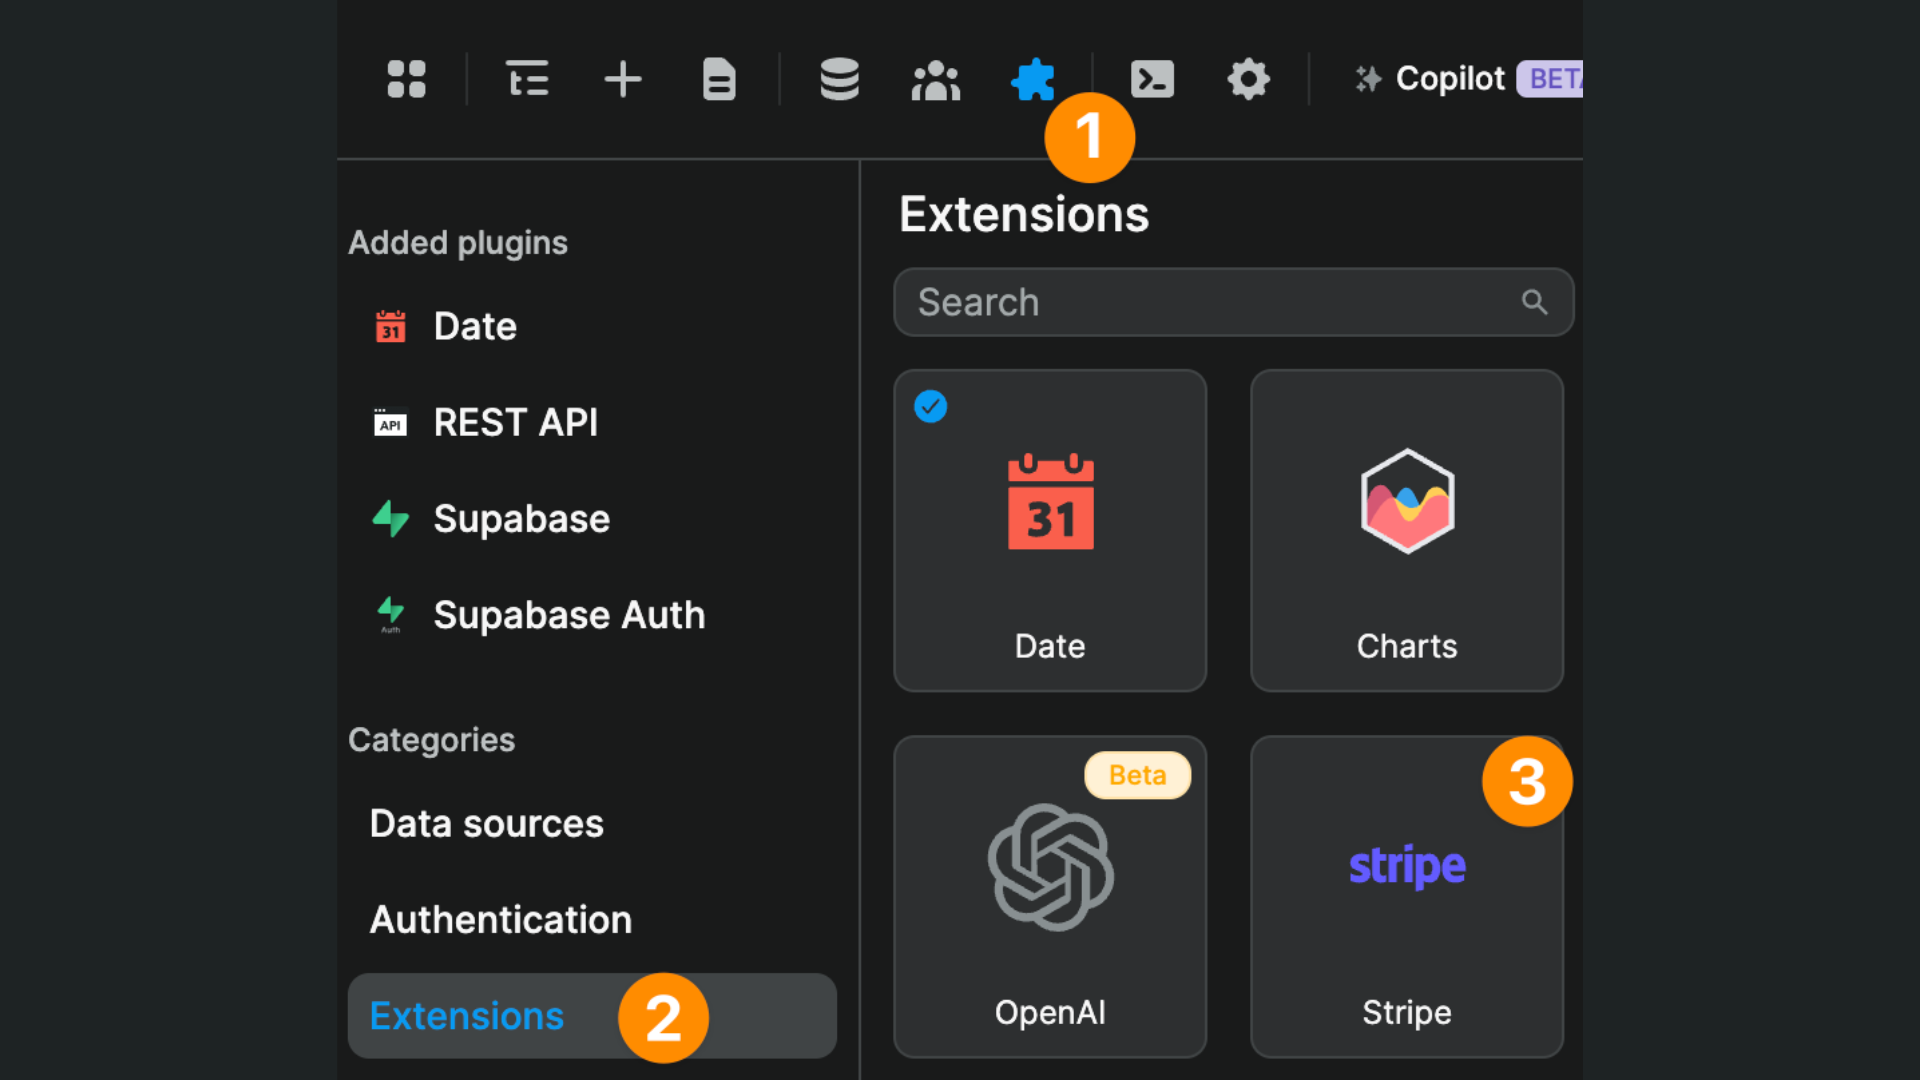
To add the Stripe Plugin to your WeWeb project, go to the Plugins > Extensions menu:
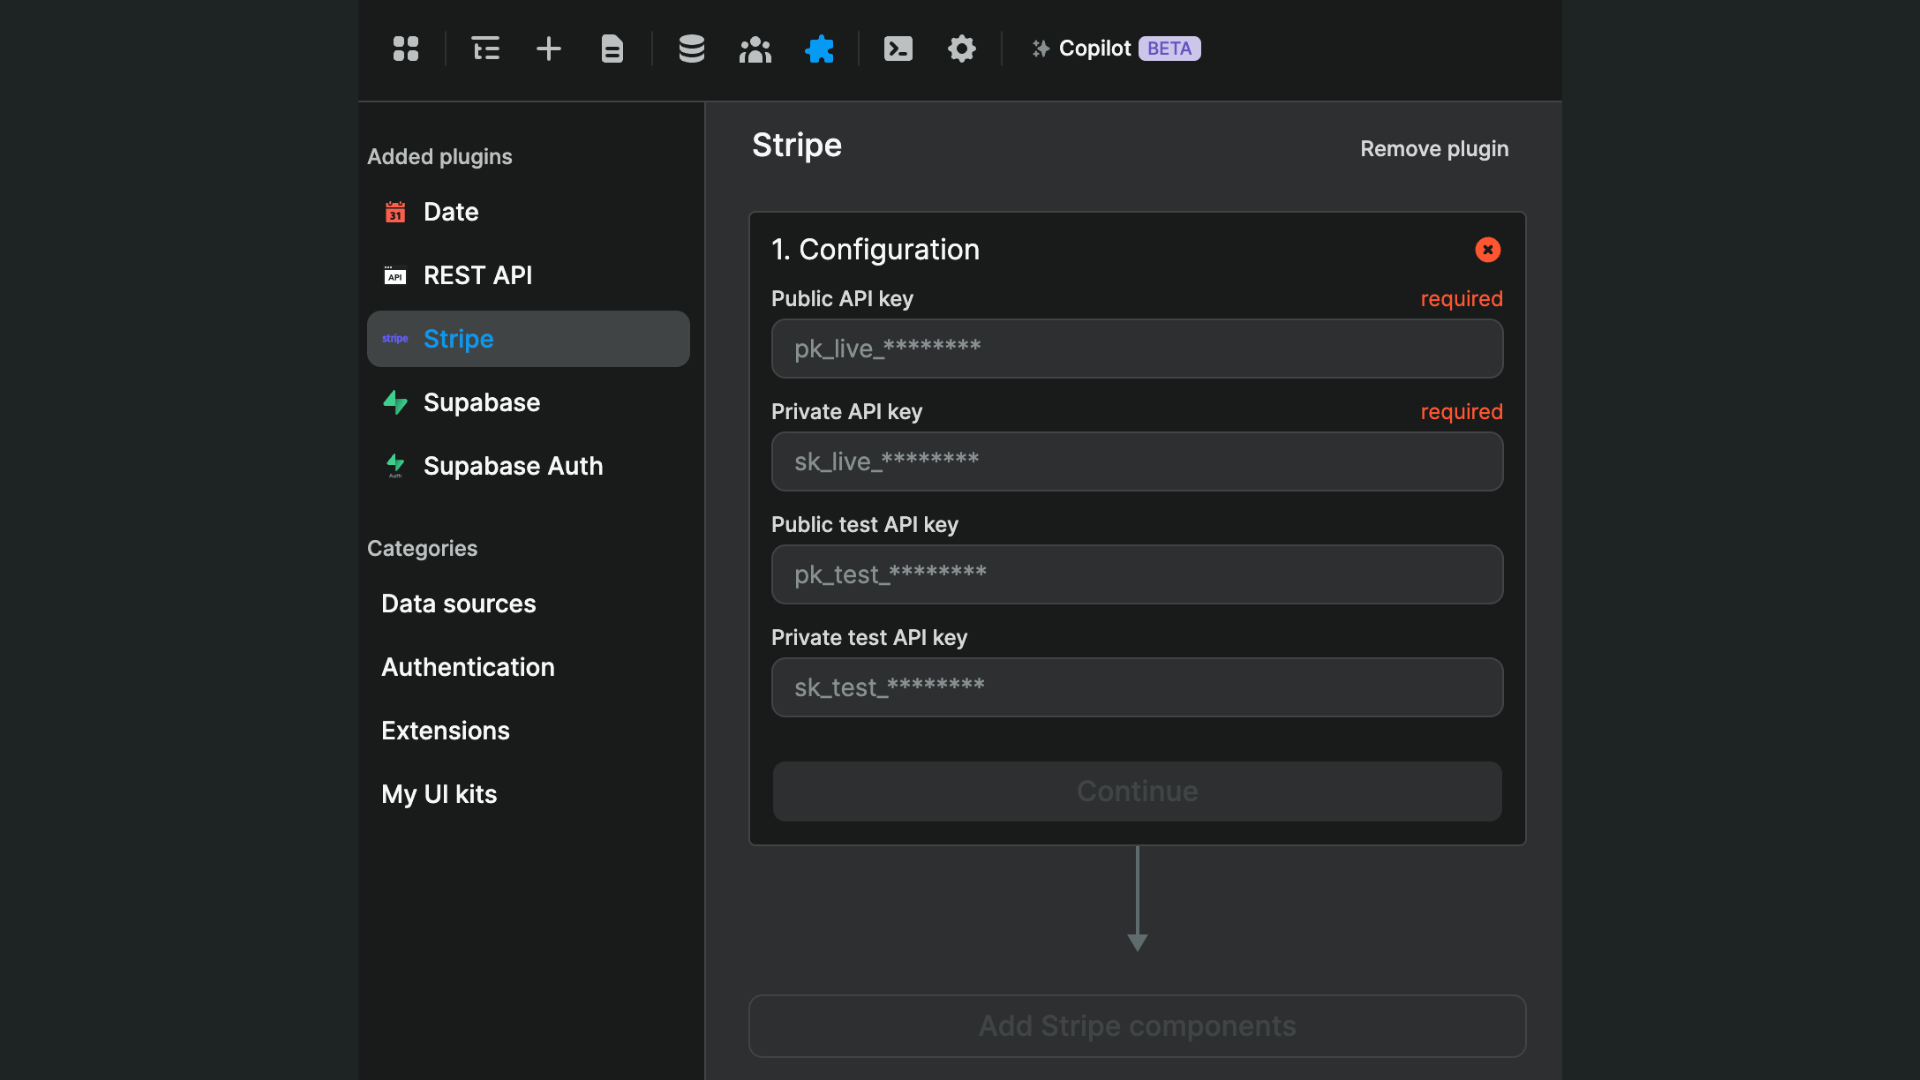
Once you have added the Stripe Extension, you will be invited to set it up with your production API keys:
TIP
If you want to work with test data in Stripe, you can also add test API keys. Better be safe than sorry! 😅
Add a payment form
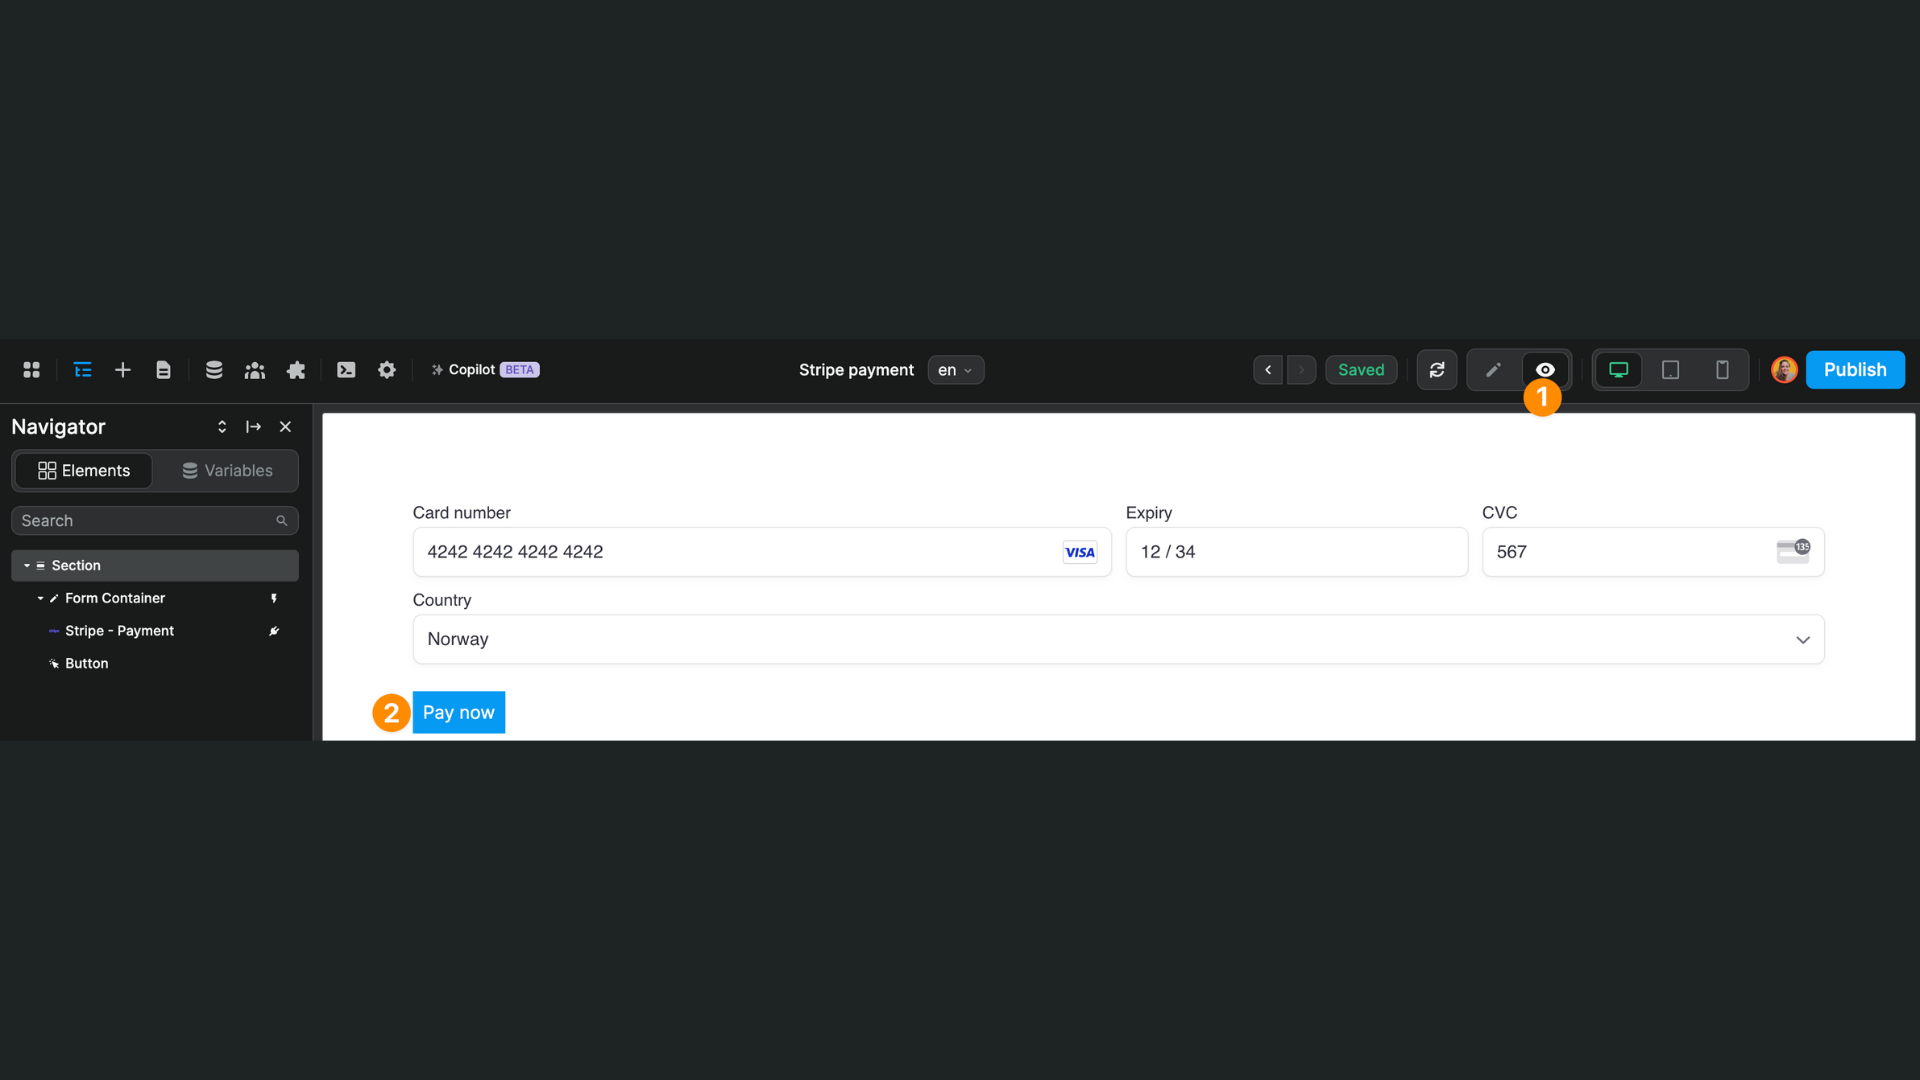
Once you have set up the Stripe plugin, you will have access to the payment form element.
To display a Stripe payment form on your web app, you'll need to add a Form Container with a submit button:
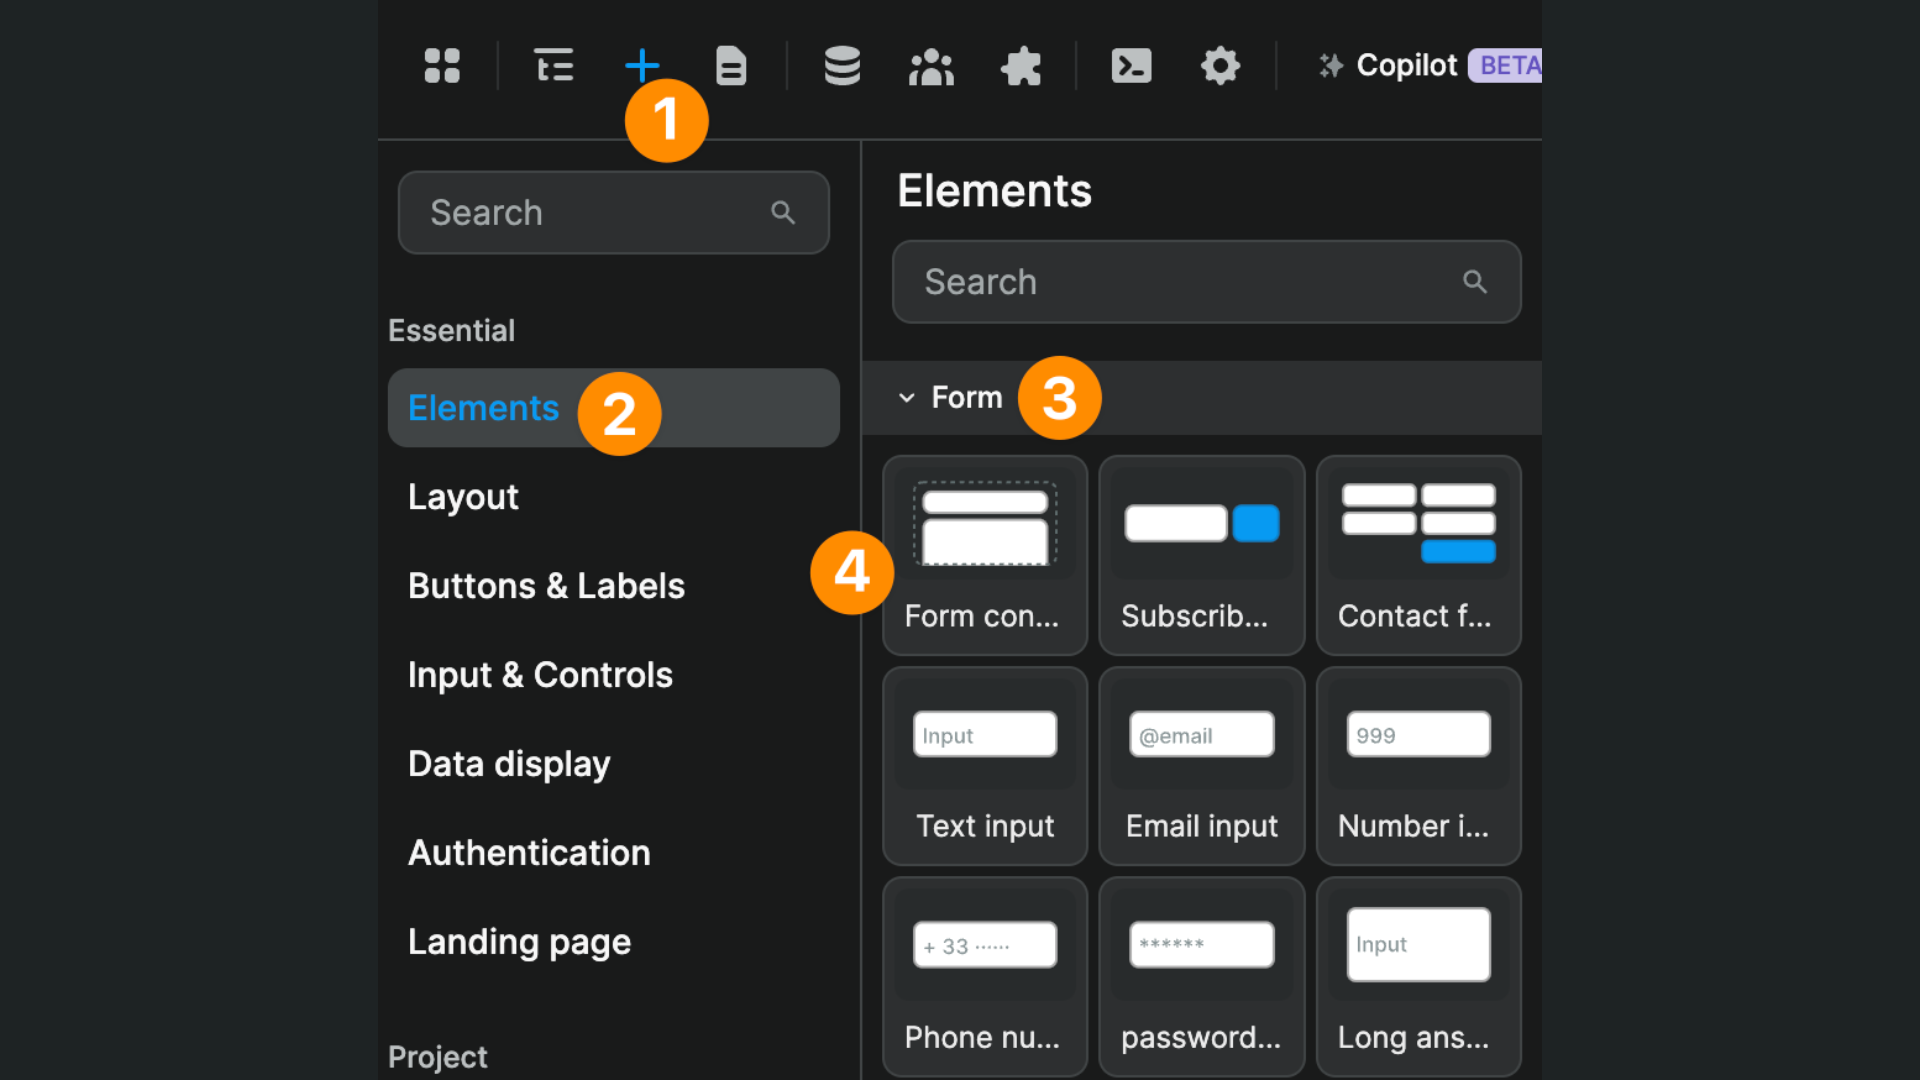
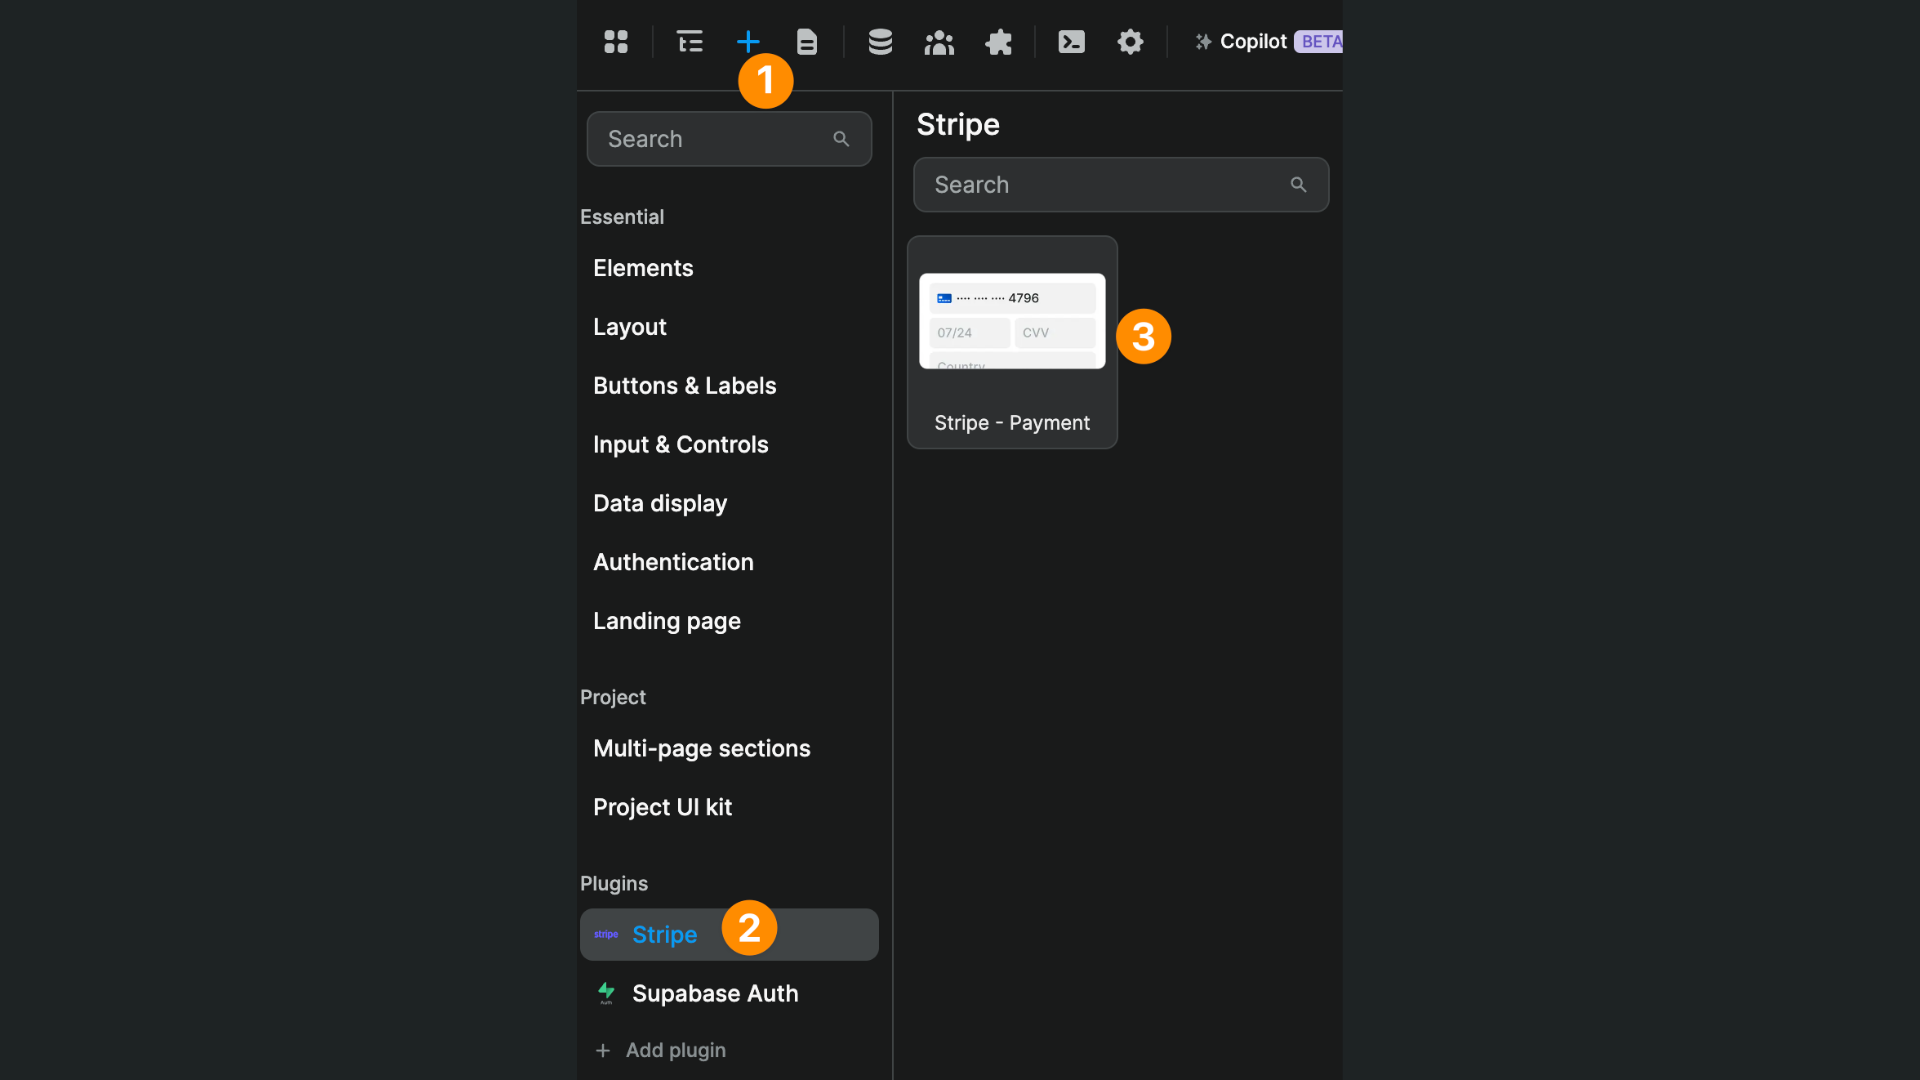
Then, you'll want to remove the input so you're only left with the button element and add the Stripe - Payment element inside the form container you added above:
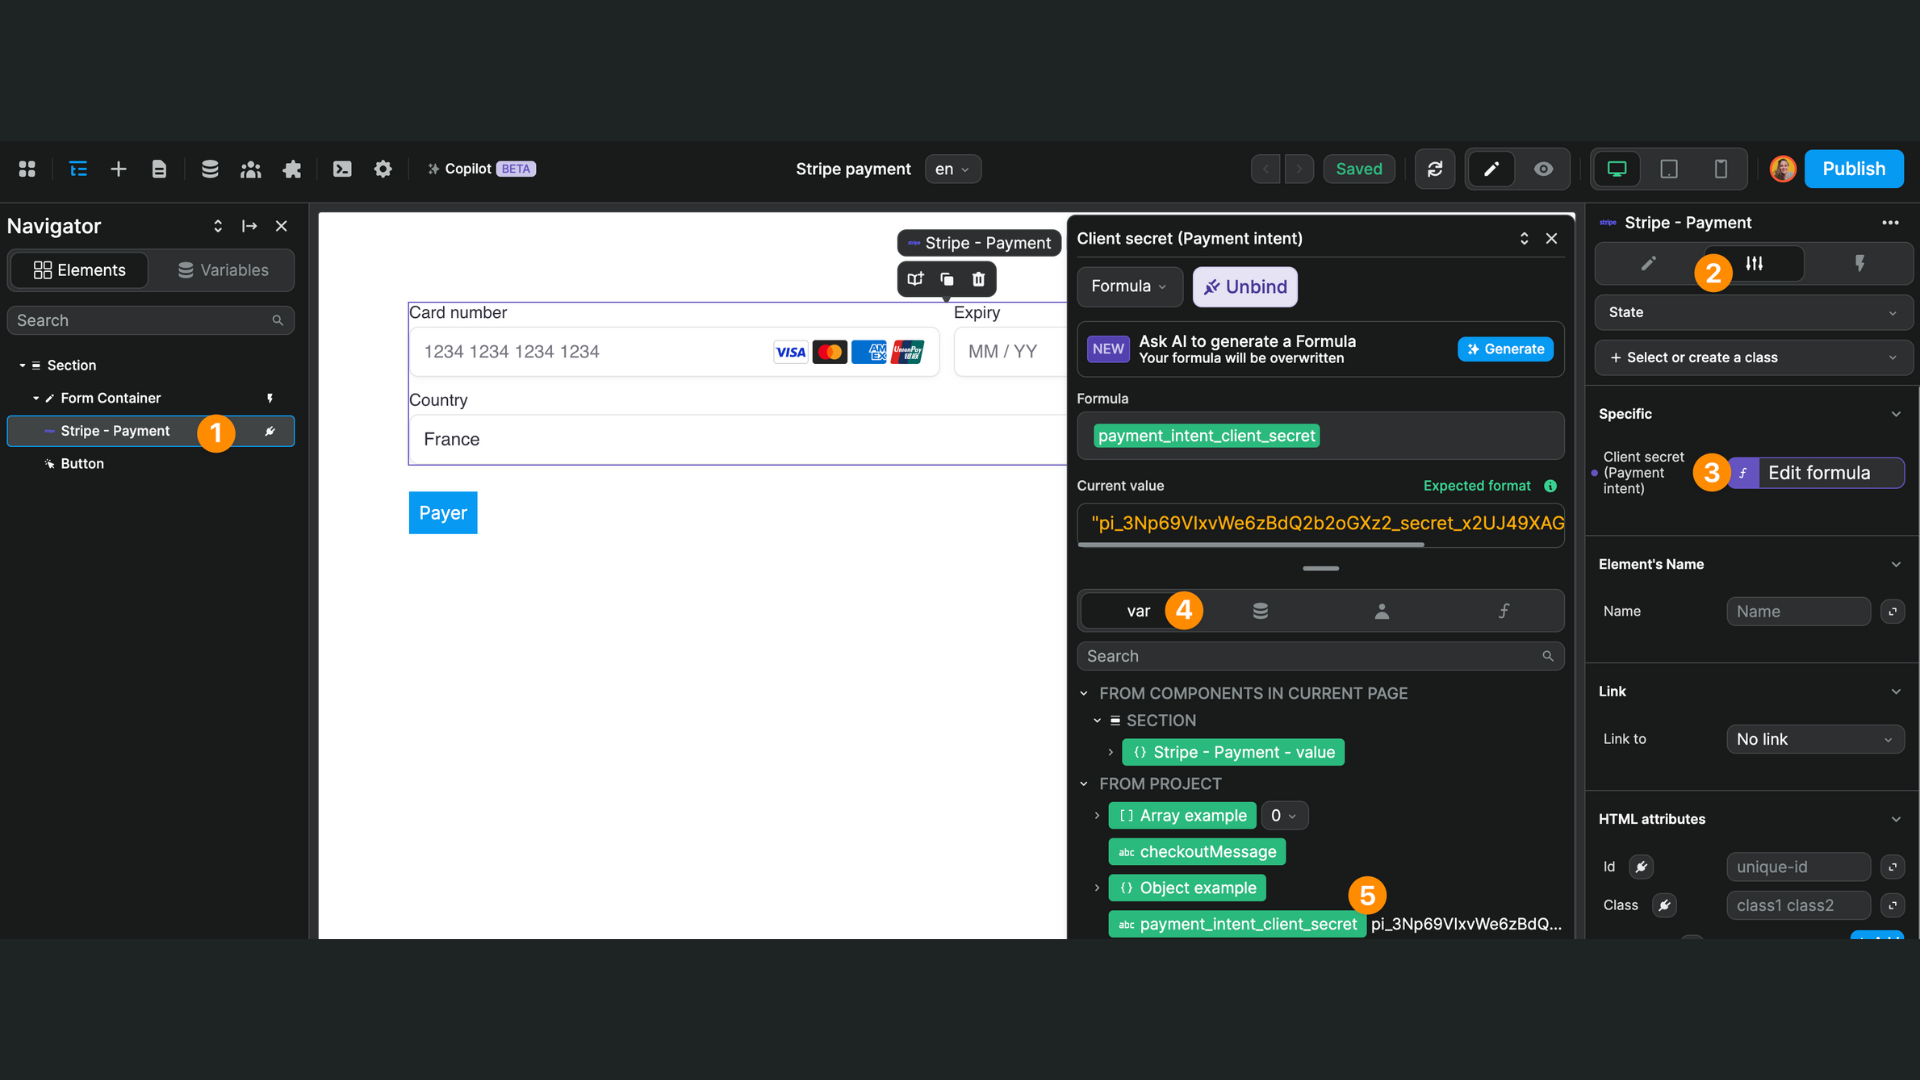
In the Stripe payment element's Settings, you'll need a client secret:
Create client intent & client secret workflow
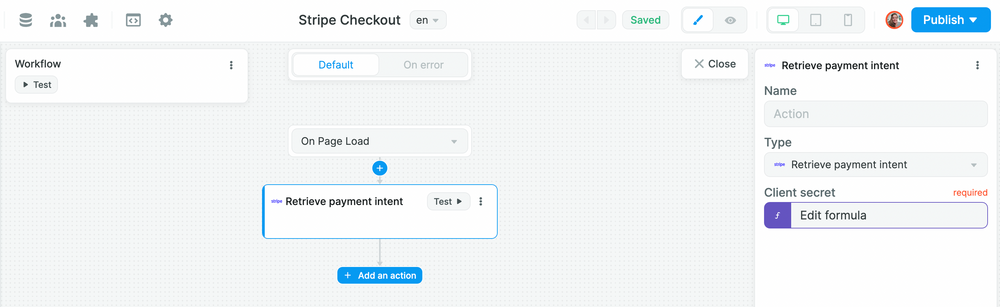
To get a client secret, we first need to create a client intent. We do this by creating a workflow that triggers on page load.
In the first step, we create a payment intent, decide which payment methods the client can use and which Stripe products they can purchase (the Price ID will come from your Stripe account):
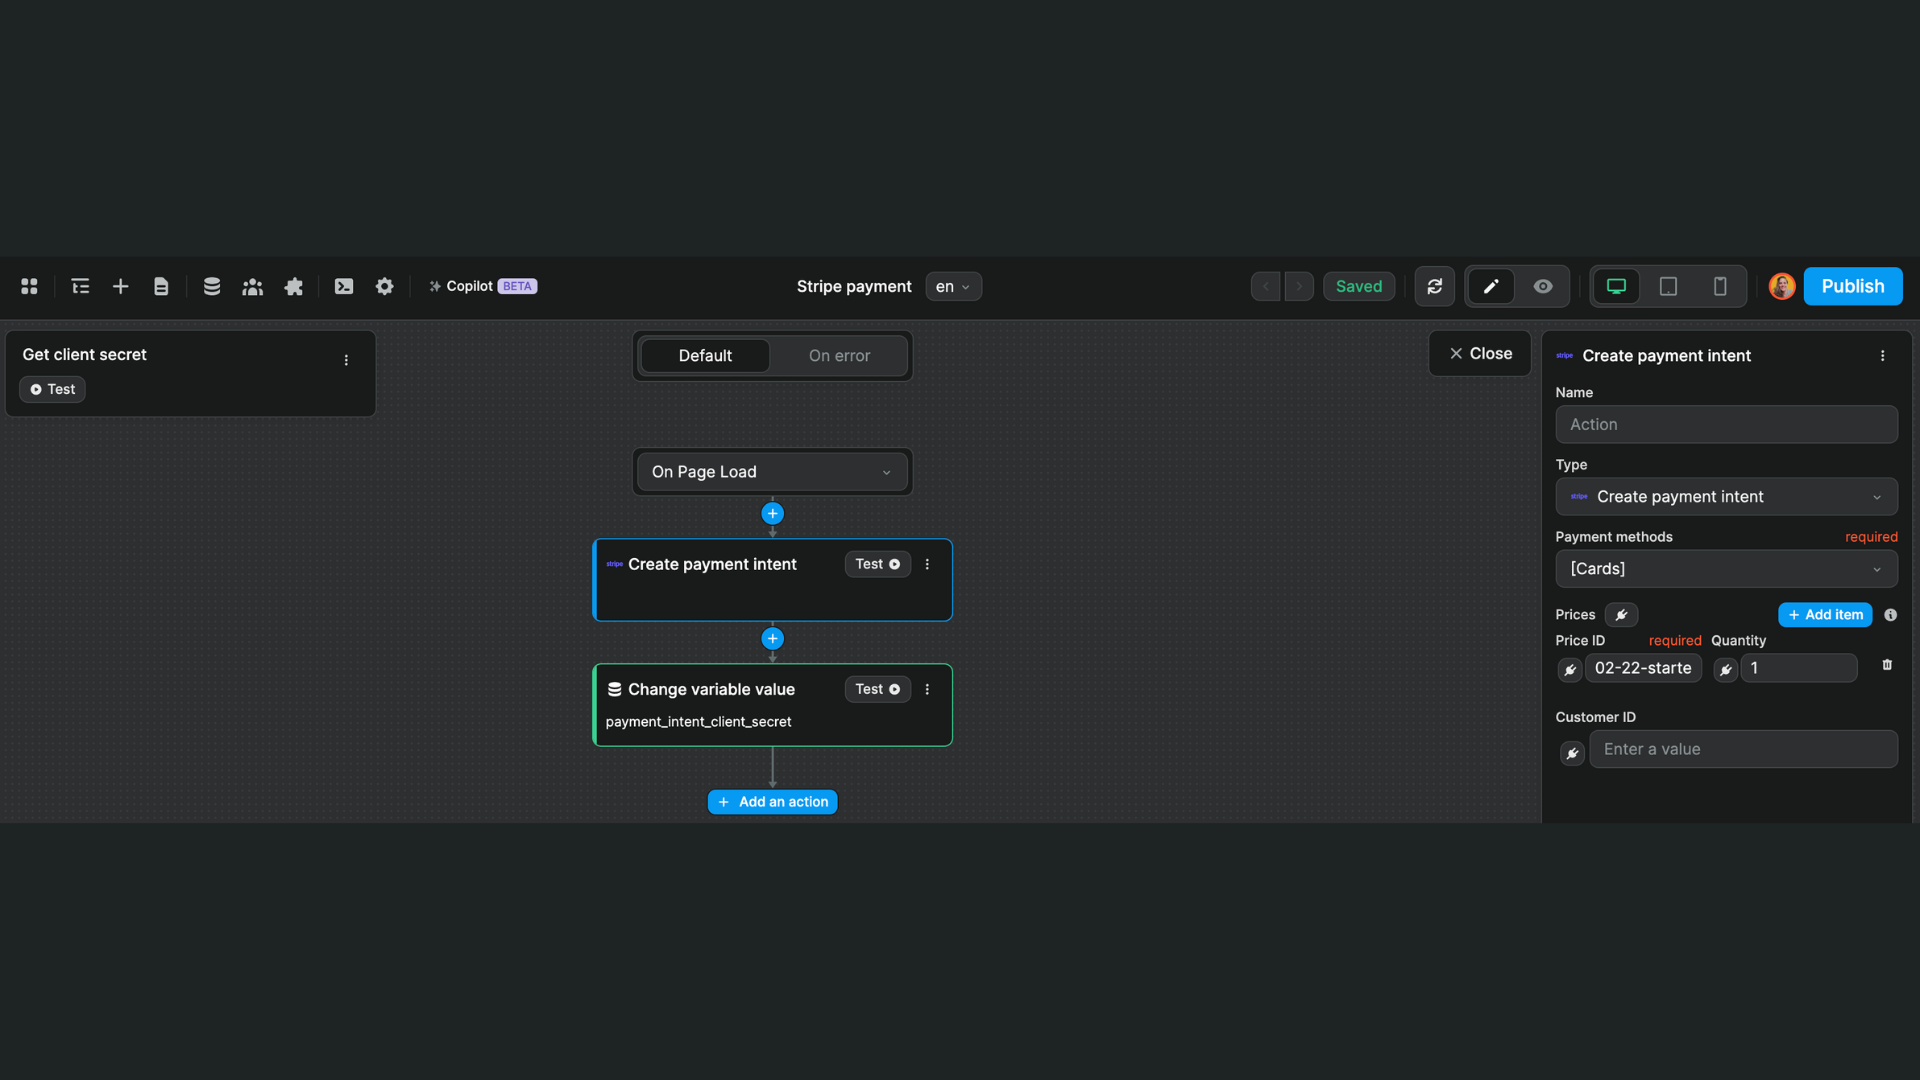
We will then test Action 1 because we need to bind its result in Action 2.
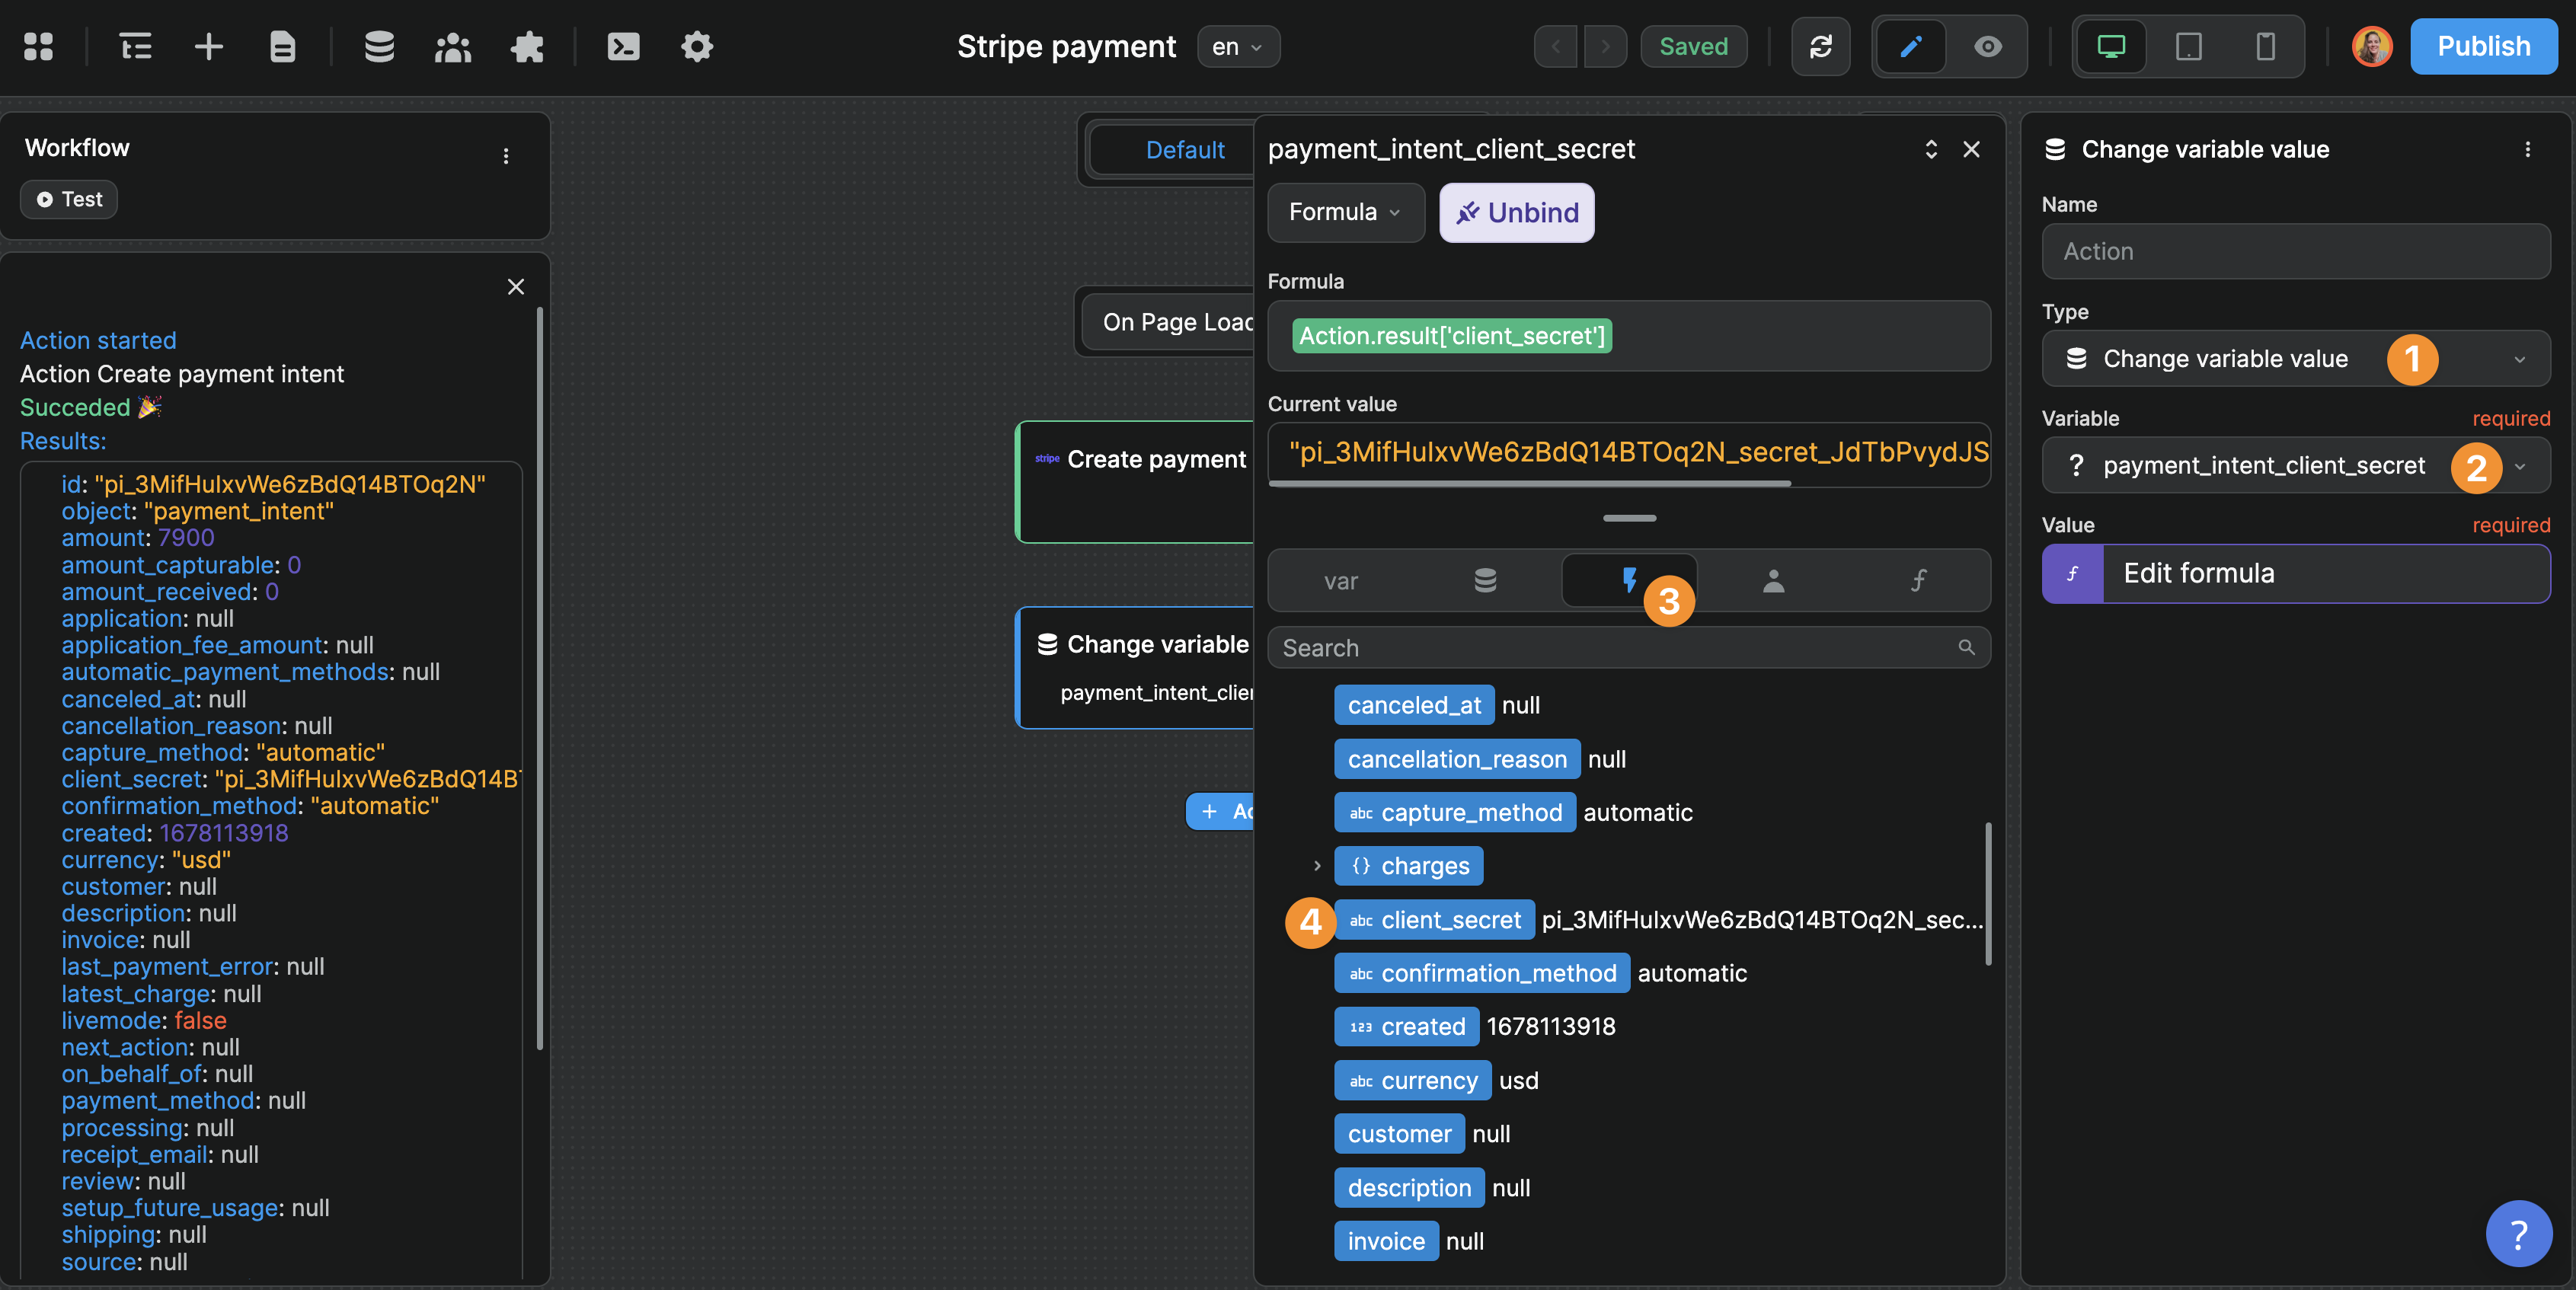
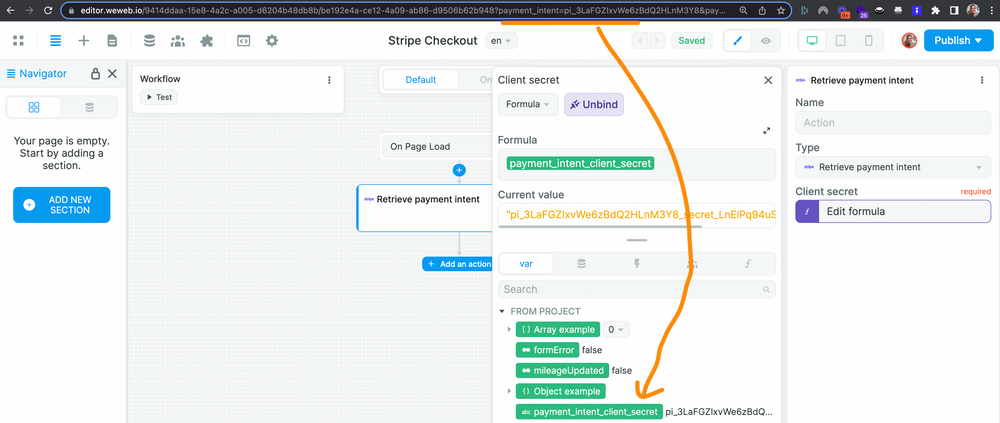
In step two, we setup a Change variable value action to update a payment_intent_client_secret variable (type Query) with the value of client_secret in the result of the previous action:
TIP
The query variable must be named payment_intent_client_secret in WeWeb because that's the name of the query string Stripe will pass when creating the client secret. If you choose a different name in WeWeb, the browser won't be able to recognize the query string provided by Stripe.
Once our workflow triggered on page load is complete, we will go back to our Stripe - Payment element and bind the payment_intent_client_secret variable to the Client secret setting:
Confirm payment workflow
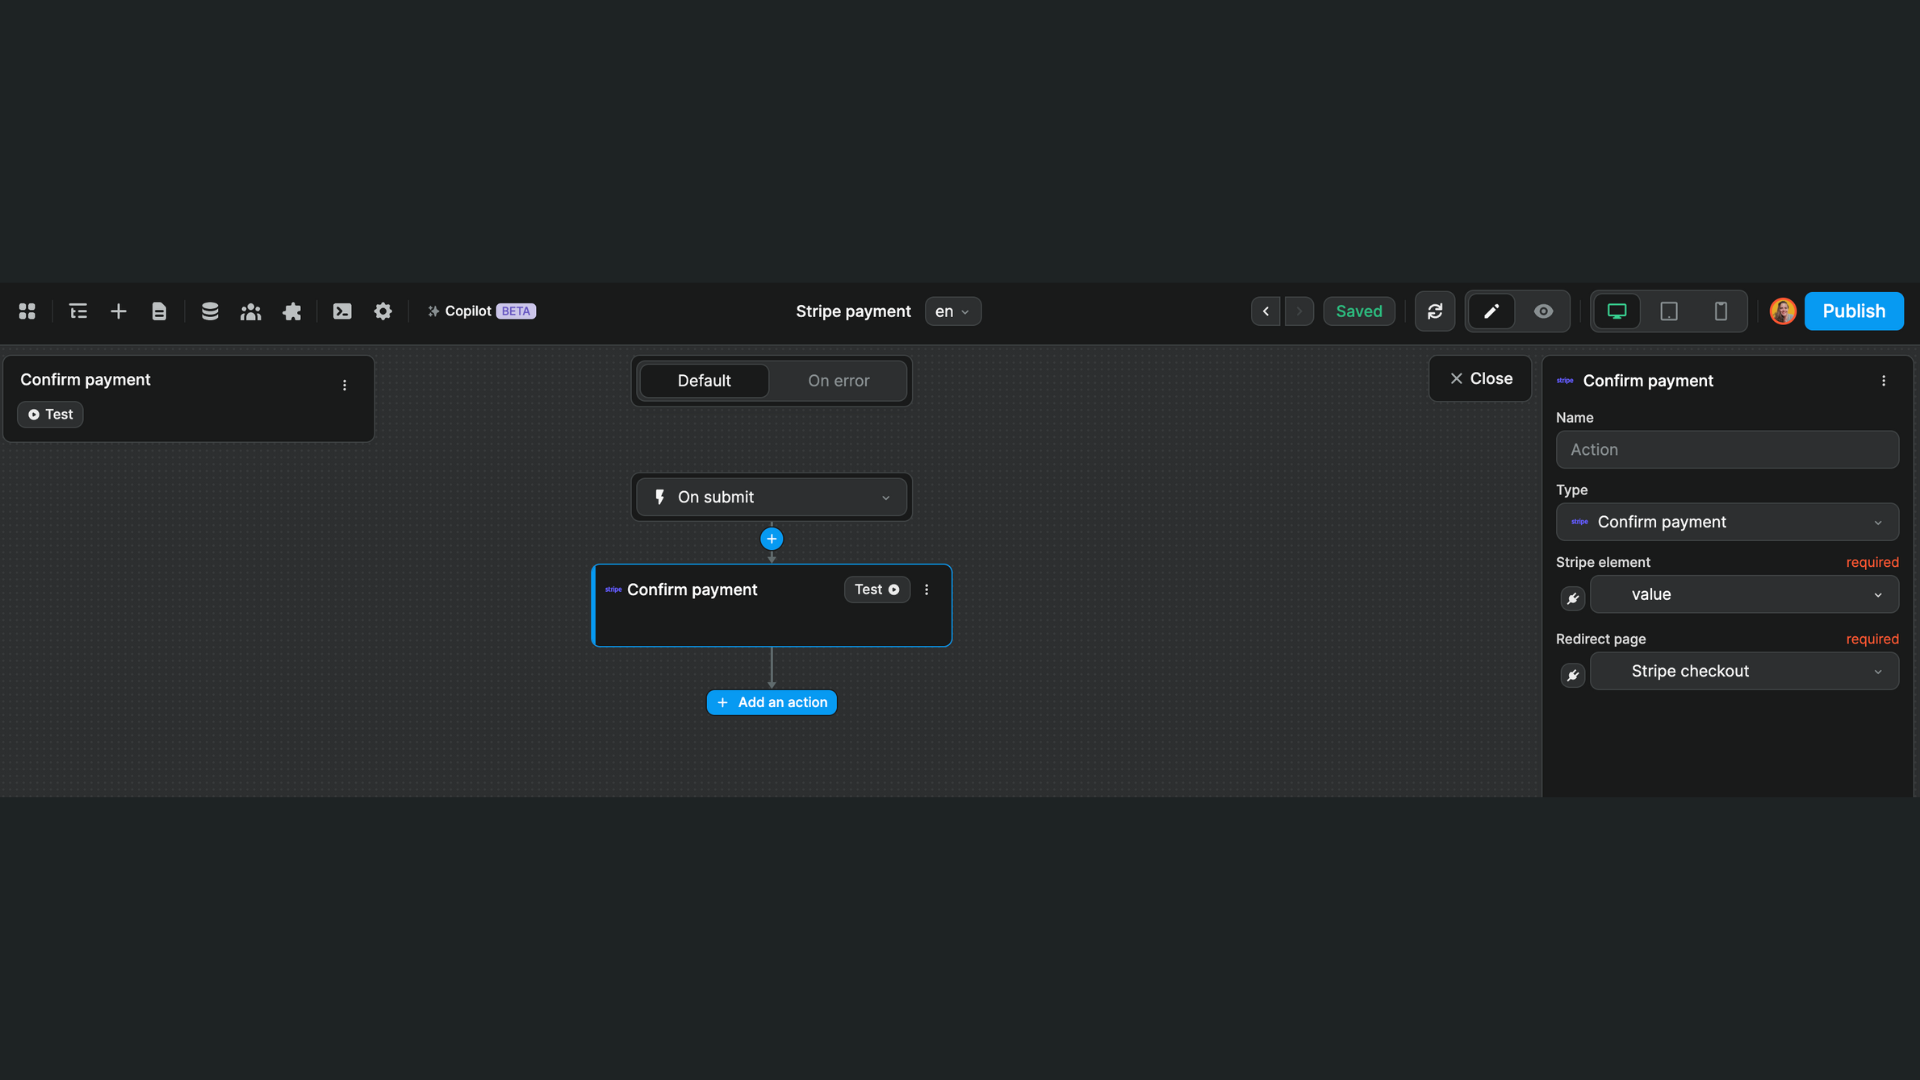
Finally, on the form container, we will trigger a workflow On submit to confirm the payment action and redirect the user to a checkout page when they submit the payment form:
Fake payment
In order to move forward with the tutorial, you will need to fake a payment intent with a fake card. Read more about simulating payments in the Stripe documentation.
Once you've entered fake payment details, you can submit the form to trigger the workflow:
You should be redirected to the checkout page.
Add a checkout page
On the checkout page, we'll create a workflow that triggers on page to retrieve the user's payment intent:
Action 1: Retrieve the payment intent
We will add the Retrieve payment intent action and bind this to the payment_intent_client_secret variable we created earlier.
It will look something like this:
If you've named your variable correctly and faked a payment with a fake Stripe card, you should be able to see the the payment_intent_client_secret query string in the URL, which is retrieved by WeWeb in the payment_intent_client_secret variable:
Action 2: Store the payment intent
After testing Action 1, we will create an Action 2 to store the payment intent in a variable of type Object.
We will choose a Change variable value action and bind it to the result of the previous action in the workflow:
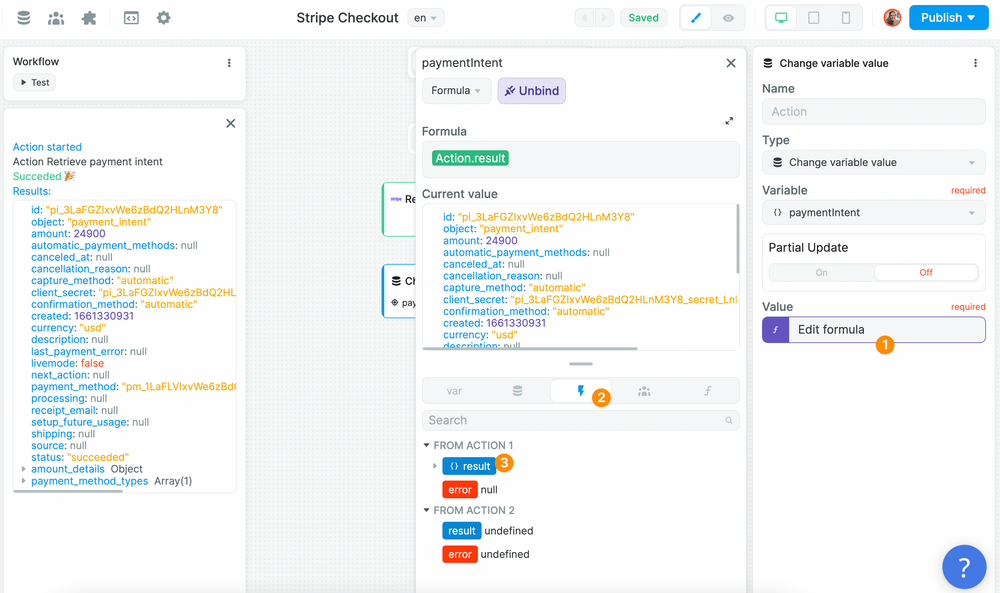
Again, we need to test this action if we want to update the variable.
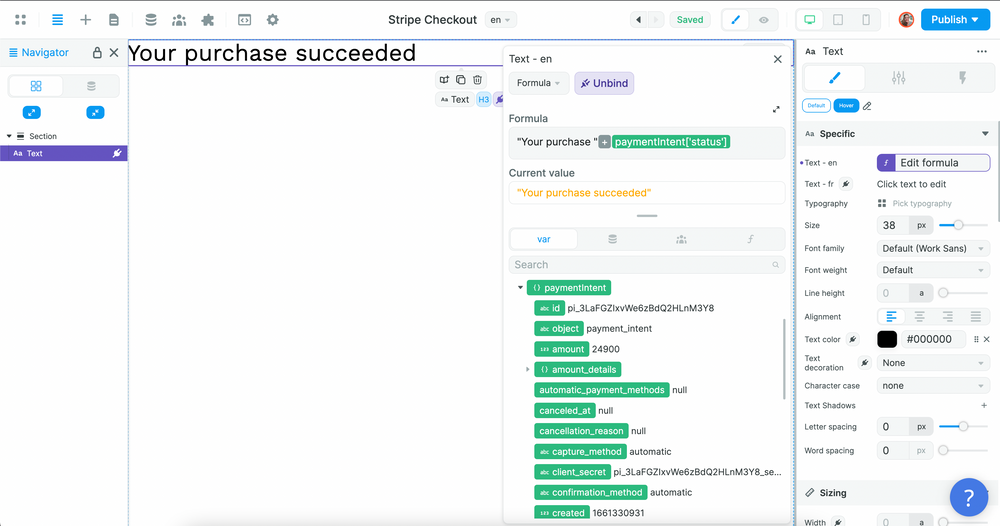
Then, we could use the information from the variable to style the checkout page.
For example:
Before publishing
When you publish your application, the Stripe - payment element will not be rendered on the page by default because it can only be rendered if a payment intent is found and, when the browser first loads the page, the client intent will not have been created yet.
In order to ensure the Stripe payment element is rendered on the page, you'll need to bind it's Conditional rendering setting to the payment_intent_client_secret variable:
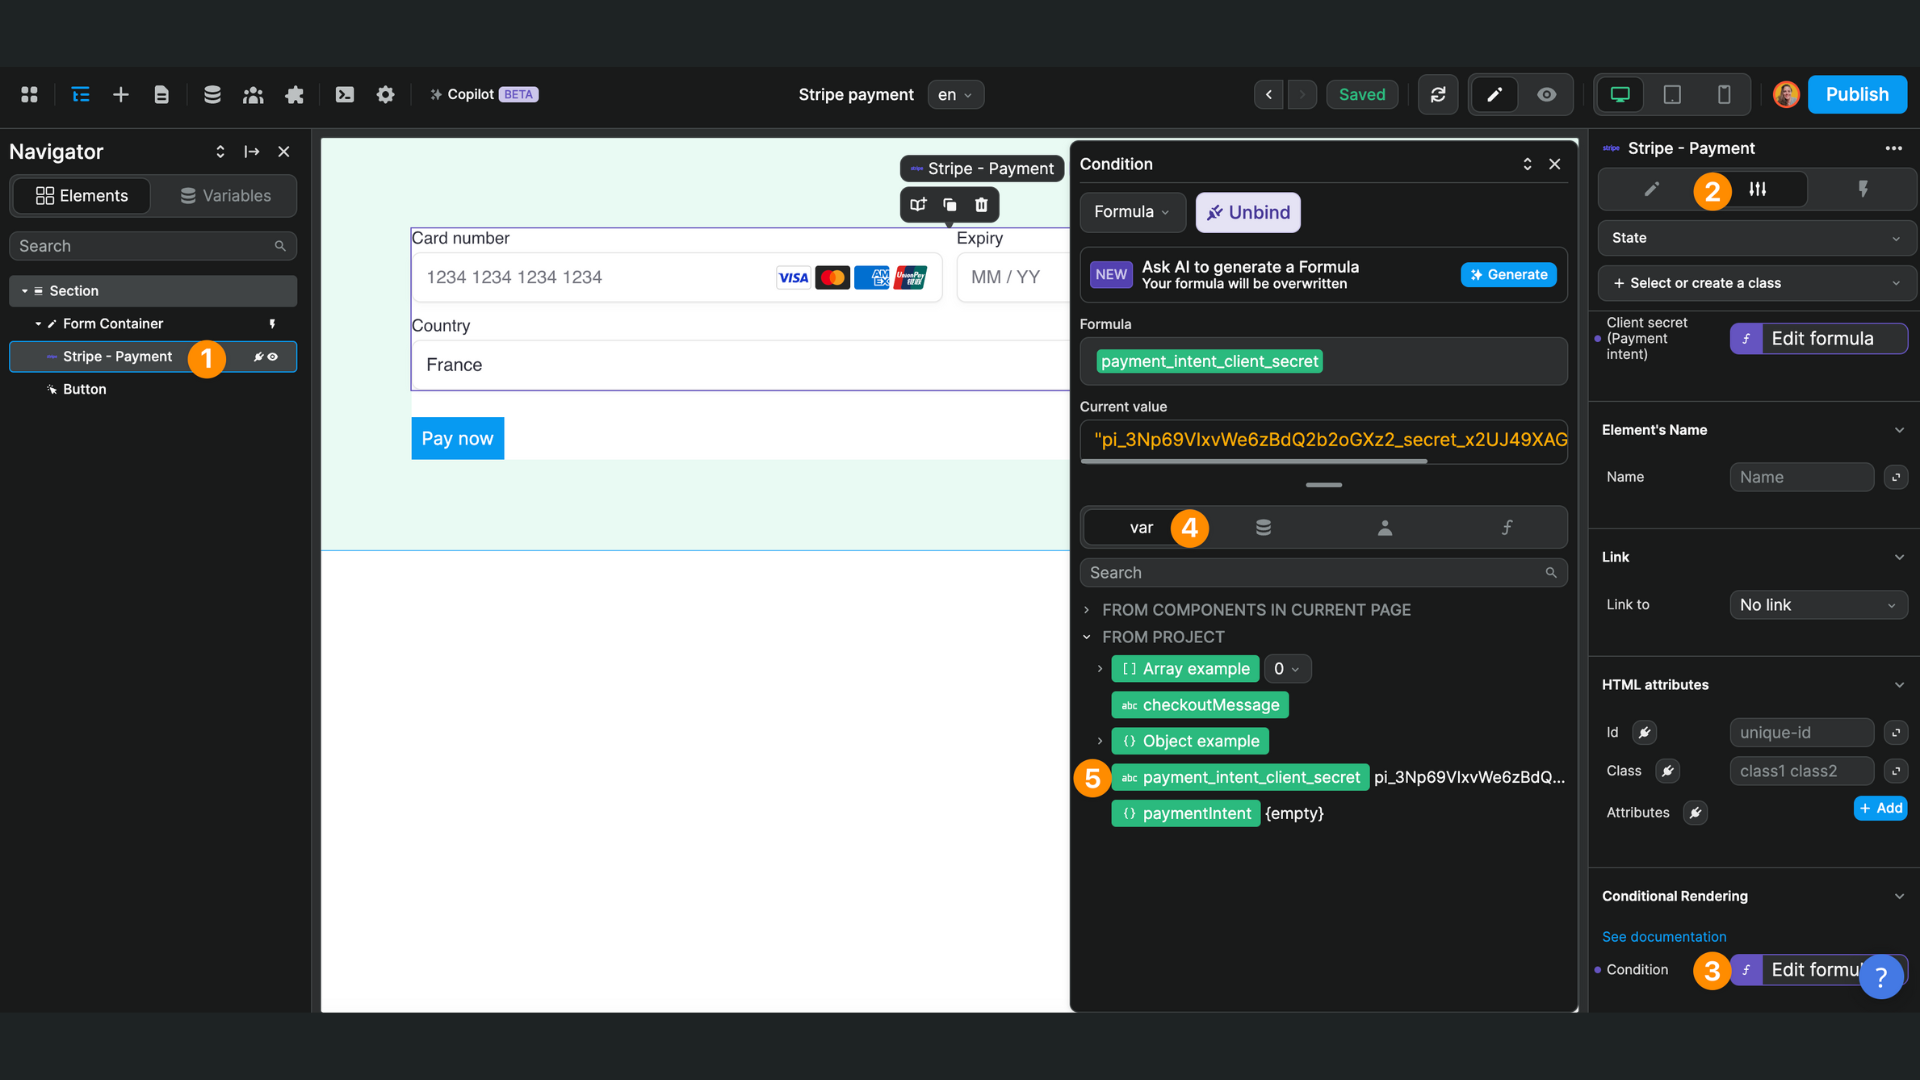
That way, when the workflow is triggered on page load and the payment intent variable updated with the client secret, the Stripe payment element will be rendered on the page.
Video Mini-Course
If you want to dig deeper and learn how to develop a full Stripe payment system in WeWeb, you can watch our YouTube series on the topic:
- How to Implement Stripe Checkout in a WeWeb app
- How to Implement Stripe Subscriptions in a WeWeb app
- How to Implement Stripe Elements in a WeWeb app