Appearance
Google Maps
Add Google plugin
To add the Google plugin, go to Plugins > Extensions > Google:
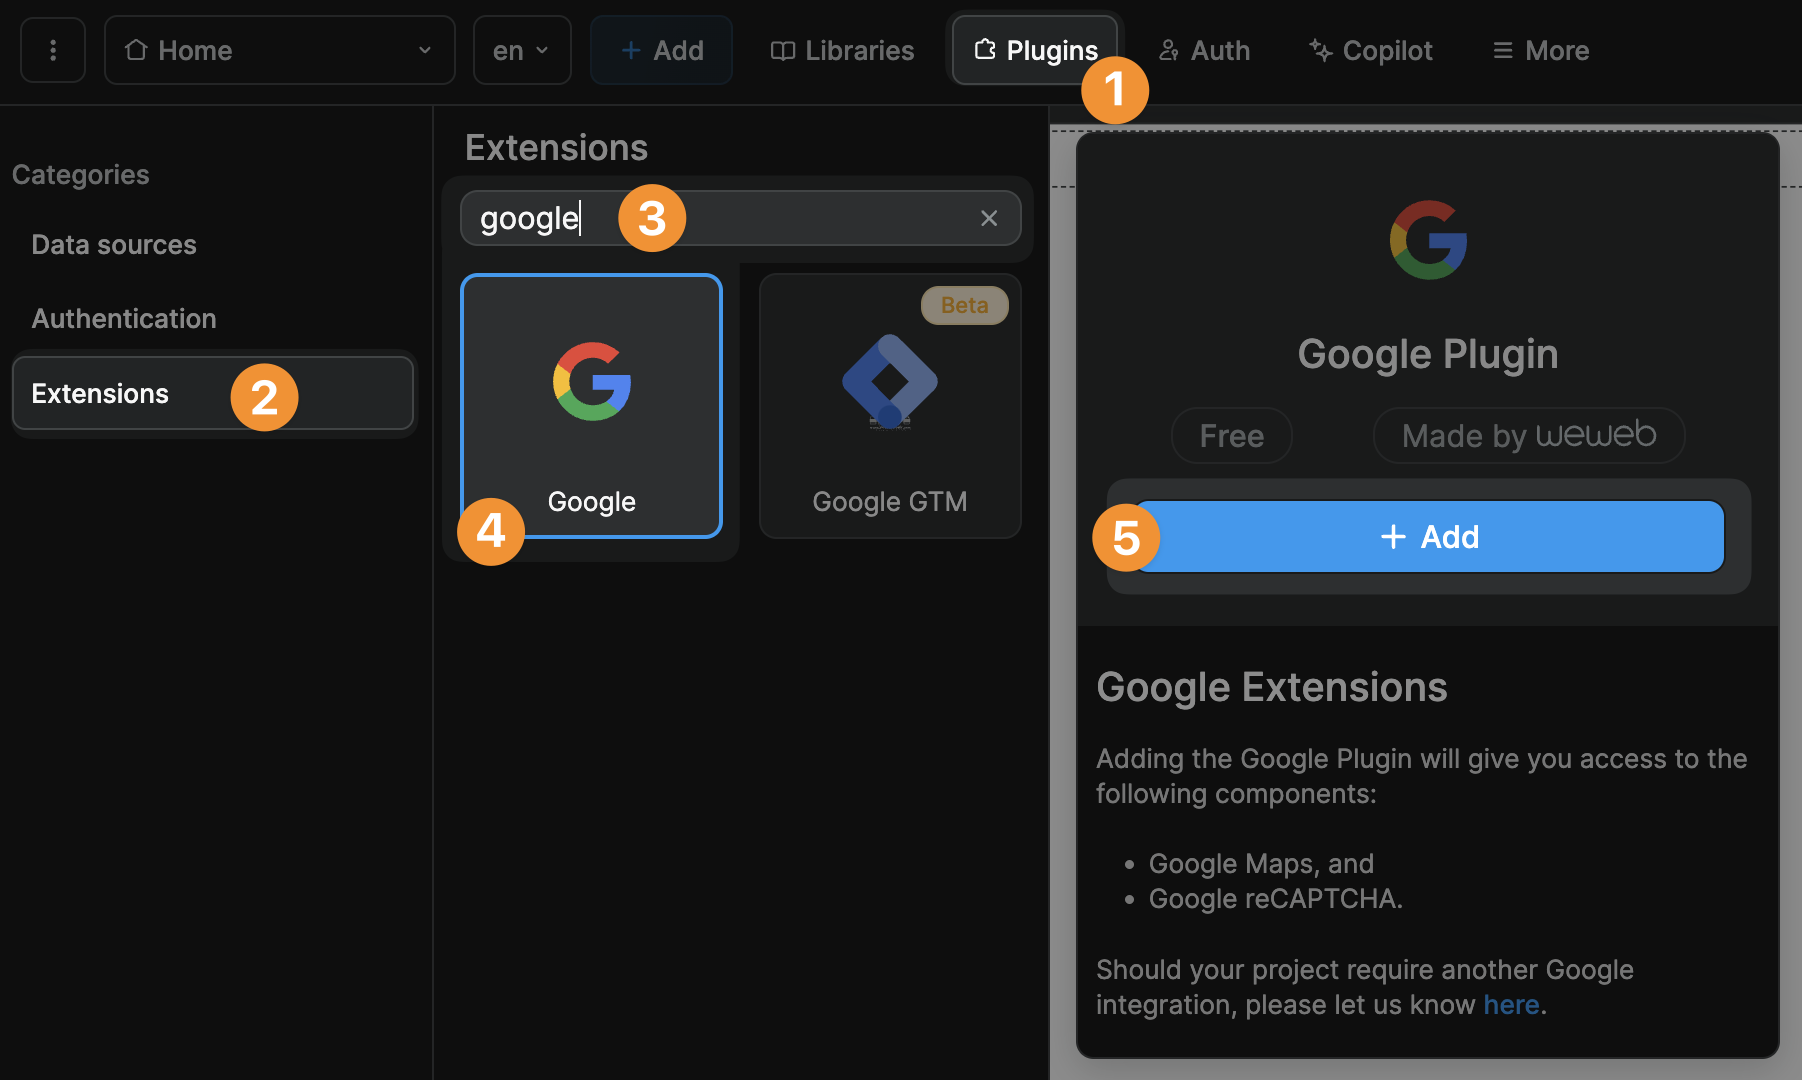
That's it. No configuration required at plugin level.
Once you have added the Google extension, you will be able to access Google Maps and Google reCAPTCHA elements.
Add Maps element
You will find the Maps element in Add > Google:
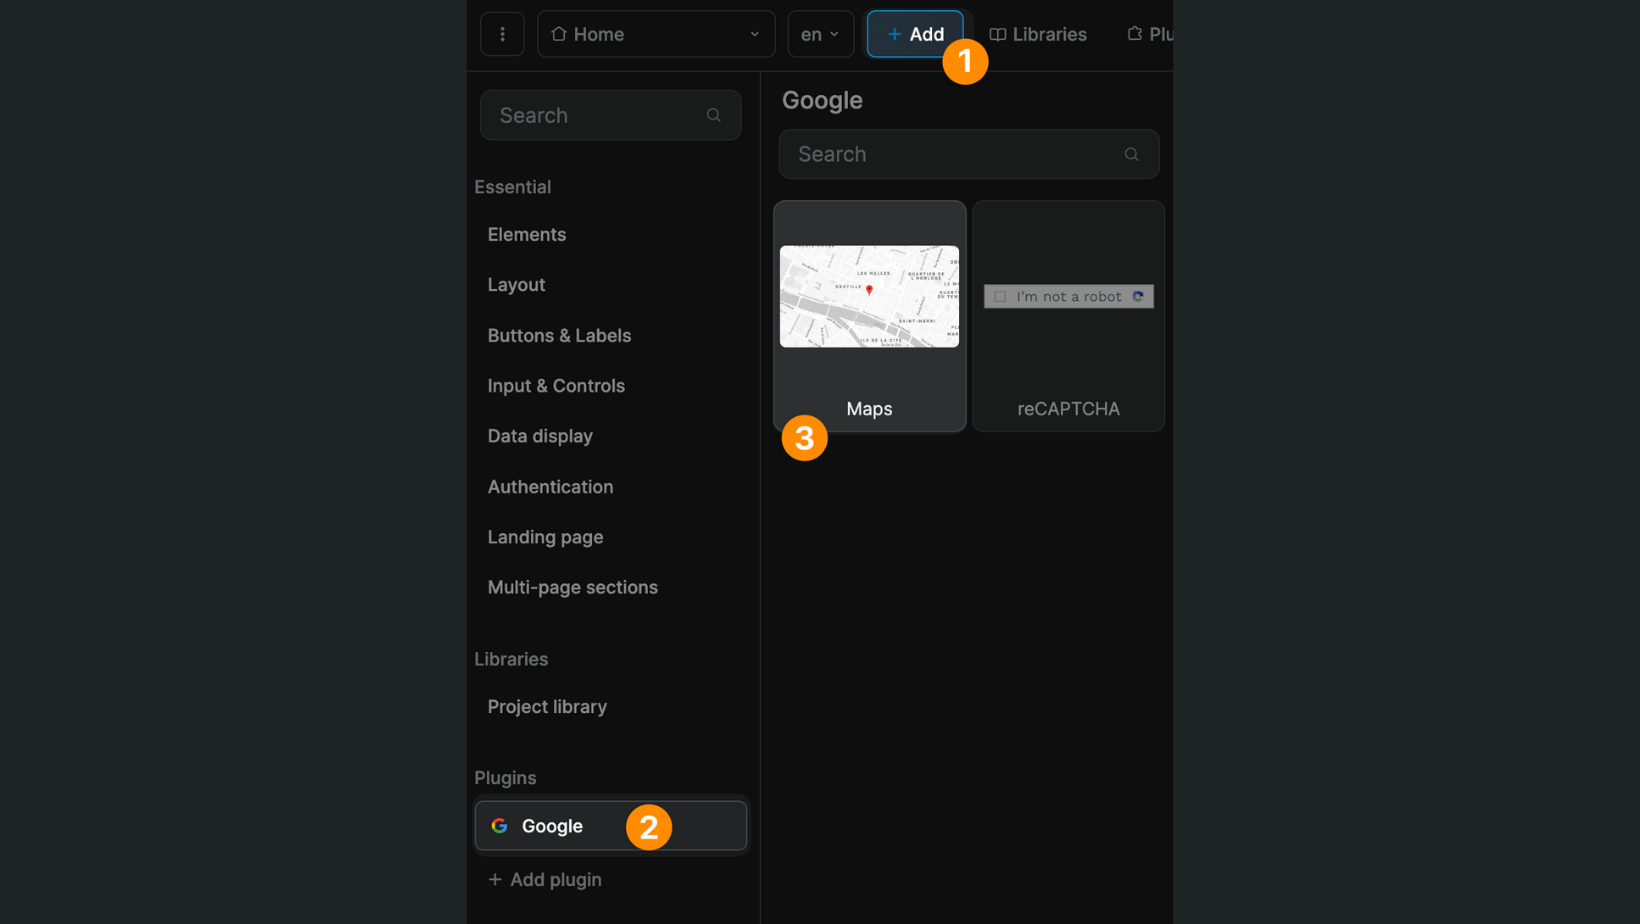
You can drag-and-drop this element in the Canvas or in the Navigator:
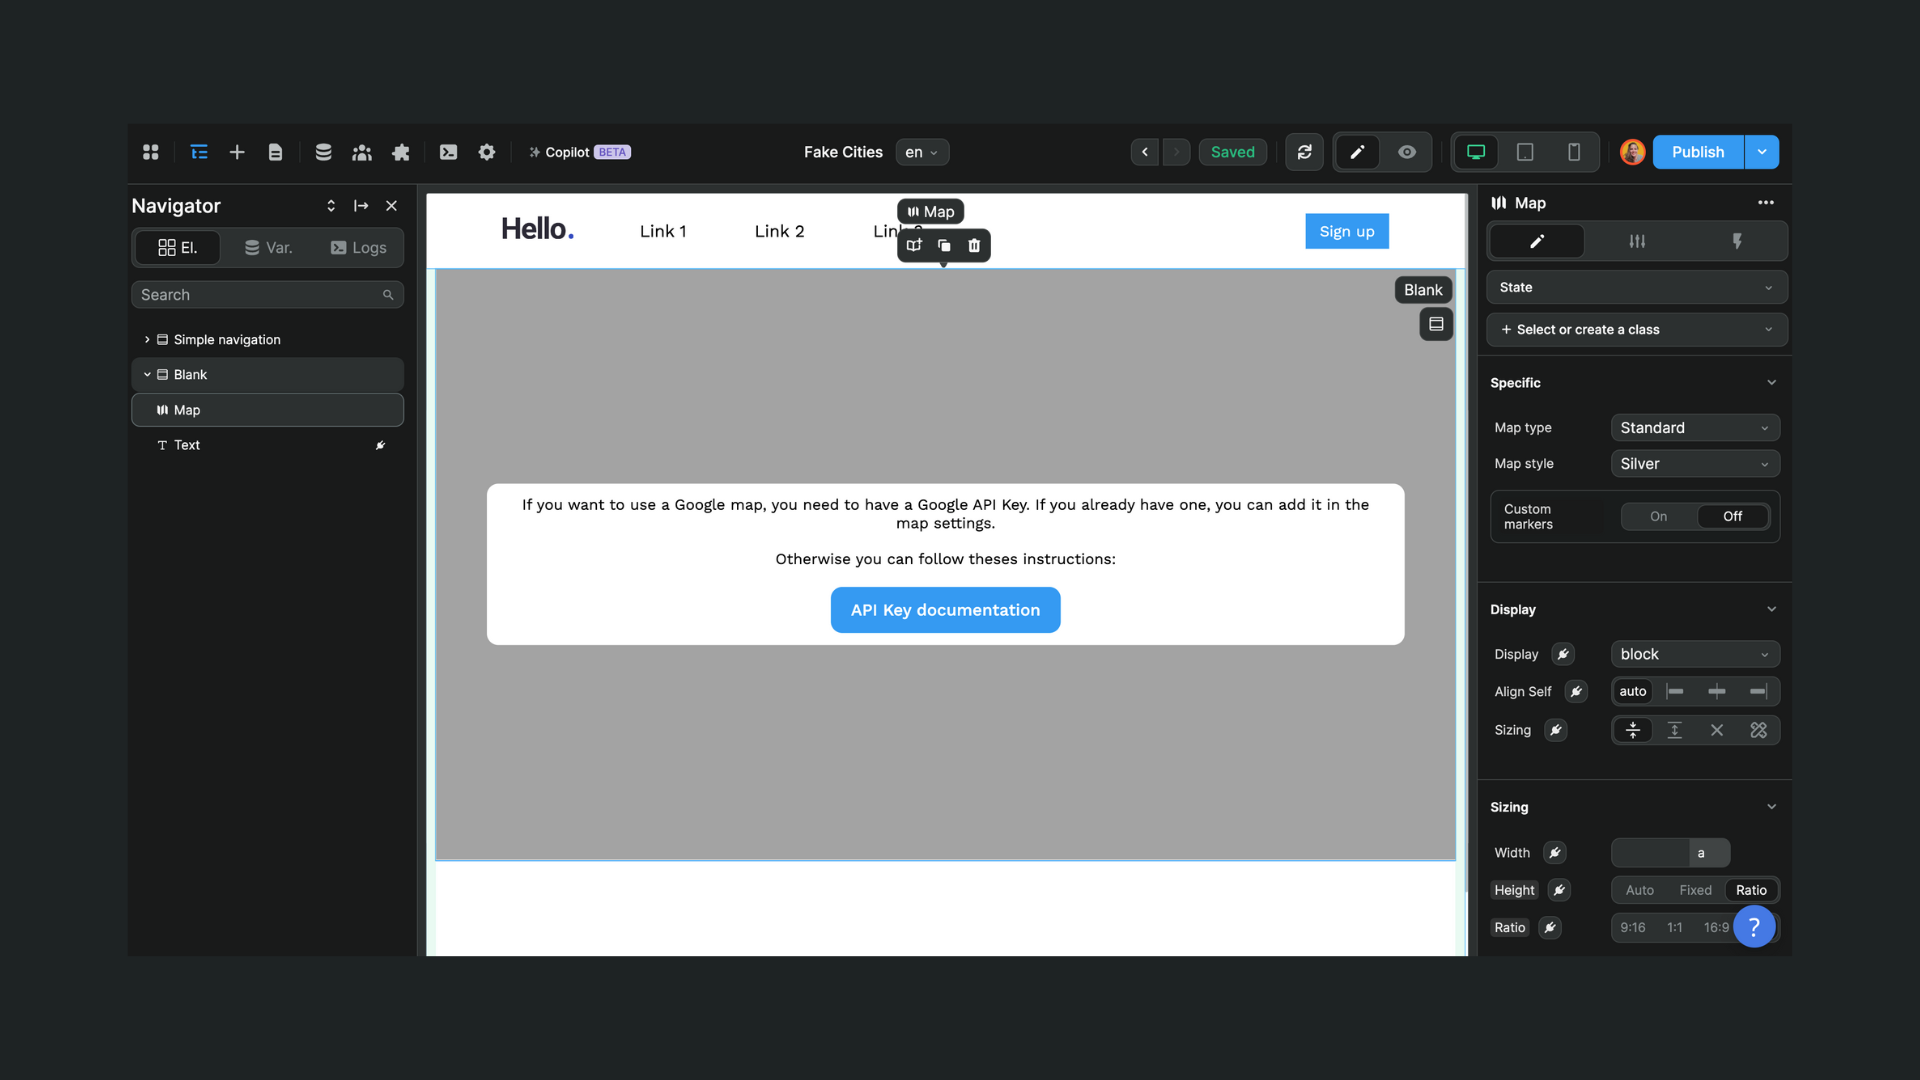
How the map element works
Before you can display locations on the map, you'll need to provide the following data:
- A Google API key
- Name of the location
- Latitude
- Longitude
With that in mind, there are two-prerequisites to use the map element in WeWeb:
- you are able to generate a Google API Key
- you have added a Collection with a list of locations in WeWeb
Google configuration
Create a Google API Key
The first thing the map element needs is a Google API Key that is enabled for the Maps Javascript API:

To get this API key, you will need to:
- Log into to the Google Cloud Platform
- Create a developer project
- Enable the Maps Javascript API as shown above
- Create an API key in the Credentials menu as show below
- Add editor.weweb.io/* as an HTTP referrer
- Restrict the API key to the Maps Javascript API
- Enable the free trial in Google

If you get stuck here, please consult the Google developer documentation.
WARNING
You will notice our API key is visible in our screen recordings. Rest assured that we have deactivated these keys after recording. An API key should always be kept secret. Do not share your API keys with anyone.
HTTP referrer
For the Google Maps element to work properly inside the WeWeb editor and when your app is published, you need to tell Google what HTTP referrers you authorized:
editor.weweb.io/*to authorize the WeWeb editor,weweb-preview.io/*if you've published your WeWeb without a custom domain, andyourcustomdomain.com/*if you've published your WeWeb project on a custom domain.
Map settings
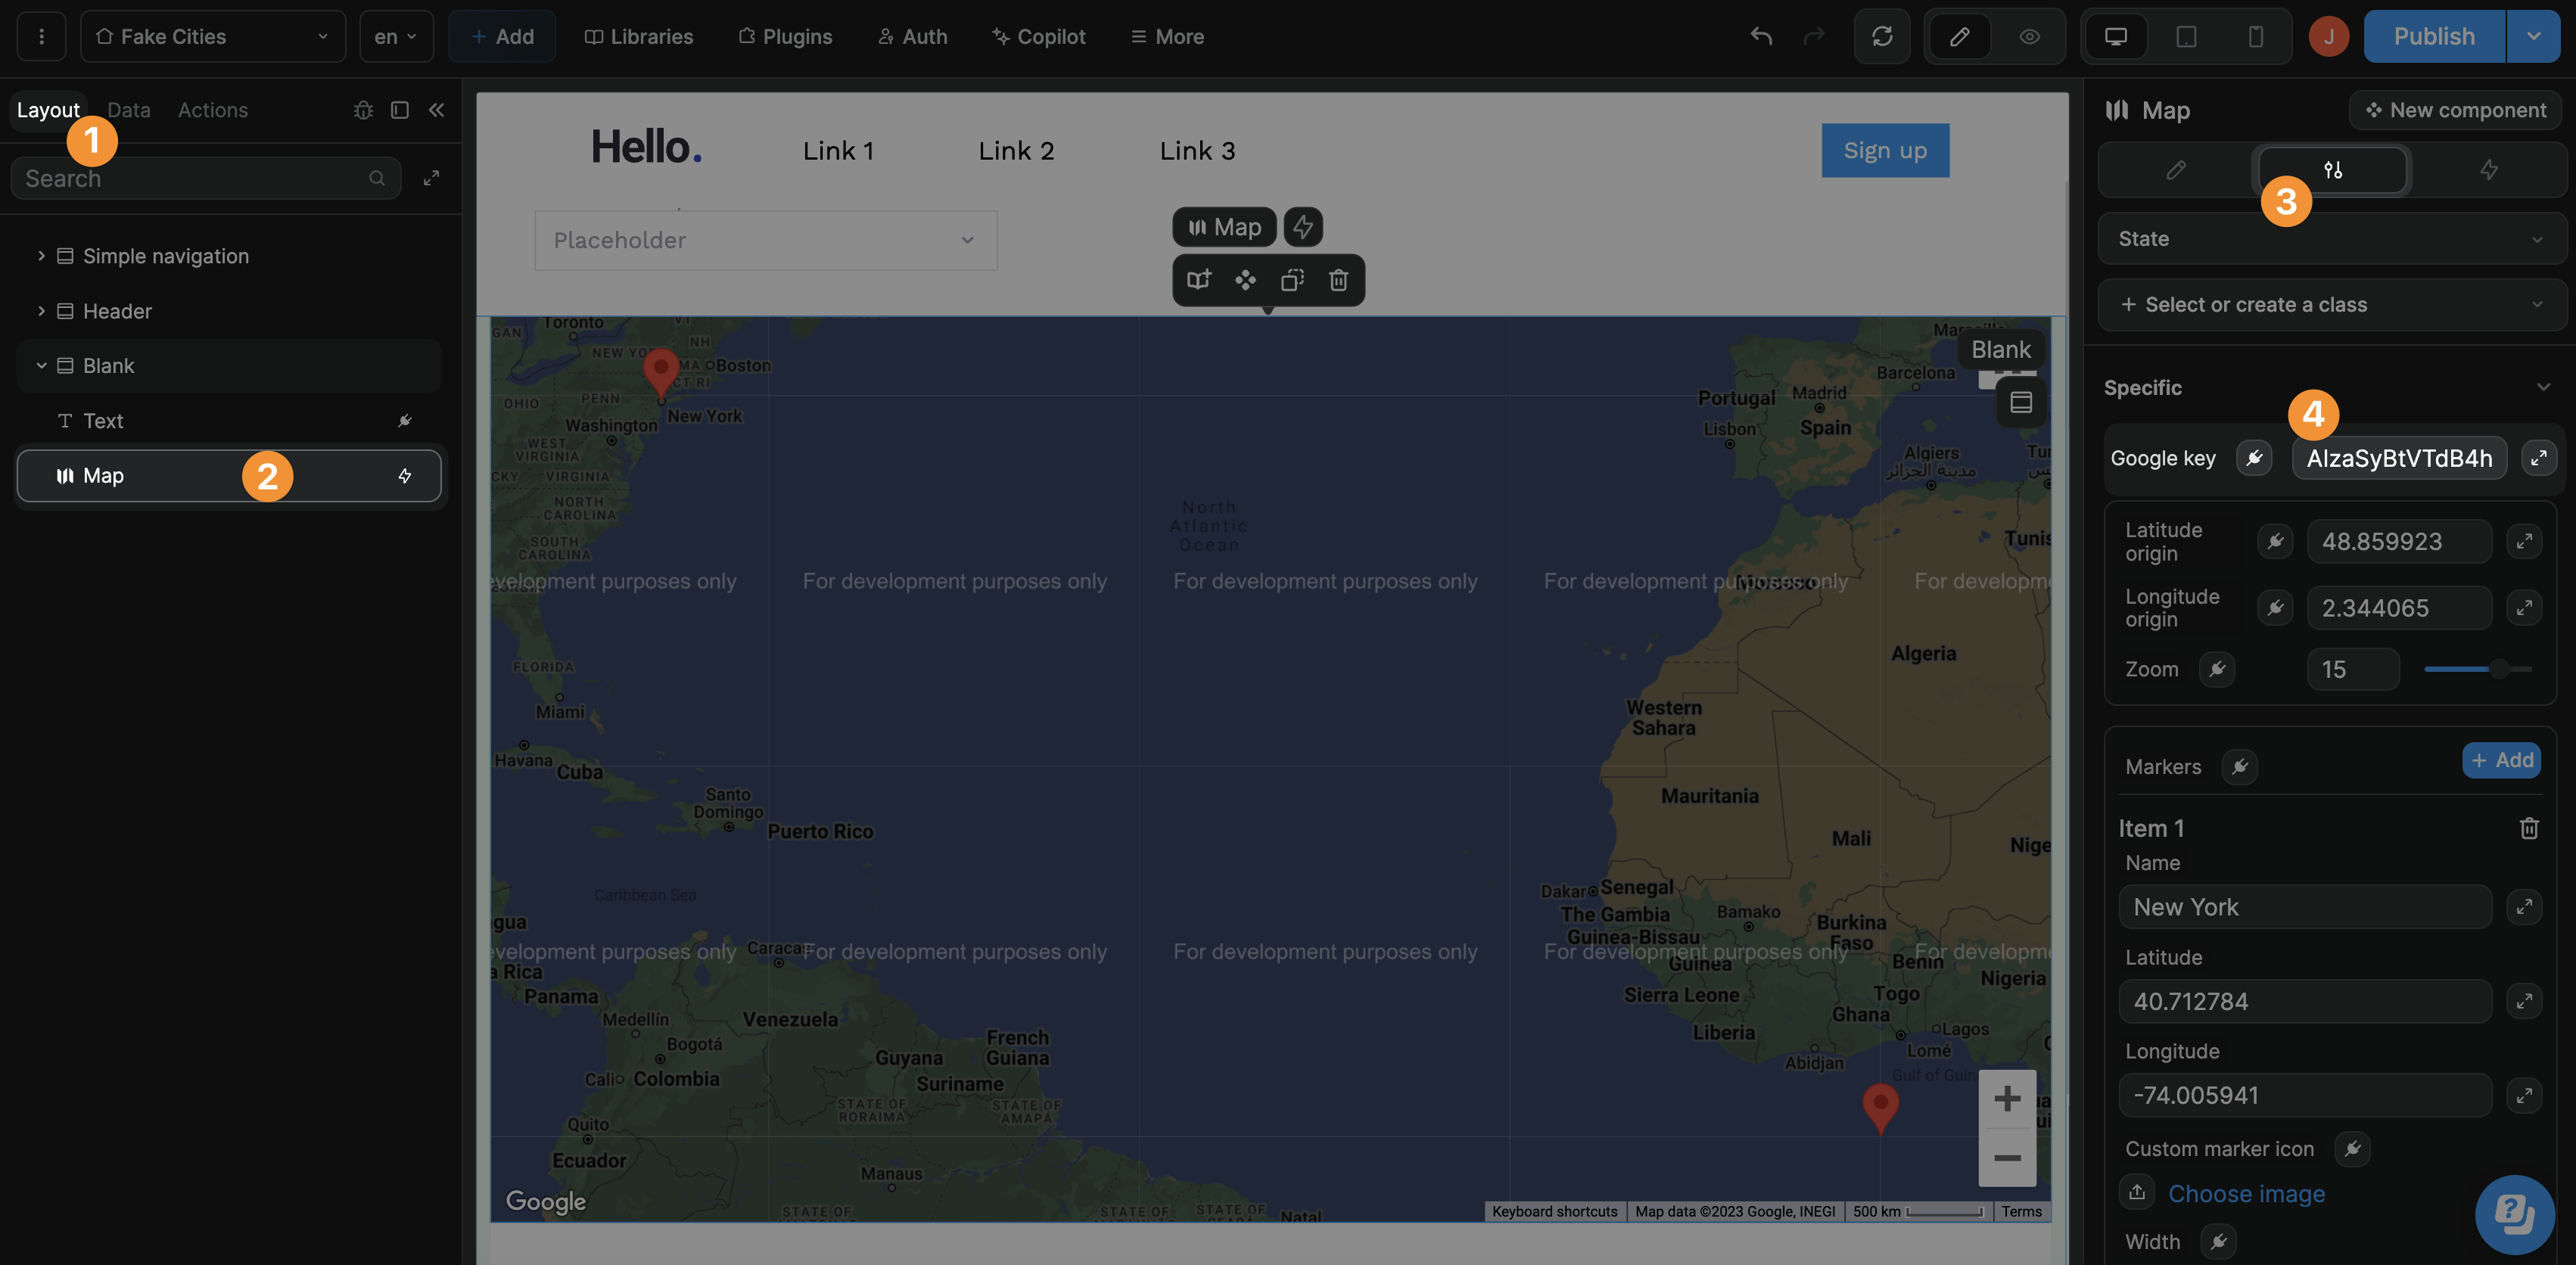
In the specific settings of the map element, you will be able to:
- paste the Google API key,
- bind your list of locations in the
Markersfield, - map the column names of your location collection, and
- toggle settings on and off (e.g. zoom control, street view control)
WARNING
The Markers field expects a list of locations in an array.
You can bind it to collection data, an Array variable, or use the createArray formula to define your list of locations.
Display data on the map
There are three steps to display data based on the marker that is selected by a user.
1- Create a variable of Object type
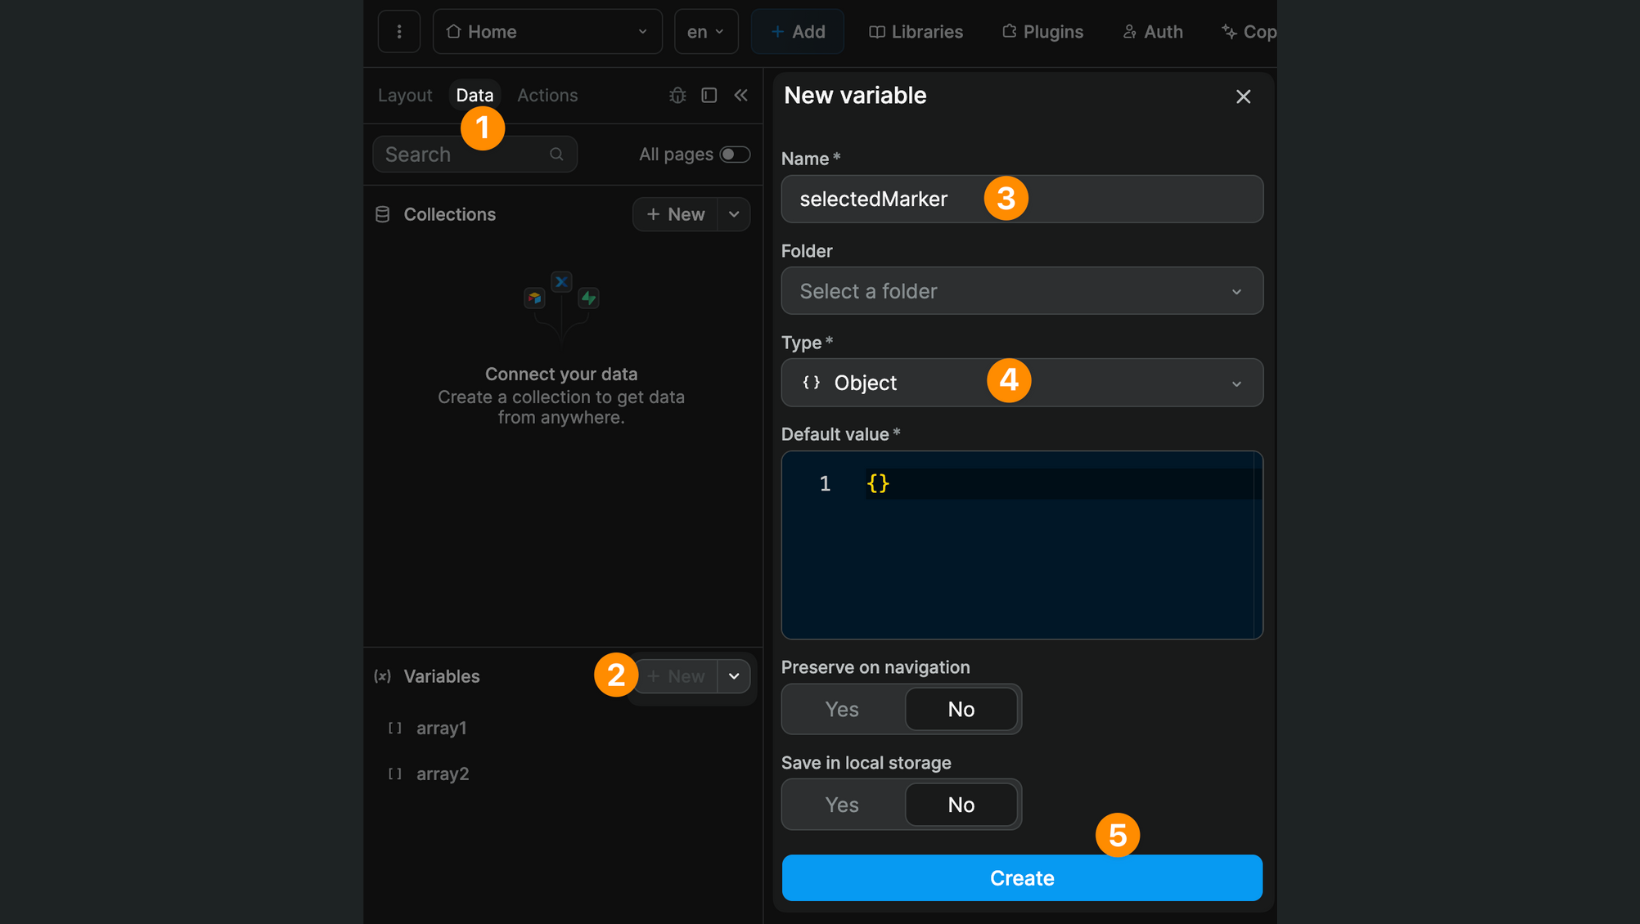
2- Update the variable based on the marker clicked by the user
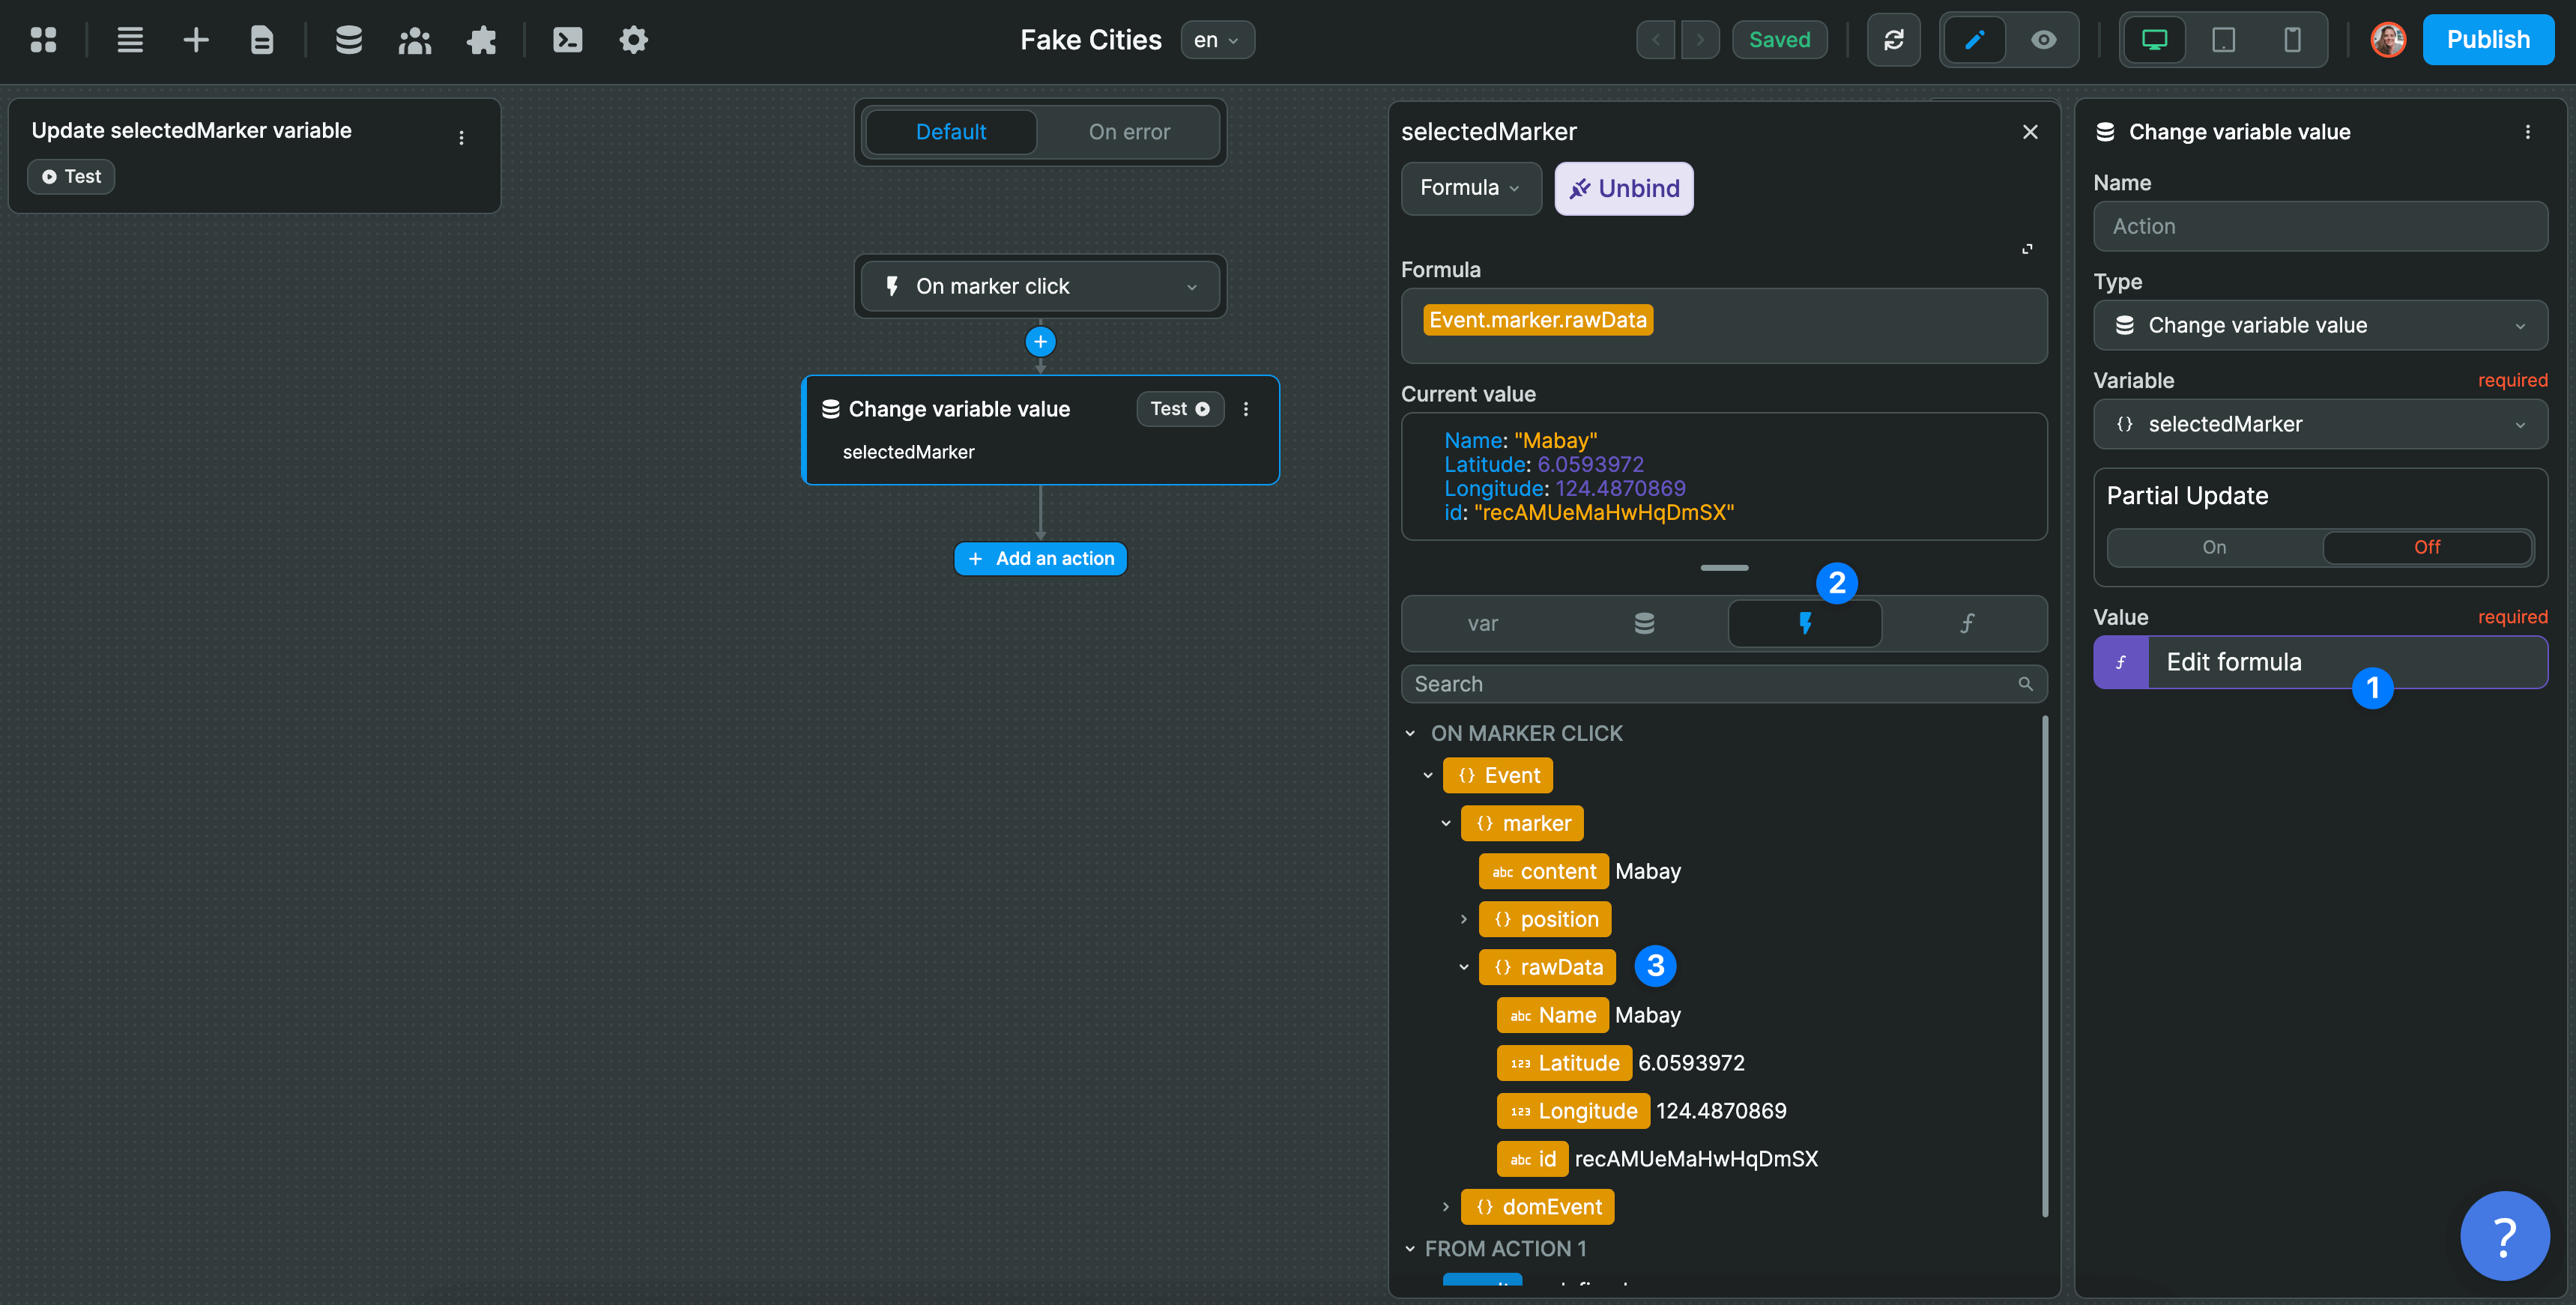
Create a workflow to update the selectedMarker variable you created in step 1.
This workflow should be:
- executed on the
Mapelement in your navigator - triggered
on marker click, - to update
change variable valueof theselectedMarkervariable you created in step 1
3- Add a Text element on the page
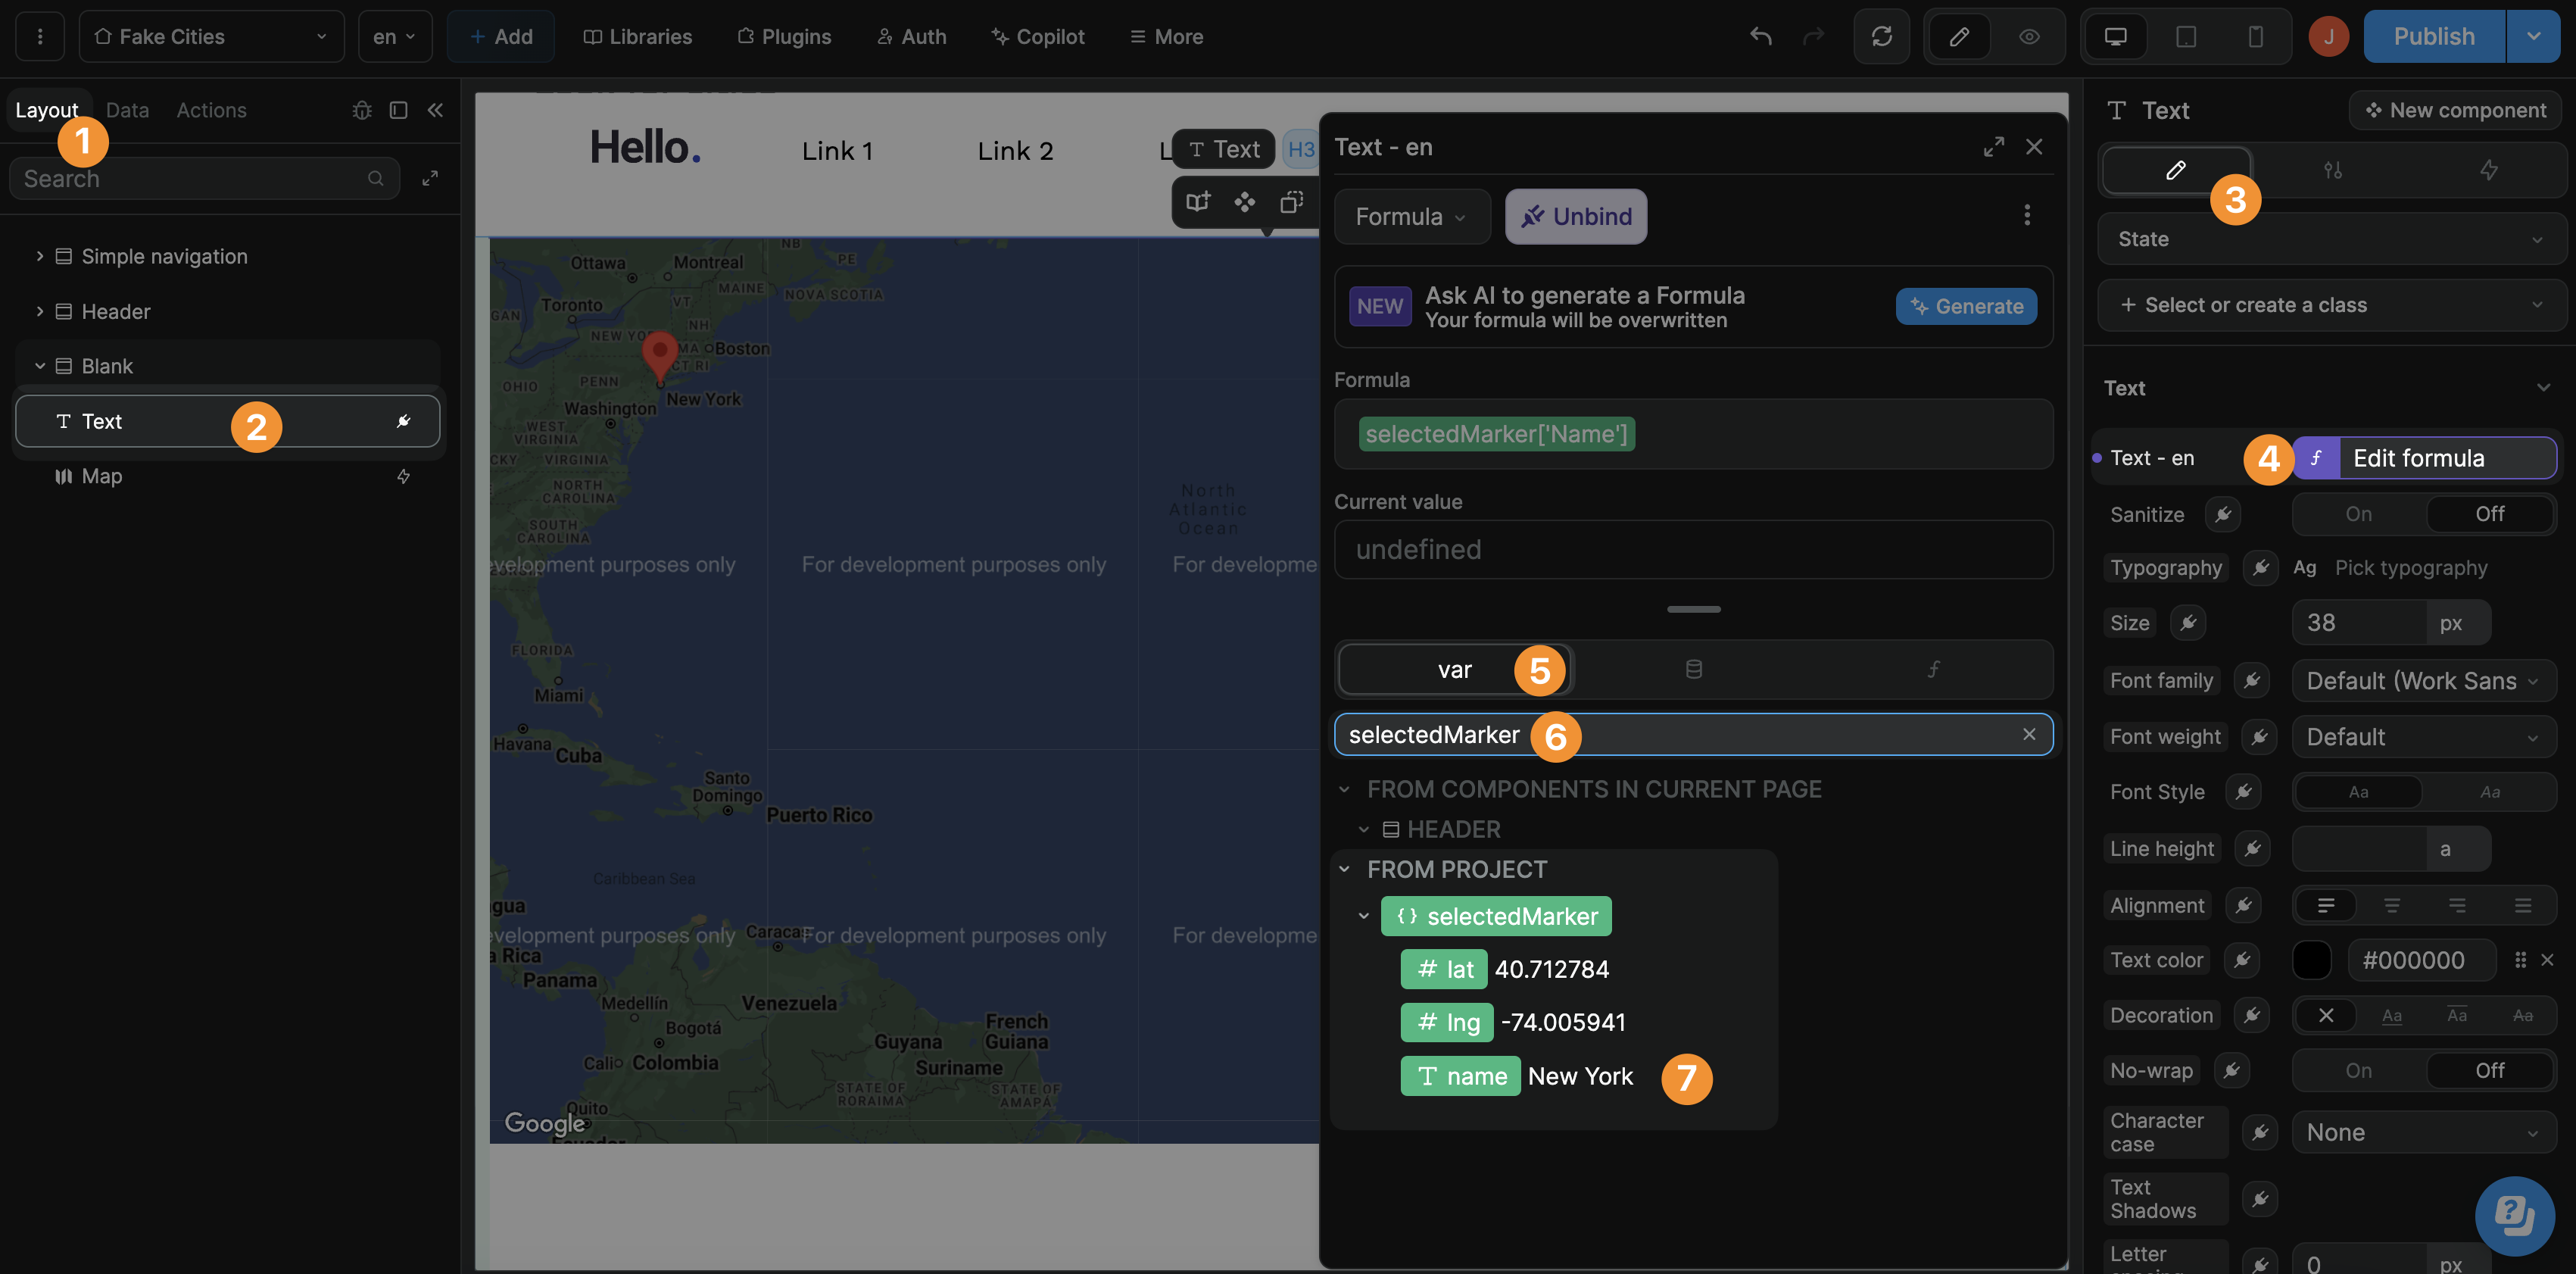
It could be anywhere on the page and styled any way you want.
The point is that you will bind this element to information from the selectedMarker variable which will change every time a user clicks on a different marker in the map.
In the example below, we bound the text element to the Name field of the selectedMarker variable:
Troubleshooting
If you run into any issues, the most likely explanation is that something is not configured properly on the Google side of things.
Double check that:
- in WeWeb you added the API key for the correct Google project,
- in Google, you added the relevant HTTP referrers for the WeWeb editor and published project,
- enabled the API key for the Maps Javascript API, and
- enabled the free trial in Google.
If this is still not working for you, don't hesitate to reach out in the WeWeb Community where we'll do our best to help.

