Appearance
Auth0
USE THE CURRENT AUTH0 GUIDE
This page describes an older Auth0 plugin flow.
For current projects using the Authentication subtab in Data & API, use Auth0 (Authentication System) →.
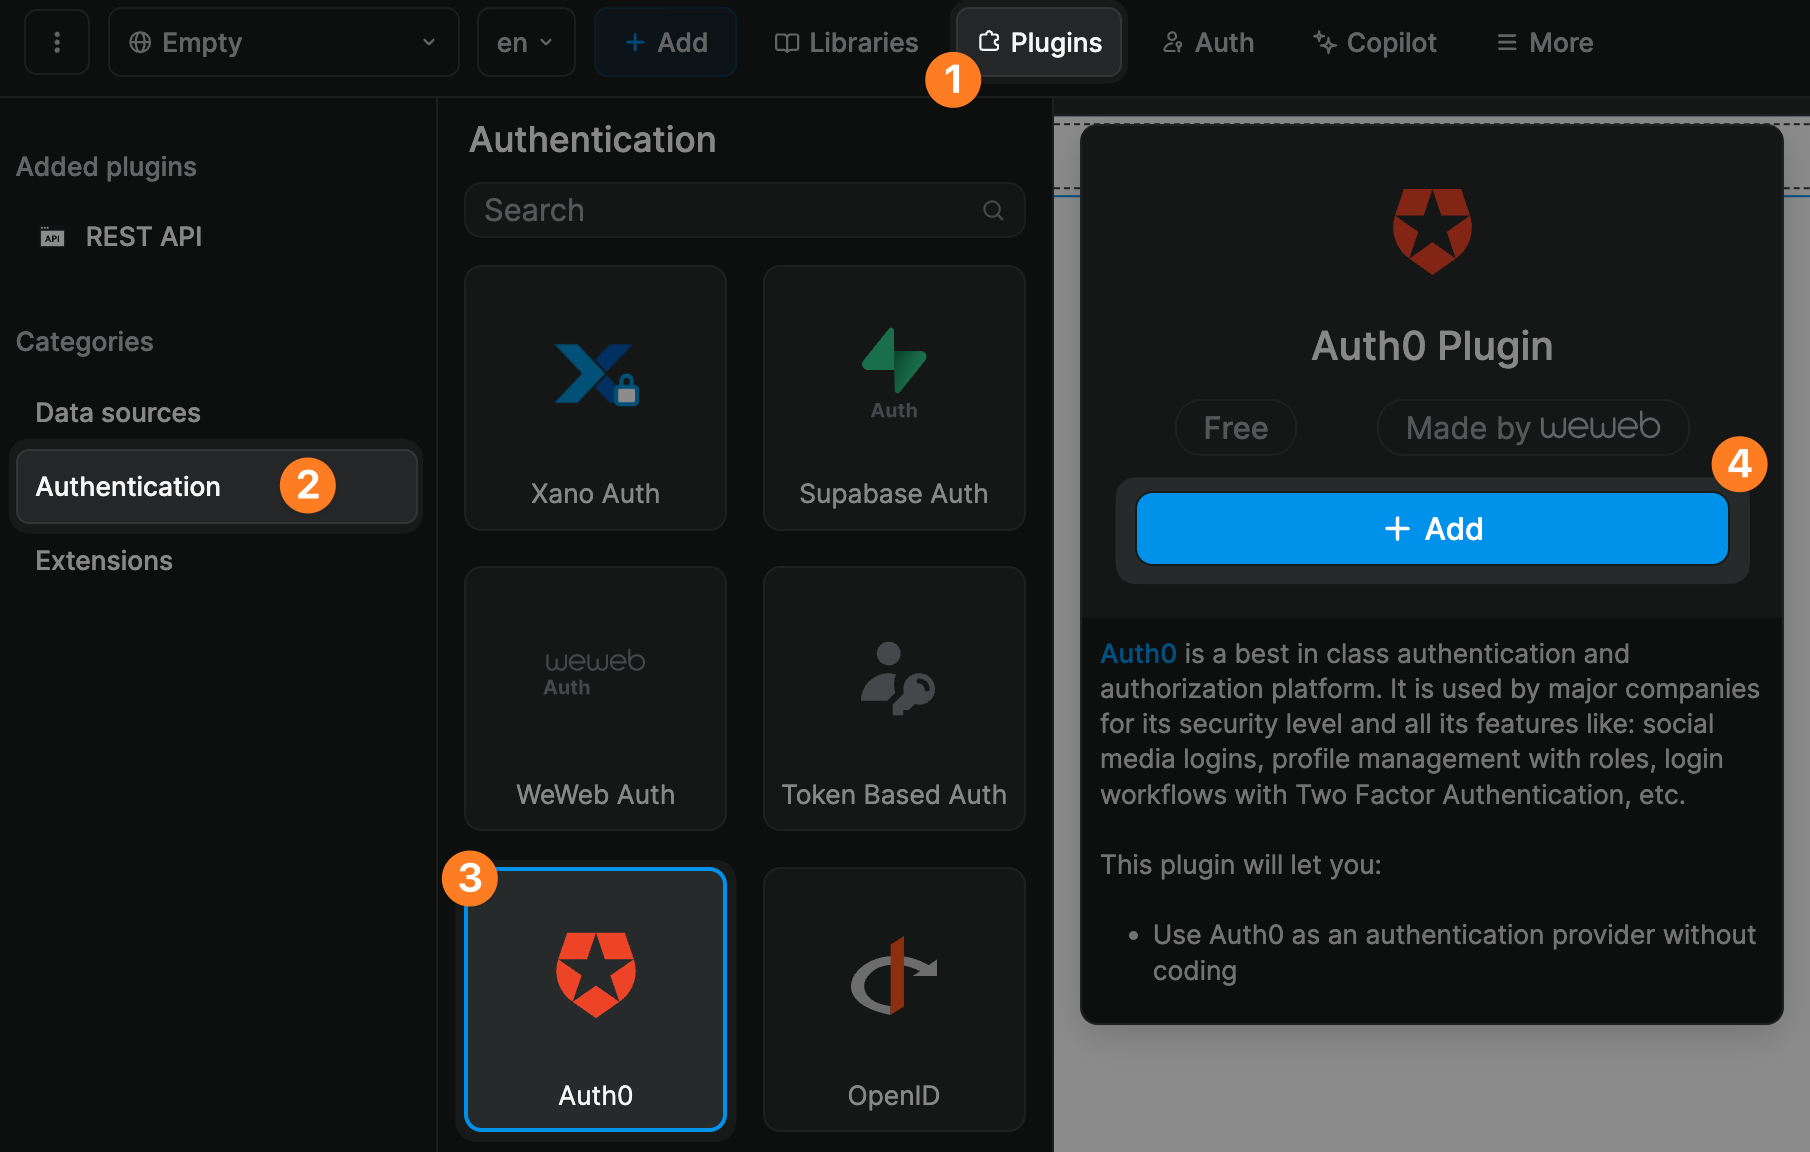
Plugin configuration
To connect your Auth0 account to WeWeb, you’ll need 3 pieces of information:
- Your Auth0
Domain - Your Auth0
Token - A default application name
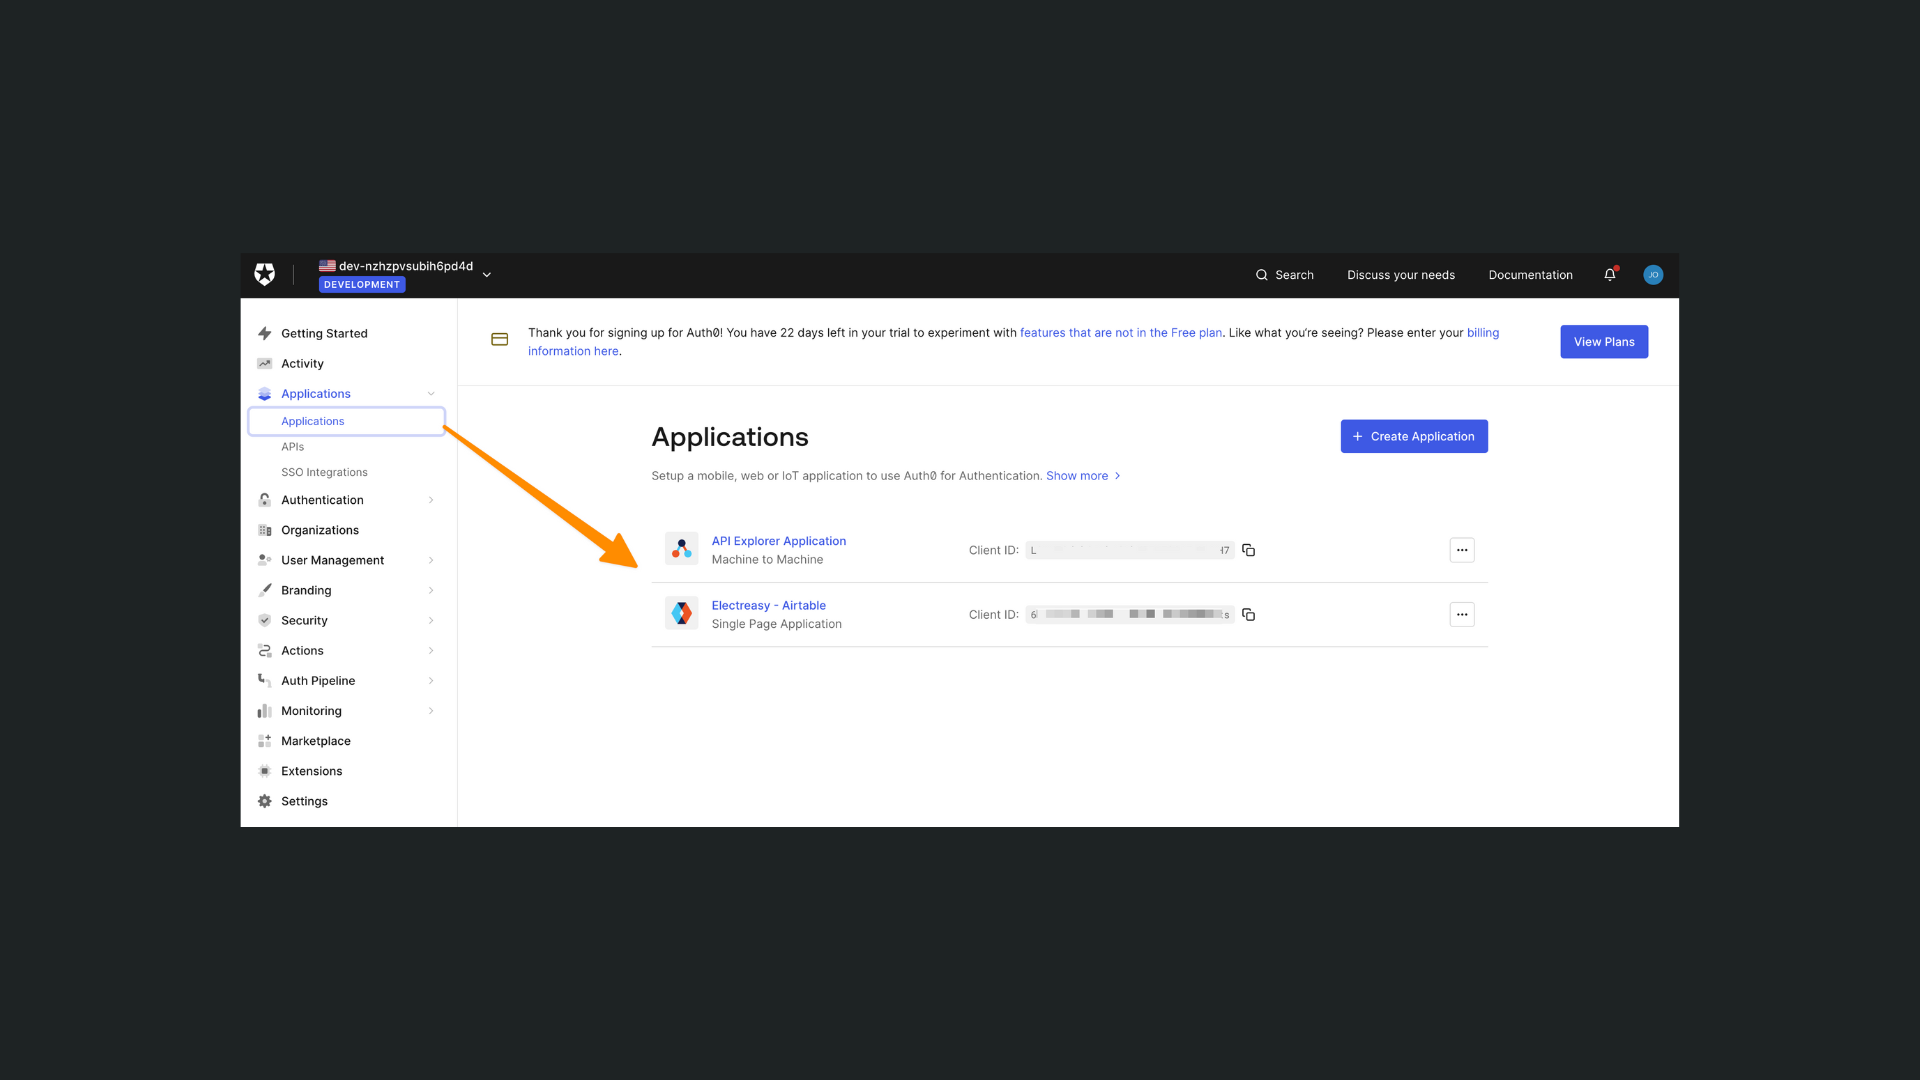
1. Your Auth0 domain
- In Auth0, go to
Applications>APIs - Copy the URL for your API audience
- Paste it in WeWeb.
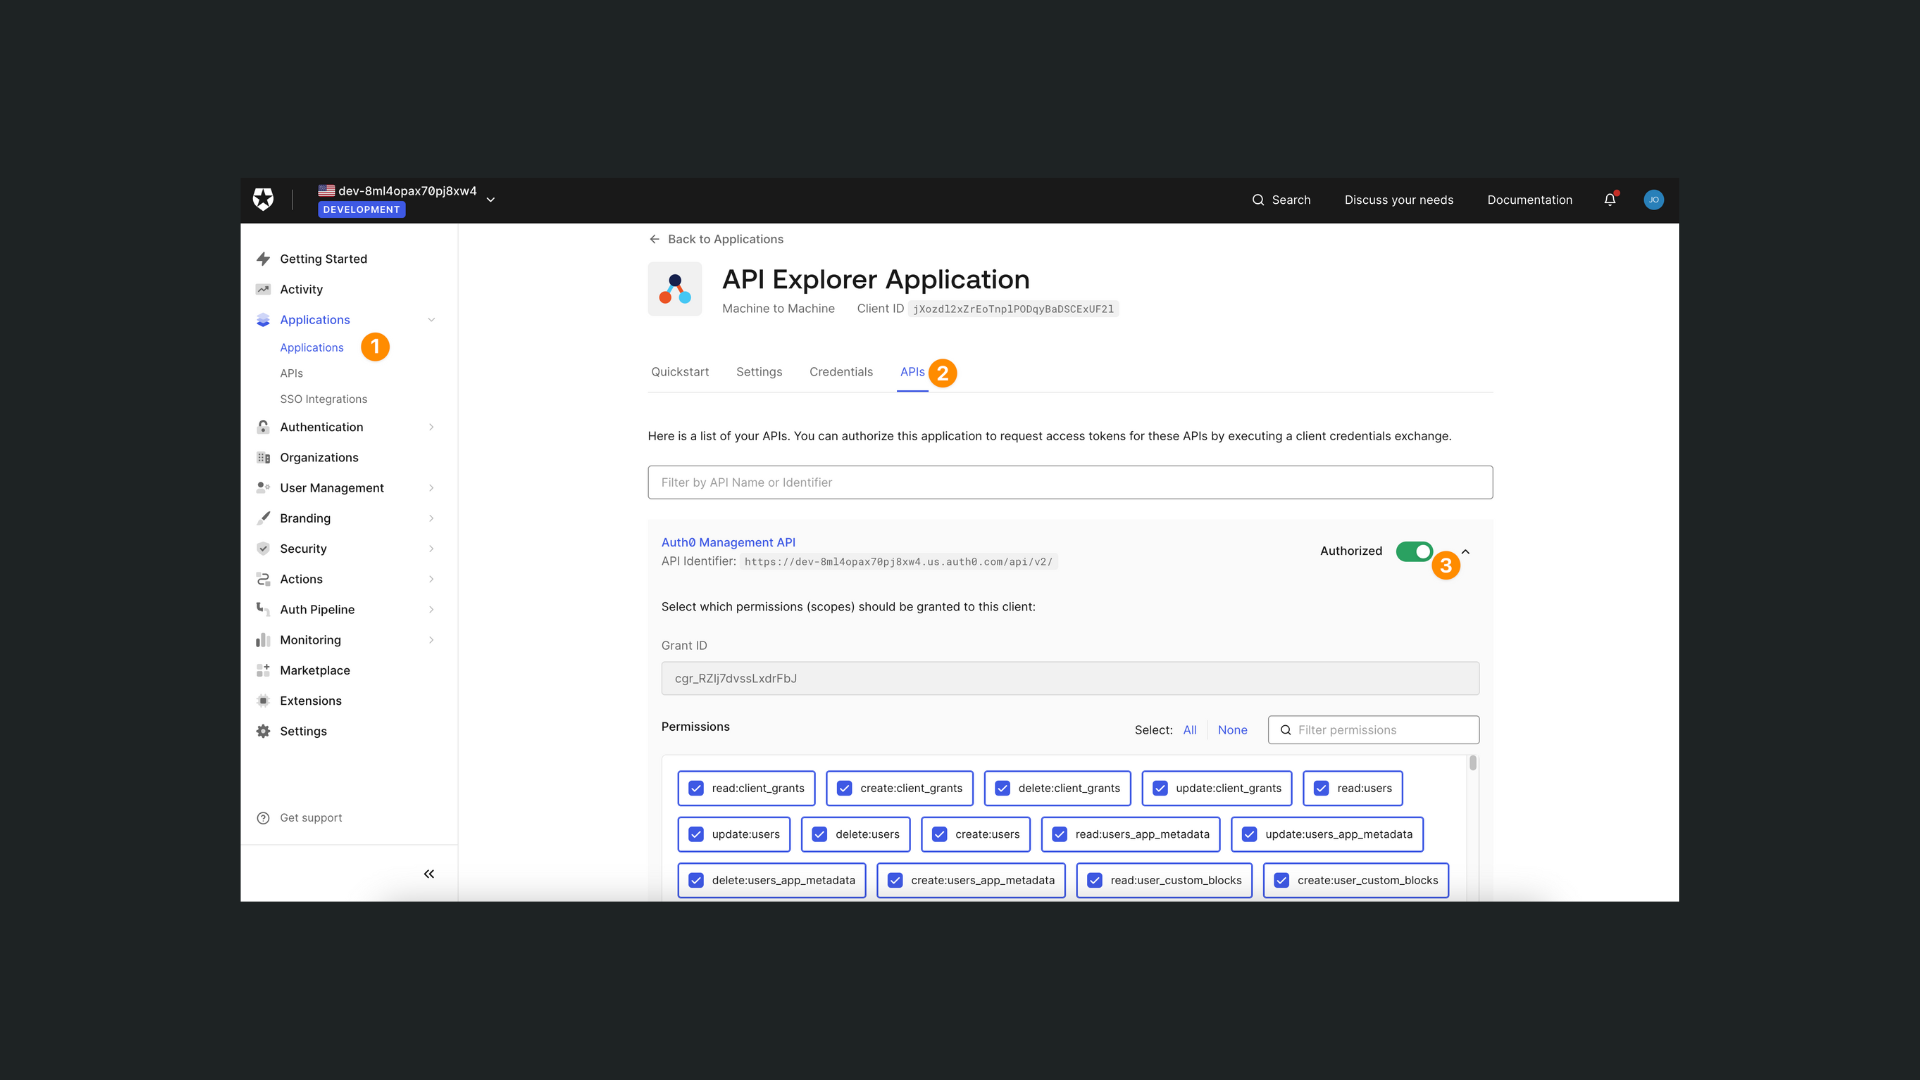
2. Your Auth0 token
- Back on the
Applications>APIsscreen in Auth0 - Click on
Auth0 Management API>API explorer - Create a test application (if you don't have one already)
- Copy the token and paste it in WeWeb

3. Default application name
By default, this will be the name of your WeWeb project but you can change it if you want to refer to a Single Page Application you created previously in your Auth0 workspace:
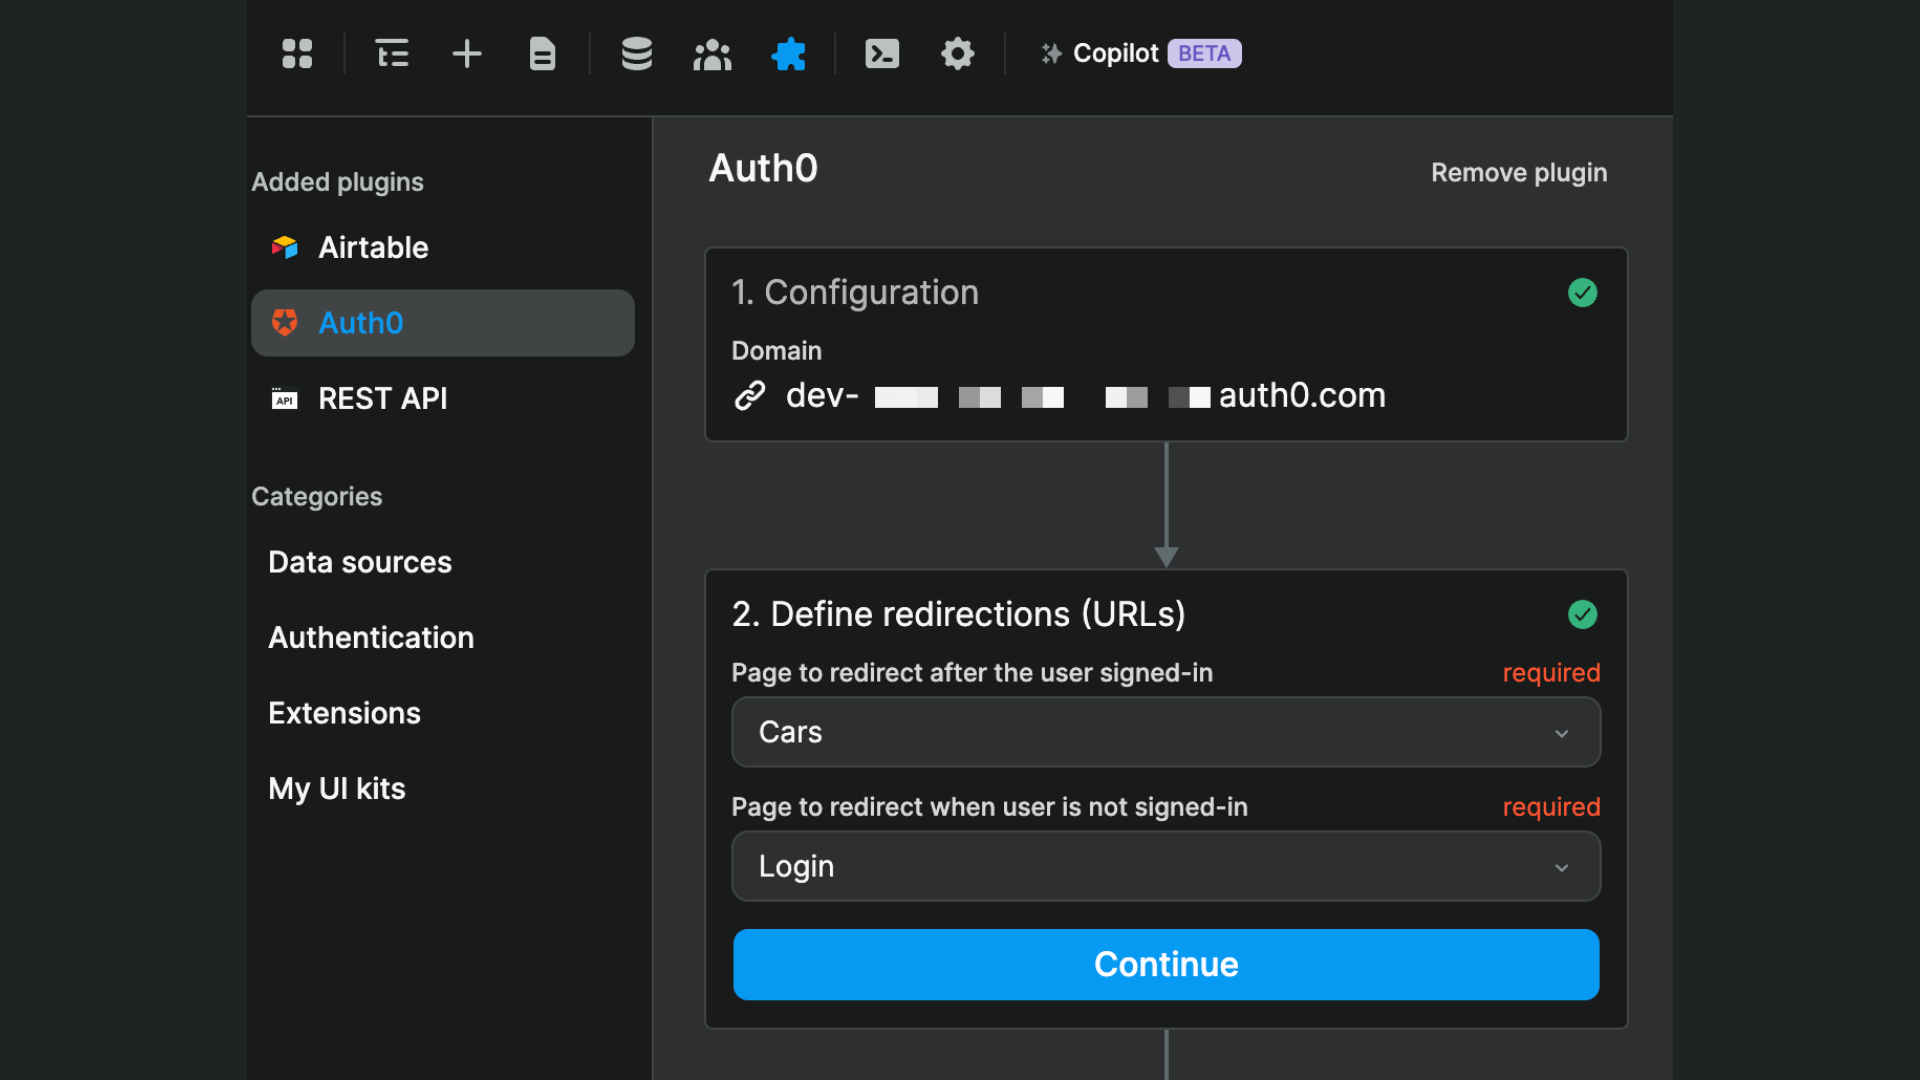
Define redirections
In order for the signup, login, and sign out flows to work properly, you'll need to define pages where users are directed:
- After they signed in – for example a personalized dashboard
- After they log out or when they try to access a private page without being logged in – for example a login or a home page
WARNING
The Page to redirect after the user signed-in should be a public page. If you wish to redirect authenticated users to a private page, you should create and select an empty public page with a workflow triggered On page load that redirects them to the page of your choice.
This may seem strange but it's how third-party authentication works on the web: the browser needs to get a cookie from the auth provider, and read it before fetching the user and redirecting them to the chosen page. If you redirect to a private page, you'll get an error because the browser won't have had time to read the cookie and fetch the user before arriving on the private page. It needs a short stop on a public page first.
Auth0 configuration
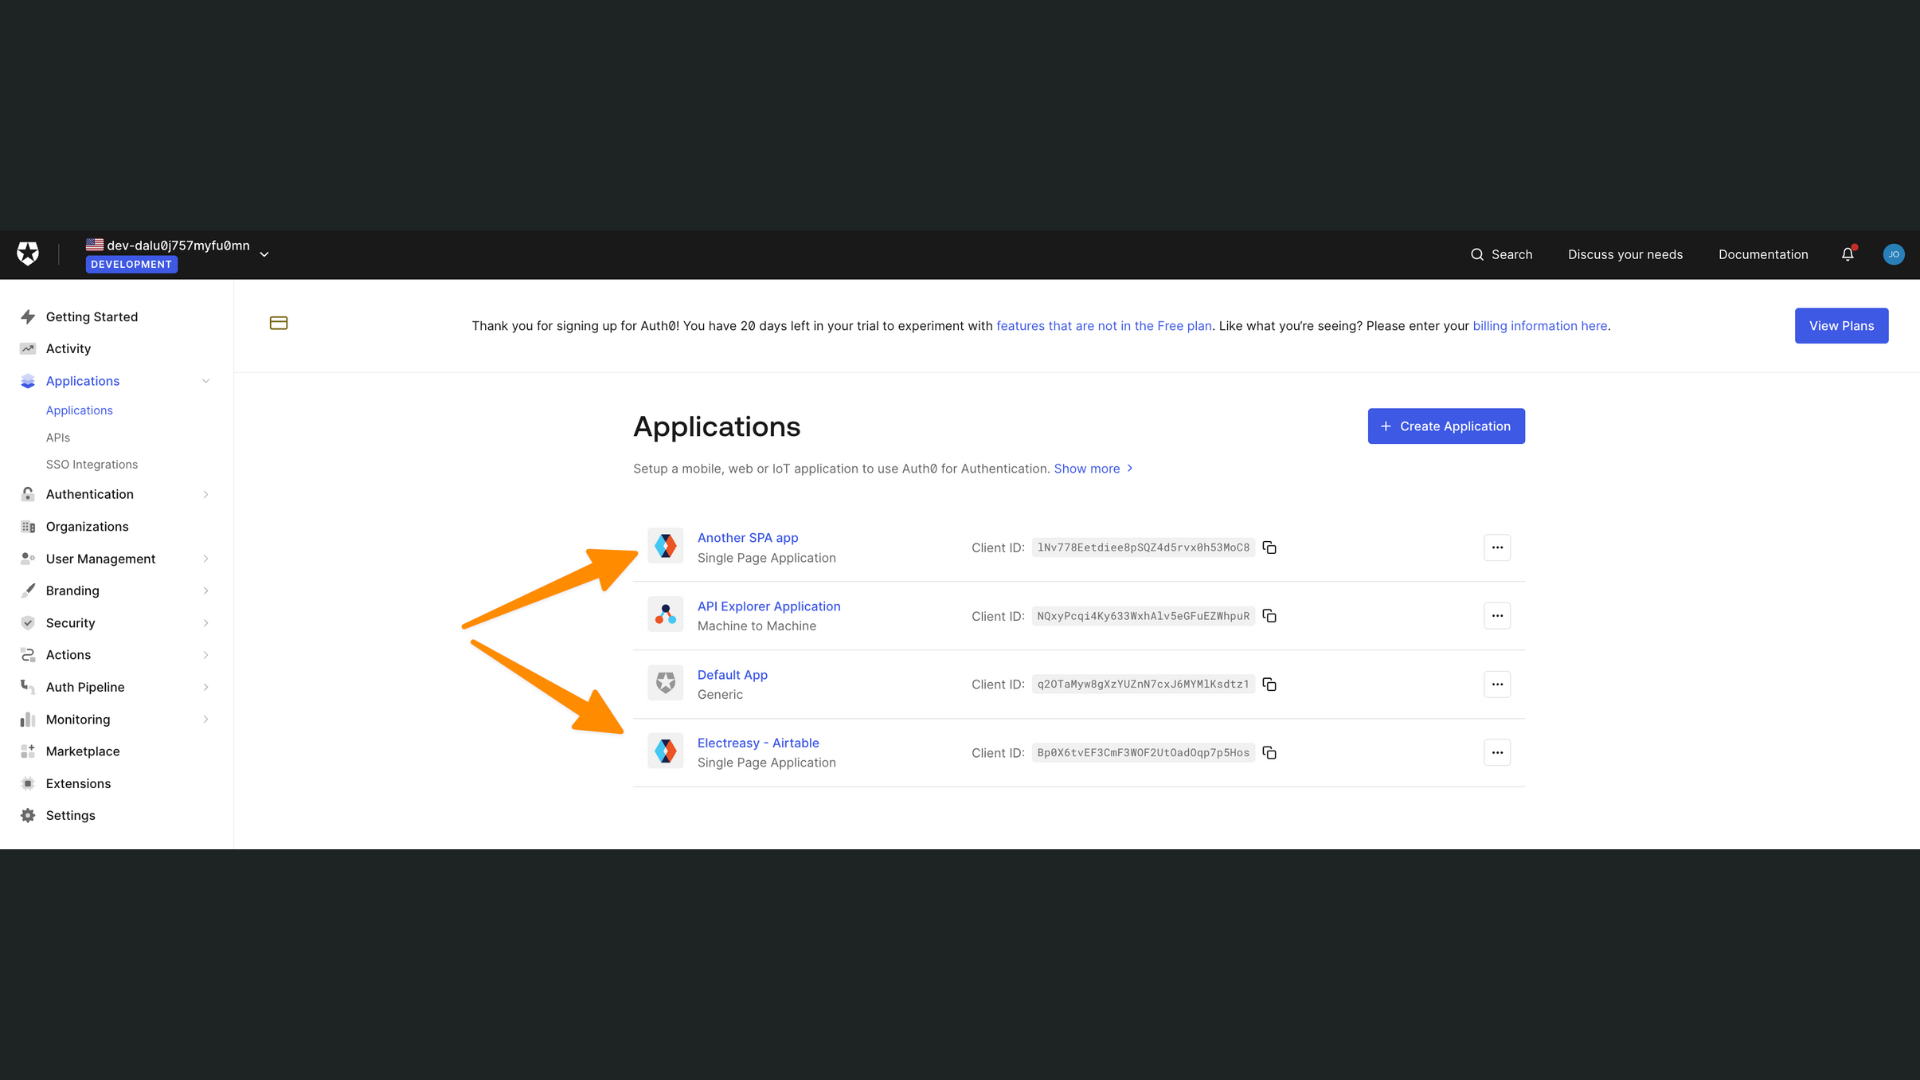
Once you have configured the Auth0 plugin in WeWeb, Auth0 will automatically create 2 applications which are both equally important to add authentication to your WeWeb project:
- A Machine to Machine application, named
API Explorer Application - A Single Page Application, named whatever you defined in the default application name above
TIP
If you don't have a Single Page Application in Auth0, we will create one for you automatically but if you already have one or more, we'll leave them.
Machine to Machine
Machine to Machine is a private application that allows Auth0 to communicate with the public application you publish. It's what allows your app to get the list of all available roles in Auth0 for example.
Make sure to give the Machine to Machine application permission to interact with your app:
WARNING
If you don't have a Machine to Machine application in Auth0, you will not have a token and will therefore not be able to setup the Auth0 plugin in WeWeb.
Single Page Application
Single Page Application is a public application that allows the WeWeb app you published (or are consulting in preview mode inside the WeWeb Editor) to communicate with Auth0. For example, it's what allows users to signup, login, or get their info when they're logged.
There are a few things you need to configure in the Settings of your Auth0 SPA to ensure users can signup, login, and sign out.
Application Login URI: This should be the URL of a dedicated login page on your published application.Allowed Callback URLs: This should include the URLs where users are redirected after logging in (e.g. in preview mode and on the live app).Allowed Logout URLs: This should include the URLs where users are redirected after logging out (e.g. in preview mode and on the live app).Allowed Web Origins: This should include the domain name of your published app andhttps://<your-project-id>-editor.weweb.ioso that you can test your user flows inside the WeWeb Editor.
TIP
We recommend including several URLs in each "Allowed" field:
- The relevant URLs inside the WeWeb Editor so you can test the Auth0 plugin while you're building, and
- The relevant URLs of your published app, so everything works live.
Signup & login flows
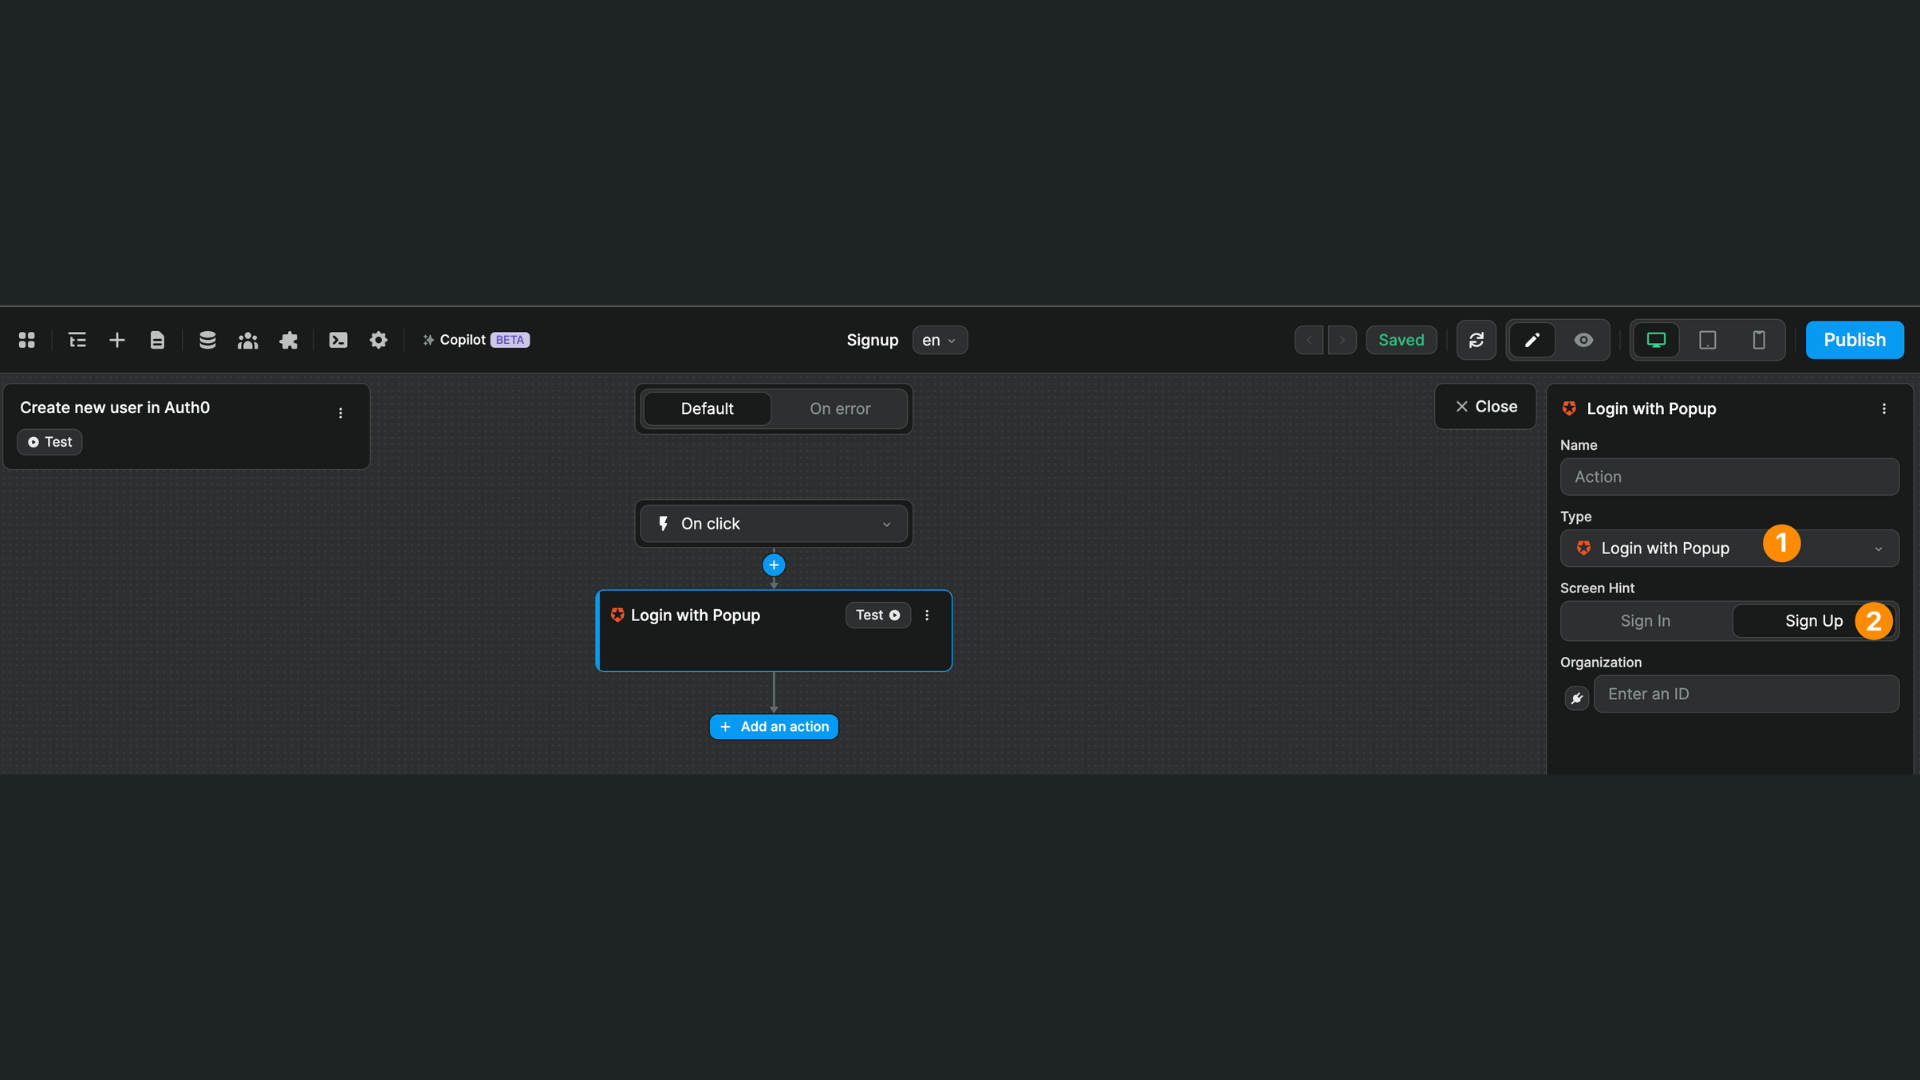
You can allow new users to sign up or login to your app by triggering a workflow with one of the Auth0 Login actions with the Sign in or Sign up option enabled.
In the example below, when a user clicks on a button on our page, an Auth0 popup will open and they will be invited to fill out their information to sign up to our app:
There's no other action required in the workflow. After signing up or logging in, the user will be redirected to the page defined in the Auth0 plugin configuration:
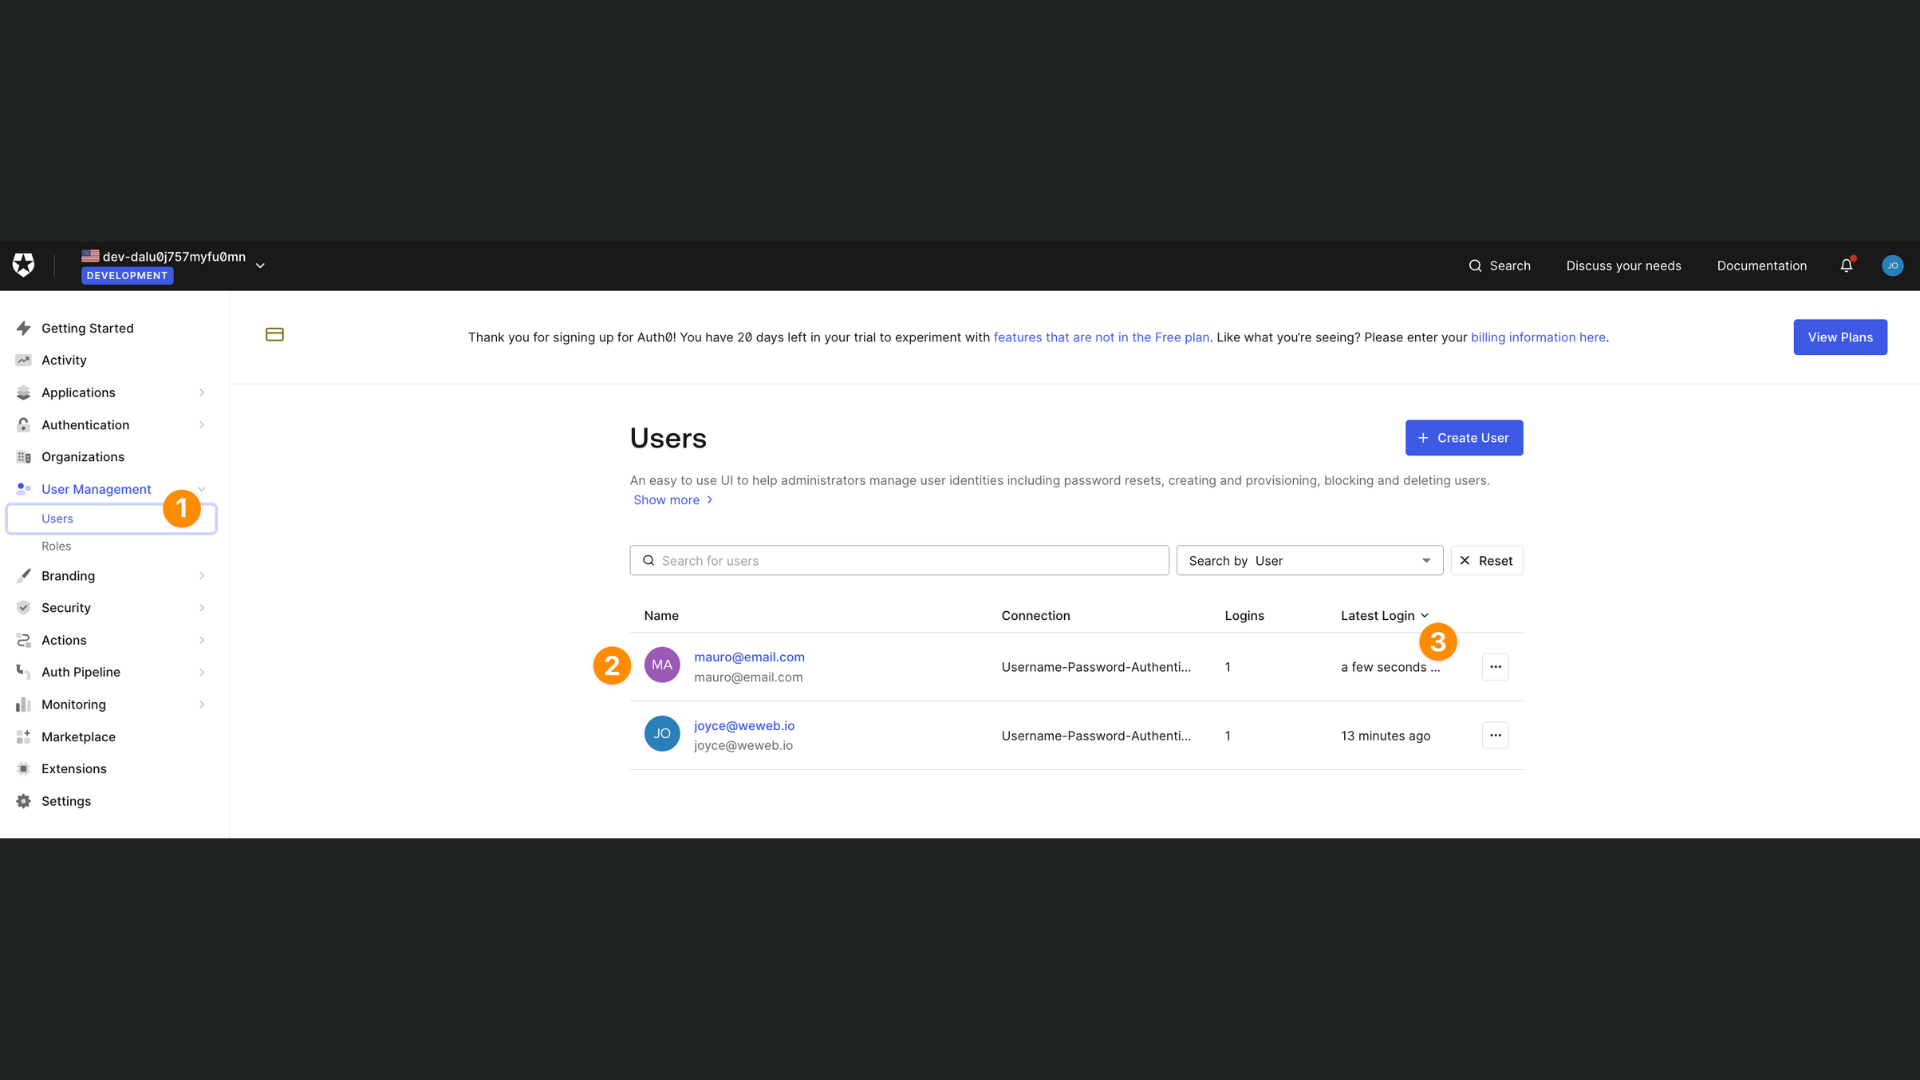
TIP
Don't hesitate to check your list of users in Auth0 to ensure your signup and login flows are working correctly. In the screenshot below, we can see our list of users and when they last logged in:
Roles & permissions
In some cases, you'll want to restrict access to pages of your web-app based on roles & permissions.
In order to do this, there are a few steps to take:
- Define roles in Auth0 (those will be automatically added to WeWeb via the plugin)
- Create user groups in WeWeb and define what role or roles a user needs to be part of that group
- Define what user groups are allowed to visit the page you want to gate
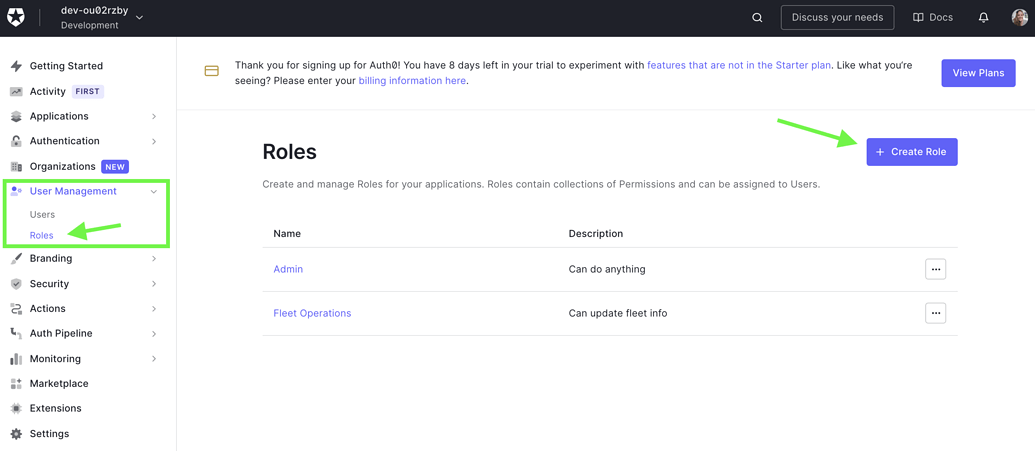
1. User roles in Auth0
To define user groups in WeWeb, you first need to create user roles in Auth0 > User Management > Roles > Create Role
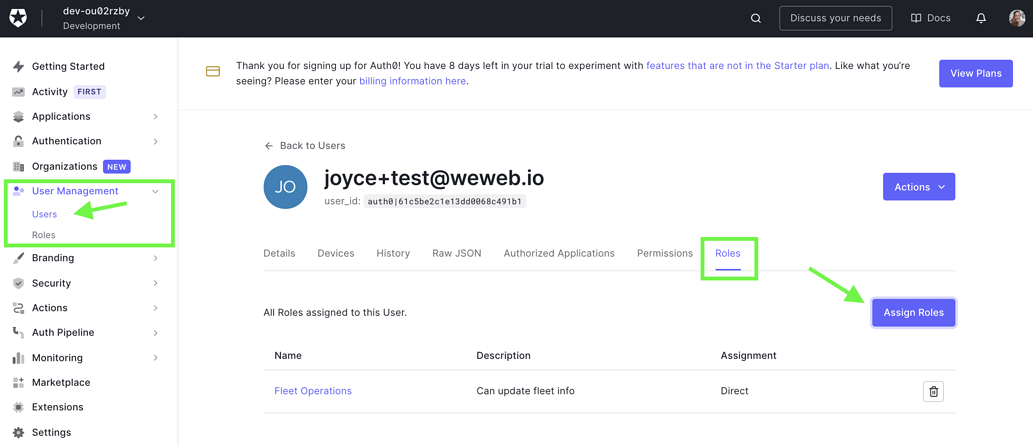
Then, you can assign roles to users in User Management > Users > Assign Roles
Once you have user roles in Auth0, you'll be able to see them in WeWeb:
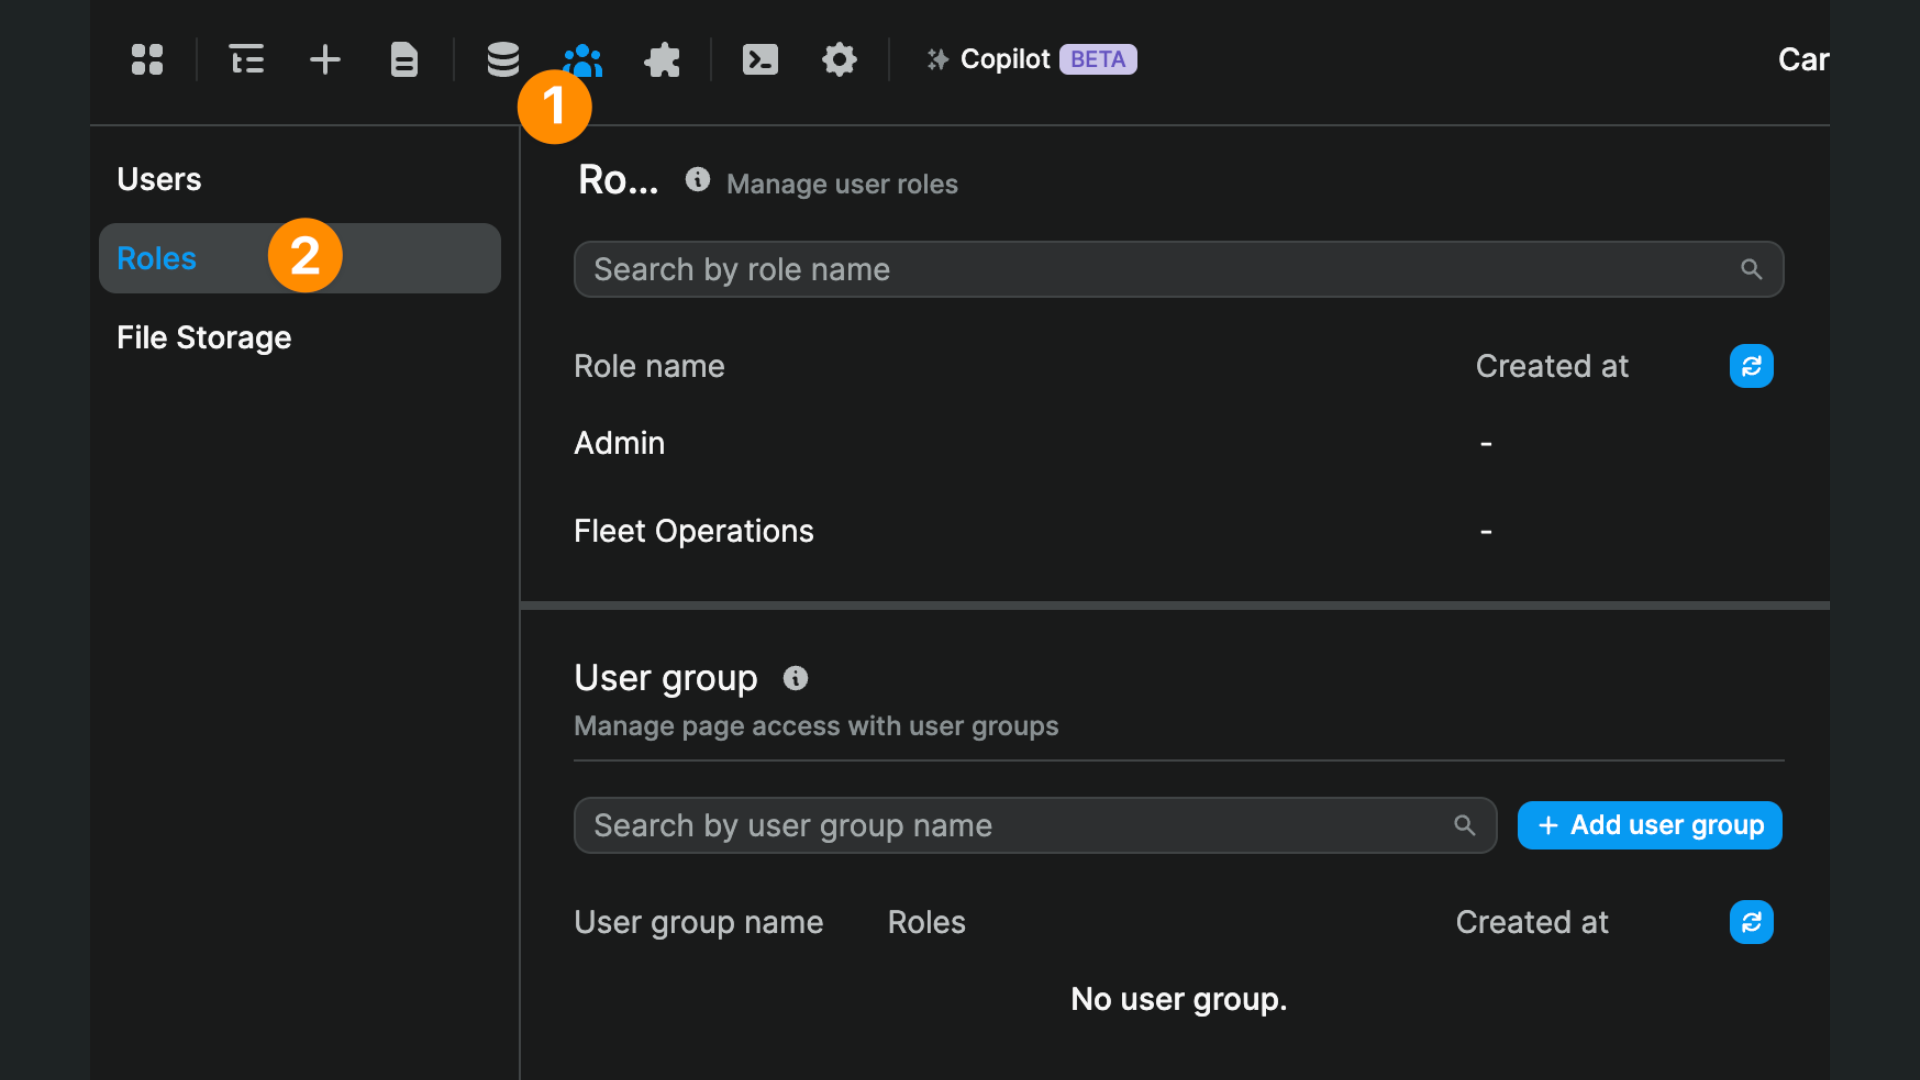
2. User groups in WeWeb
Assuming you've added user roles in Auth0, you'll be able to create user groups in WeWeb and define what role(s) users need to have to be part of each group:

WARNING
When you add several roles to a user group, a user needs to have BOTH these roles. It's an AND statement, not OR.
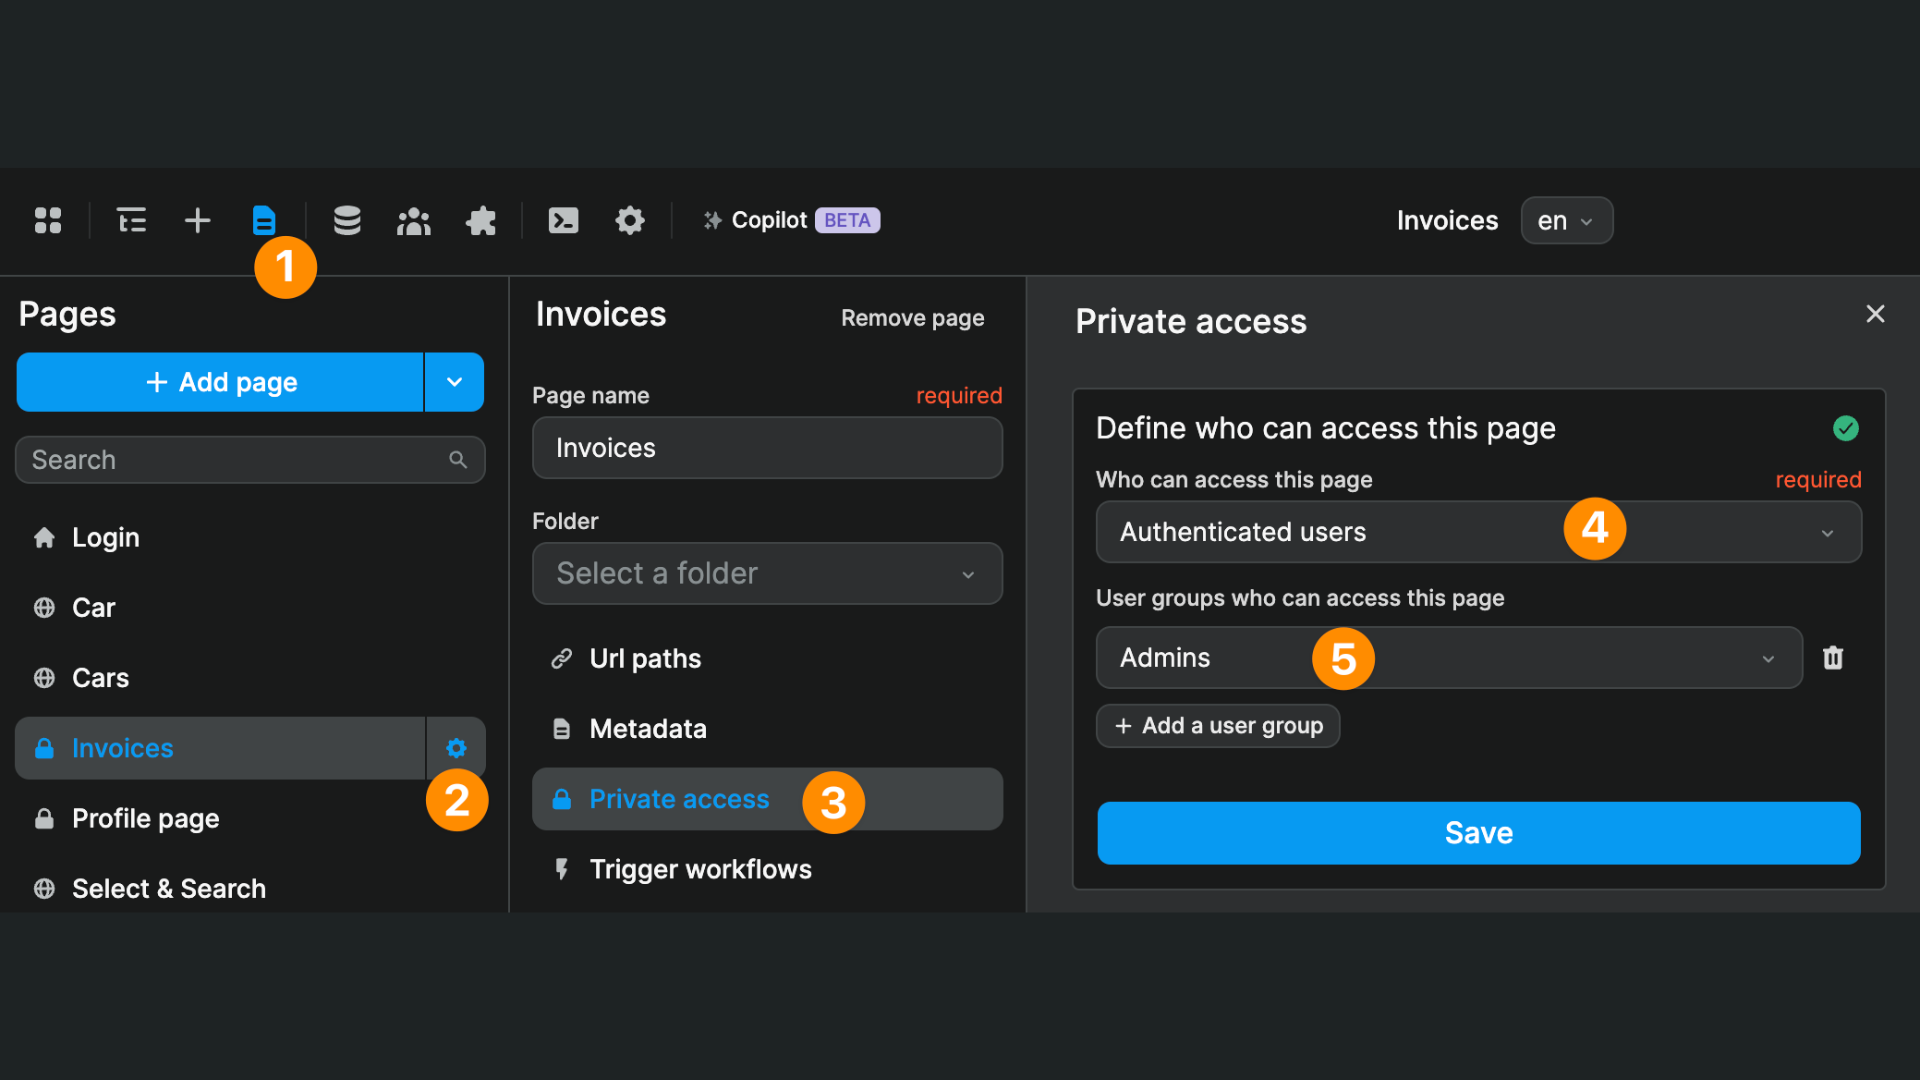
Restrict page access
By default, when you add a new empty page in your WeWeb app, everybody can access it, even users who have not signed in.
You can limit access to your WeWeb app at page level:
- Go to the page settings >
Private access - Restrict access to
Authenticated users - If applicable, select which authenticated user group(s) can access the page
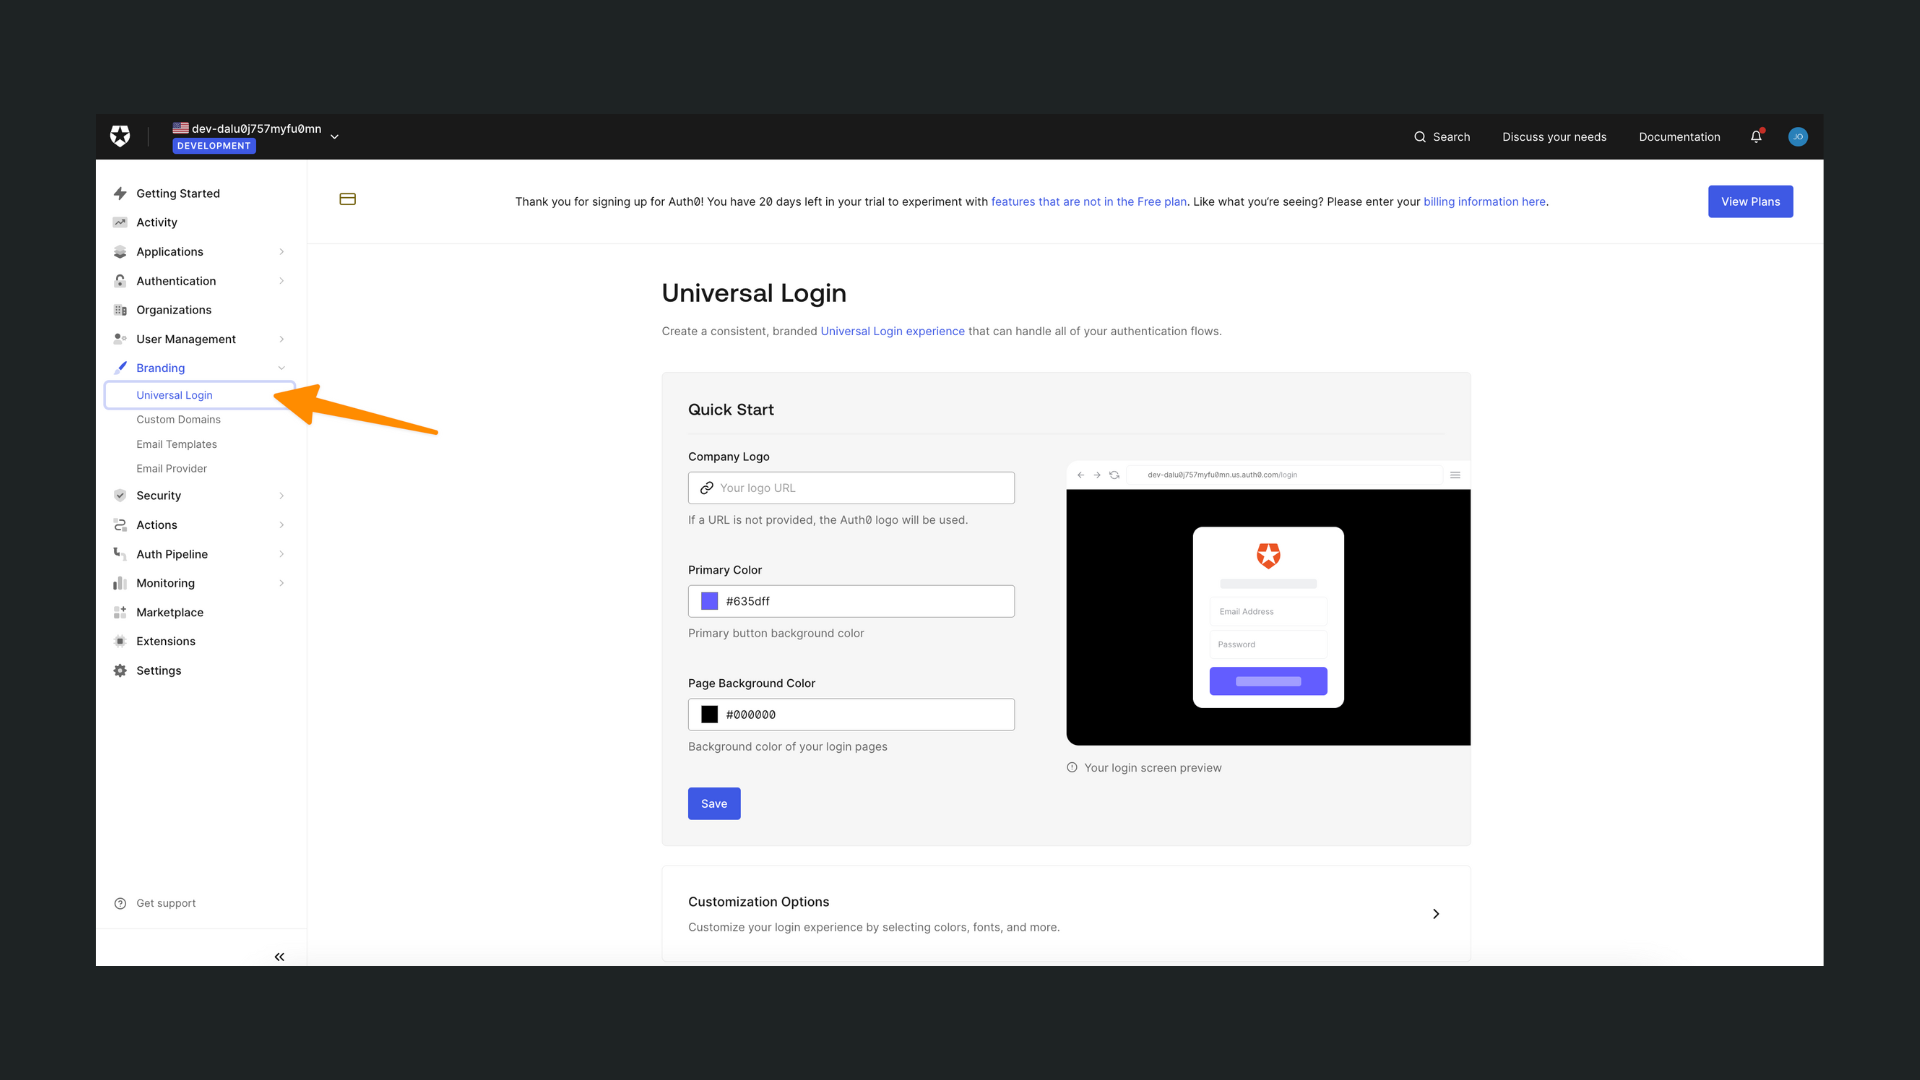
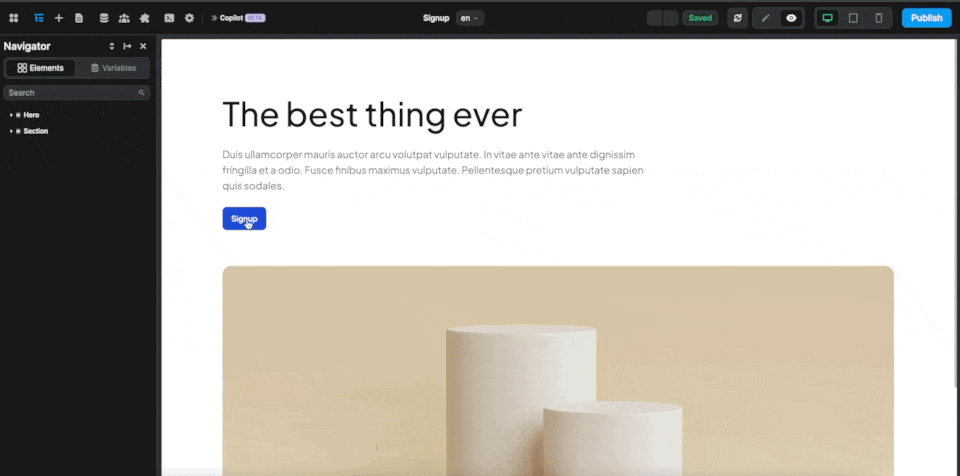
Personalize UX
You can personalize the popup displayed to users when they signup or login in the Branding section of your Auth0 account: