

Appearance
Members and groups
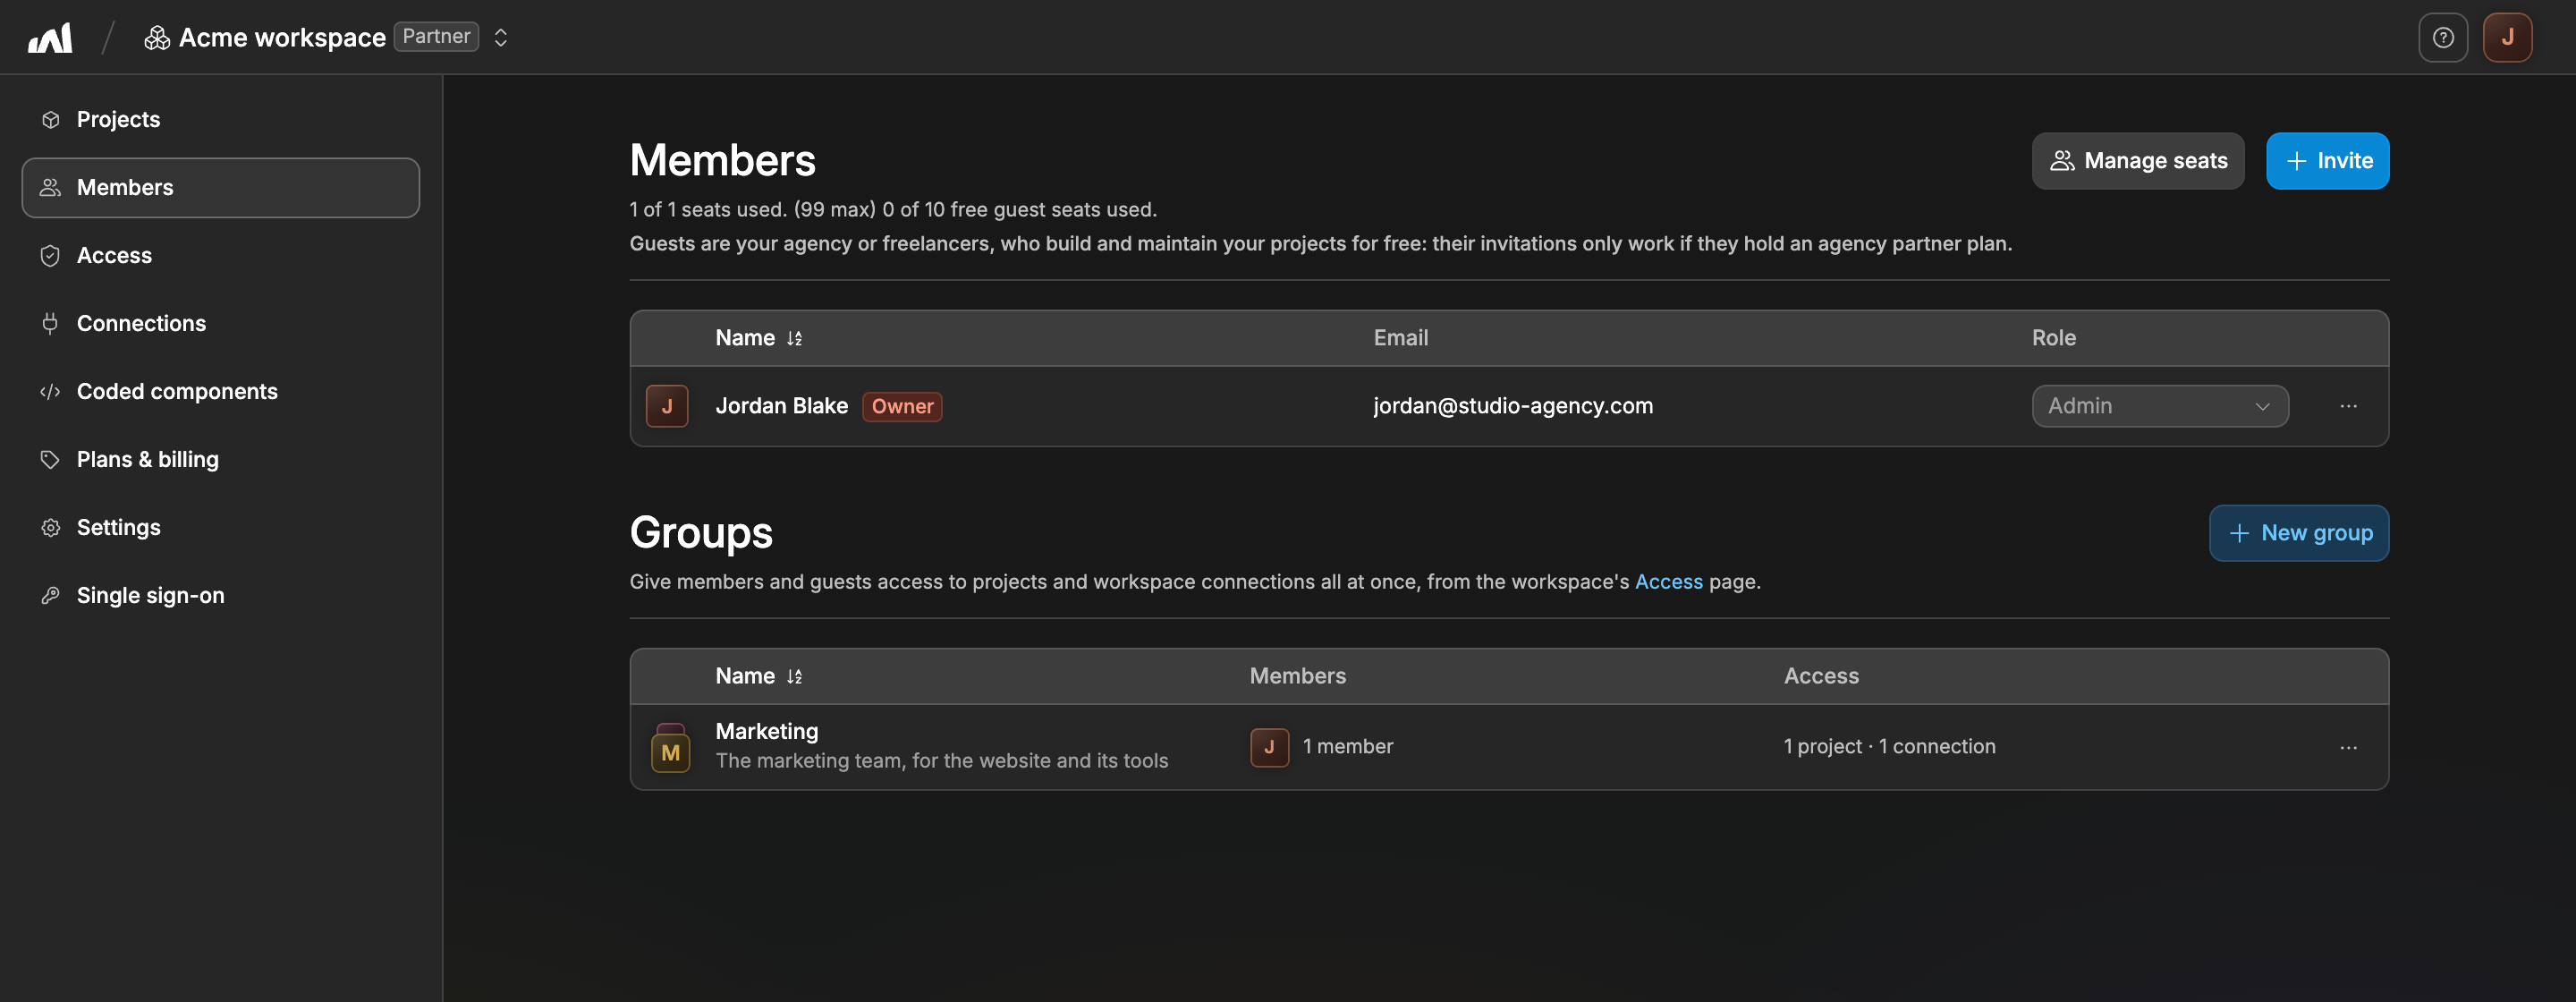
The Members page of your workspace is where you decide who works with you. It has two sections:
- The
Memberssection lists the people in your workspace and the invitations you've sent, with the role of each one. - The
Groupssection lets you give the same access to several people at once.
To open it, go to your workspace dashboard and click Members in the menu on the left. You see this page if your role has the Members or Access workspace permission.
TIP
To upgrade or downgrade your workspace plan, open the Plans & billing tab of your workspace.
Members vs guests
You can invite:
- Team members, who take one of the seats your workspace pays for, and
- Up to 10 free guests, your agency or freelancers, who build and maintain your projects for free.
Being in the workspace doesn't open every project. What a person can open depends on their role and on the projects and connections they're given. Learn more about giving access →
TIP
When inviting agency or freelancer guests, make sure to use the email address they used to subscribe to the WeWeb agency partner plan. The invitation will not go through otherwise.
Invite members & guests
To invite people, you need the Members workspace permission.
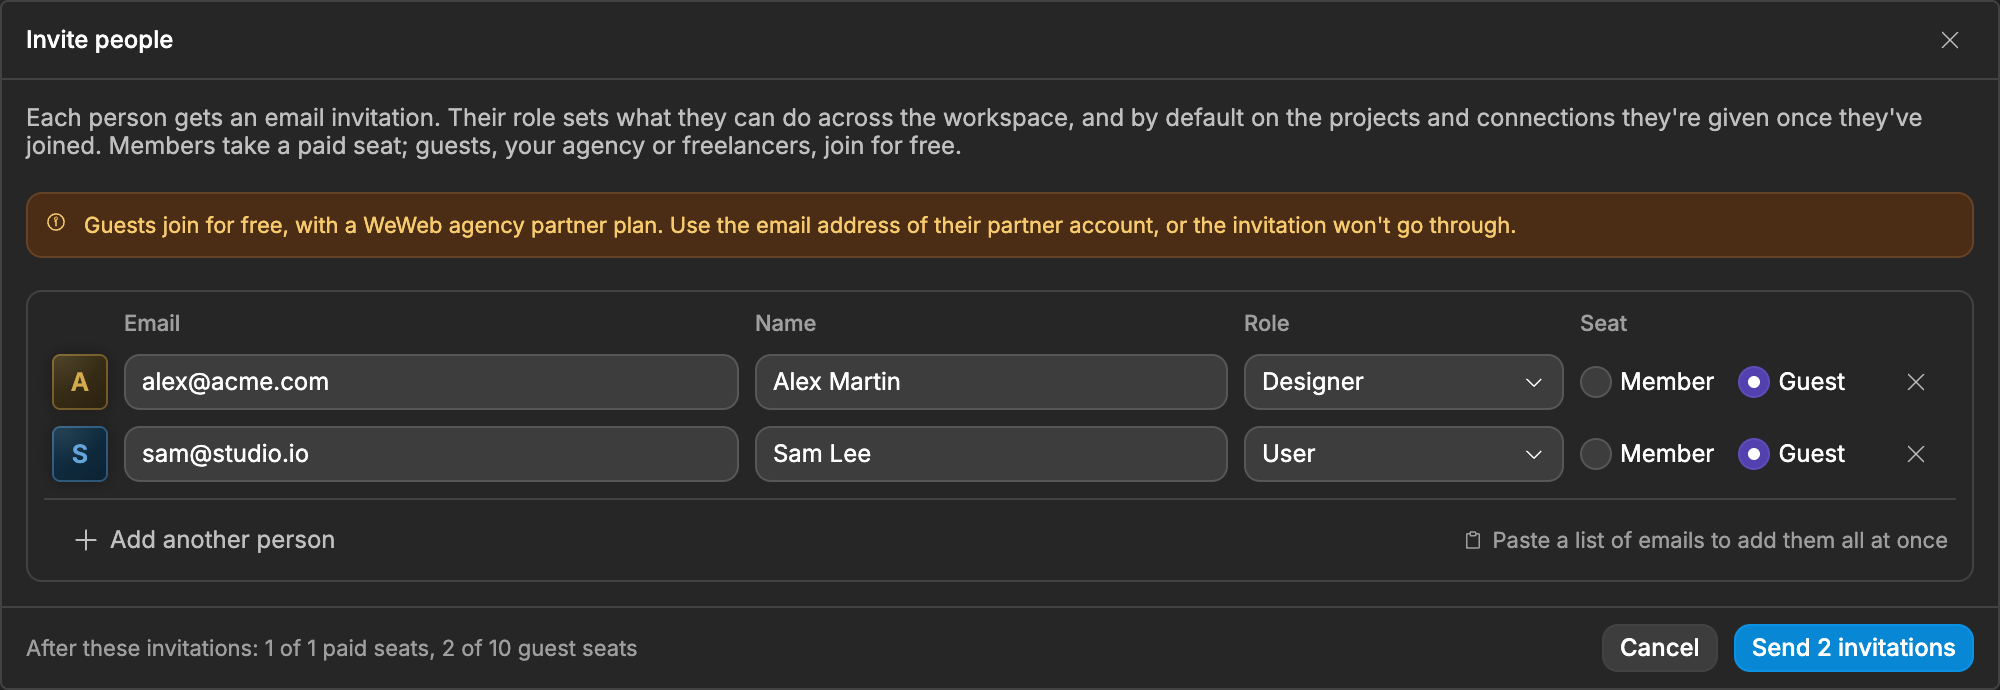
- Click the
Invitebutton at the top of theMemberssection. - For each person, fill in their
EmailandName, and choose theirRole. - Under
Seat, chooseMember(takes a paid seat) orGuest(free, for people with a WeWeb agency partner plan). There's no default: you choose every time. - To invite several people at once, click
Add another person, or paste a list of emails into anEmailfield to add them all at once. - Click
Send invitation.
Each person gets an email invitation. Once they've joined, their role applies right away.
A few rules apply to the role you choose:
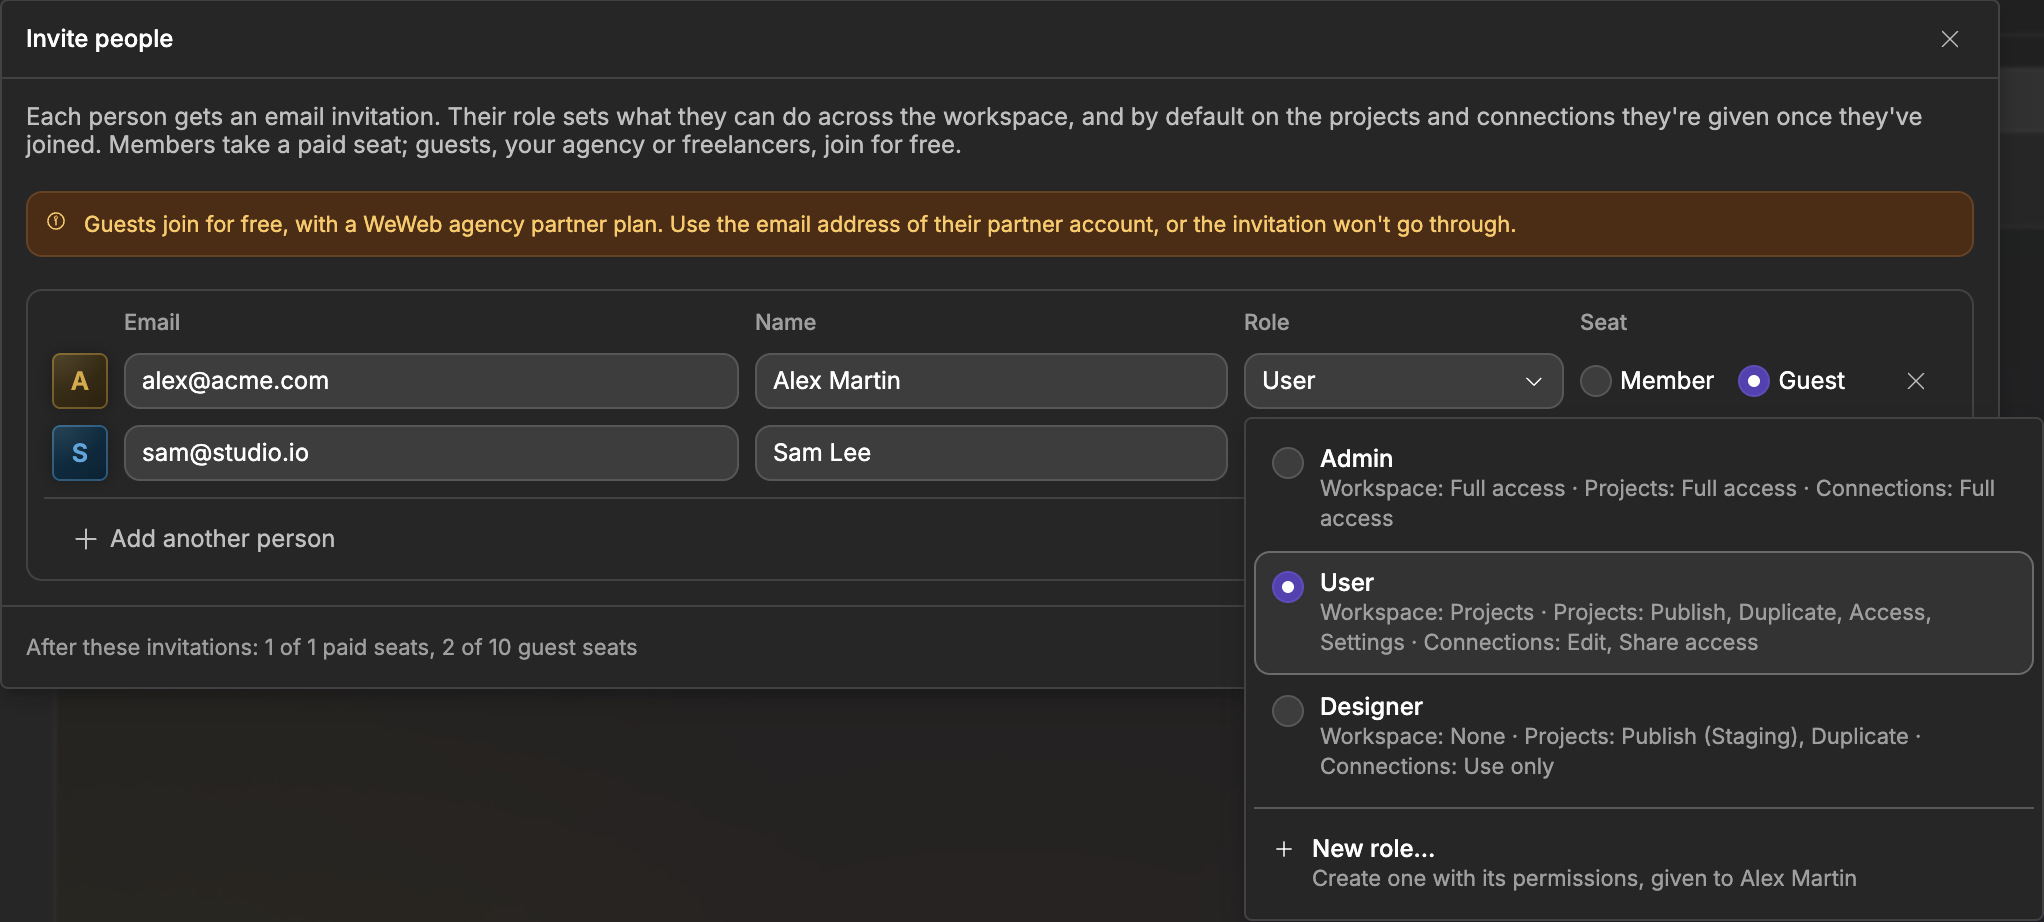
- Giving another role than
Userneeds theAccessworkspace permission. - Unless you have full access to the workspace, you can only give a role whose permissions you have yourself. A role that gives more is greyed out.
- With the
Accessworkspace permission,New role…at the bottom of the list creates a role and gives it to that person. Learn more about roles →
If you don't have enough seats left, the window tells you. With the Billing workspace permission, click Add seats: once you've added them, your invitations are still there, ready to send.
INFO
If your workspace uses single sign-on, you don't invite people here: your company directory decides who is in the workspace, and the Invite button doesn't show.
Managing members
To change someone's role, pick another one in the Role column of their row. The same rules apply as when inviting.
For everything else, click the three dots at the end of their row. Depending on your permissions, you can:
- Suspend them with
Suspend. They keep their role and access, but can't open anything. Without single sign-on, they keep their seat for when they come back. With single sign-on, they don't take a seat while suspended. UseReactivateto bring them back. - Remove them with
Remove from workspace. - Hand the workspace over to them with
Make owner. Only the owner sees this option. You then get theAdminrole, and your access to the projects and connections you created, and to the projects you moved into the workspace, follows your role, like anyone else's.
You can't change the status of, or remove, someone whose role has permissions yours doesn't have.
To choose which projects and connections someone can open, go to the Members tab of the Access page.
Roles
Every member and guest has a role, which sets what they can do in the workspace and, by default, on its projects and connections. Every workspace has two built-in roles:
- The
Adminrole has full access to everything. - The
Userrole works in the projects and connections they're given, and in those they create, with every permission on them. It can't manage the workspace.
You create and change roles in the Roles tab of the Access page. Learn more about roles →
Groups
Groups let you share projects and workspace connections with several people at once. Whatever a group is given, its members and guests have, including people added to the group later.
For example, create a Marketing group with your marketing team, then give that group access to your website project and your HubSpot connection.
To create a group, you need the Access workspace permission:
- In the
Groupssection, clickNew group. - Give it a
Nameand, if you like, aDescription. - Under
Members and guests, add the people who belong to it. - Click
Create group.
WeWeb then opens the group's access, where you choose the projects and connections it gets. Later, change them from the Members tab of the Access page, where groups are listed below the members.
To rename a group or change who is in it, click the three dots on its row, then Edit. To delete it, click Delete.
Unless you have full access to the workspace, you can't add yourself to a group that gives more than you have.
If your workspace uses single sign-on, groups come from your company directory, which keeps their members up to date. You can't create or edit groups by hand, but you give directory groups access to projects and connections the same way, from the Access page.
Seats
The top of the Members section shows how many seats you use.
- Without single sign-on, each member takes a seat and each guest takes a free guest seat. Use
Manage seatsto add or remove seats. - With single sign-on, a member only takes a seat once they can open at least one project or connection. Pending and suspended members, and members without any access, take no seat.
Troubleshooting
A few things to keep in mind:
- Guests will not receive an invitation if the invite was sent to an email address without a WeWeb agency partner program.
- If you close the popup before clicking the
Send invitationbutton, the invitation(s) will not go through. - To join your workspace, new members and guests should validate the invitation by clicking the link they receive by email.
- If a button is greyed out, hover it: WeWeb tells you which permission you're missing.
When someone has received but not activated their invitation, you'll see a Pending label next to their name. You can resend or revoke the invitation by clicking on the three dots at the end of their row, then on Resend invitation or Revoke invitation:

CONTINUE LEARNING
Now that your team is in the workspace, set up your roles and choose which projects and connections each person can open.