Appearance
USE THE CURRENT CUSTOM AUTH GUIDE
This page describes an older token-based auth plugin flow.
For current projects using the Authentication subtab in Data & API, use Custom Auth (Authentication System) →.
Token-based authentication
Add plugin
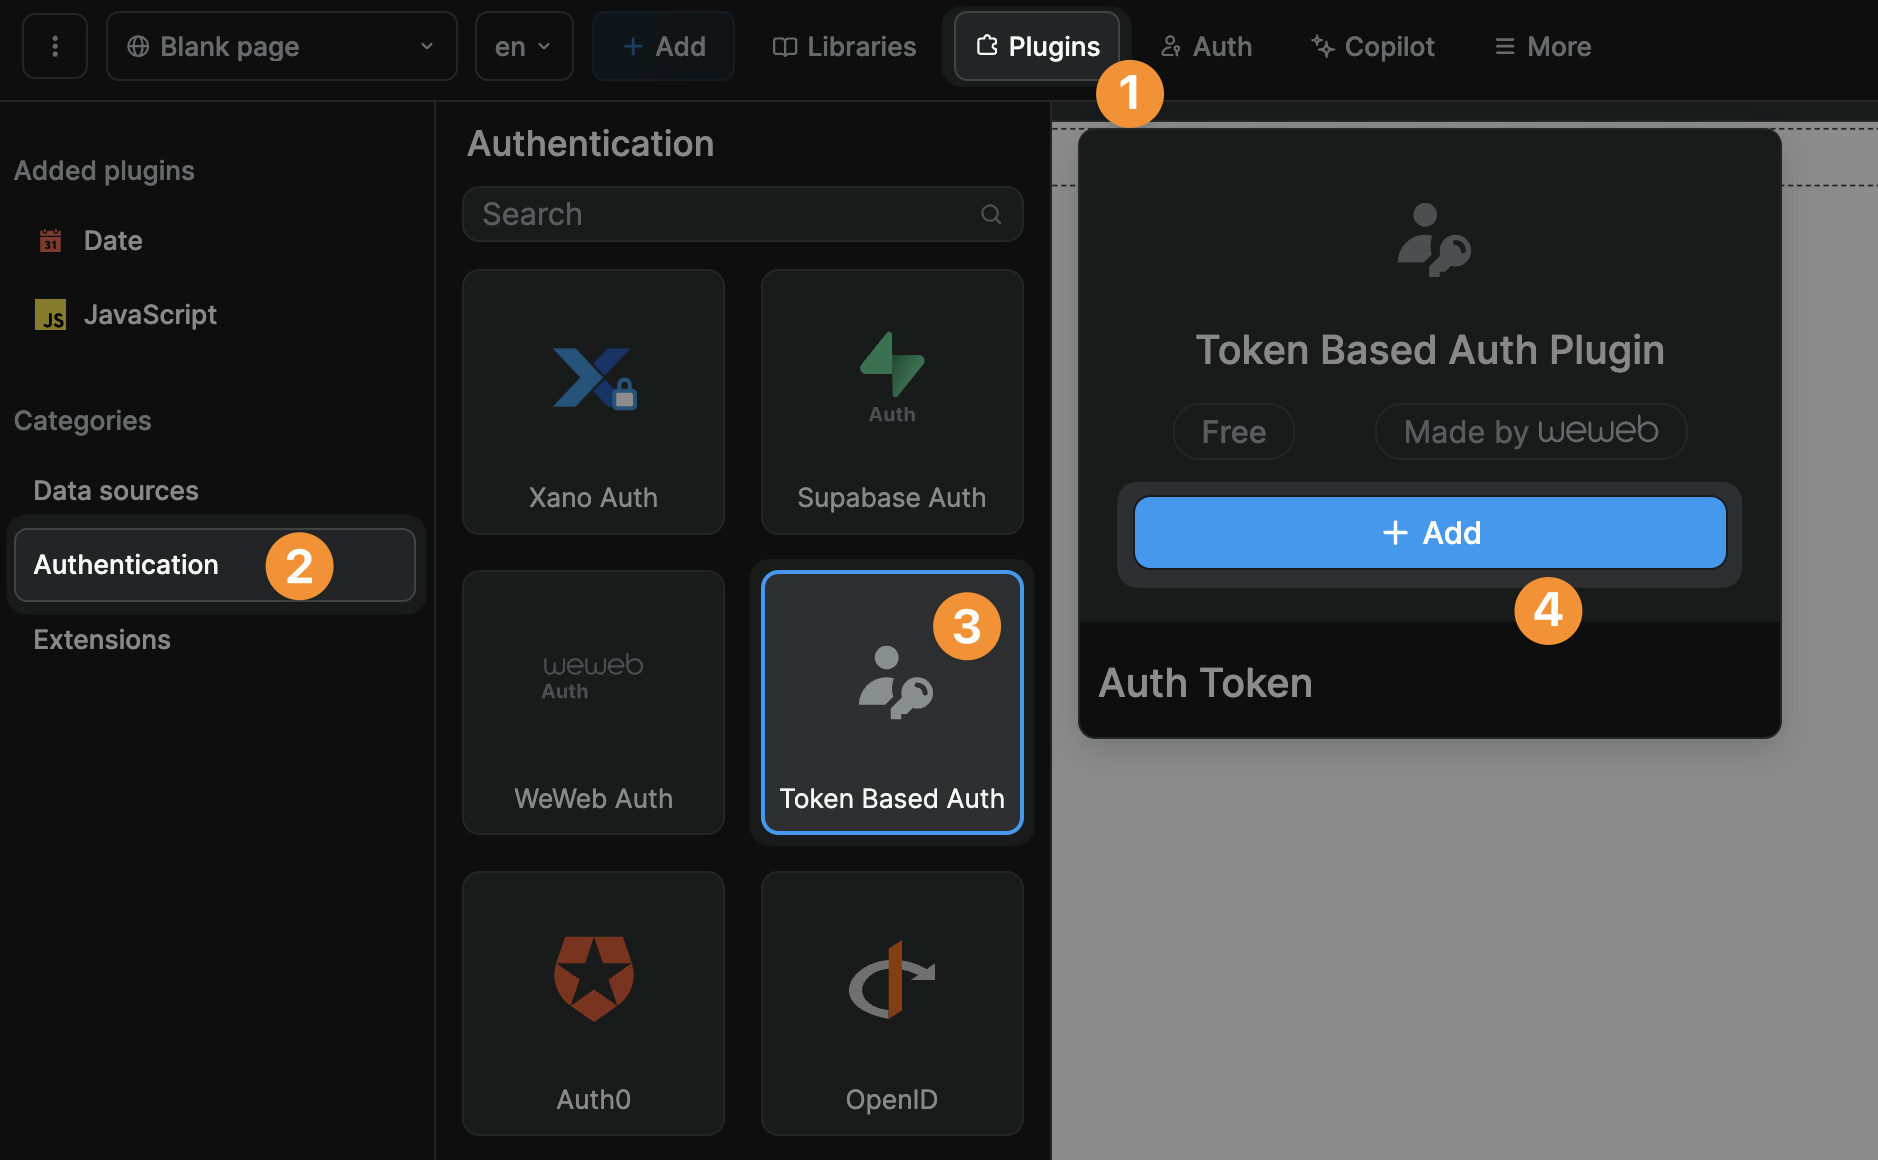
To connect your WeWeb app to a token-based authentication system, go to Plugins > Authentication > Token Based Auth:
Configure plugin
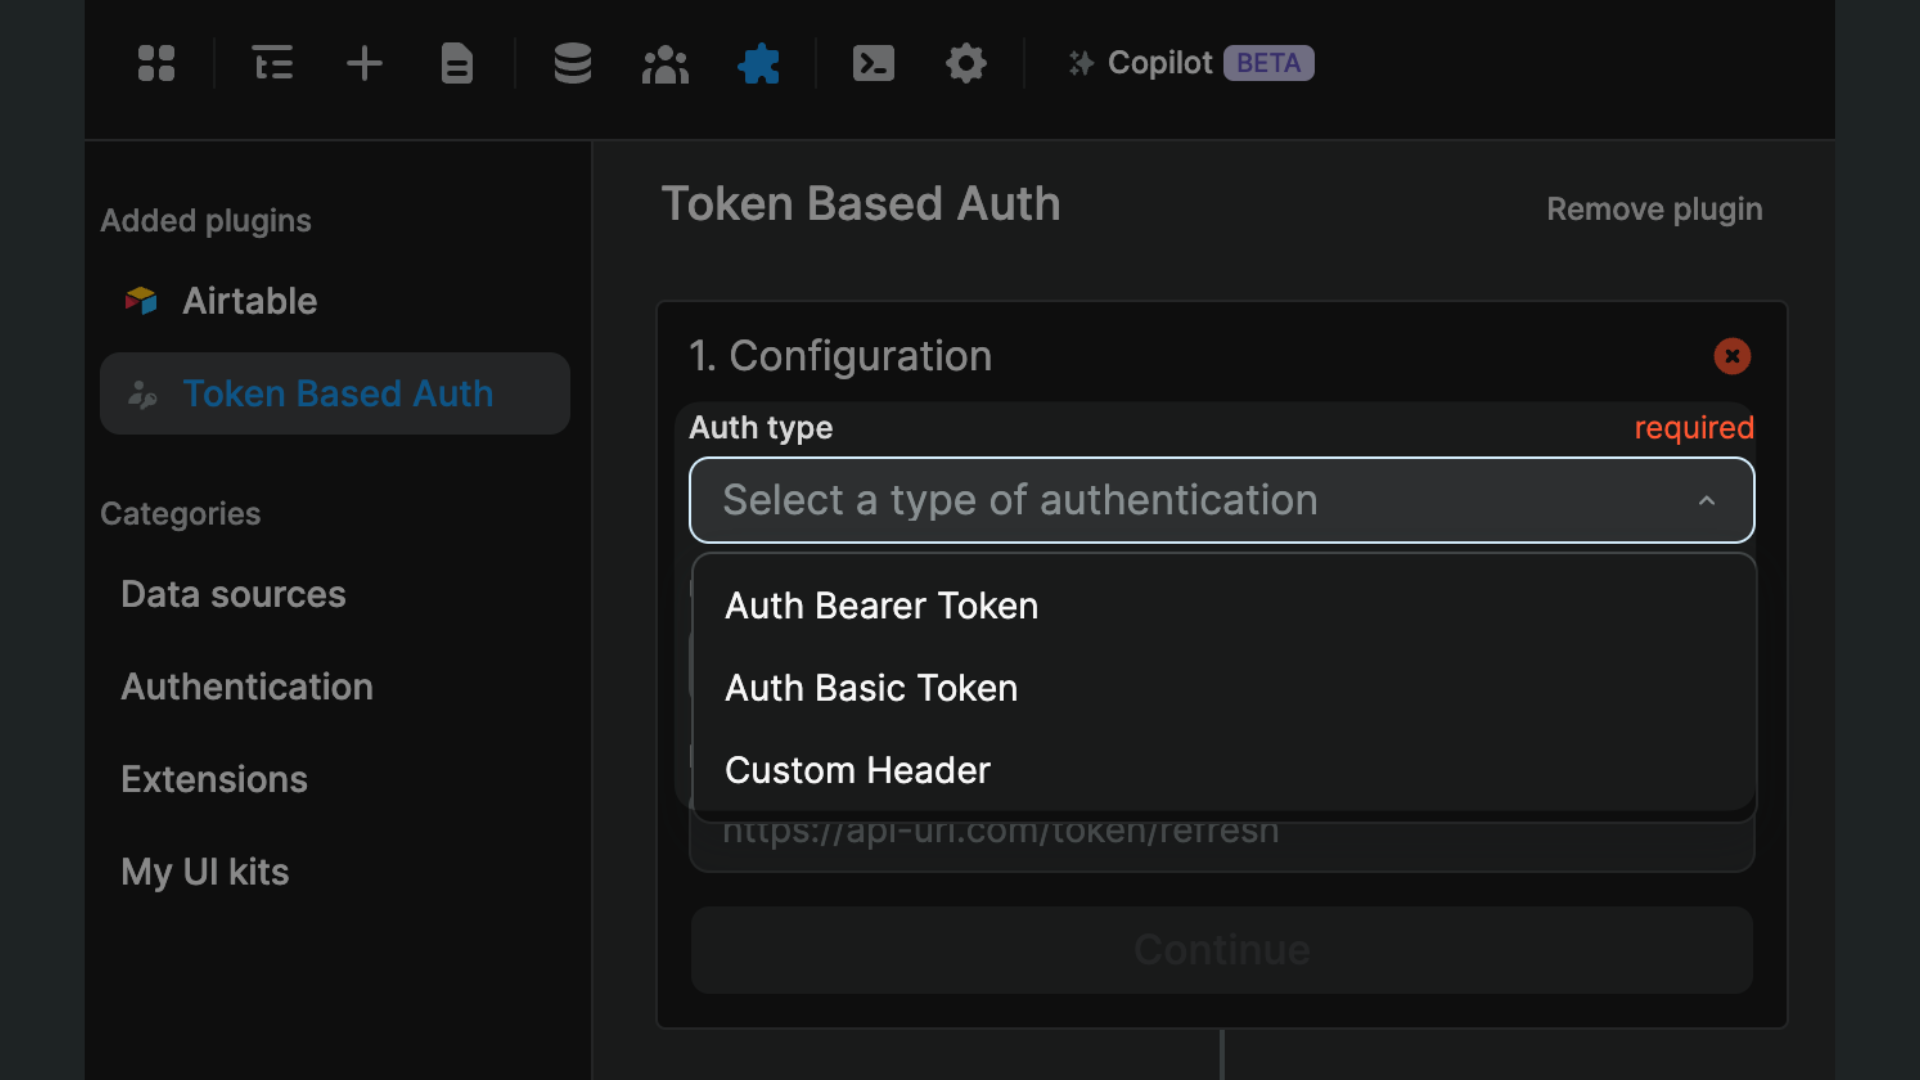
When you add the Plugin, you will be invited to choose the authentication type:
- Auth Bearer Token,
- Auth Basic Token, or
- Custom Header
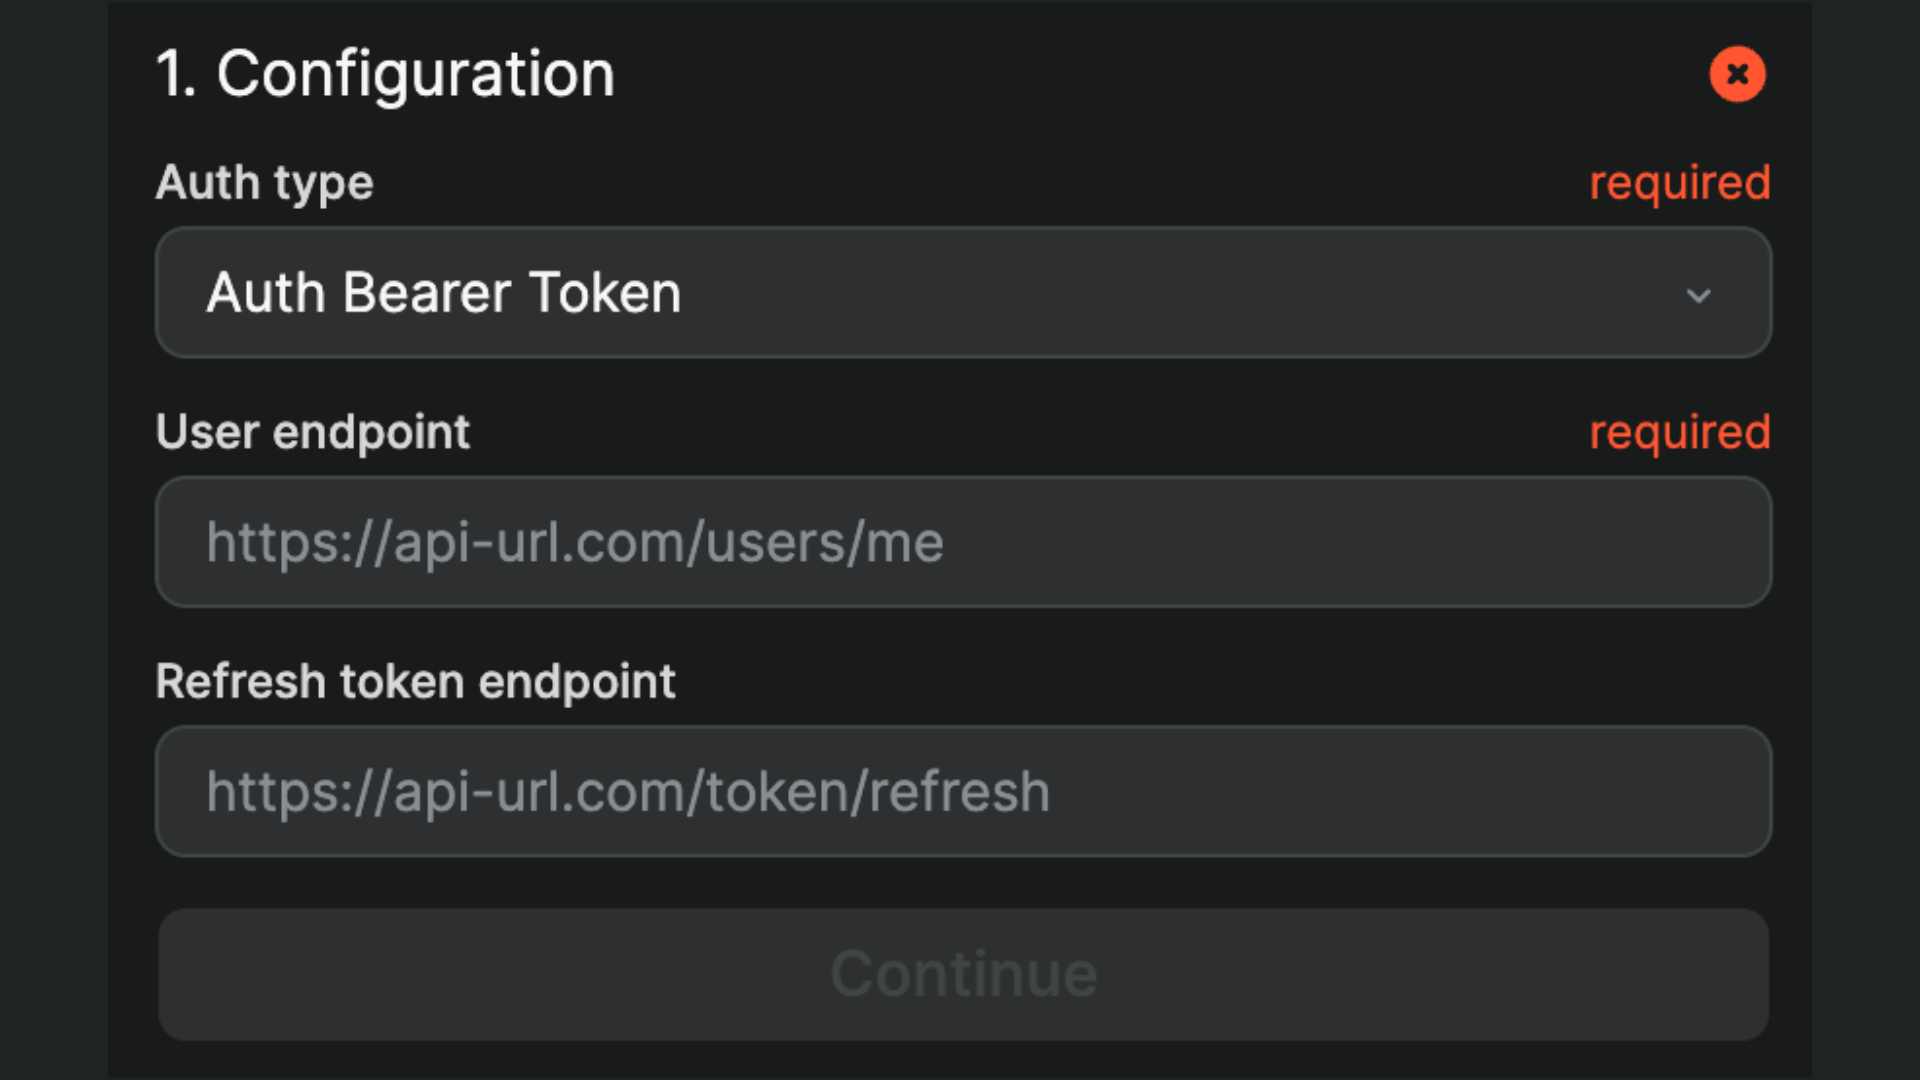
Depending on the authentication type you choose, you will be invited to add further information.
For Auth Bearer Token or Auth Basic Token authentication, you will be invited to provide a user endpoint (required) and refresh token endpoint (optional):
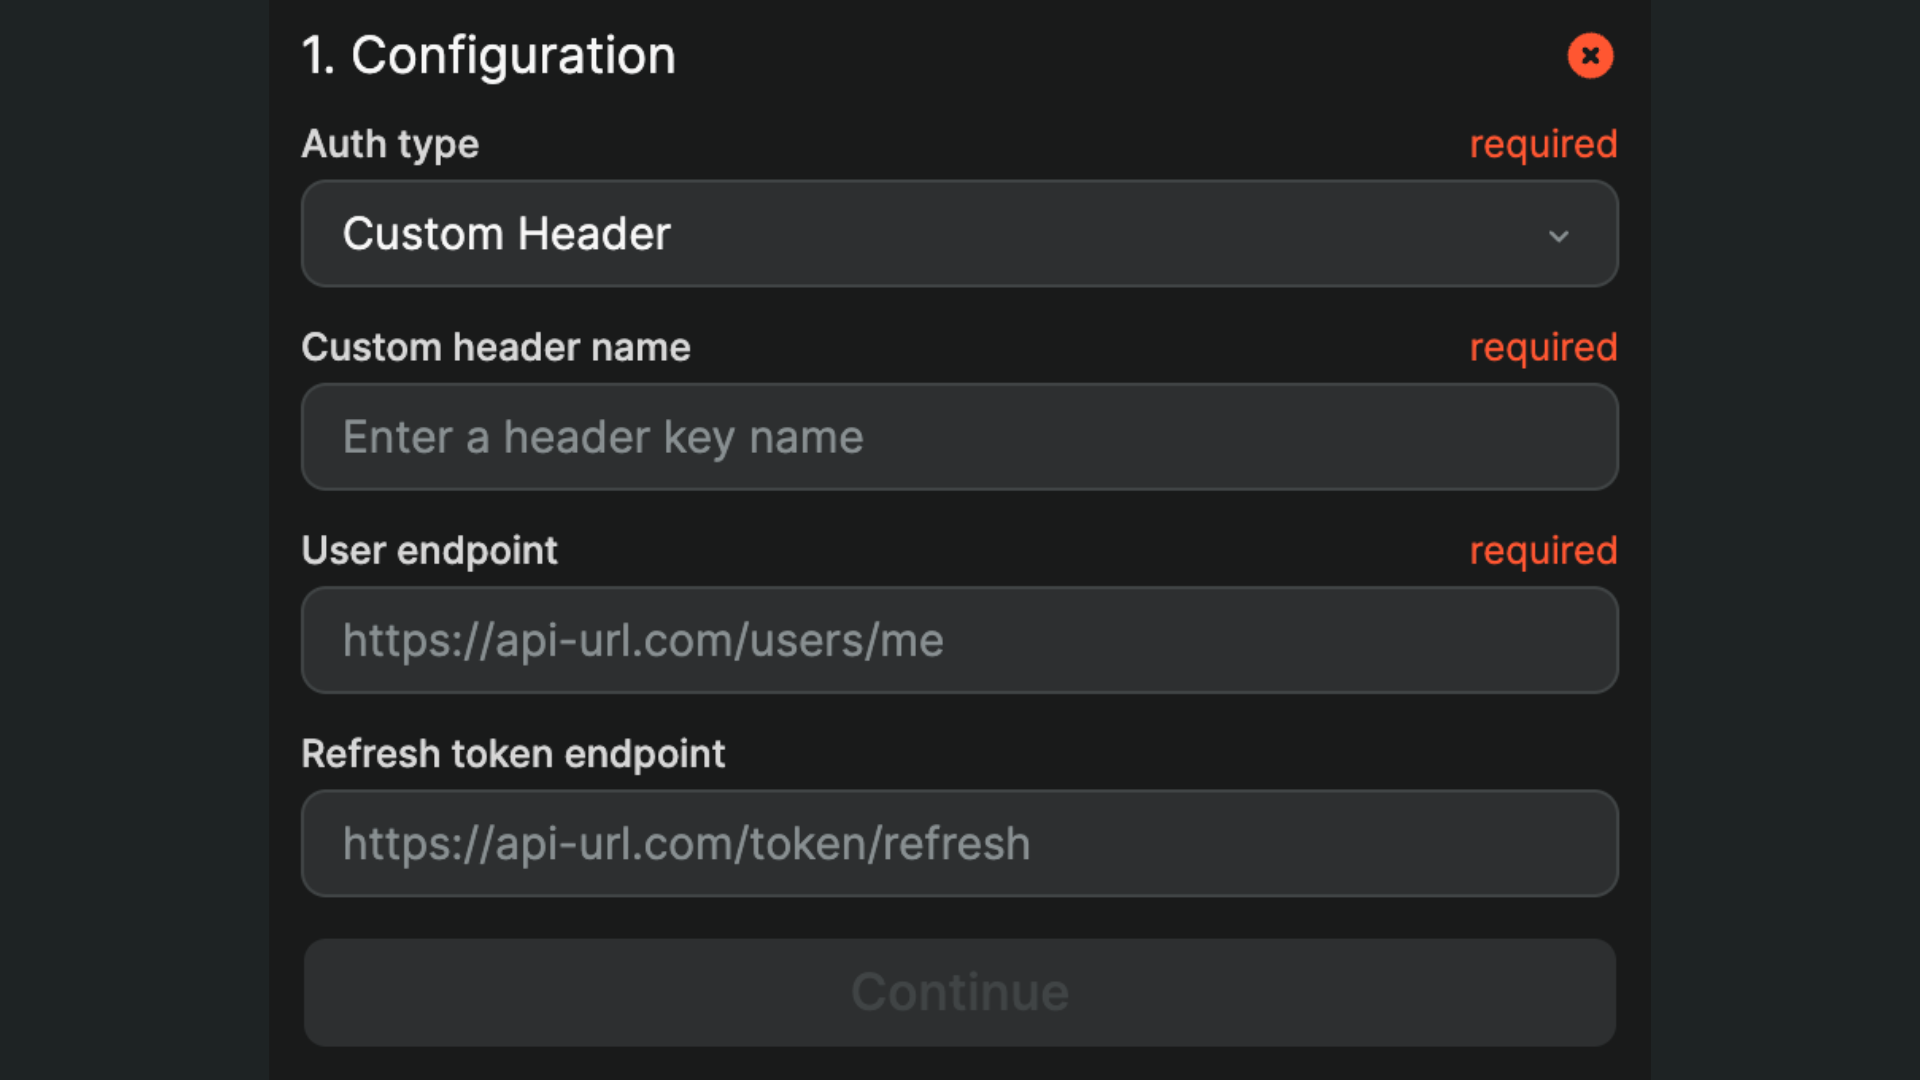
For Custom Header authentication, you will also be invited to fill out the custom header name:
TIP
If you're unsure how to complete this step, please contact the provider of the authentication system you are attempting to set up.
Define dedirection
Choose a public page where you want to redirect users when they are not signed in:
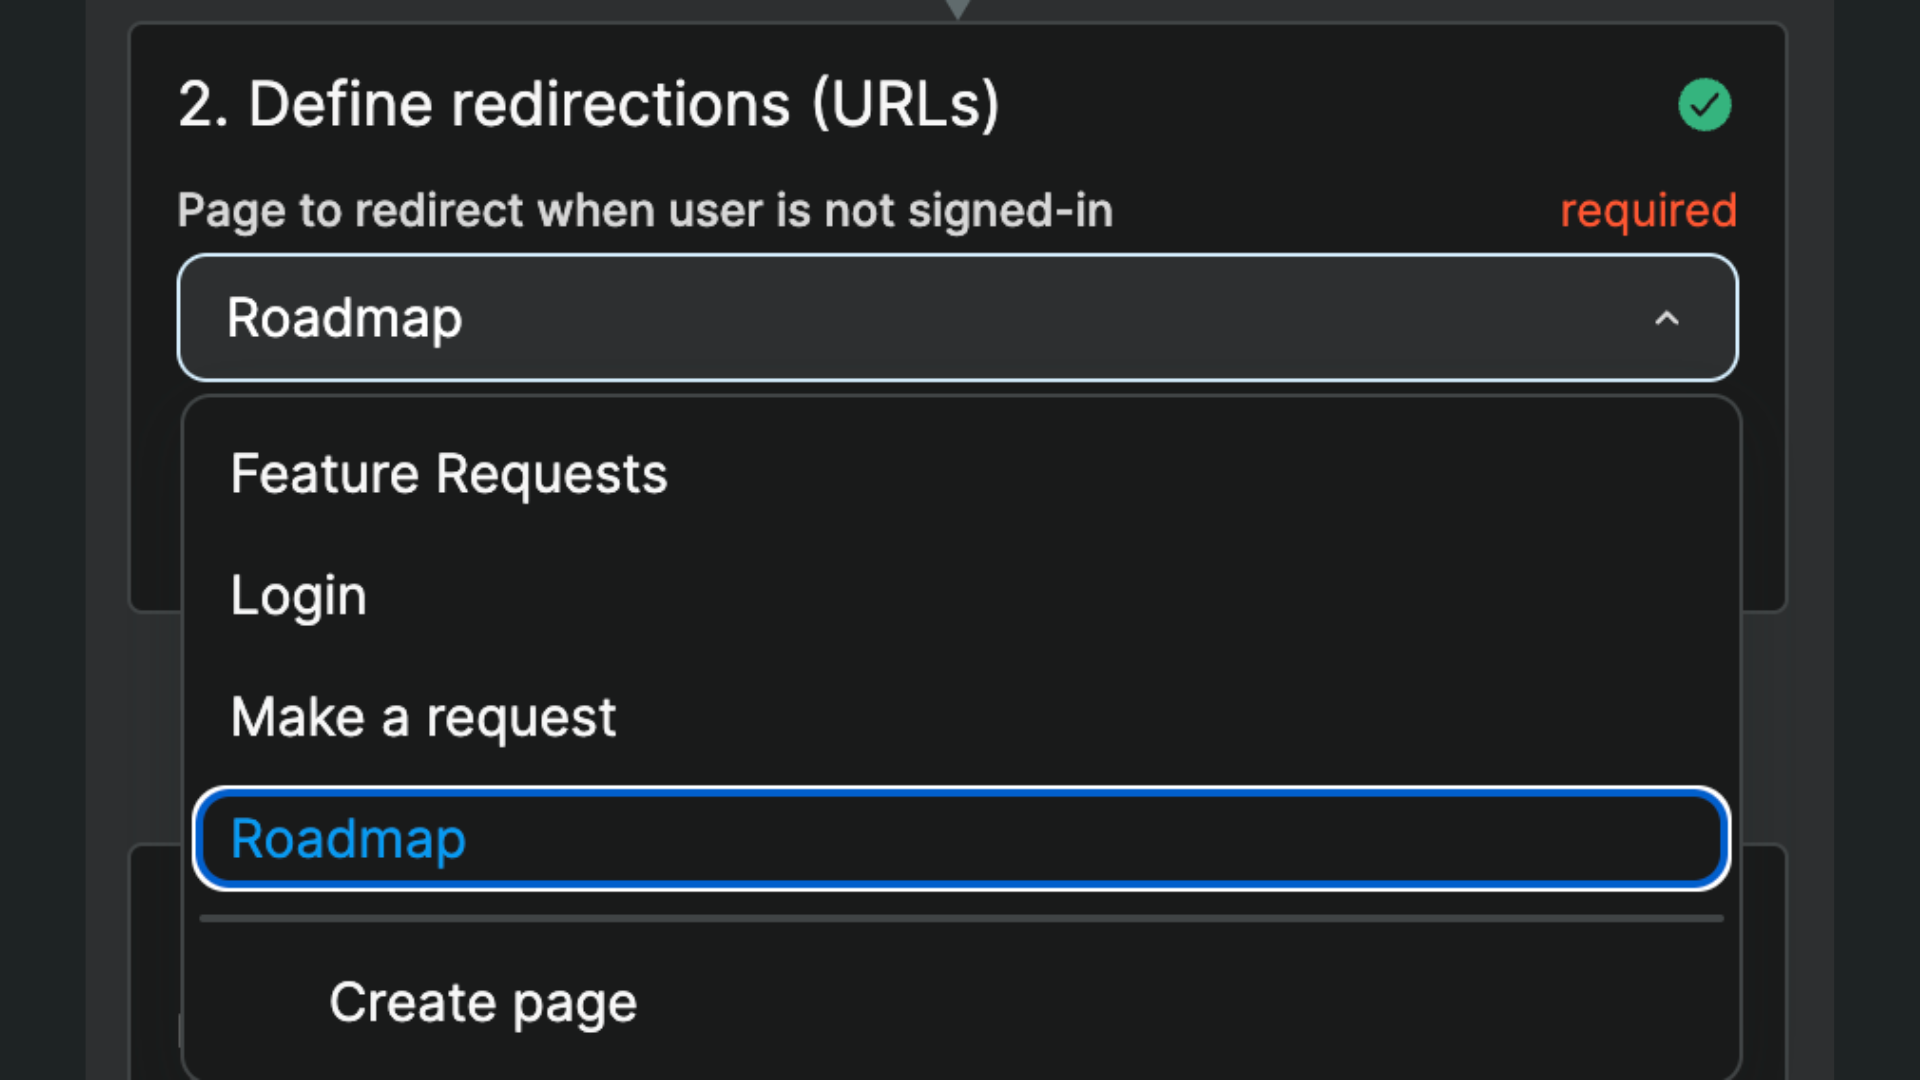
WARNING
Choose a public page. If you redirect users to a private page when they are not logged in, you will create an infinite loop in your app and your users' browser will crash.
User roles & user groups
In your backend
In order to gate content in WeWeb based on user roles and permissions, you first need to have information about roles in your backend and that information needs to be accessible to WeWeb via API.
For example, you could create a role column in your user table and make it available in the me endpoint so that, when a user logs in to your app, you fetch their role at the same time.
In the WeWeb plugin
Assuming you have roles defined in your backend, you'll have to tell the Token Based Auth plugin where to find the user role in the backend:
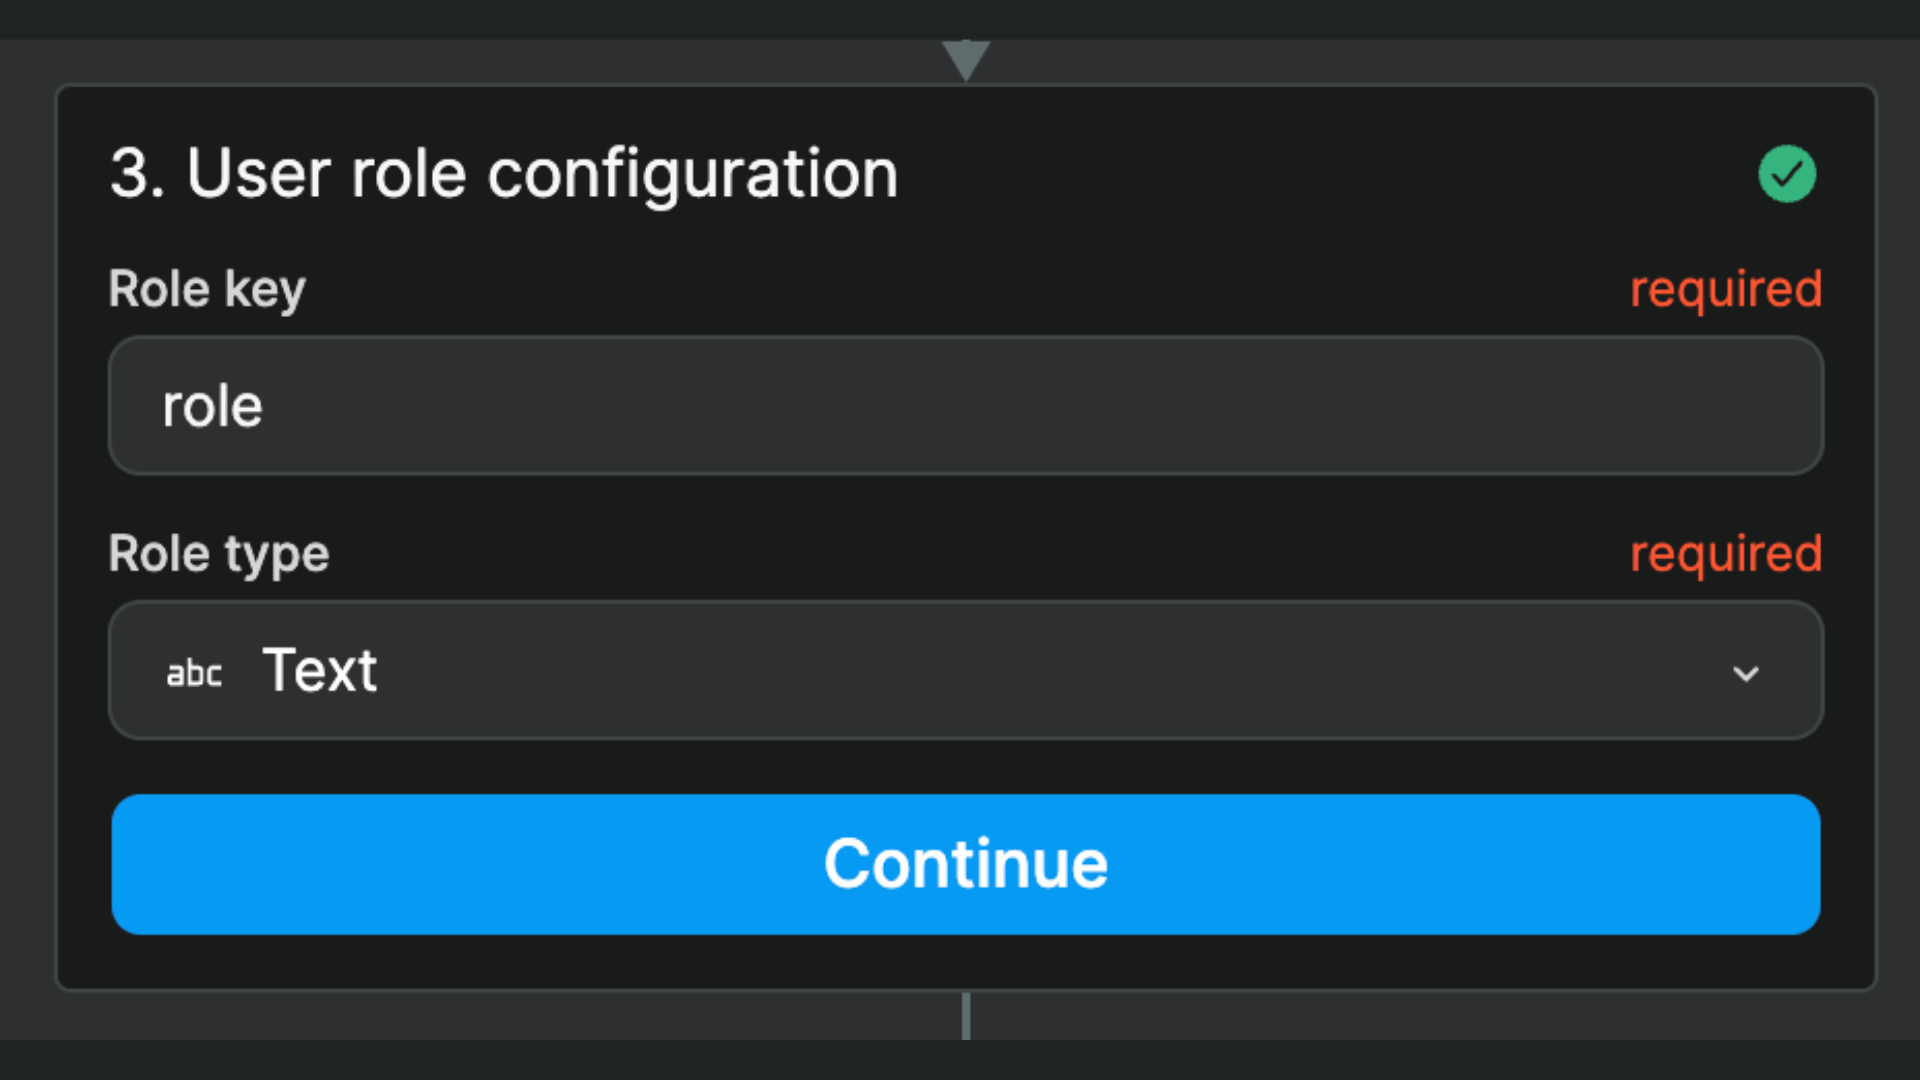
WARNING
The Role key is case sensitive. If the column name in your backend is Roles, you should type this in exactly: roles won't work.
The Role type must match the data type where you store user role(s) in your backend. In the example above, it's a single Text in a column named role but other common use cases could be a List of texts named roles or a List of objects named users.
In the WeWeb Auth tab
Once you've told the plugin where it can find the user roles in your backend, you'll need to create the user roles and user groups in WeWeb:
- Go to the
Authtab, - Add the user roles you have in your backend, and
- Add user groups and decide what role(s) a user needs to be part of a group.
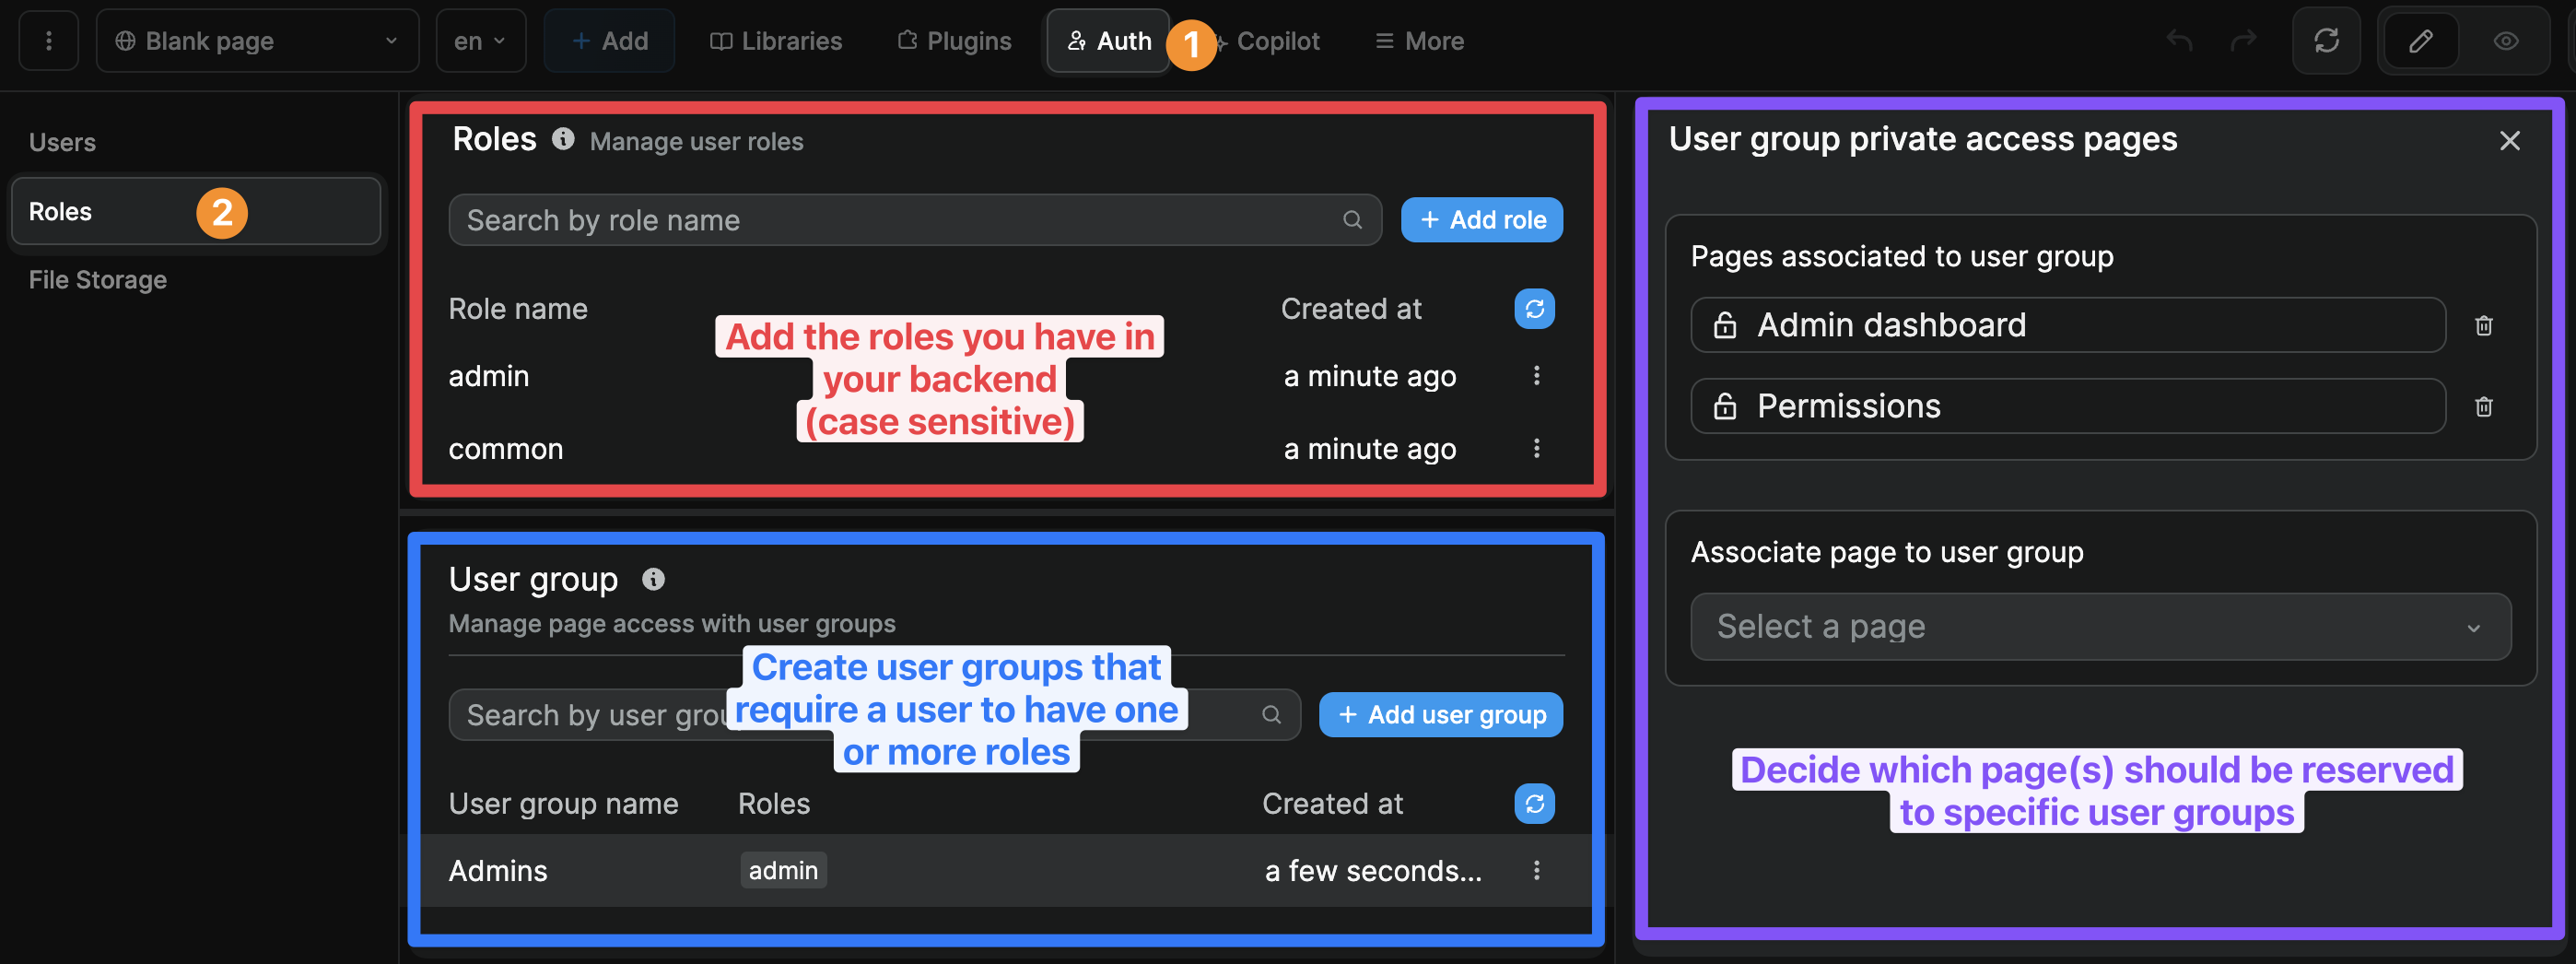
WARNING
The Role name should be exactly the same as in your backend (casing included) because that's how the WeWeb plugin will be able to identify the users that have that role.
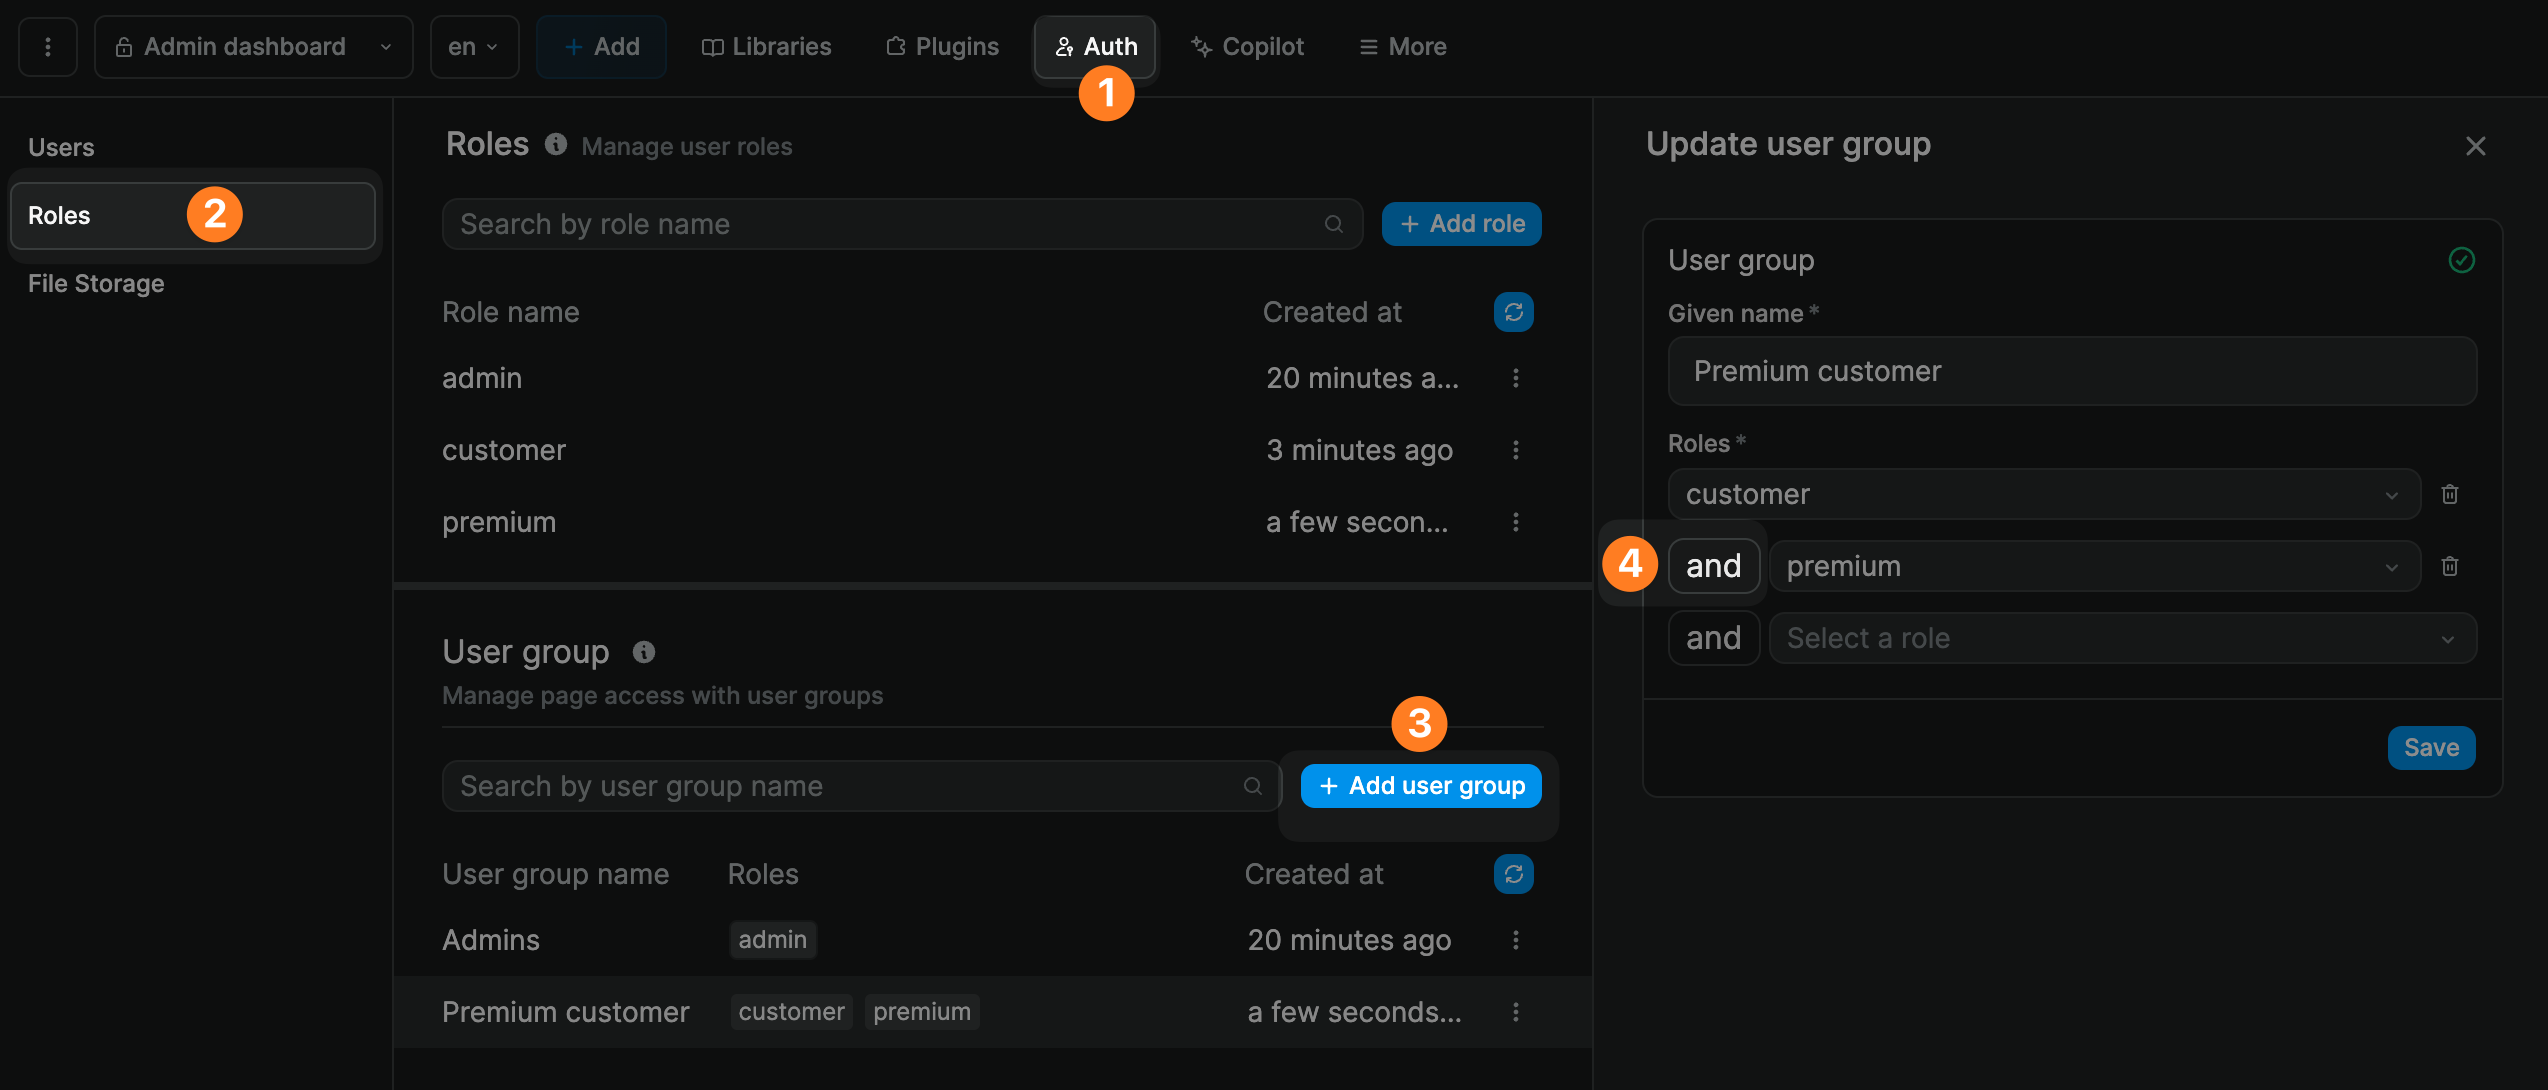
In addition, when you add several roles to a user group, a user needs to have BOTH these roles to be part of the user group. It's an AND statement, not OR.
In the example below, the members of the Premium customer user group must have both the Customer and the Premium roles associated with their user profile:
Private pages
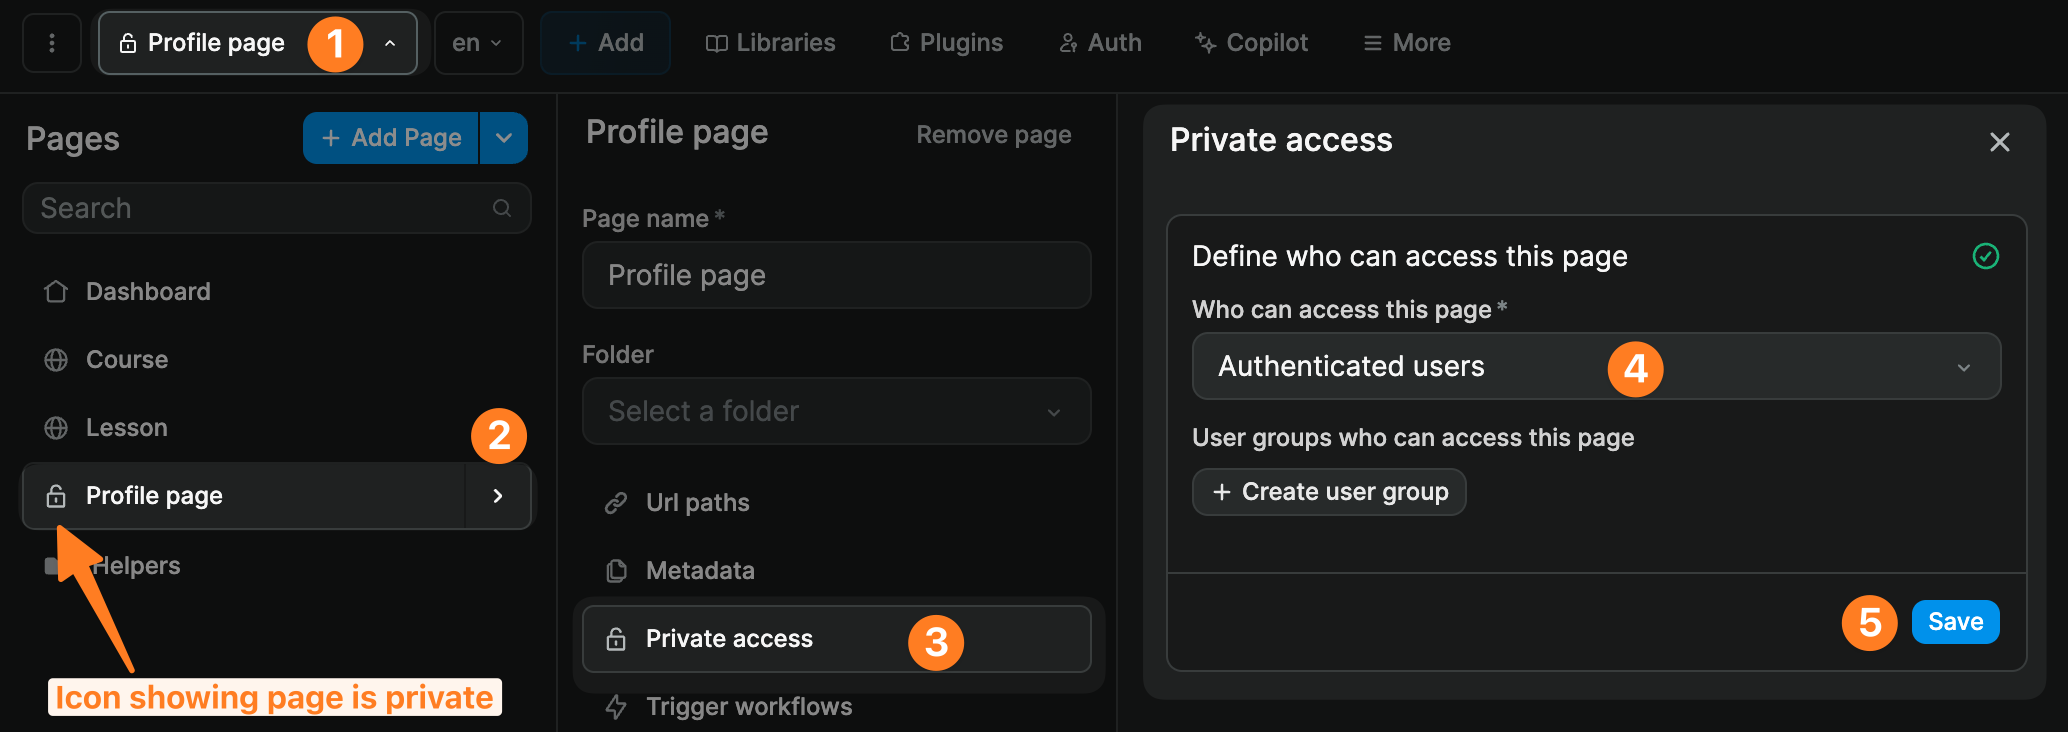
When you setup the Token Based Auth plugin, an Authenticated users user group will be created by default even if you don't define additional user groups.
You can use this user group to restrict access to a page:
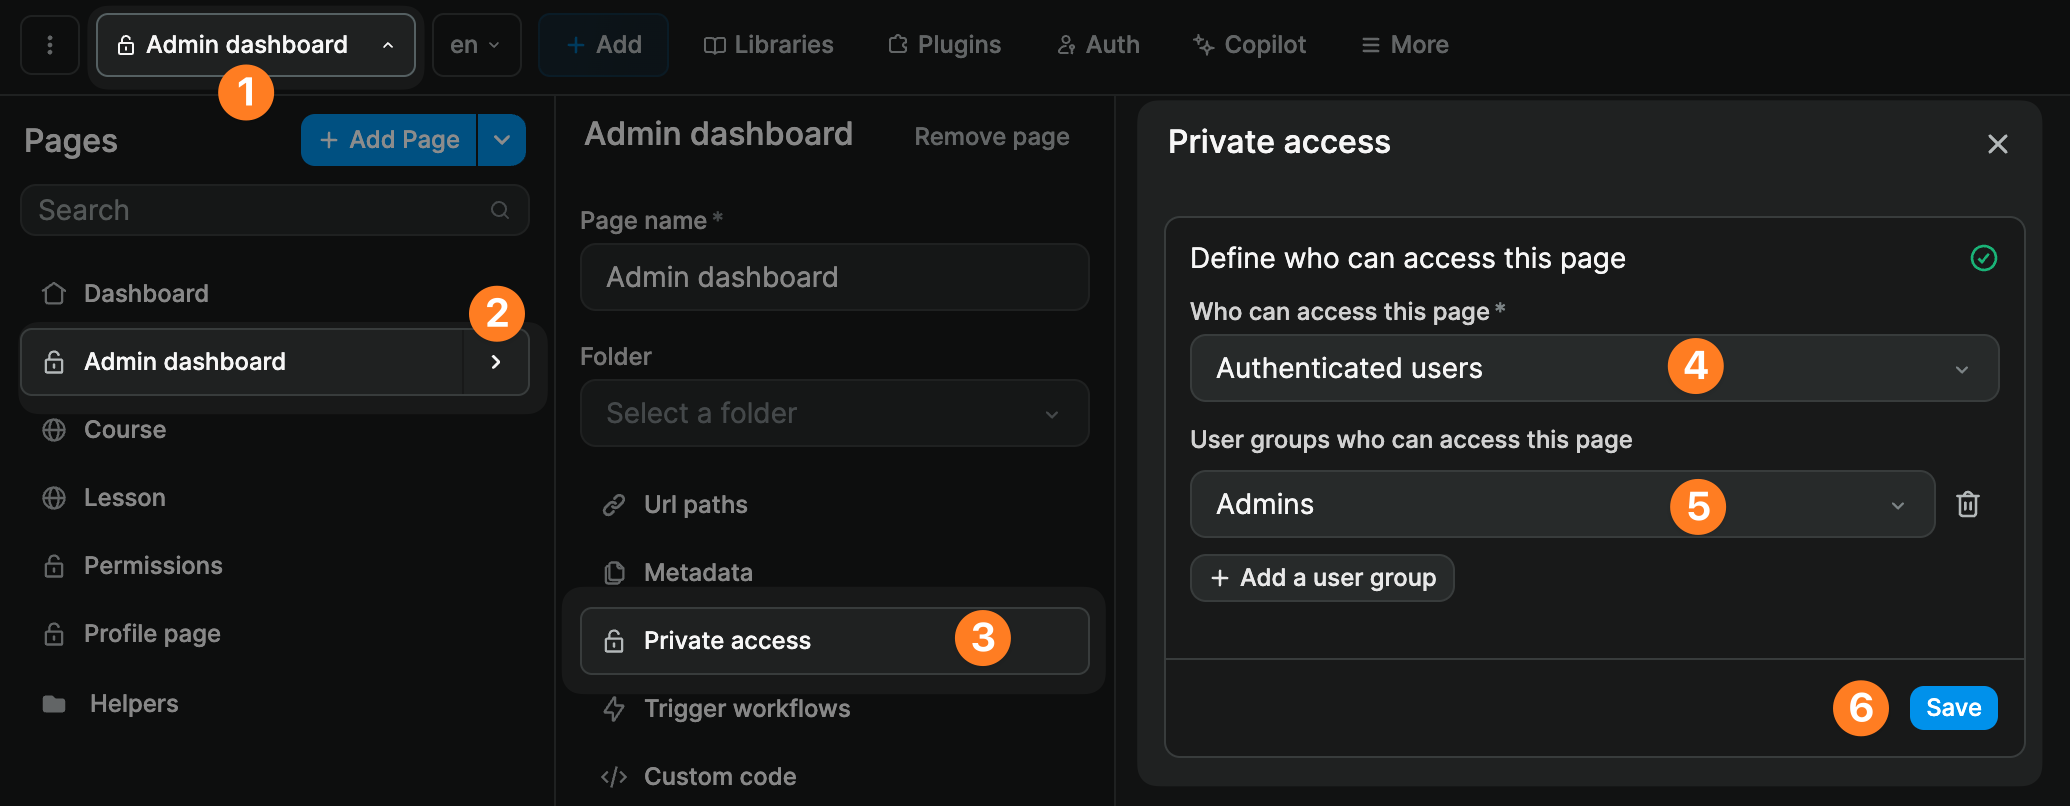
If you have user roles in your backend, you can add user groups in WeWeb that refer to those user roles and restrict access to pages further:
Signup and login workflows
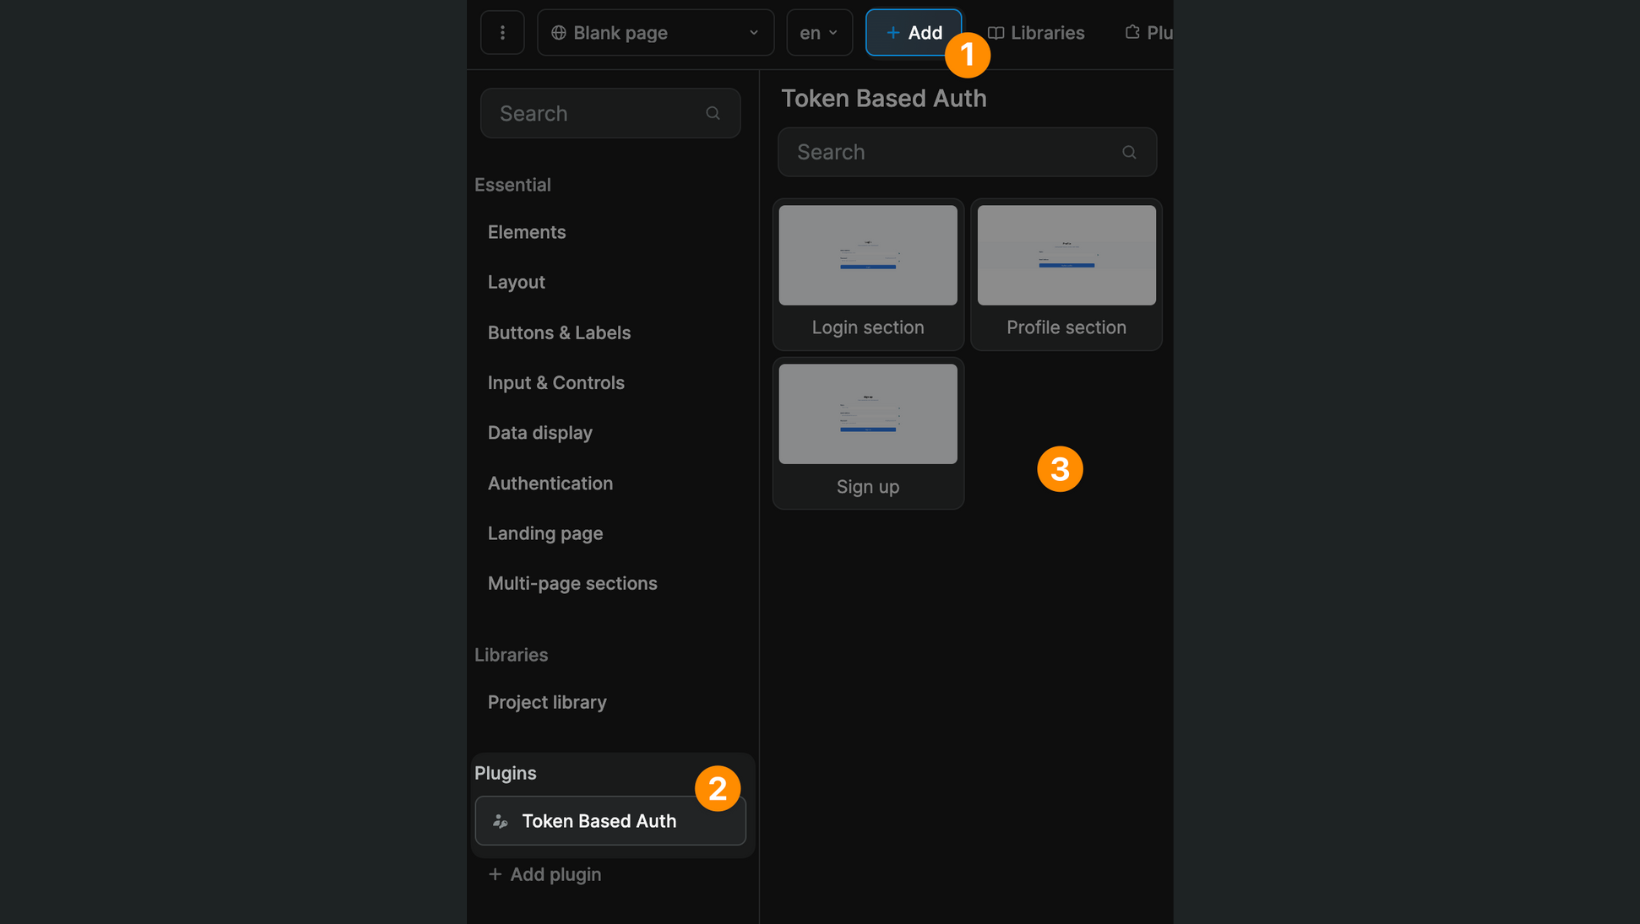
When you add the Token Based Auth Plugin to a WeWeb project, new elements will appear in the Add menu under the Plugins section:
- Signup forms,
- Login forms, and
- User profile forms.
You can add an authentication form by drag-and-dropping it on the Canvas.
You will find a no-code workflow on the Form Container which you can configure to suit your needs.
In step 1, we make an API request to POST the user's email and password to our Authentication System. The URL endpoint and requested information will depend on your Authentication System:
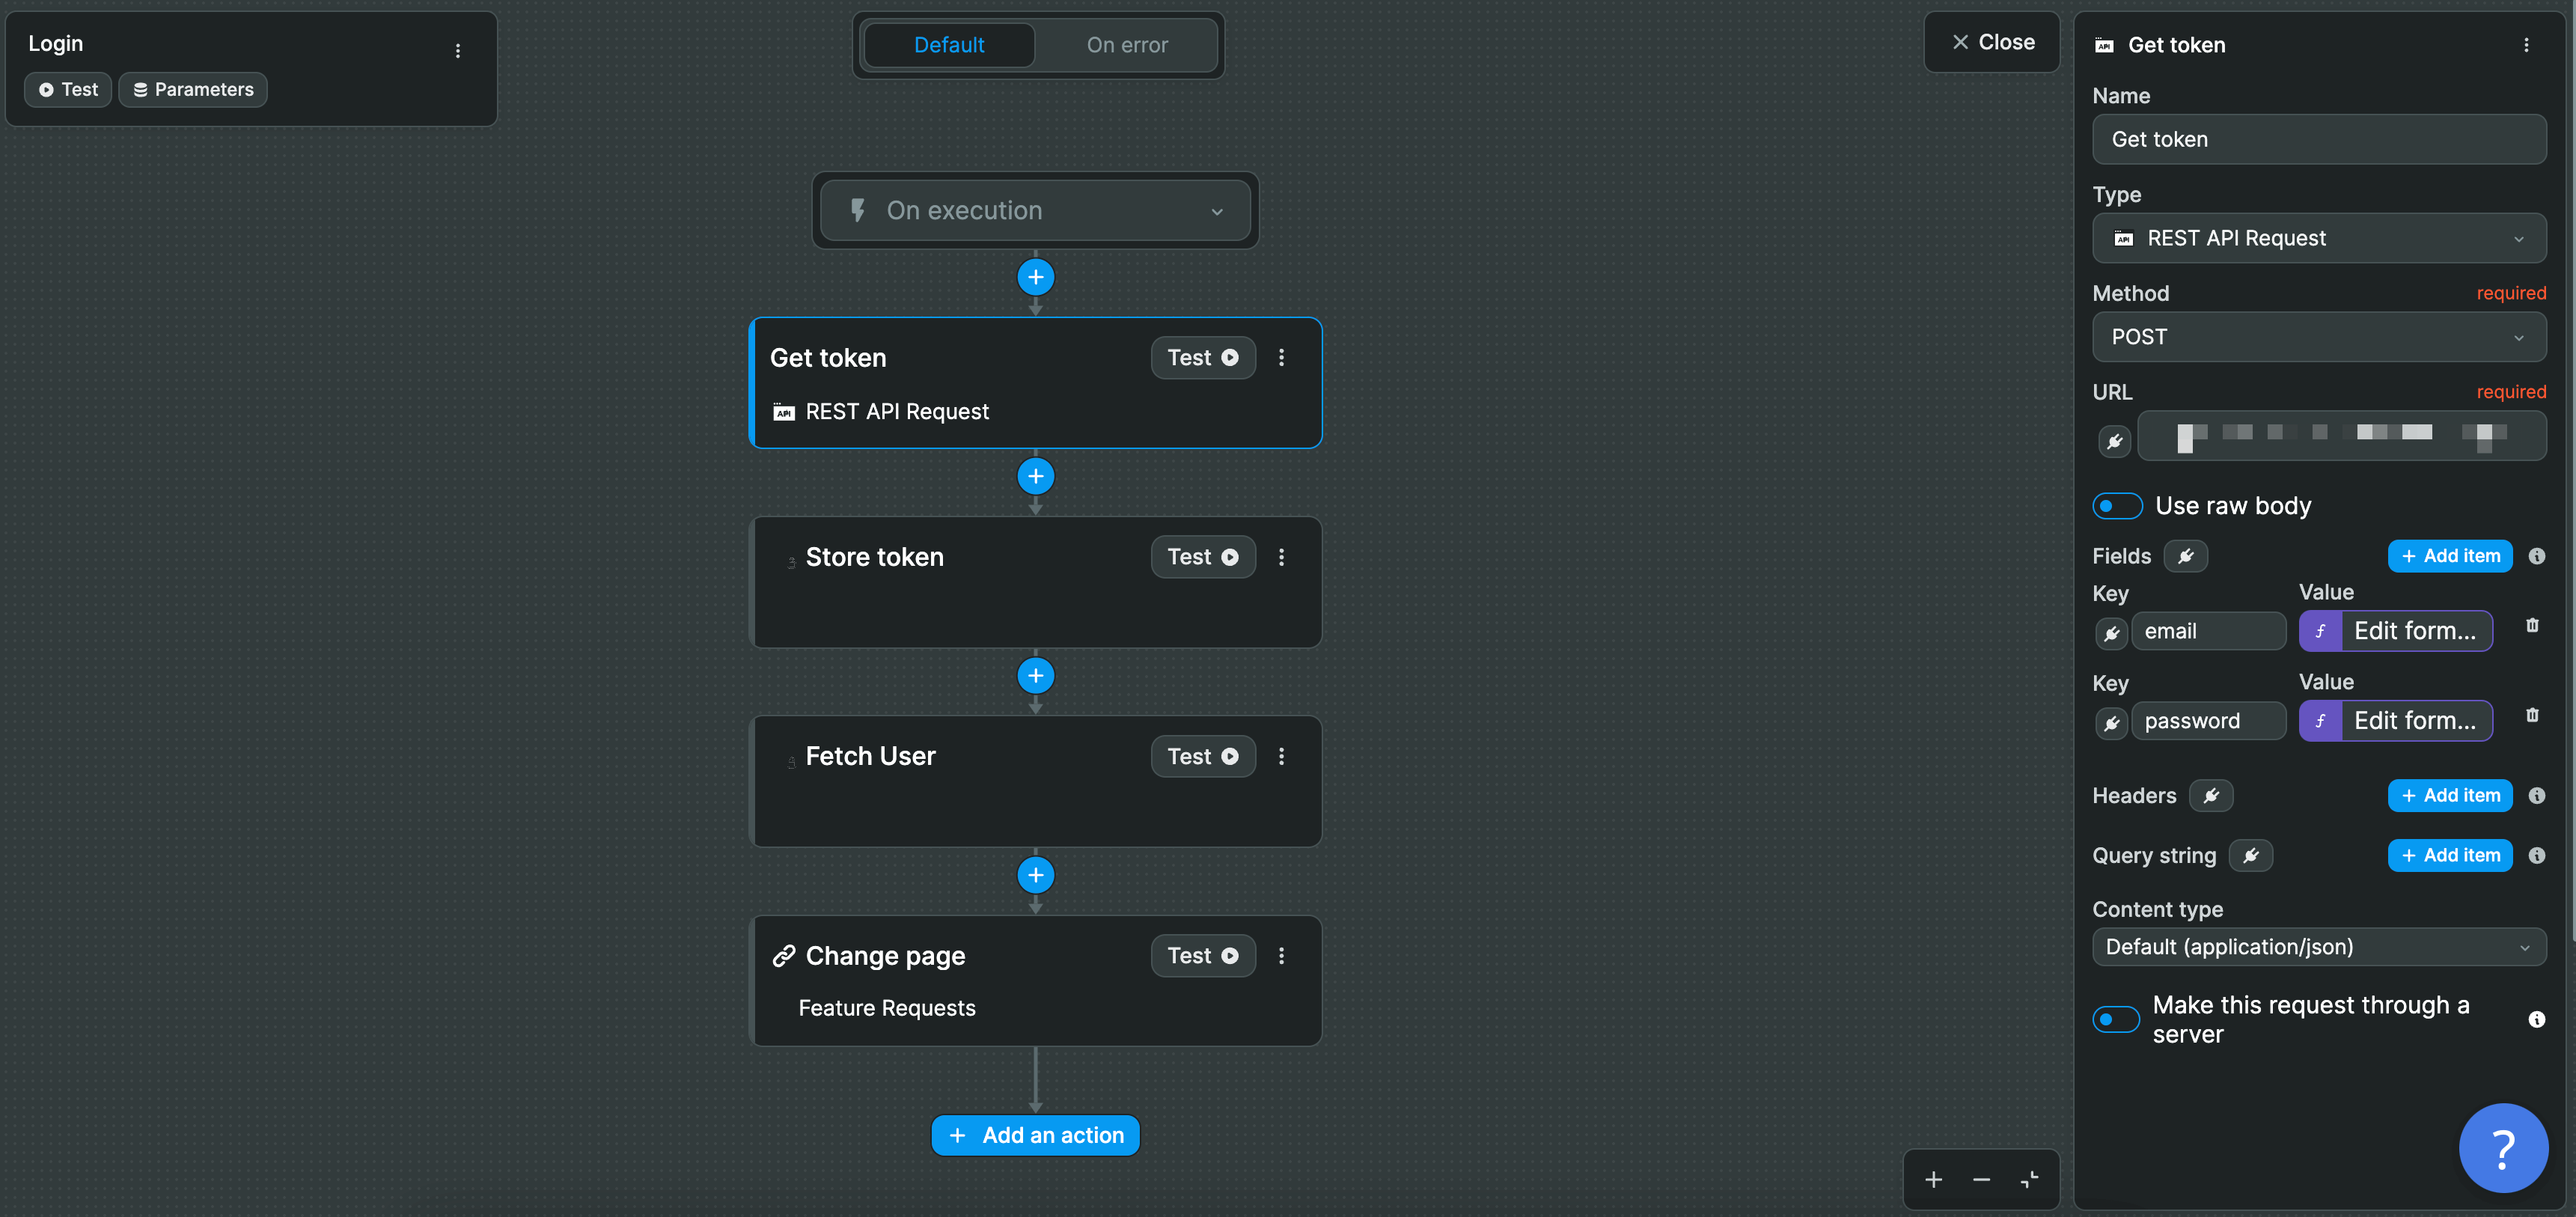
In step 2, we store the user token from the result of the previous action:
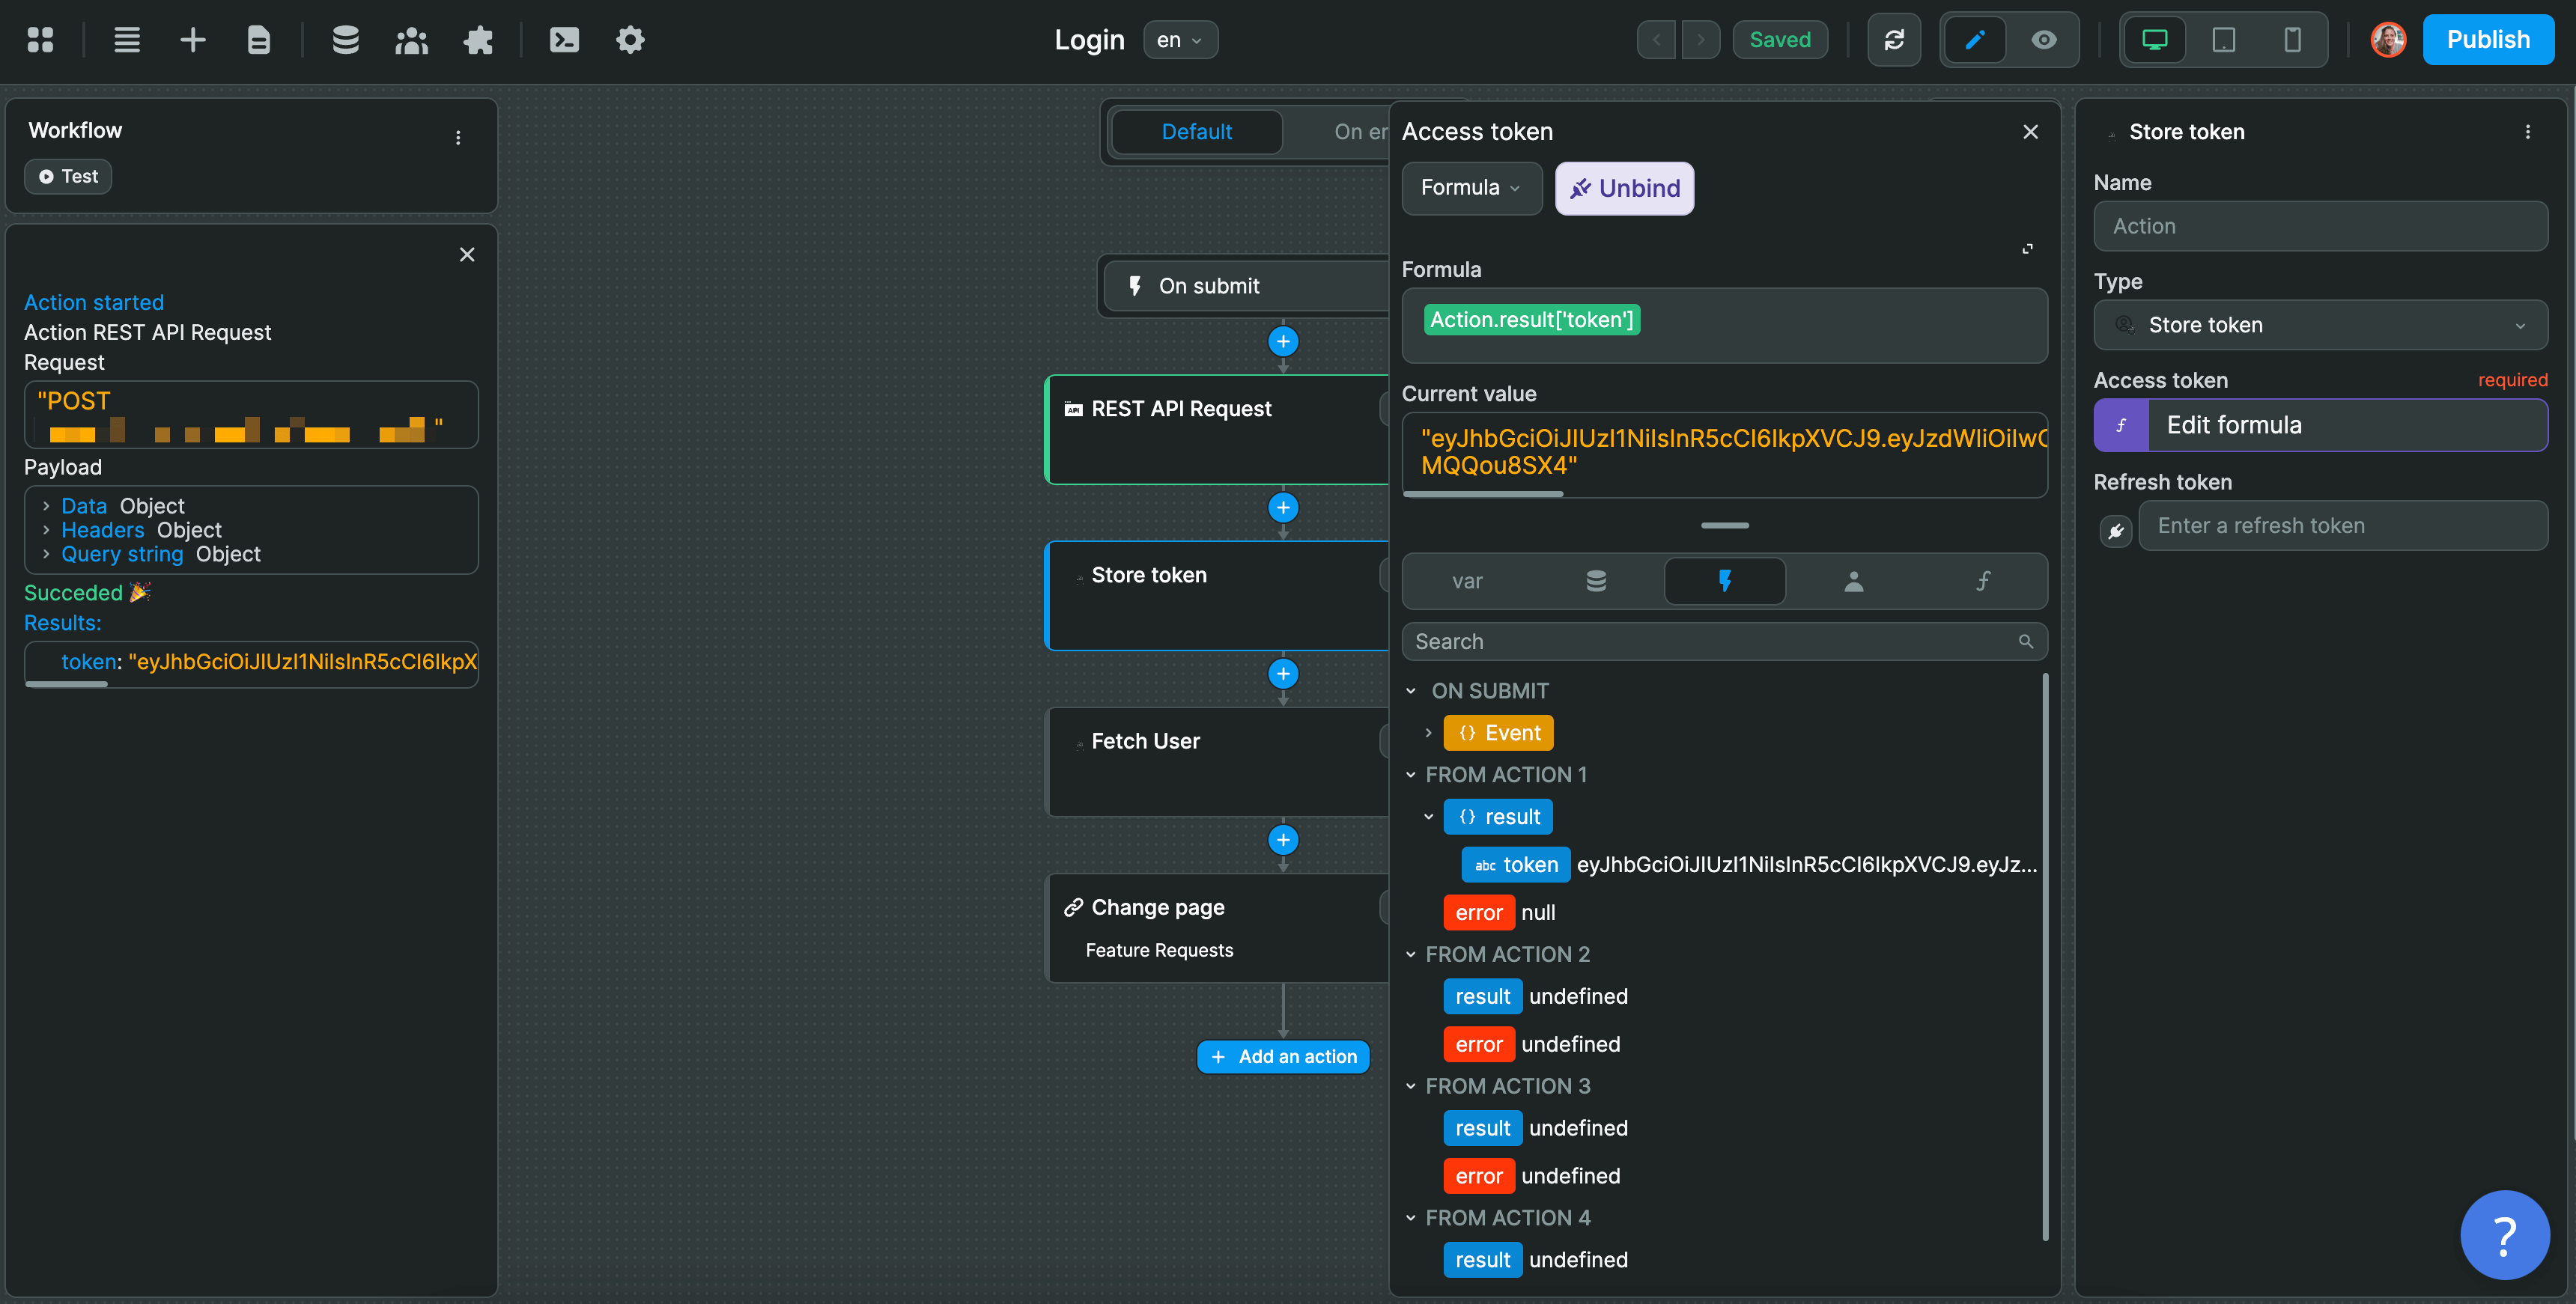
In step 3, we fetch the user before redirecting the user to another page in step 4.
In the example above, we are using a Custom Header authentication type but the logic remains the same for signup, login, custom header, auth bearer, and auth basic.
Based on the information provided by the user in the Form, i.e. the Component Variables in the Form Container, you:
- Make an API call to your Authentication System with the
API requestaction, - Store the user token with the
Store tokenaction, - Fetch the user with the
Fetch useraction, based on the token stored in action 2, and - Redirect the user to the appropriate page with the
Navigate toaction.