Appearance
Academy
Want to learn more about creating animations in WeWeb? Check out our Animations mini-course that shows you how to add animations to your components and create nice transitions.
CSS Animations
Different approaches
To add CSS animations to an element on a WeWeb page:
- select that element, on the page
- go to the CSS styles tab of that element, and
- choose your preferred way of creating an animation in the
Animationdropdown
You can find the all the definitions of the CSS animation properties here.
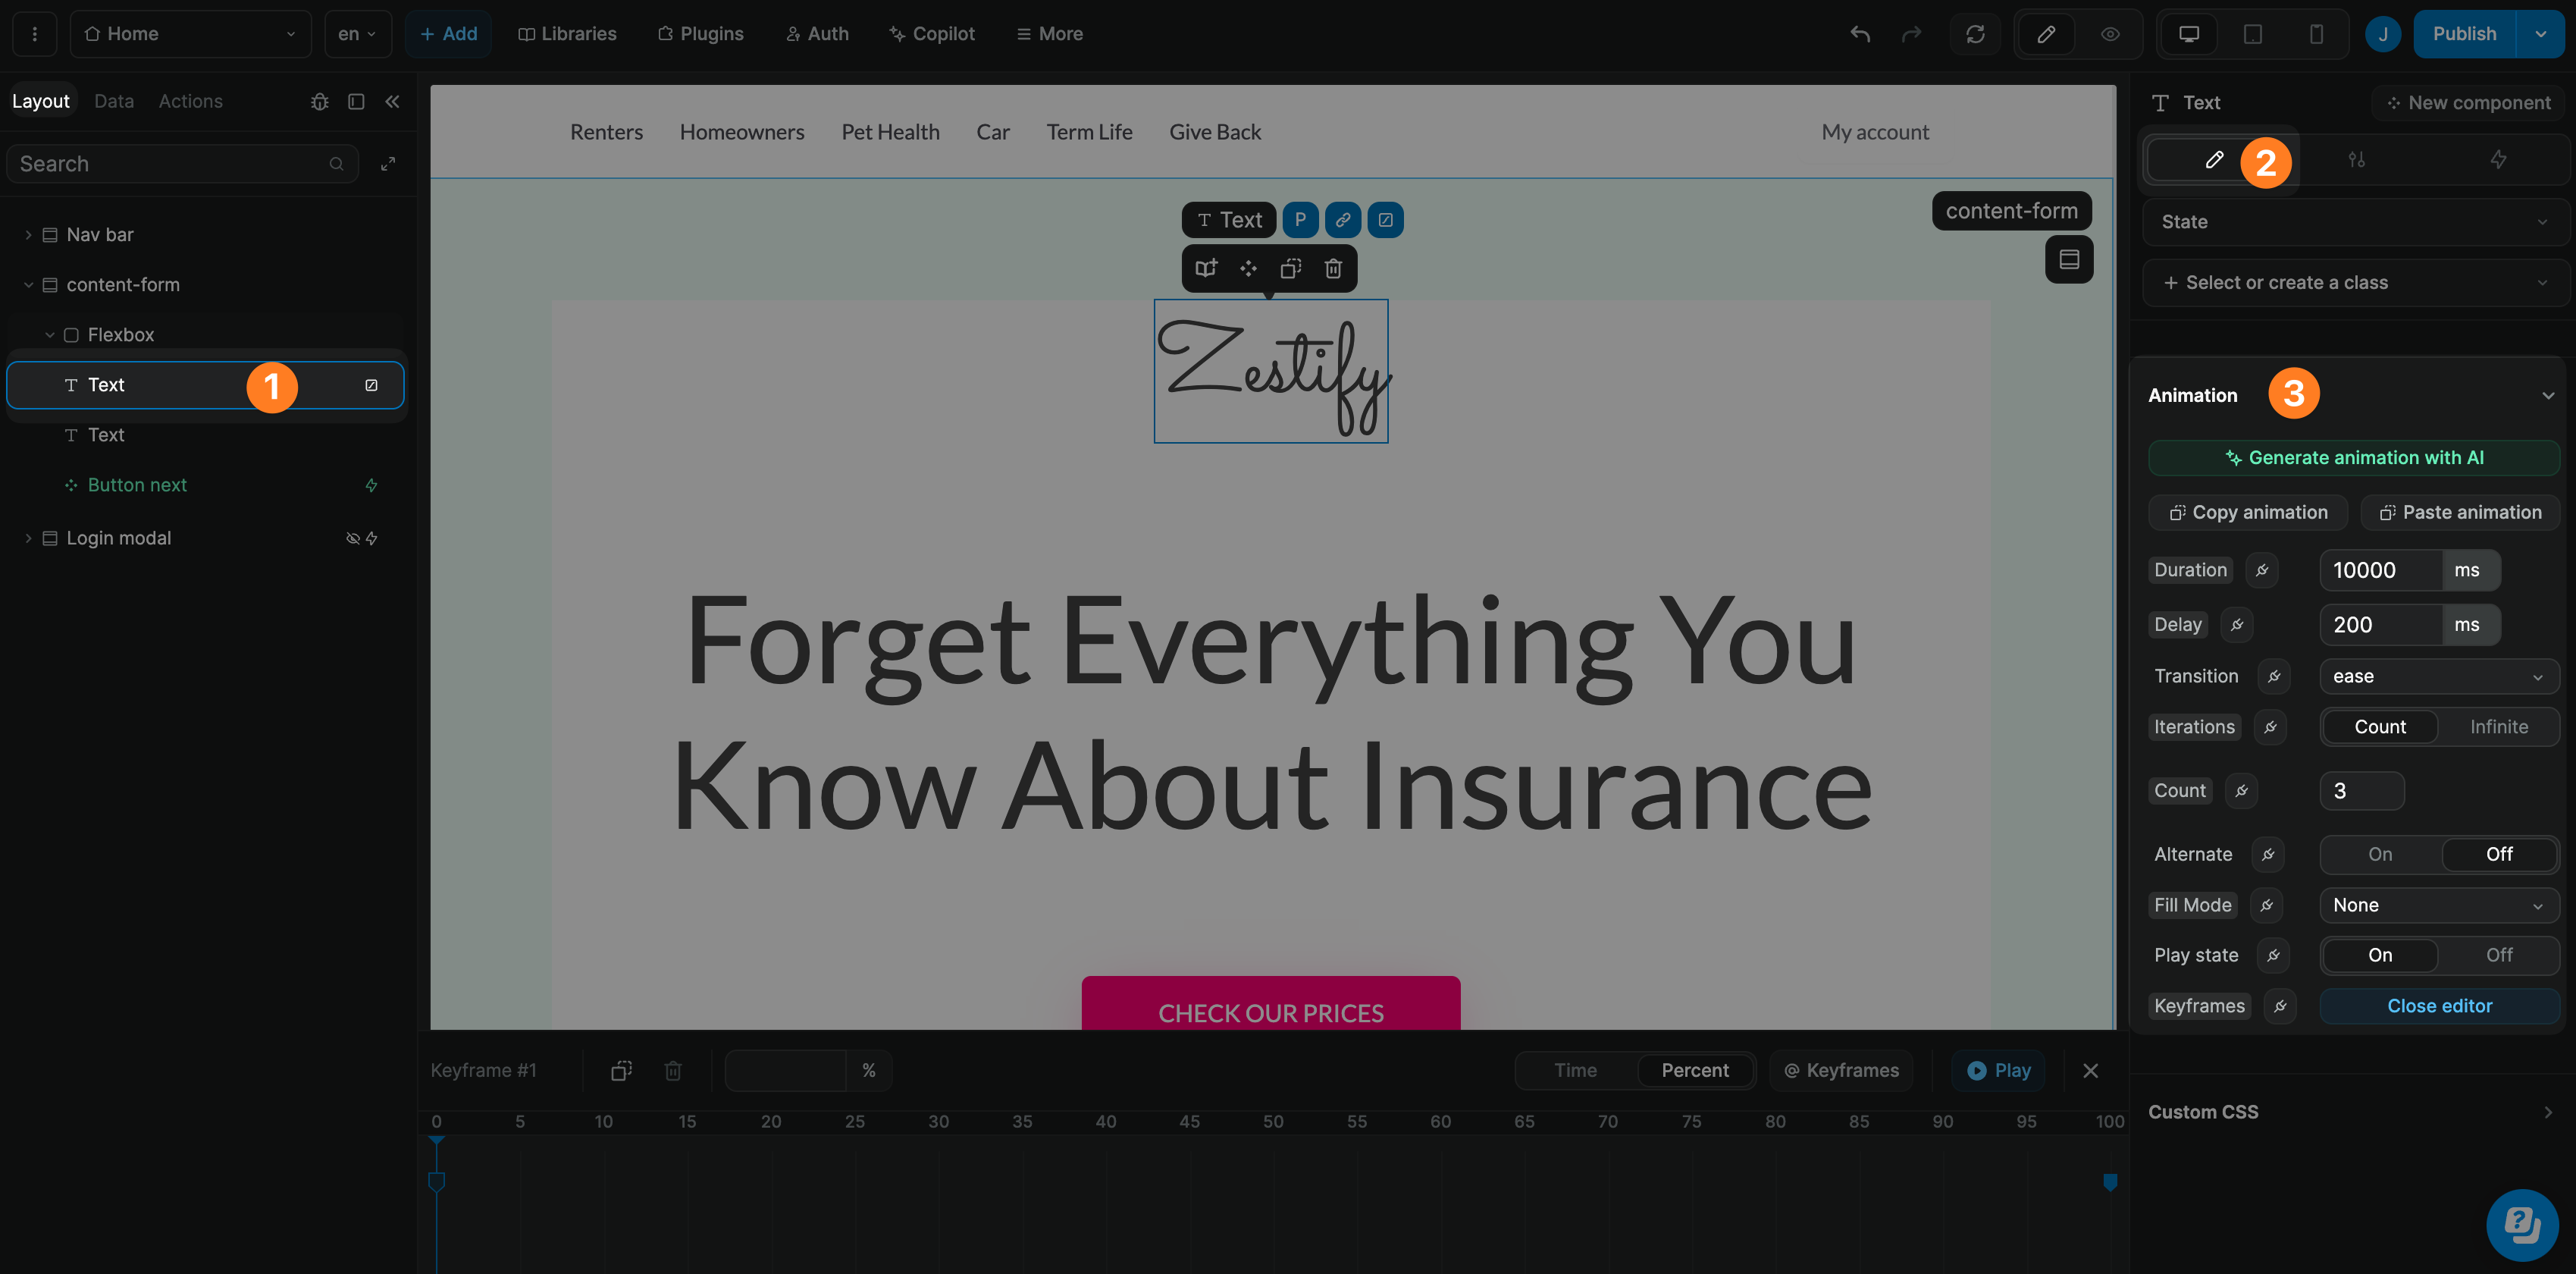
There are three main ways to get started:
- Manually add keyframes.
- Import keyframes.
- Ask WeWeb AI.
Animation properties
In the Animation panel, you can set the following properties to customize your animations:
- Duration: Define the duration of the animation in milliseconds (ms).
- Delay: Add a delay before the animation starts, also in milliseconds (ms).
- Transition: Choose how the animation transitions between keyframes. Options include:
easeease-inease-outease-in-outlinear
- Iterations: Set how many times the animation repeats. You can specify a number or select
Infinitefor continuous looping. - Alternate: Enable or disable the alternate mode. When enabled, the animation reverses direction after each iteration.
- Fill Mode: Control how the animation applies styles outside its active period:
- None: No styles from the animation are applied before the animation starts or after it ends. The element will only be styled during the animation's active period.
- Forwards: The element retains the styles defined in the animation's final keyframe after the animation ends.
- Backwards: The element immediately applies the styles defined in the animation's first keyframe, even during the animation's delay period.
- Both: Combines the behaviors of
ForwardsandBackwards. The element applies the styles from the first keyframe during the delay and retains the styles from the final keyframe after the animation ends.
- Play State: Toggle the animation's play state (
OnorOff). - Keyframes: Open the editor to create, import, or edit keyframes for the animation.
Keyframes editor
If you're familiar with keyframes, you can create your own using our no-code keyframes editor:
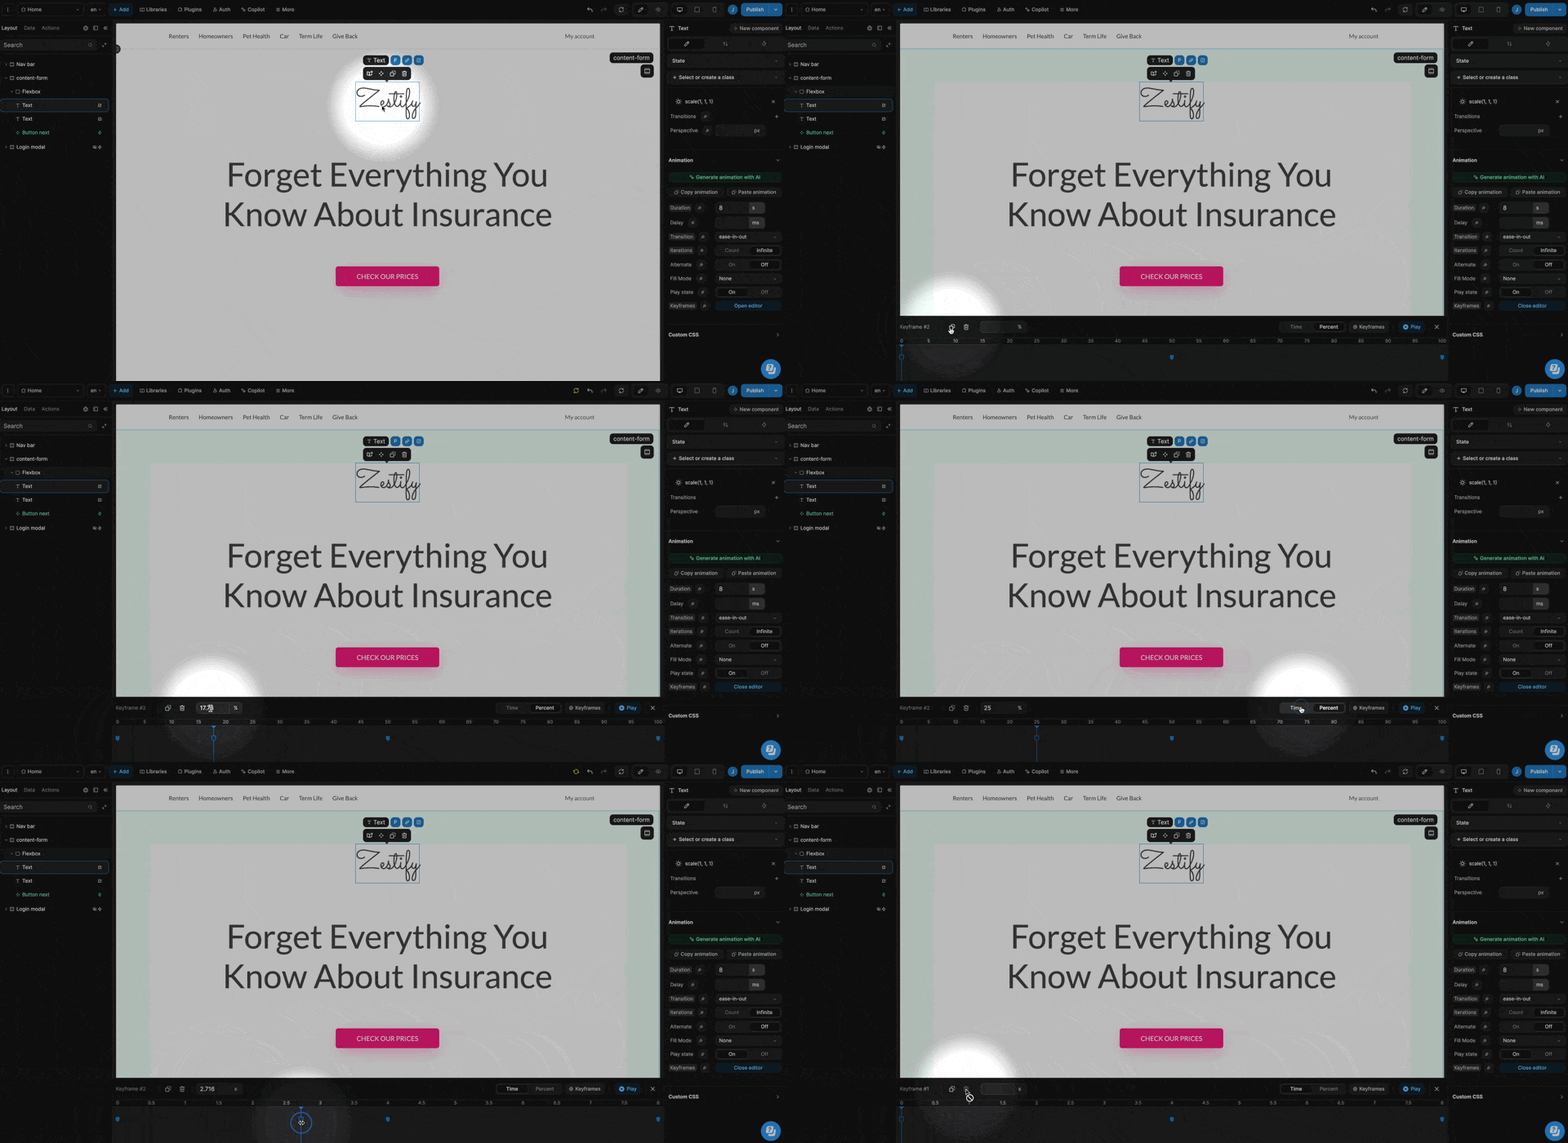
To add an animation, select the keyframe where you want to define properties. Then, you can modify any CSS property from the style panel. You can identify properties set on a keyframe with their green highlight. Do that for the initial keyframe, the final one, and all the intermediate ones to create a smooth animation.
In the example above, we:
- copy
Keyframe #1which createsKeyframe #2 - move
Keyframe #2on the animation timeline - change the value of
Keyframe #2and changing it to seconds instead of percentage - delete
Keyframe #2to get back where we started
Import keyframes
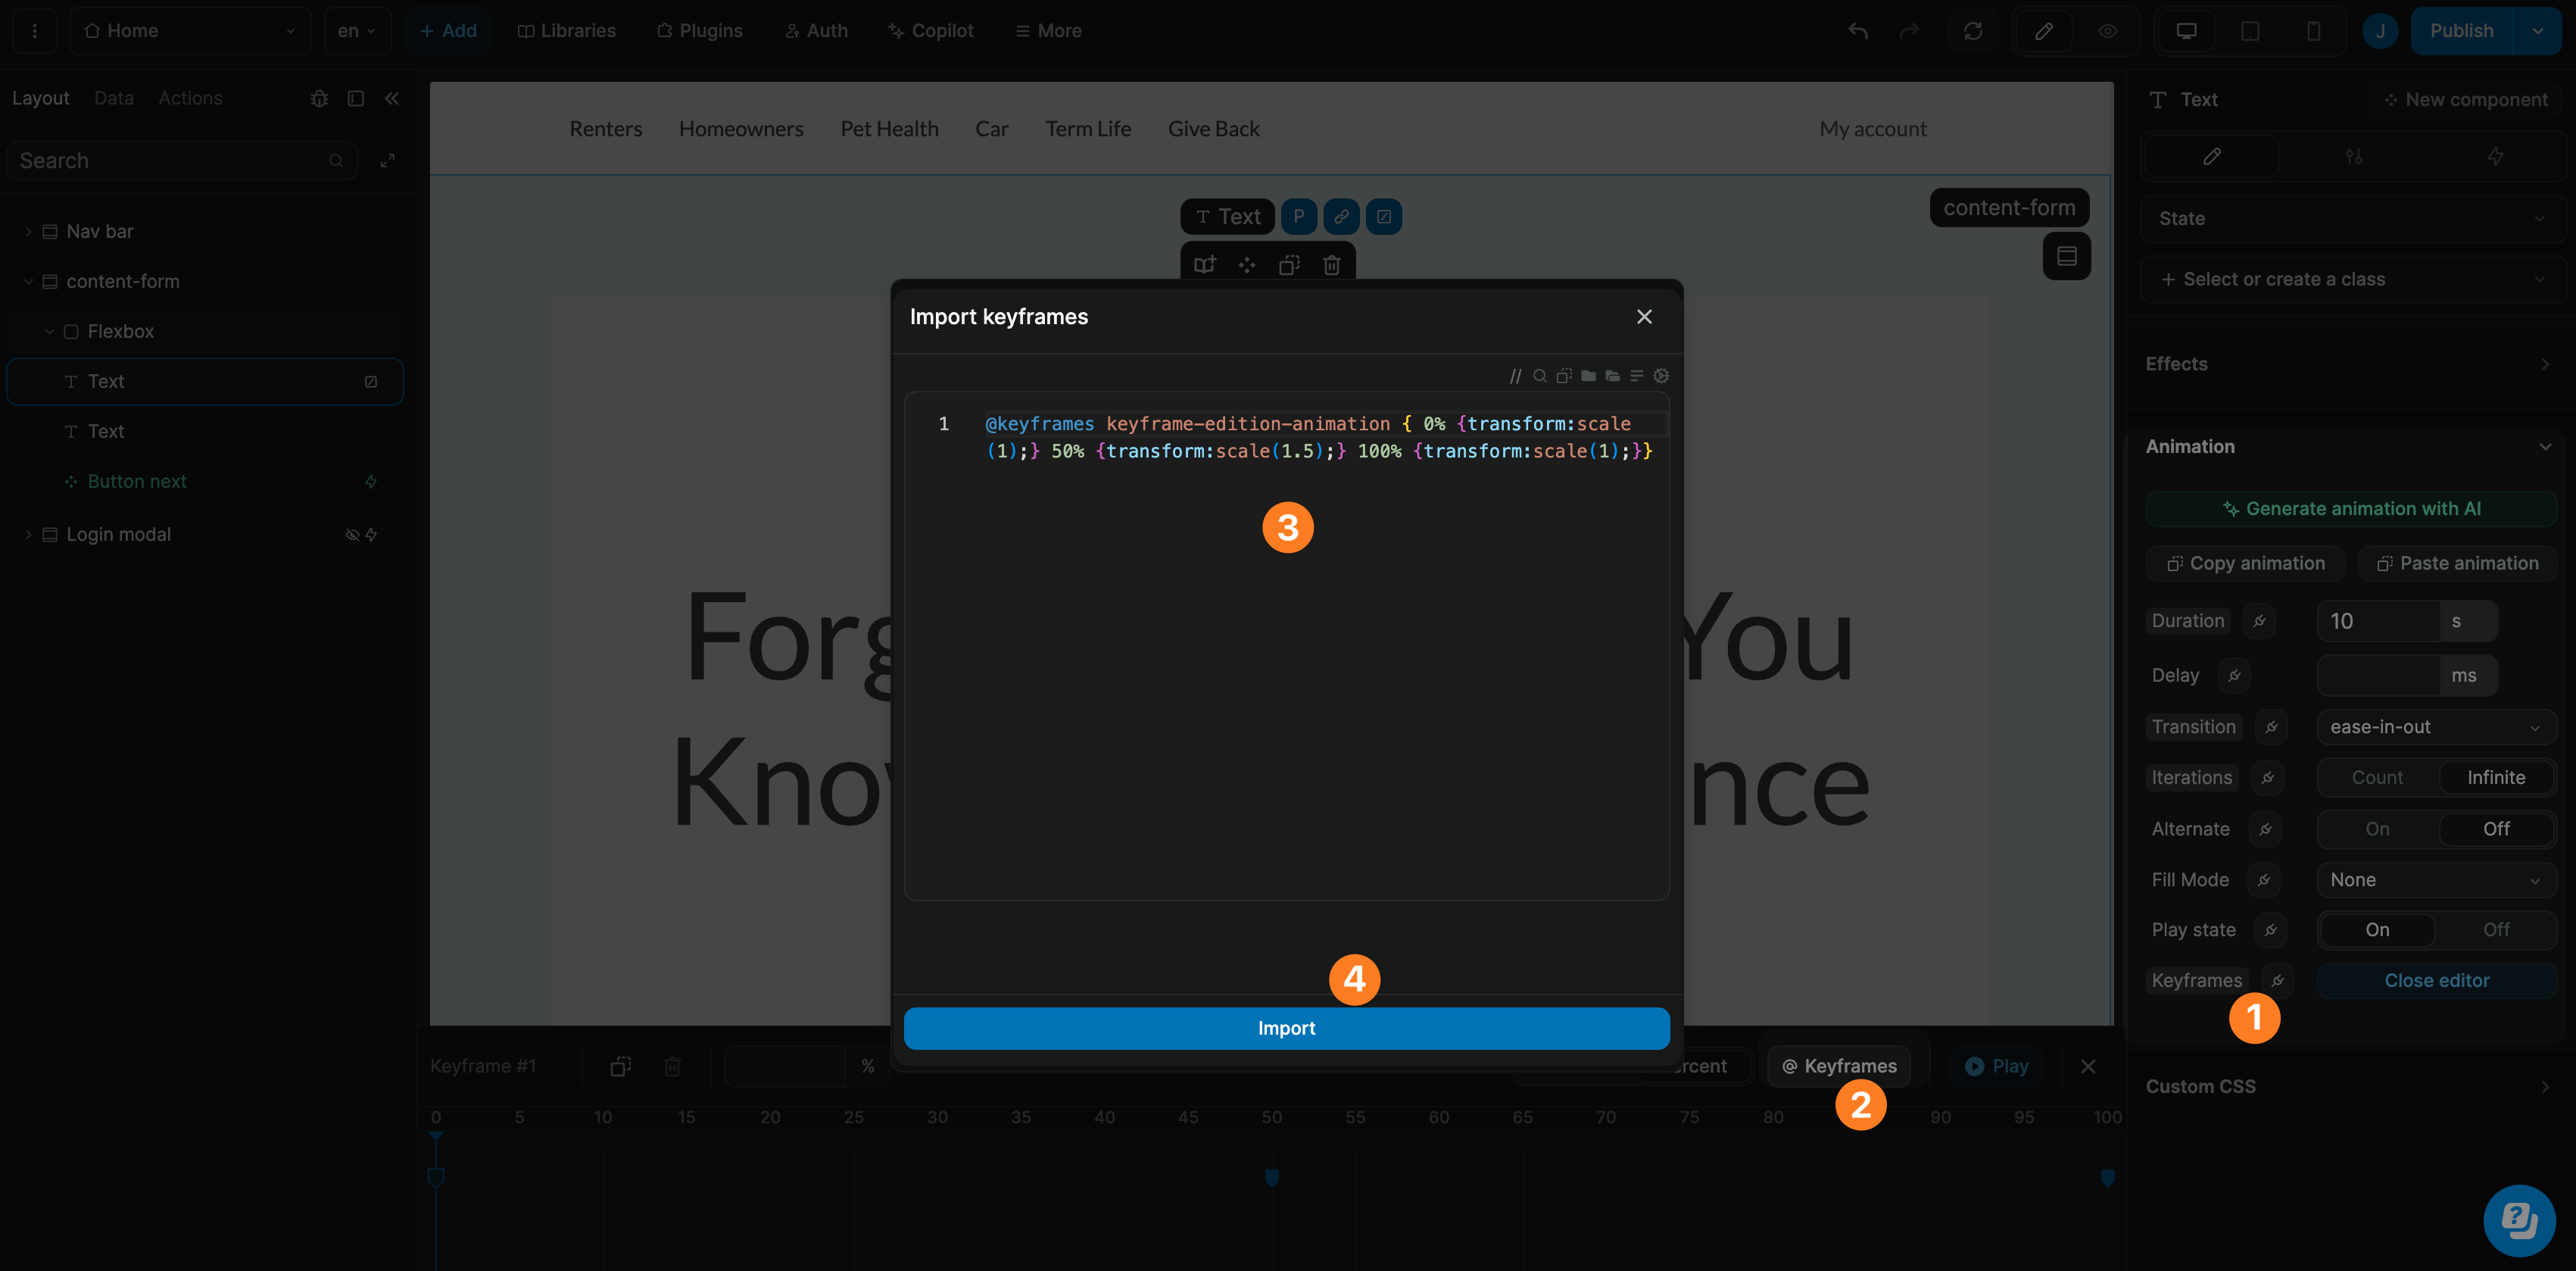
To save time, you can also paste and import keyframes in the WeWeb keyframes editor:
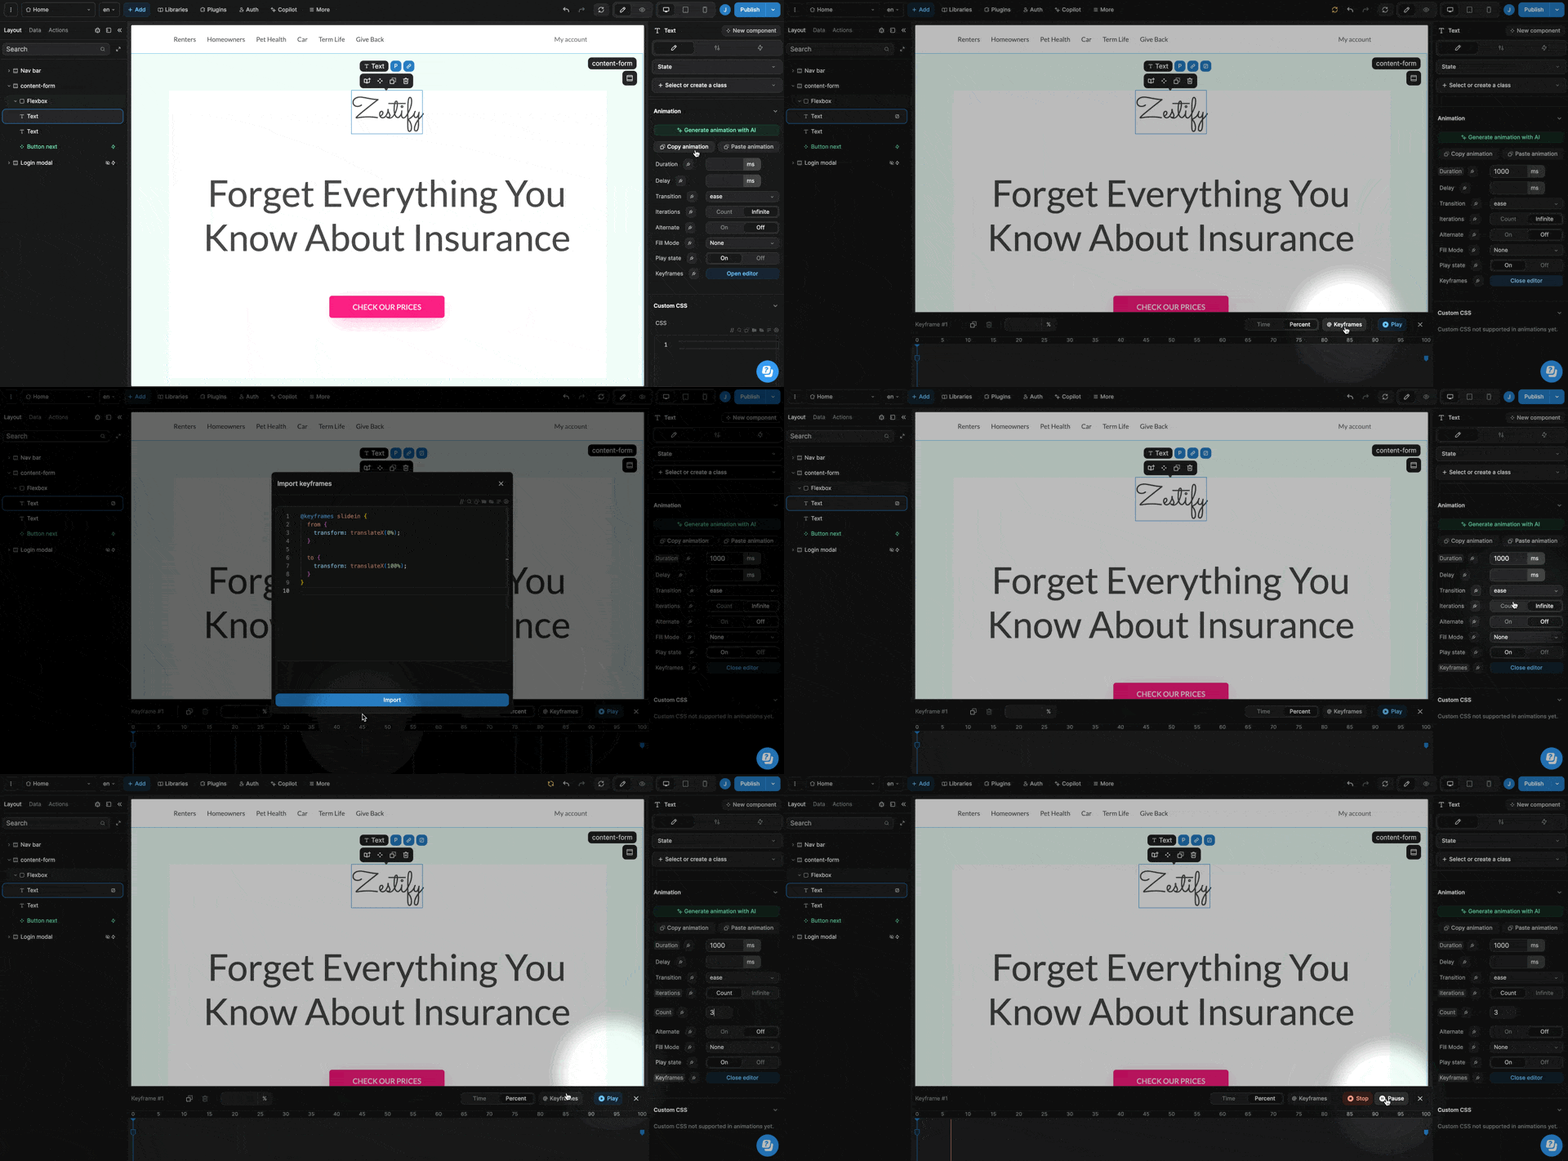
In the example above, we:
- first opened the keyframes editor to import the keyframes used as examples in MDN's documentation,
- then used the WeWeb editor to limit the animation to 3 counts.
WeWeb AI
If CSS animations to come easily to you, we recommend asking WeWeb AI for help to get started:
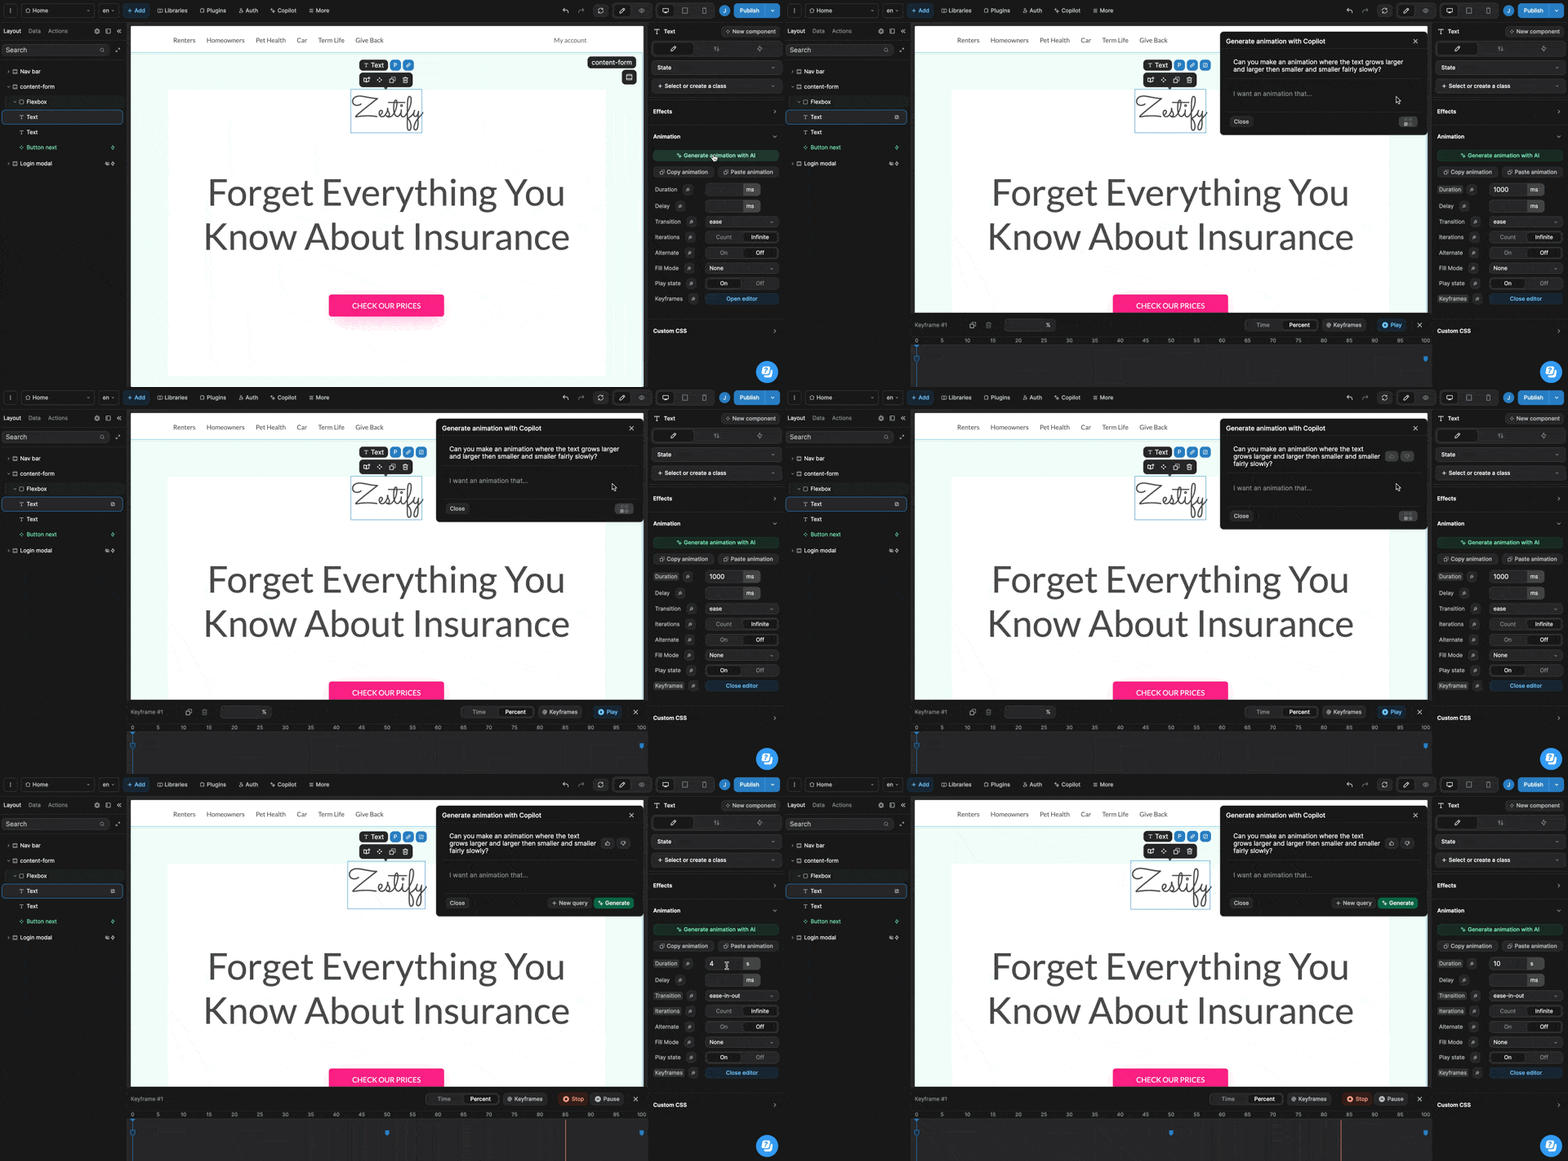
In the example above, we:
- first asked WeWeb AI to "make an animation where the text grows larger and larger then smaller and smaller fairly slowly",
- then used the WeWeb editor to slow down the animation.
TIP
You can also edit the keyframes generated by WeWeb AI in the keyframes editor:
Copy/paste an animation
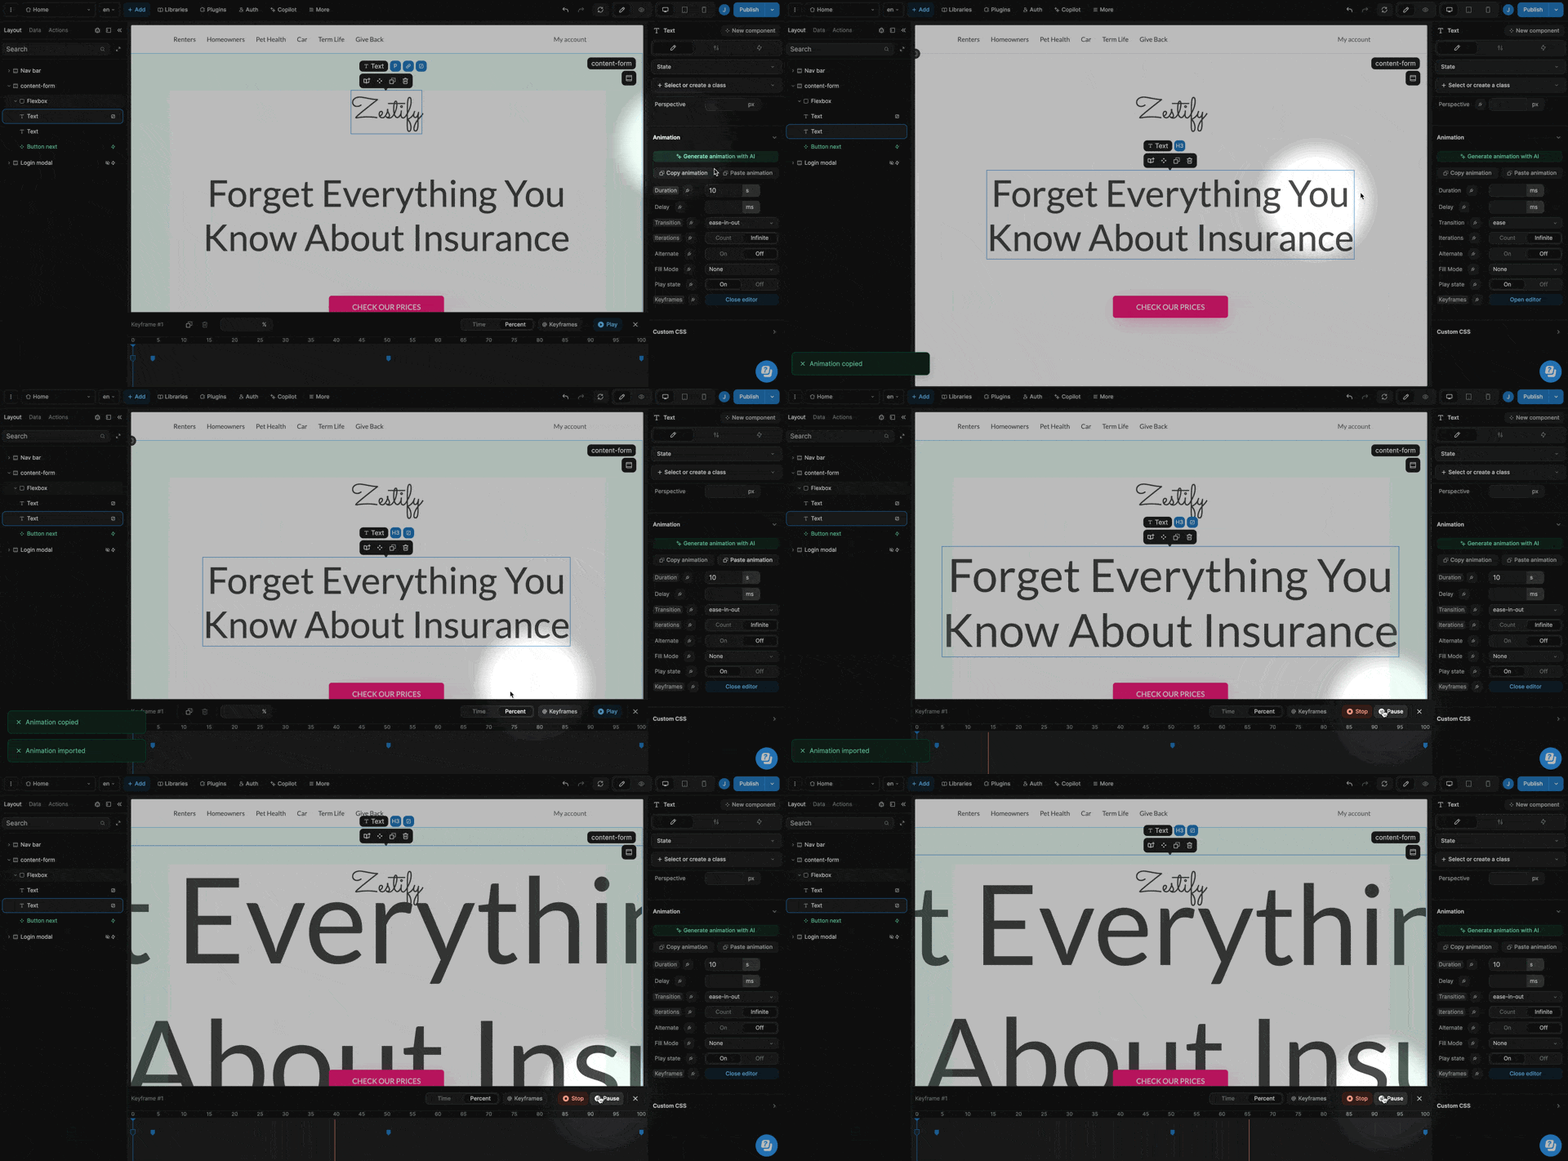
To reuse an animation, you can copy it and paste it on a similar element (e.g. here, we are copy/pasting an animation between two text elements):
WARNING
You can only paste animations that were copied from the same type of element (e.g. text on text, container on container, etc.)
Pulse animations
Pulse animations are effective for drawing attention to important elements. They typically involve a subtle enlarging or glowing effect that repeats, similar to a heartbeat. These animations can help guide users to important actions without being too distracting.
Pulse animations are great for:
- Drawing attention to call-to-action buttons
- Highlighting new features or important notifications
- Creating a sense of liveliness in otherwise static interfaces
- Indicating that an element is clickable or interactive
Appear transitions
Appear transitions are special animations that make elements elegantly appear when they first render or when they scroll into view. These subtle effects can enhance user experience by creating a more dynamic and polished interface.
You can use appear transitions to:
- Create a smoother experience when elements load on the page
- Draw attention to content as users scroll down
- Make UI elements feel more responsive and interactive
- Add visual hierarchy to guide users through your content

