Appearance
Rich Text
Display and edit rich text
With the Rich text input element, you can:
- Display rich text on a page,
- Allow users to input and edit rich text,
- Allow users to mention other users in the text.
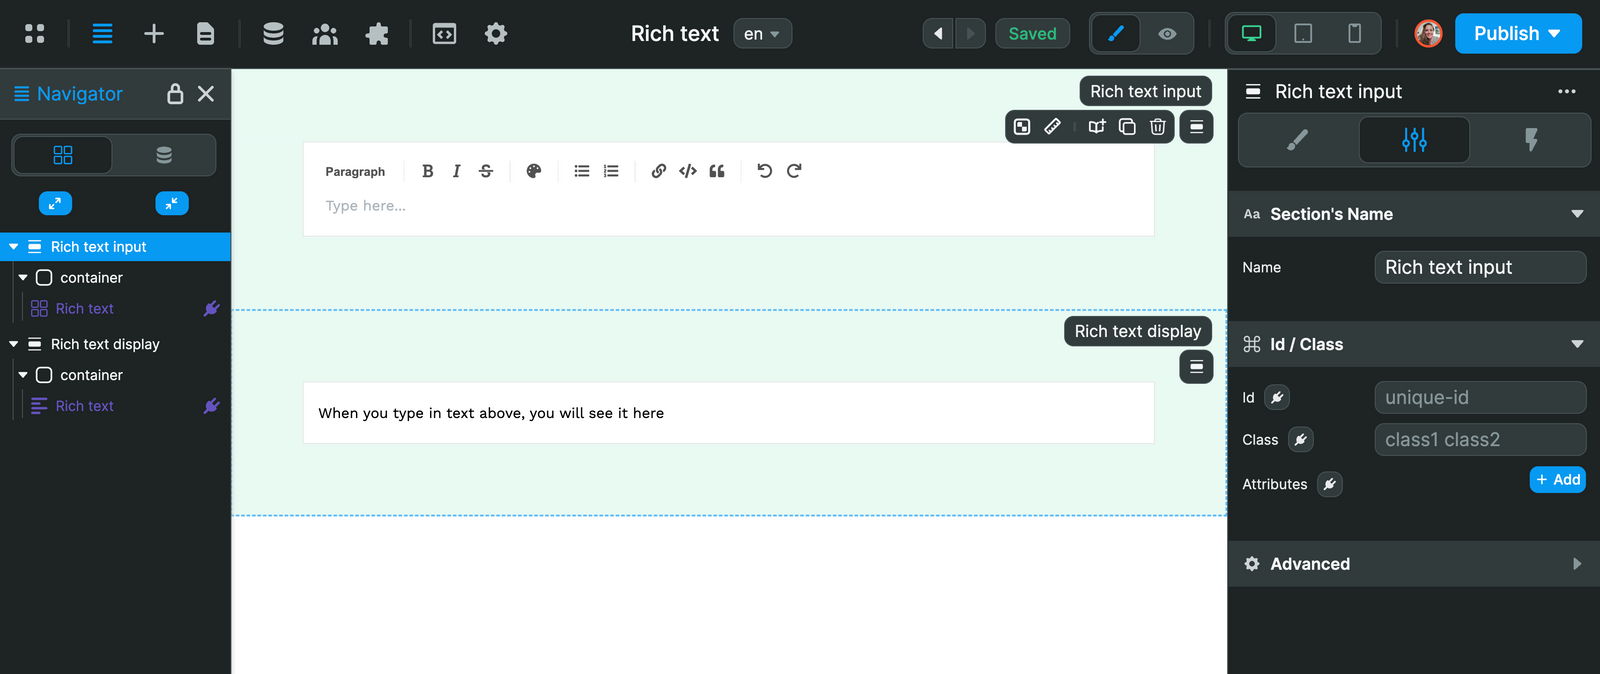
In the screenshot above, you can see two sections with:
- The element in editing mode, where users can type and style content
- The element in read-only mode, where users can see what the content will look like on an HTML page.
Style rich text
When using the Rich text input element, you can:
- Type markdown,
- Show or hide the style bar,
- Add bullet points, ordered lists, links, quotes, and code blocks, and
- Tag / mention other users.
Here's what it looks like in action:
Add mentions
If you want to allow users to tag other users, you'll need to define a list of users who can be tagged.
In order to do that, you'll need to:
- Select the element on the page
- Go to the
Settings>Mentions - Provide a list of users with an
IdandLabel, - Map the
IdandLabelvalues of the element to the correct columns (or keys) in your list of users.
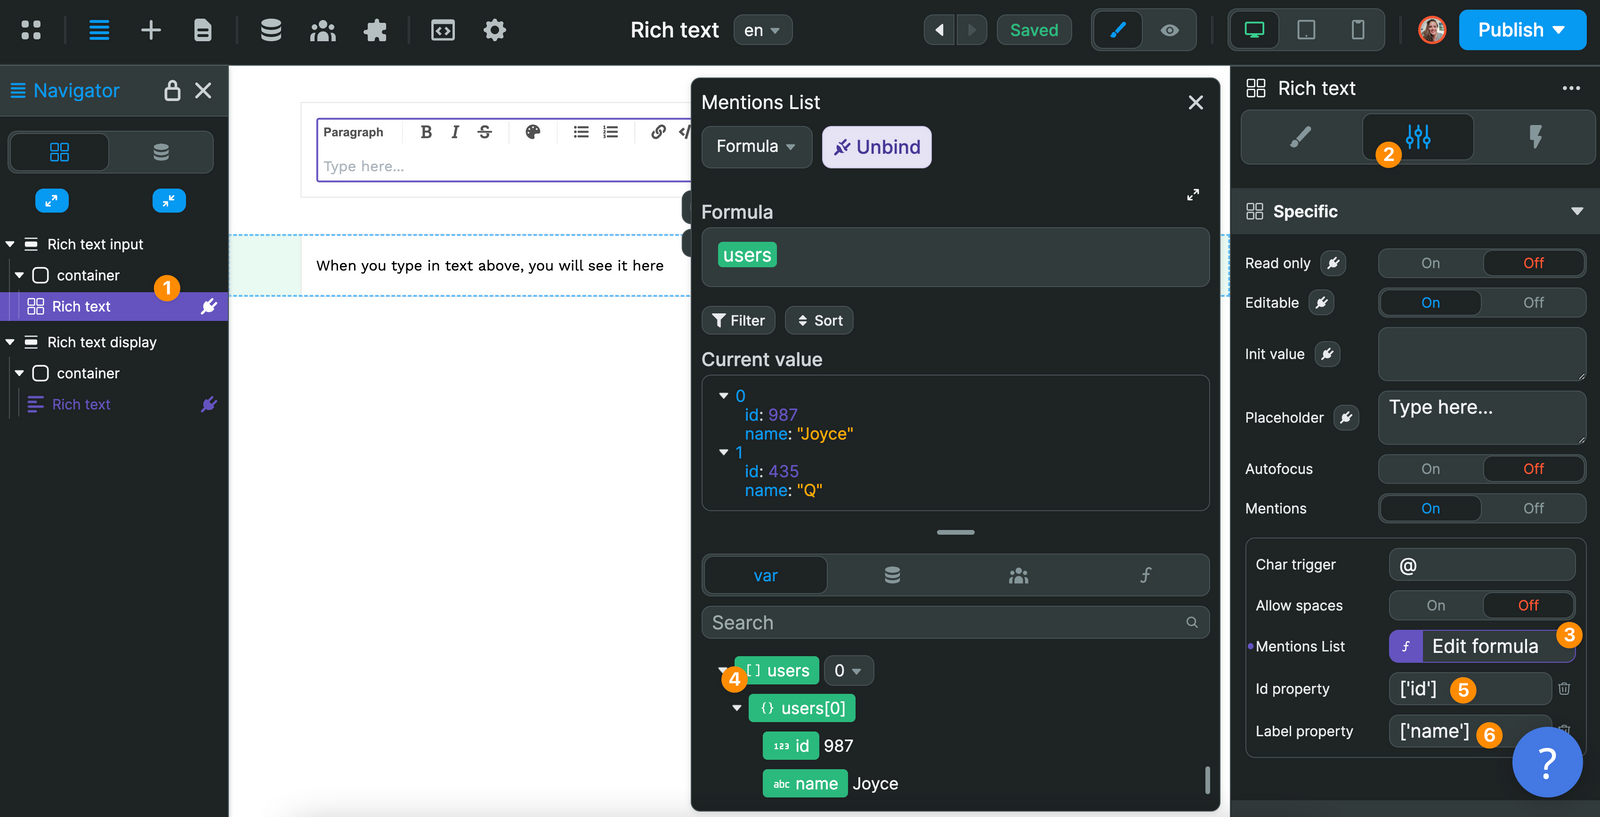
In the example above, we have an array variable (i.e. a list) with two users. Each user has an id and a name.
In the element settings, we bound the users variable to the Mentions Lists property, and mapped the id and name values to the Id and Label properties of the element.
Update or create record
A really cool way to use the Rich text input element is to allow users to create or update content.
For example, users could:
- Write articles for you,
- Update their user profile, or
- Create a product page.
In order to do that, you'll need to:
- Add a button with a workflow triggered
On click, and - Send the value from the
Rich text - valuevariable.
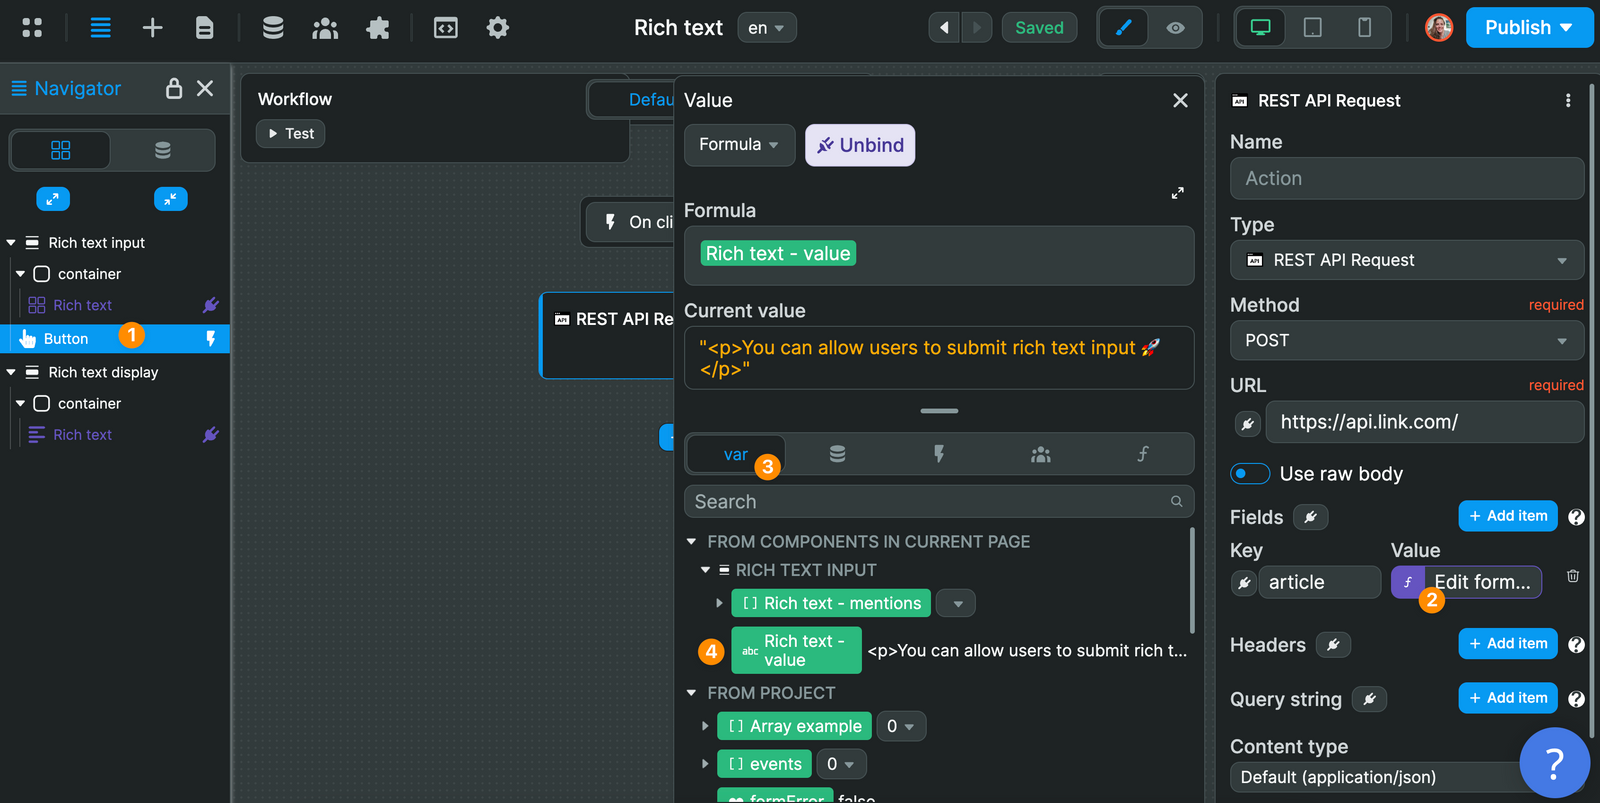
In the example above, we make an API request to POST the value of the Rich text - value variable to an article column in our backend.
You can follow the same logic to send data to an Airtable database, Xano, Supabase, or any other backend.
Custom menu
In the design tab of the rich text input element, you can choose to enable Custom menu:
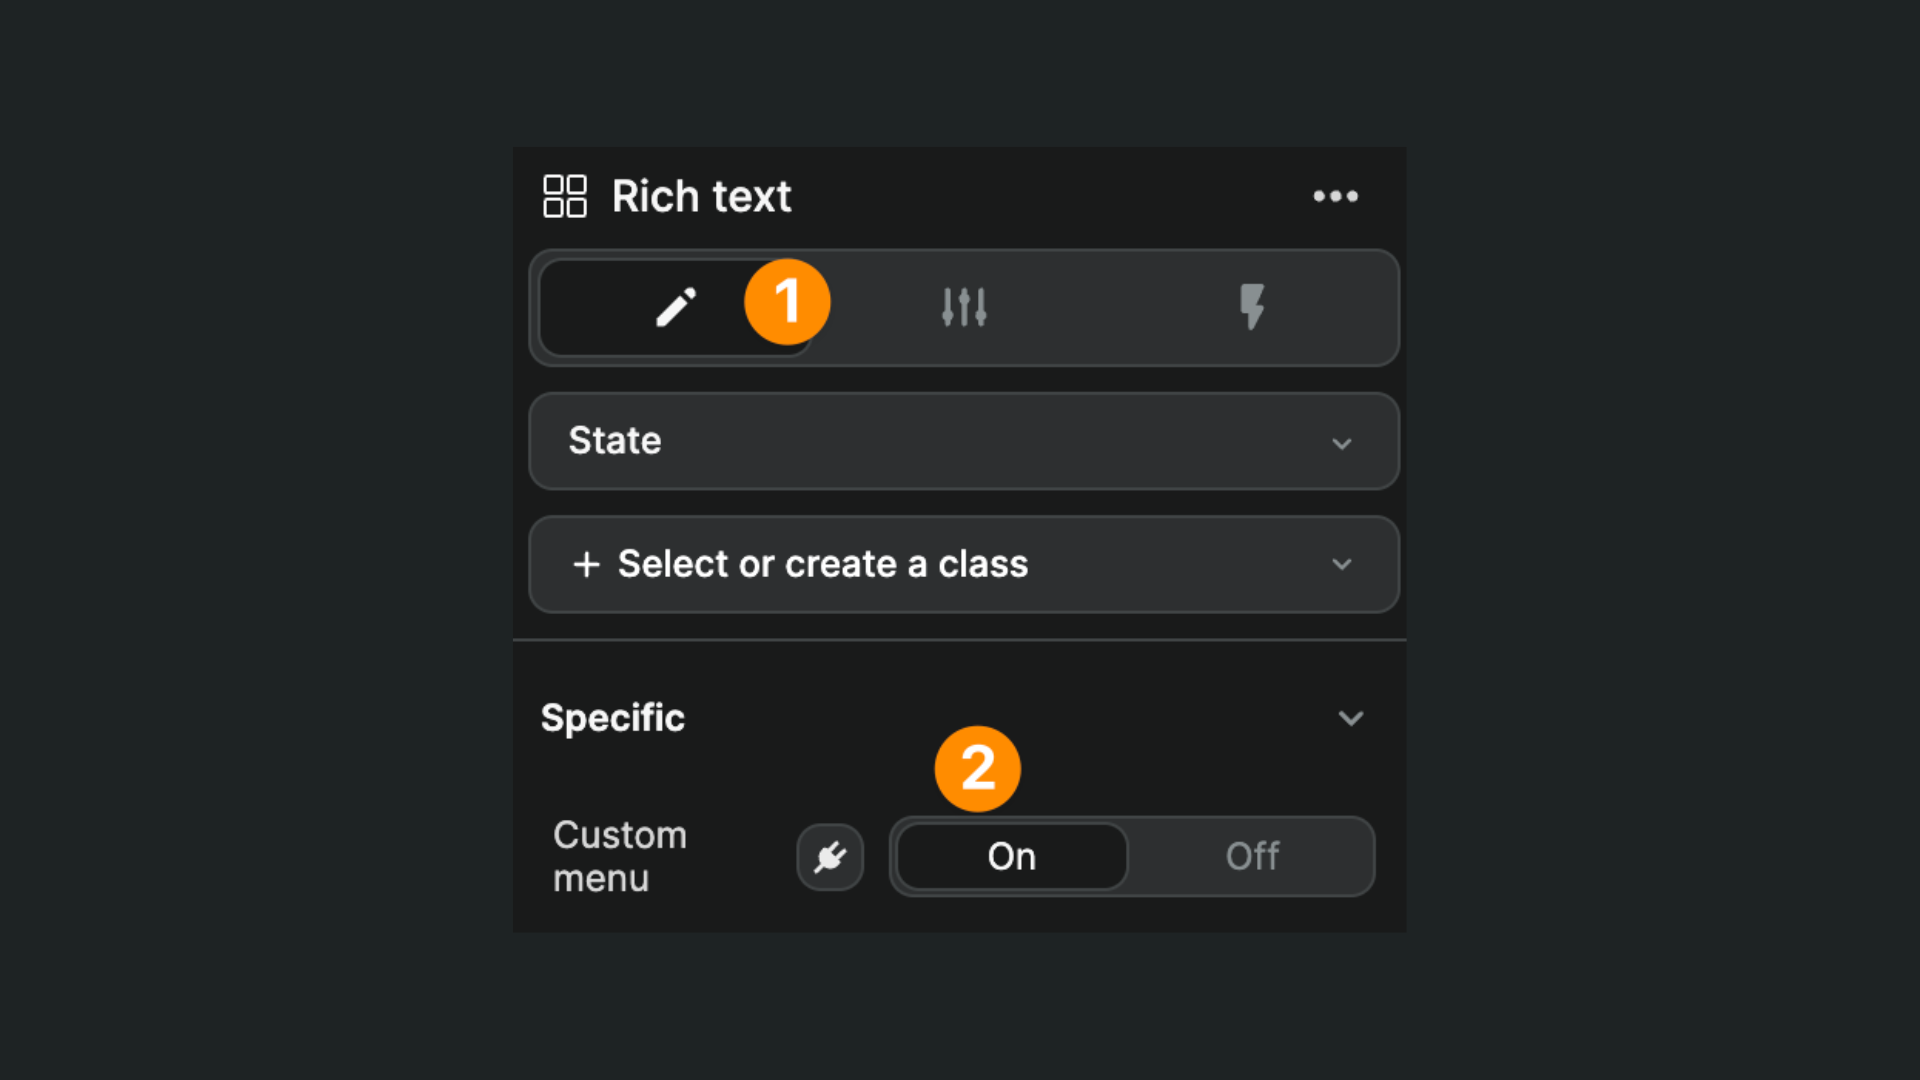
This option allows you to design your own editing menu, to match your brand's design system for example:
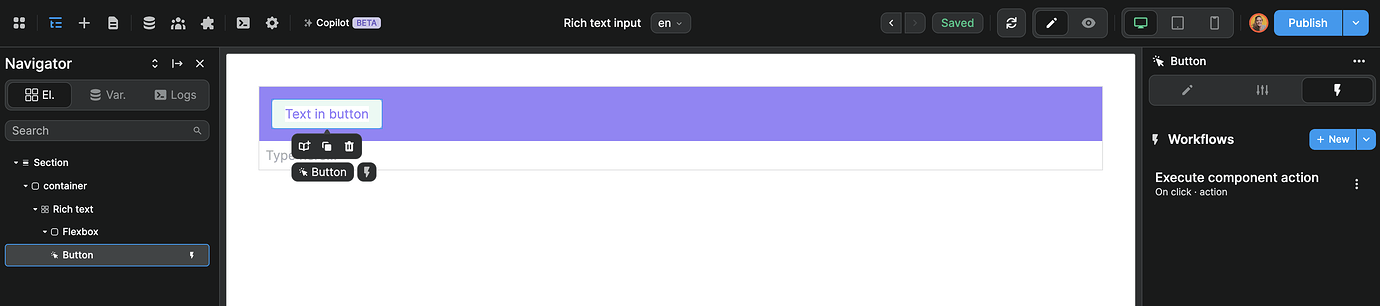
You can add the buttons you want with the style you want and use the Execute component workflow to trigger the desired behavior:
Here’s what it looks like in action with the Toggle Bold, Toggle Italic, and Toggle Underline actions:
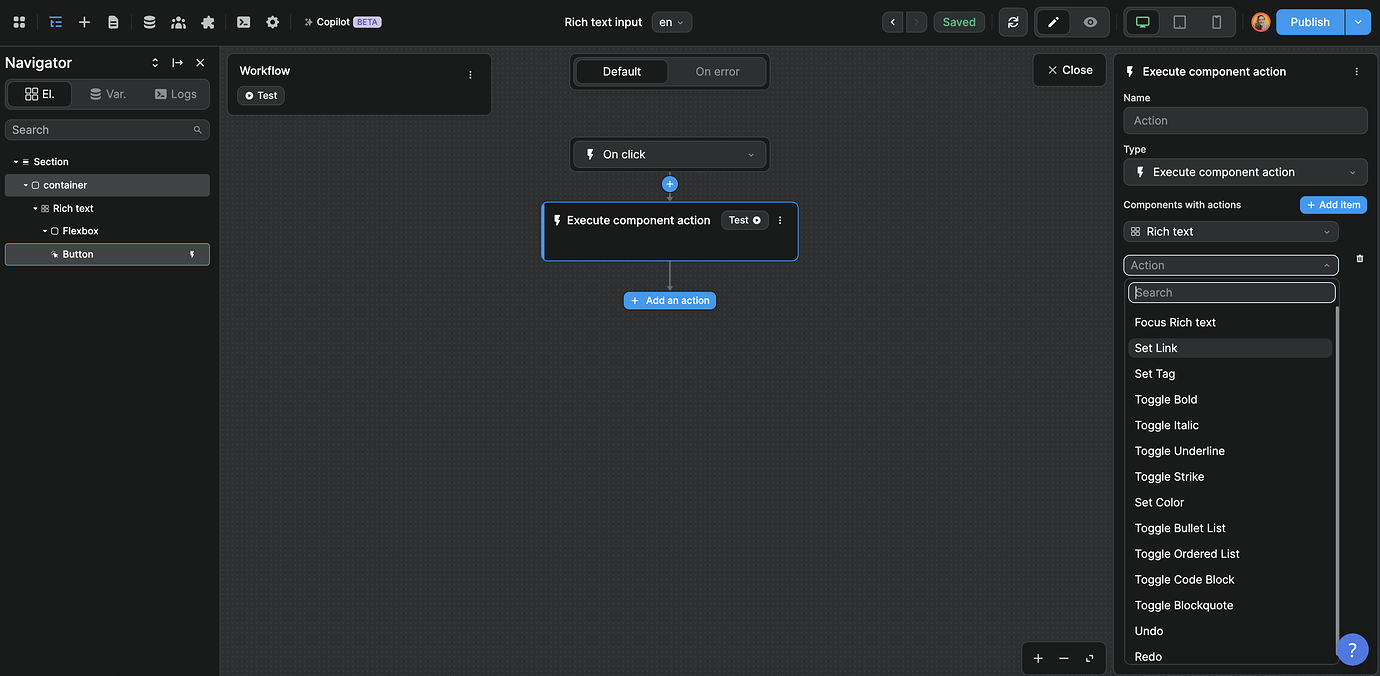
Rich text component actions include:
Focus Rich textTo focus the user on the rich text elementSet linkTo add a link to the selected textSet tagTo choose the HTML tag of the selected textToggle boldTo make the selected text boldToggle italicTo make the selected text italicToggle underlineTo underline the selected textToggle strikeTo strike out the selected textSet colorTo choose a color for the selected textToggle bullet listTo create an unordered list of itemsToggle ordered listTo create a numbered list of itemsToggle Code BlockTo create a code blockToggle BlockquoteTo create a blockquoteUndoTo undo the previous user actionRedoTo redo the previous user action
Paste text without formatting
When users paste text from another source into the Rich text input element, the original styling and formatting might be preserved. If you prefer to have the text inserted without any external styling, you can encourage users to use the “Paste as plain text” option. The shortcut is typically Ctrl + Shift + V on Windows or Cmd + Shift + V on Mac. This bypasses any formatting and pastes the text directly.