

Appearance
Return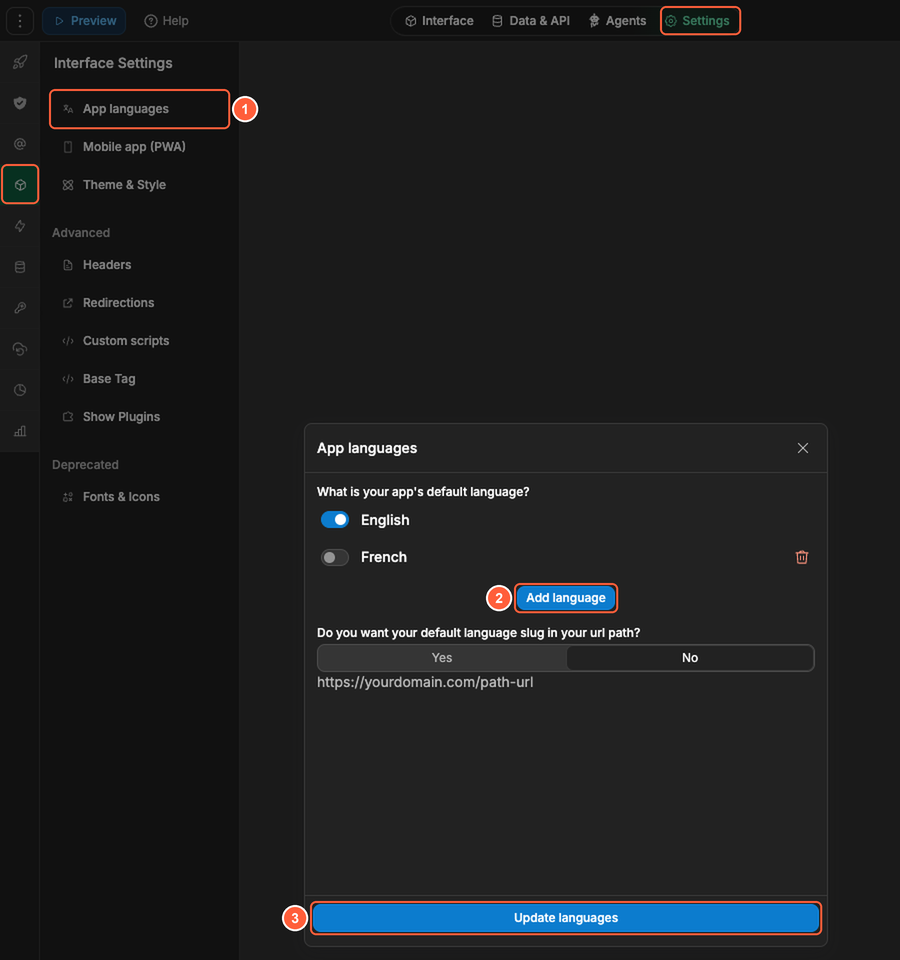
Setup different languages in your app
Add multiple languages so users can view your app in their preferred language.
Steps at a glance
- Open your app language settings.
- Add the languages you want, then turn them on for each page.
- Add a language switcher in your interface.
- Test translations in preview.
1) Add app languages
- Open the
Settingstab, thenInterface Settings, and clickApp languages. - Click
Add languageand pick each language you want to support. - Click
Update languages.
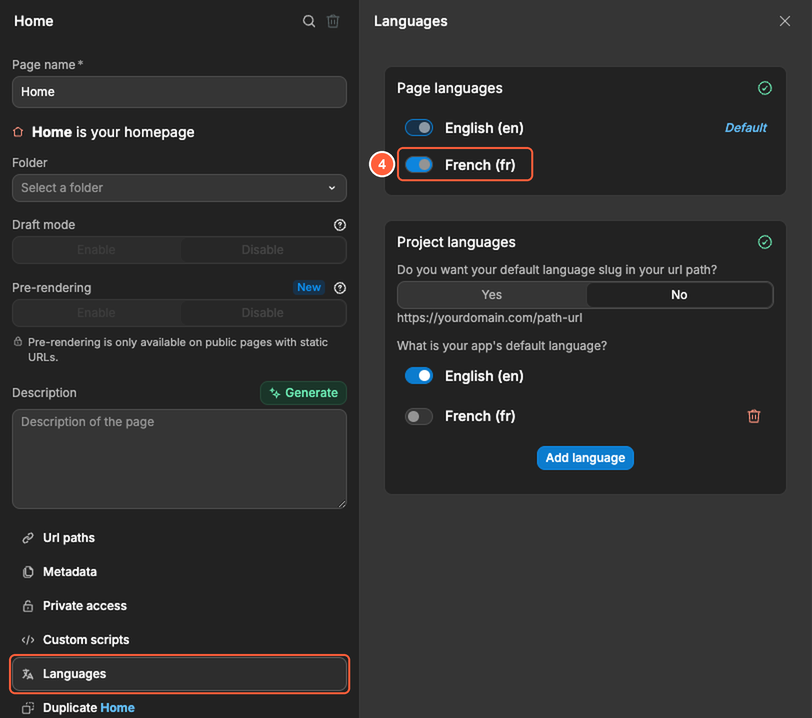
- Turn the new languages on for each page you want to translate: click the gear icon next to the page name, open
Languages, and turn the languages on underPage languages. A new language is not turned on for your existing pages.
2) Add a language switcher
- Add the
Languageelement from theAddpanel. It lists the languages turned on for the page, and switches the language when the user picks one. - To build your own switcher instead (for example with buttons), use the
Change languageaction in a workflow.
3) Translate your content
- Replace hard-coded text with translatable text wherever possible.
- Test pages where dynamic content is shown (for example buttons, form labels, errors).
Common pitfalls
Some pages stay in the default language
- Make sure the language is turned on for those pages, under
Page languagesin the page settings. - Make sure the text on those pages uses translatable values (not plain text).