

Appearance
Return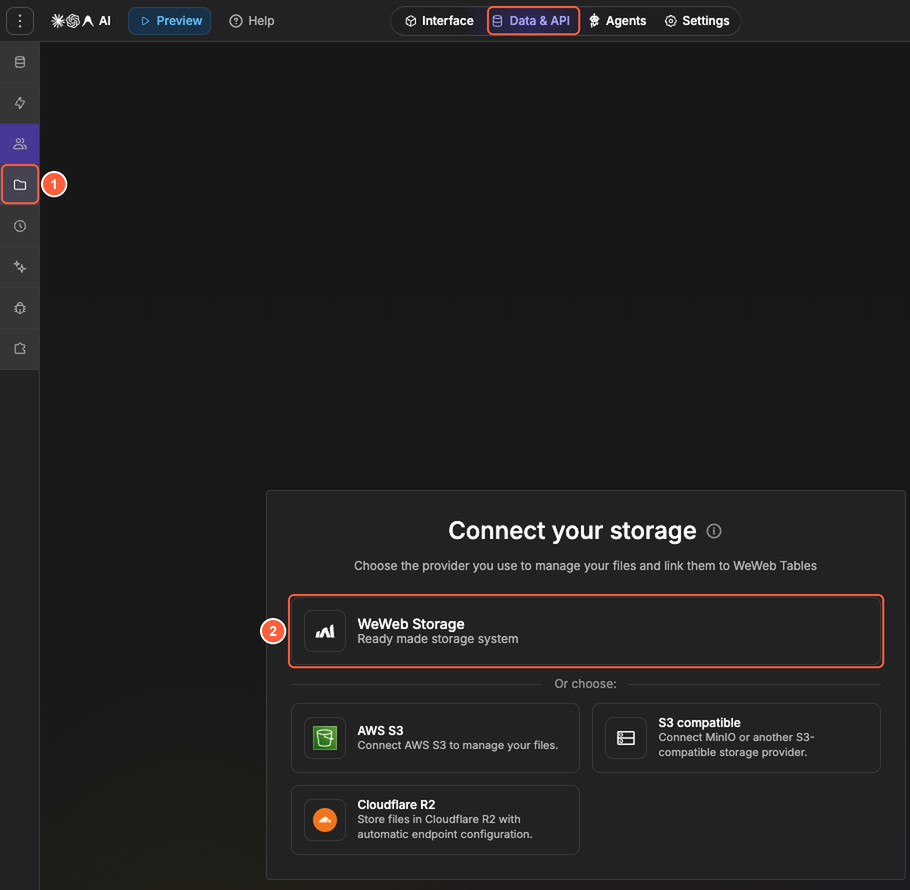
Save files with WeWeb Storage
Set up WeWeb Storage so users can upload files and you can save the file path for later use.
TEMPLATE AVAILABLE
If you wish to skip the manual setup, there is a workflow template available called Upload a File or Get Signed Download URL. You can find it in the WeWeb Storage templates available when creating an API endpoint.
Steps at a glance
- Enable
WeWeb StorageinData & API. - Create an upload API from the WeWeb Storage template.
- Call that API from the
Interface. - Save the returned file path on the related record.
1) Enable WeWeb Storage
- Go to the
Data & APItab, then open theStoragesubtab. - Select
WeWeb Storage. WeWeb sets it up right away. - If your project doesn't have a backend yet, WeWeb first asks where to host it: choose a
Location, then clickContinue.
2) Create an upload API
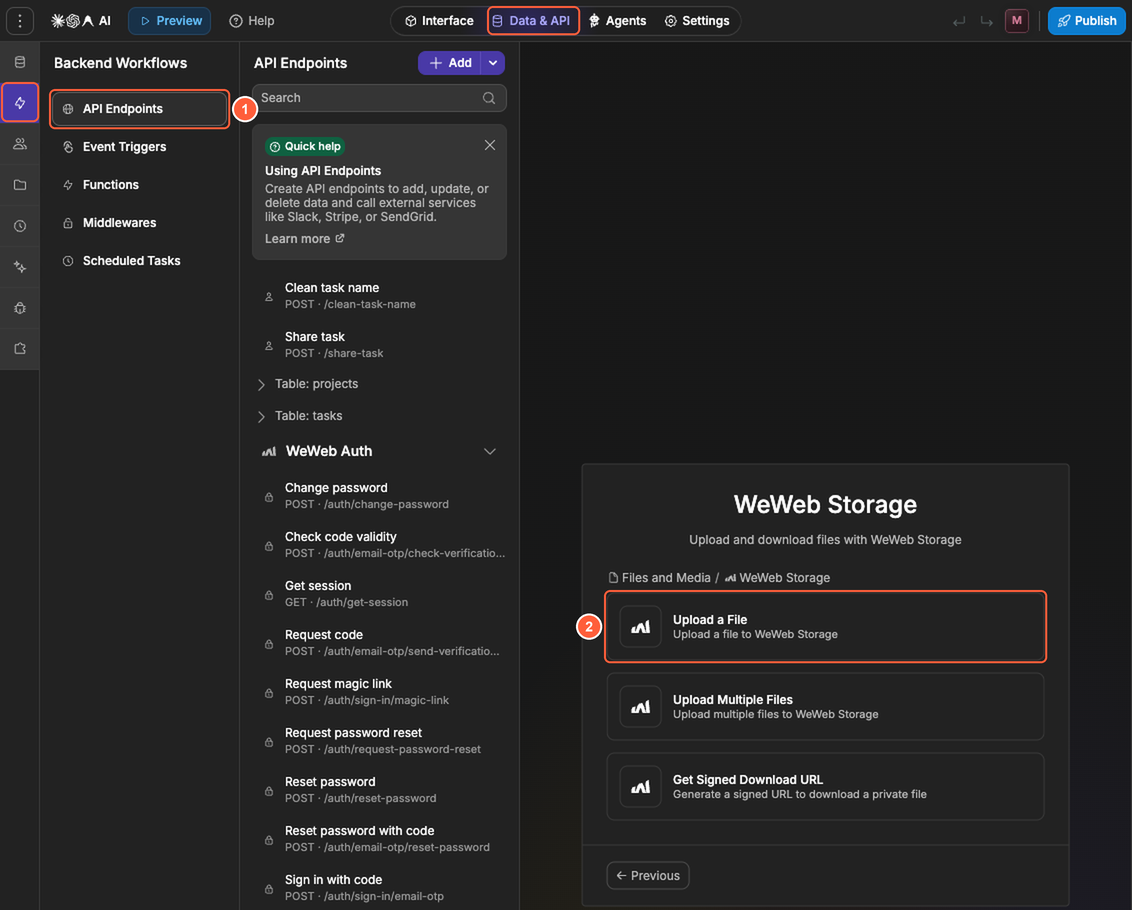
- Go to the
Data & APItab, then open theBackend Workflowssubtab and go toAPI Endpoints. - Click
Add, then chooseFiles and Media,WeWeb StorageandUpload a File. ClickContinuetwice to create the endpoint.
- In the
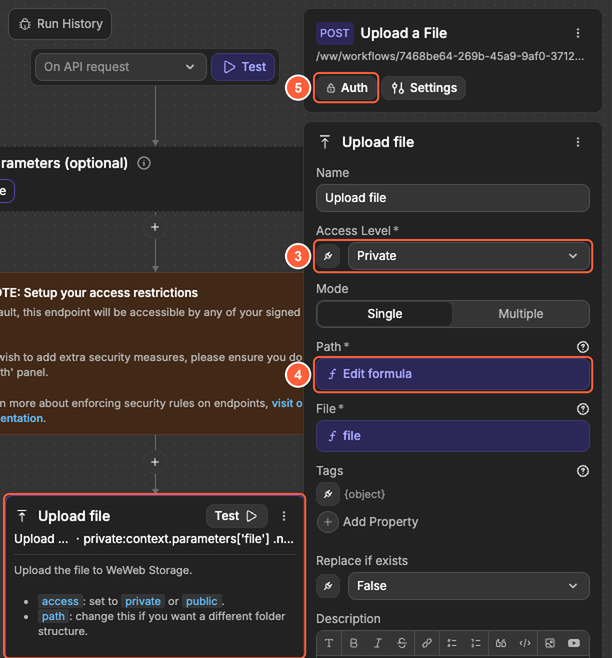
Upload fileaction, setAccess LeveltoPublicorPrivate. - Change its
Pathto choose where the file is saved, for exampleuploads/orusers/avatars/followed by the file name. By default, the file is saved under its own name. - Click
Authat the top of the endpoint to review who can upload. By default, any signed-in user can.
3) Upload from the interface
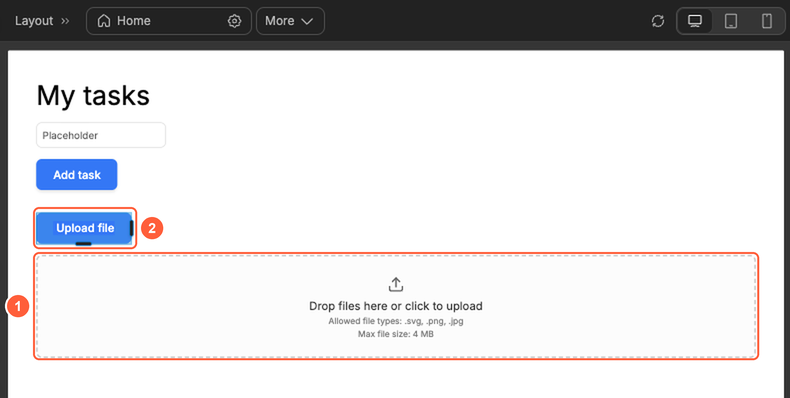
- In the
Interface, add aFile uploadelement from theAddpanel. - Add a button such as
Upload file.
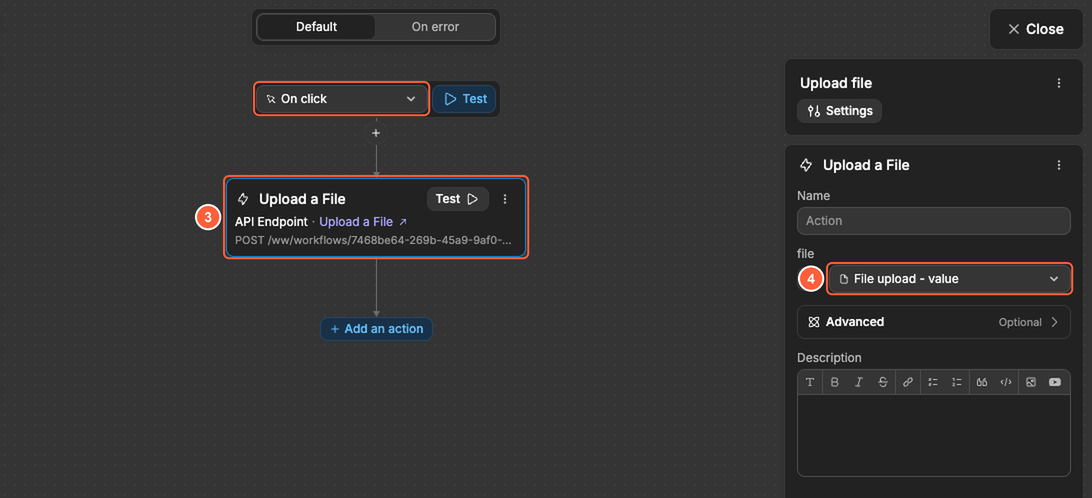
- In the button's
Workflowstab, create anOn clickworkflow and add your upload API endpoint (From Data & API, thenAPI). - Set the endpoint's
fileinput to the value of theFile uploadelement.
When the workflow runs, the API returns the uploaded file details.
4) Save the file reference
After the upload succeeds, save the returned file information on the related record.
Recommended rule:
- Always save the file
path - Only save the
urlwhen the file is public
Examples:
- Save a profile photo path on the user record
- Save a contract path on the contract record
- Save a resume path on the application record
Common pitfalls
The file uploads but you cannot find it later
- Save the returned
pathin your data right after the upload. - Do not rely only on the upload response shown during testing.
You do not see the file in Storage
- Make sure you are viewing the same environment where the file was uploaded.
Private files do not open directly
- Create a signed download URL API and use that signed URL instead of trying to use a public link.